Overview
There are two main synchronization workflows:- Cloud to local: Start with a cloud agent and bring it to local development
- Local to cloud: Start locally and push to the cloud
- A Writer API key. Learn how to create and manage API keys.
- The
writerpackage installed. Learn how to install the Writer Framework package. - If you plan to do both local and cloud development, review considerations for dual-environment development to properly handle environment variables and secrets for both local and cloud development.
Cloud to local workflow
If you’ve already created an agent in the AI Studio Agent Builder web editor and want to continue development locally:Step 1: Export from cloud
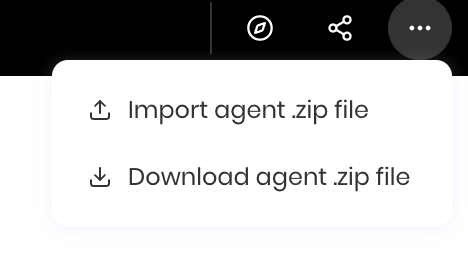
From your cloud agent in Agent Builder, click the three dots in the top right corner of your agent and select Download agent .zip file to download a.zip file containing your agent’s configuration.

The downloaded zip file contains your agent’s UI components and blueprints in a hidden folder called
.wf. If the zip file appears to only contain generic starter files, check for the .wf folder which contains the internal configuration files for your agent.Step 2: Create local project
Create a new local project with Writer Framework and import the cloud agent by unzipping the export file you downloaded:Step 3: Import the cloud agent into your local project
Import the cloud agent by unzipping the export file you downloaded into your local project:A to replace all files in your local project with the exported agent.
You can also choose the following options:
yto replace an individual filerto rename an individual fileNto cancel the import and not replace any files
Step 4: Set up environment variables
Set up a.env file in your local project directory and add your Writer API key:
Step 5: Start local development
Start the local development server:Local to cloud workflow
To start development locally and then push to the cloud development environment, follow these steps:Step 1: Create local project
Start with a local project:Step 2: Develop locally
Build your agent locally using the Writer Framework development environment. You have full access to:- Python code editing
- UI component configuration
- Blueprint design
- Local testing and debugging
Step 3: Prepare for cloud sync
Before syncing to the cloud, ensure your code handles both Vault and environment variables as described in the handle environment variables and secrets section.Step 4: Download the local agent’s export file
When you’re ready to sync your local agent to the cloud, download the local agent’s export file from the web editor. In the visual editor interface, click the three dots in the top right corner of your agent and select Download agent .zip file to download a.zip file containing your agent’s configuration.

.wf folder that contains your UI components and blueprints as internal JSON files. Don’t include sensitive information in the exported file because it is visible in the cloud editor.
Step 5: Import the local agent into your cloud project
Open the Agent Builder web editor in AI Studio and click the three dots in the top right corner of your agent. Then select Import agent .zip file to upload the local agent’s export file. A modal appears and asks you to confirm that you are overwriting your existing agent.
Deploy your agent
After syncing your agent to the cloud, deploy it following the standard cloud workflow. From the agent editor interface in Agent Builder, click Configure deployment in the top right corner of the Agent Builder interface. You can also access the deployment configuration by going to the AI Studio homepage and selecting the agent you created. If the agent isn’t deployed, you see a toggle bar that says Draft.
Considerations for dual-environment development
- Local-only libraries: If you install Python packages locally that aren’t listed in Python libraries installed in Agent Builder, your agent won’t run in the cloud version of Agent Builder because those packages aren’t available there.
-
Environment file visibility: Your
.envfile is visible in plain text in the cloud editor when you sync your local project. Any file you add to your local project is included in the export file to the cloud. Before syncing, move your.envfile to a different location or delete it to prevent it from showing in the cloud editor, and add your secrets to Vault. - Vault availability: Vault is only available in the cloud version of Agent Builder. For local development, you must use environment variables. Structure your code to handle both scenarios gracefully.
- Keep your local Writer Framework package up to date: When you sync your agent to the cloud, the cloud version of Agent Builder uses the latest version of the Writer Framework package. If you’re using a different version of the Writer Framework package in your local project, you might encounter errors when you sync to the cloud. To avoid this, keep your local Writer Framework package up to date by running the following command:
Handle environment variables and secrets
The following code shows an example of how to look for secrets in Vault first, then fall back to environment variables:Next steps
- Learn about local development workflows
- Understand how to deploy your agent from the cloud
- Explore custom Python code for advanced functionality