This page describes how to use tool calling in Agent Builder. If you’re looking for an overview of tool calling, see Introduction to tool calling.
- In a chatbot conversation with the Chat reply block. Use this block to add tool calling to your chatbot conversation.
- In a blueprint with the Tool calling block. Use this block to add tool calling to your blueprint outside of a chatbot conversation.
Add tool calling to your blueprint
To add tool calling to your blueprint, you need to:- Add the Tool calling block to your blueprint
- Write a prompt that explains what the tool calling block is trying to accomplish
- Define the tools you want to provide to the model
- Connect the tool calling block to the blocks that execute the tools
- Add a Return value block to the end of the tool calling block
Add the tool calling block
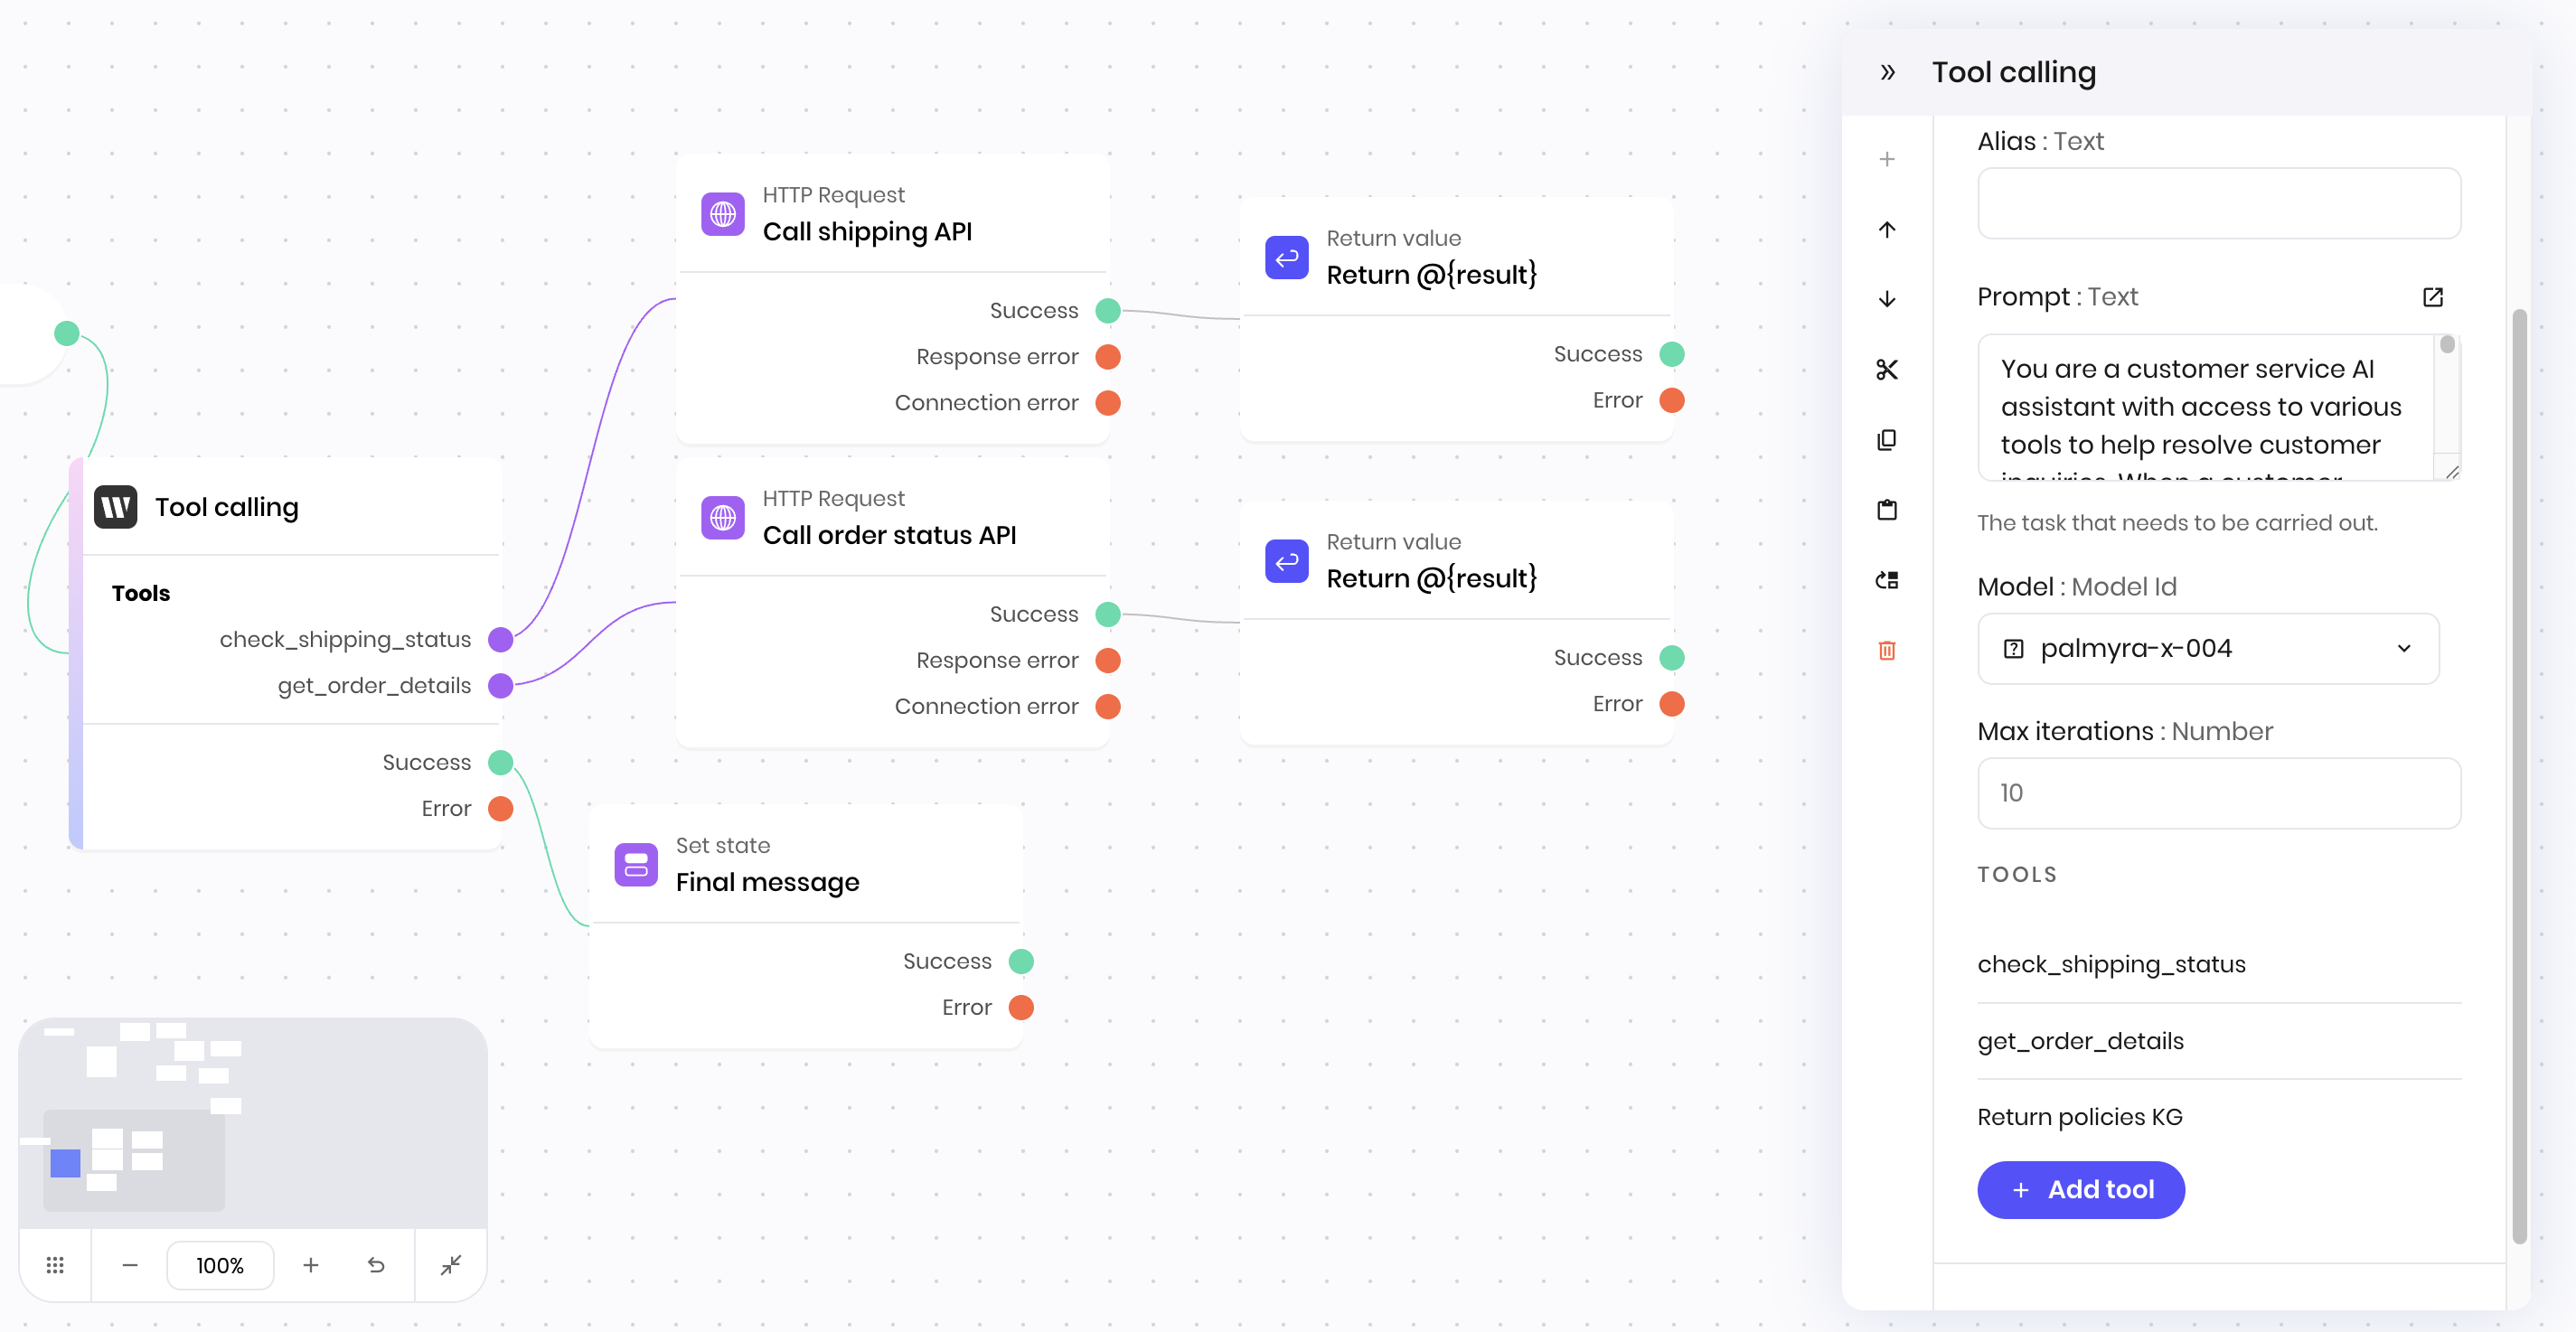
Add either the Tool calling block to your blueprint or the Chat reply block to your chatbot conversation.Write a prompt
The prompt you write for the tool calling block in the Prompt field guides the model’s behavior and decision making. It should explain what the tool calling block is trying to accomplish and what tools are available to use.Define your tools
Define the tools you want to provide to the Tool calling block, so that it knows what tools are available to use. To add a new tool, click the Add tool+ button in the Tool calling block’s configuration menu. In the Add tool modal that appears, select the Tool type from the dropdown, either:- Function: A function that the model can call
- Knowledge Graph: A Knowledge Graph that the model can query
- Function
- Knowledge Graph
If you’re using a function, enter the function name and definition. See tool definition for more details about how to define the function.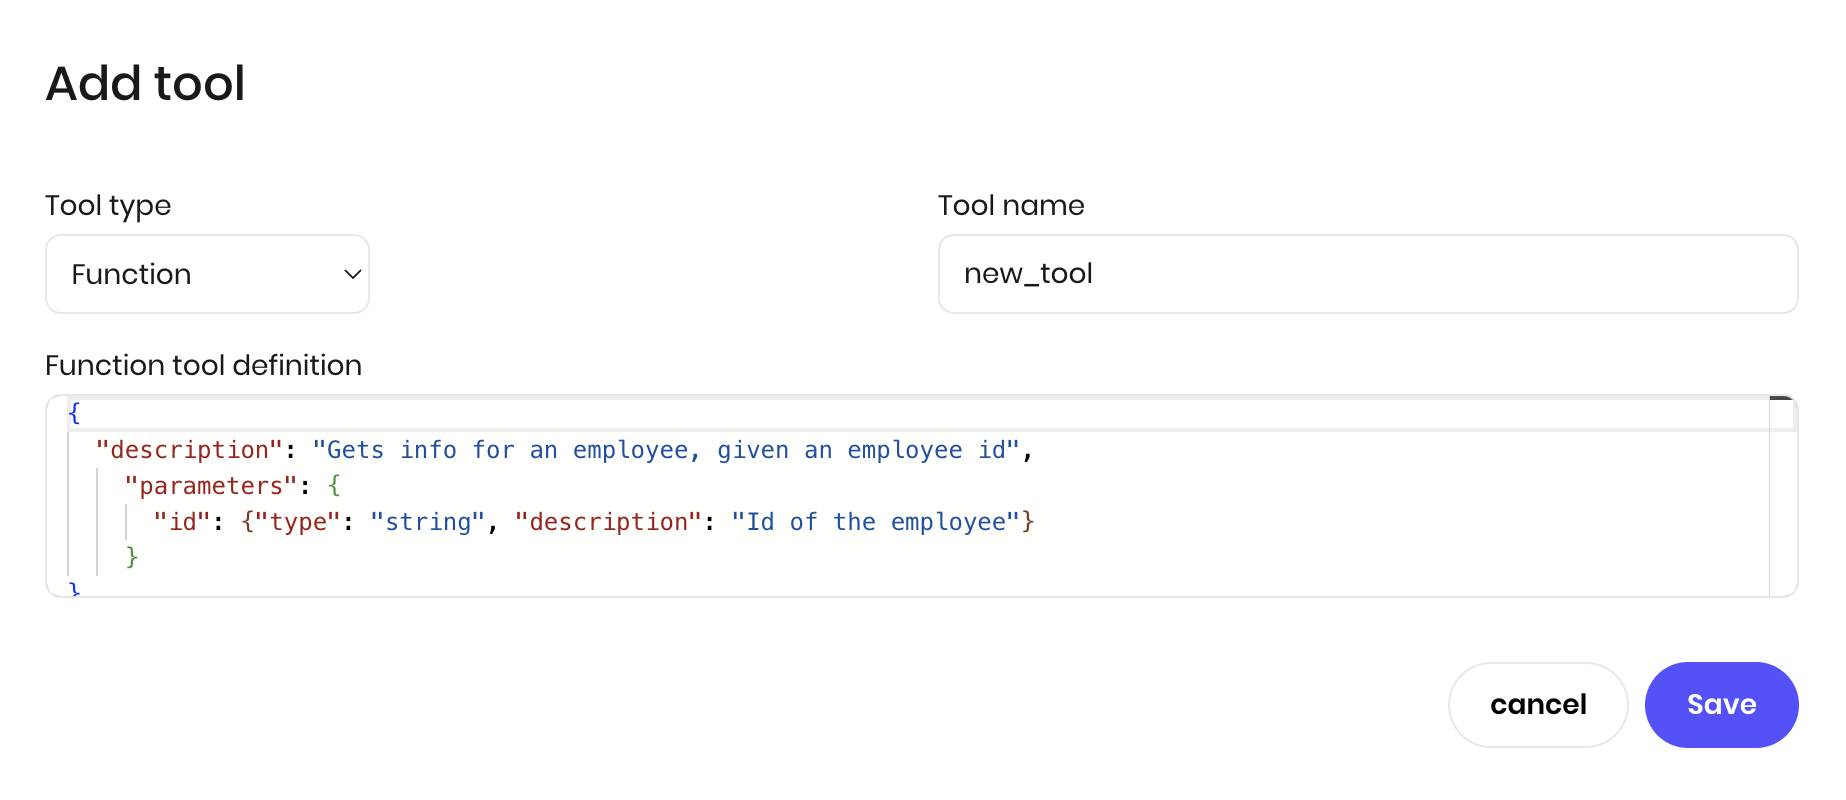
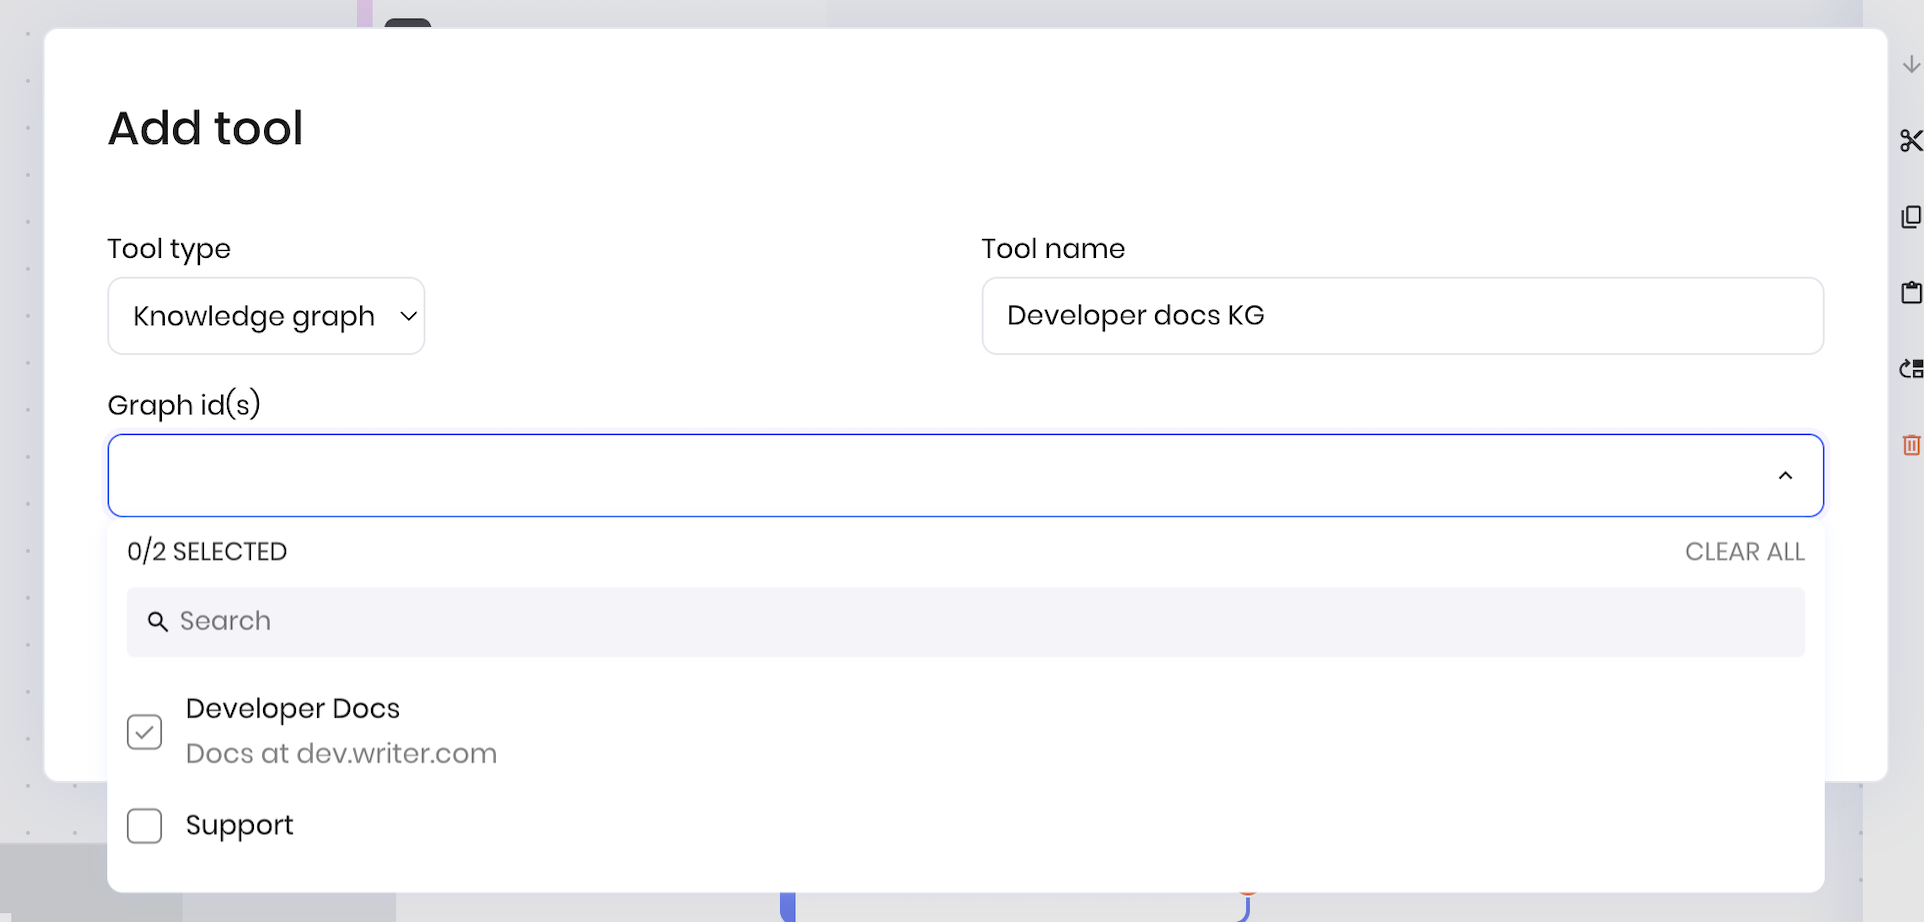
If you are using the Knowledge Graph tool, you only need to select which Knowledge Graphs you want to use. You do not need to define the tool or connect it to the blocks that execute the tools as described below. The following steps are only for the Function tool type.
Tool definition
The tool definition for aFunction tool follows the JSON Schema format and has the following structure:
Example tool definition
Below is an example of a tool definition that gets the details of a package’s shipping status. It takes a tracking number and a carrier name as input parameters and returns the shipping status of the package.Connect the tool calling connectors to the blocks that execute the tools
When you define aFunction tool in the block’s configuration, it adds a connection point, shown as a purple circle, to the block. This allows you to connect it to another block or chain of blocks that perform the tool’s work.
1
Create an HTTP Request block that calls a shipping status API. Access the arguments to the tool call by the names you provided in the tool definition; for example,
@{tracking_number} and @{carrier}.2
Add a Return value block to the end of the HTTP Request block to send the result back to the model.
3
Provide a tool definition to the Tool calling block that indicates there’s a tool that can check the status of a package and it needs the tracking number and carrier name as input parameters.
4
Connect the HTTP Request block to the Tool calling block at the
check_shipping_status connection point.Success transition. The @{result} variable is available in the next block with the tool calling block’s final output.
View tool calls logs
When a Tool Calling block executes, it provides a list of thoughts and actions that it took to complete the task. You can observe these in the logs of the blueprint. Expand the Logs section at the bottom of the blueprint. Find the Tool calling log and click the Trace button to see the full trace of the tool calls.
