Build the UI
The UI for the agent contains:- A file input block
- A select input to choose the persona to summarize the file for
- A button to start the summarization process
- A message block to indicate that the file is in progress
- A text block to display the results
1
Add a File Input block
First, add a File Input block to the canvas. In the block’s configuration panel, update the following fields:
-
Label:
Research paper PDF -
Allowed file types:
.pdf -
Allow multiple files:
no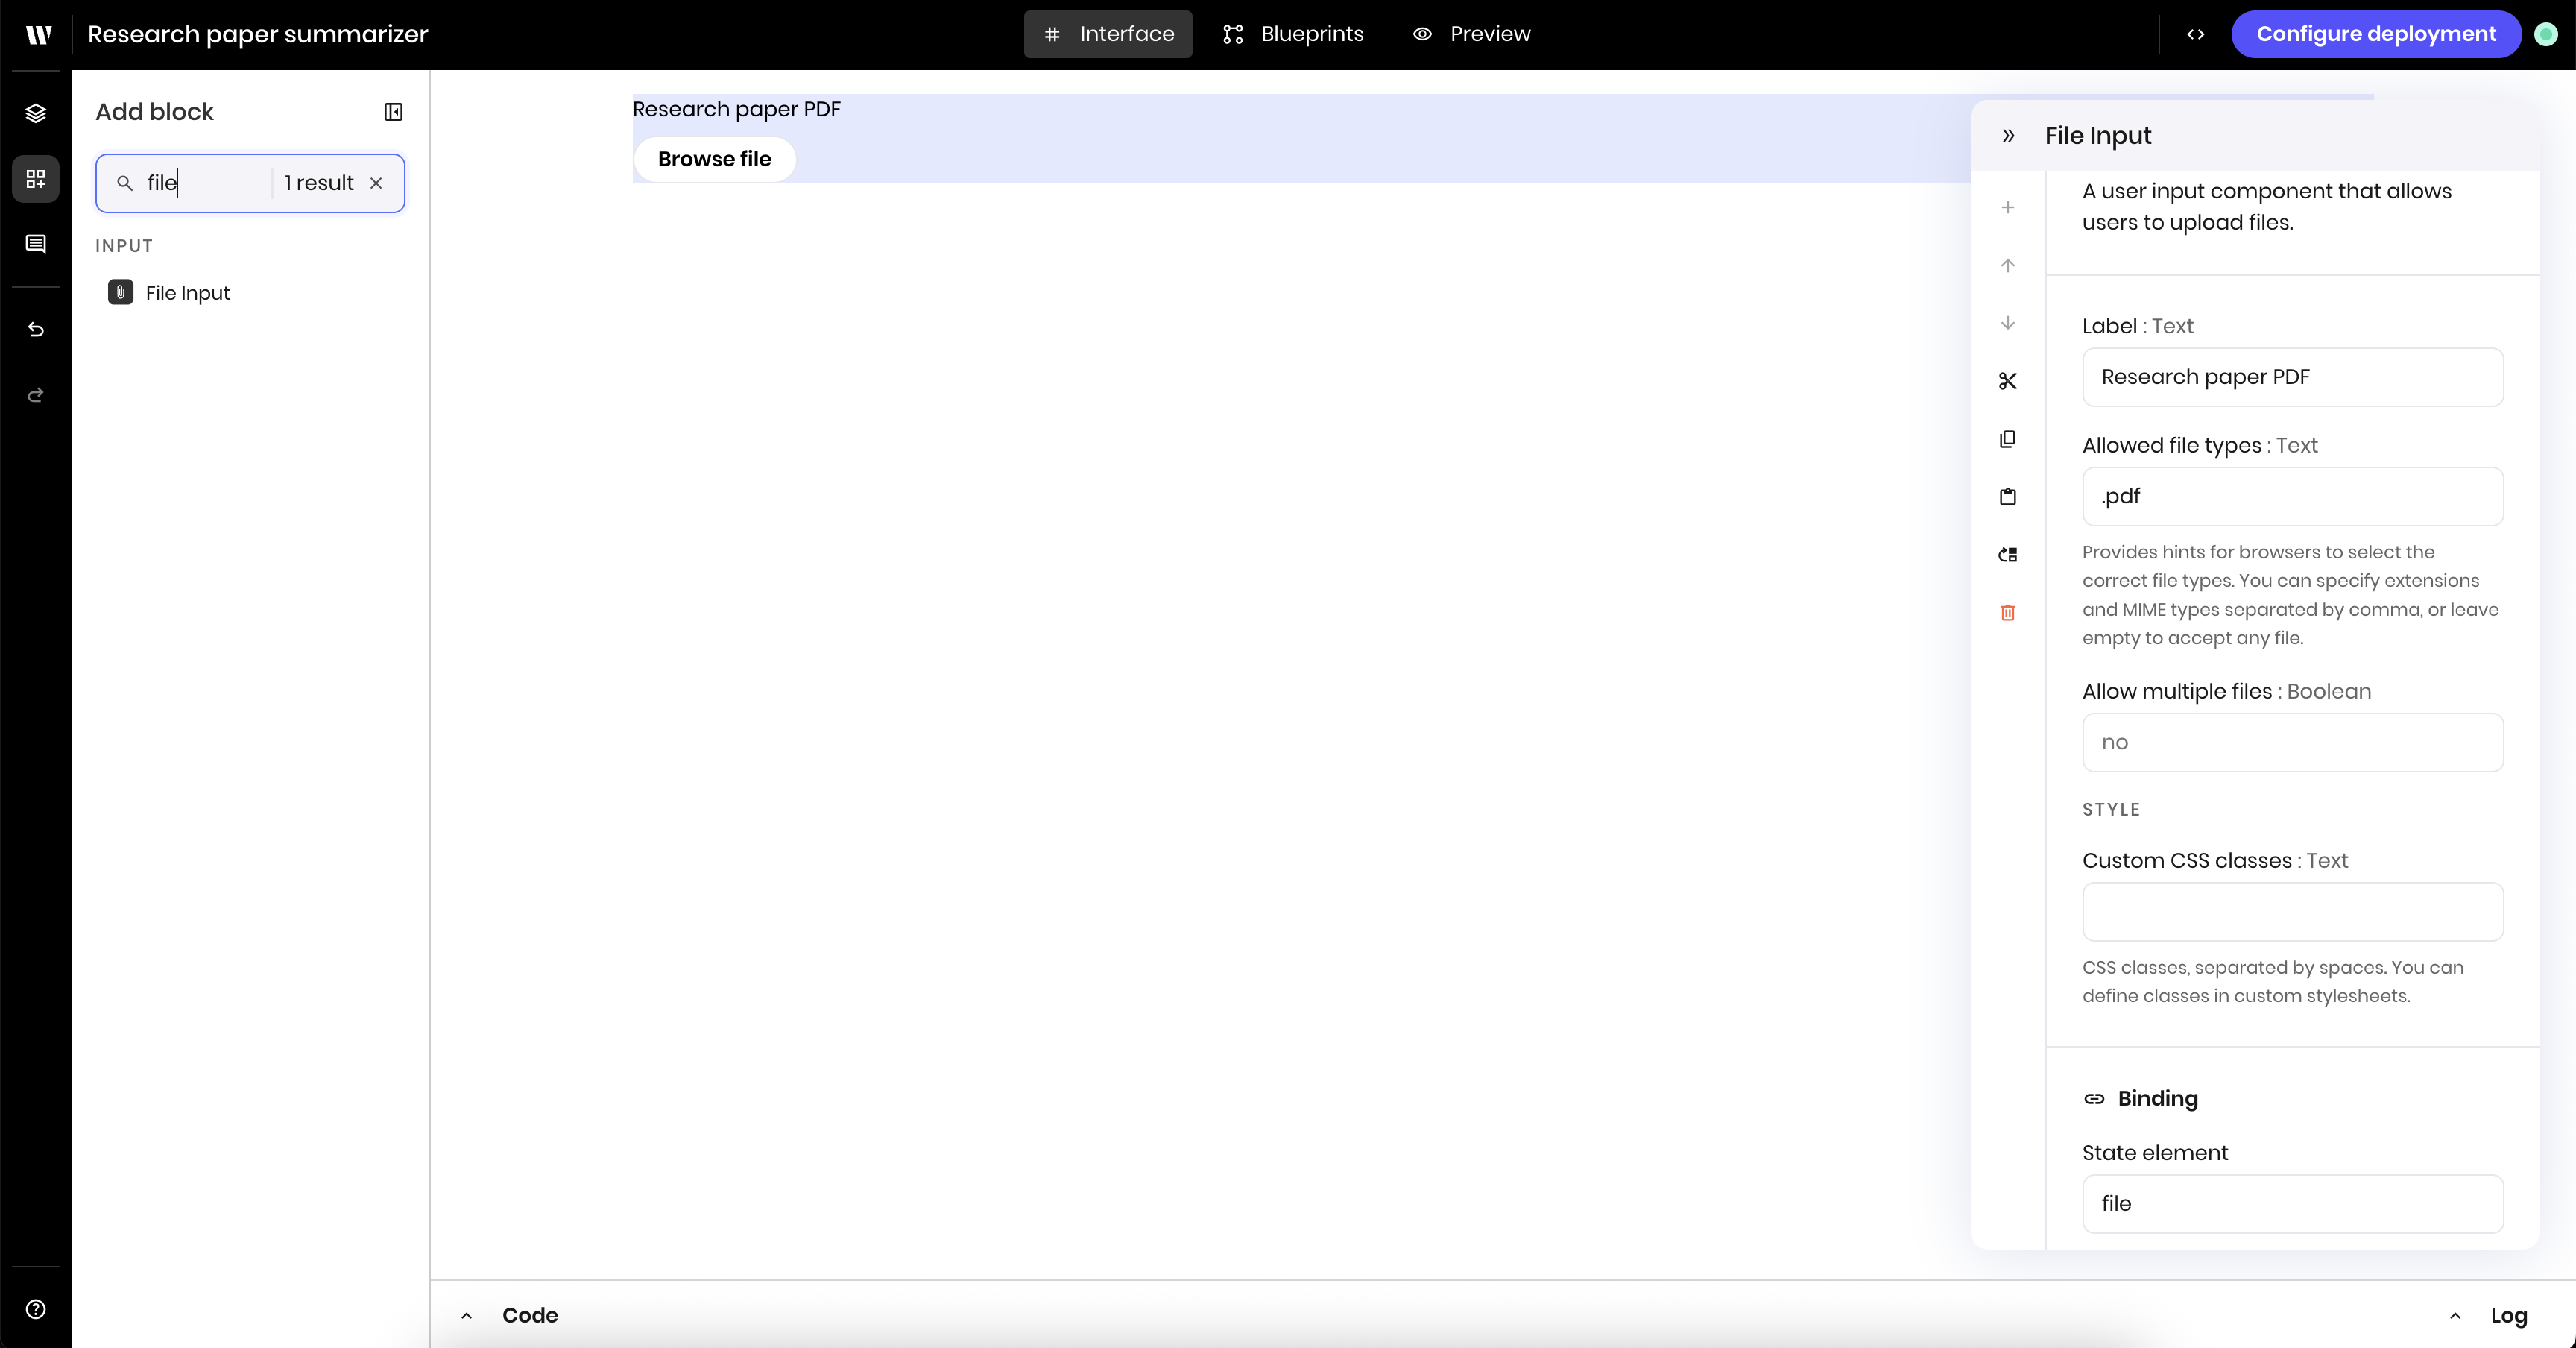
2
Add a select input to choose the persona
Next, add a Select input block to the canvas, which creates a dropdown. In the block’s configuration panel, update the following fields:
-
Label:
Persona -
Options: add the personas you want to summarize the file for. This example uses the personas
Sales,Marketing,Product, andEngineering. -
Link variable under Binding:
persona. You use this variable name in the blueprint when asking the text generation block to generate a summary for the selected persona.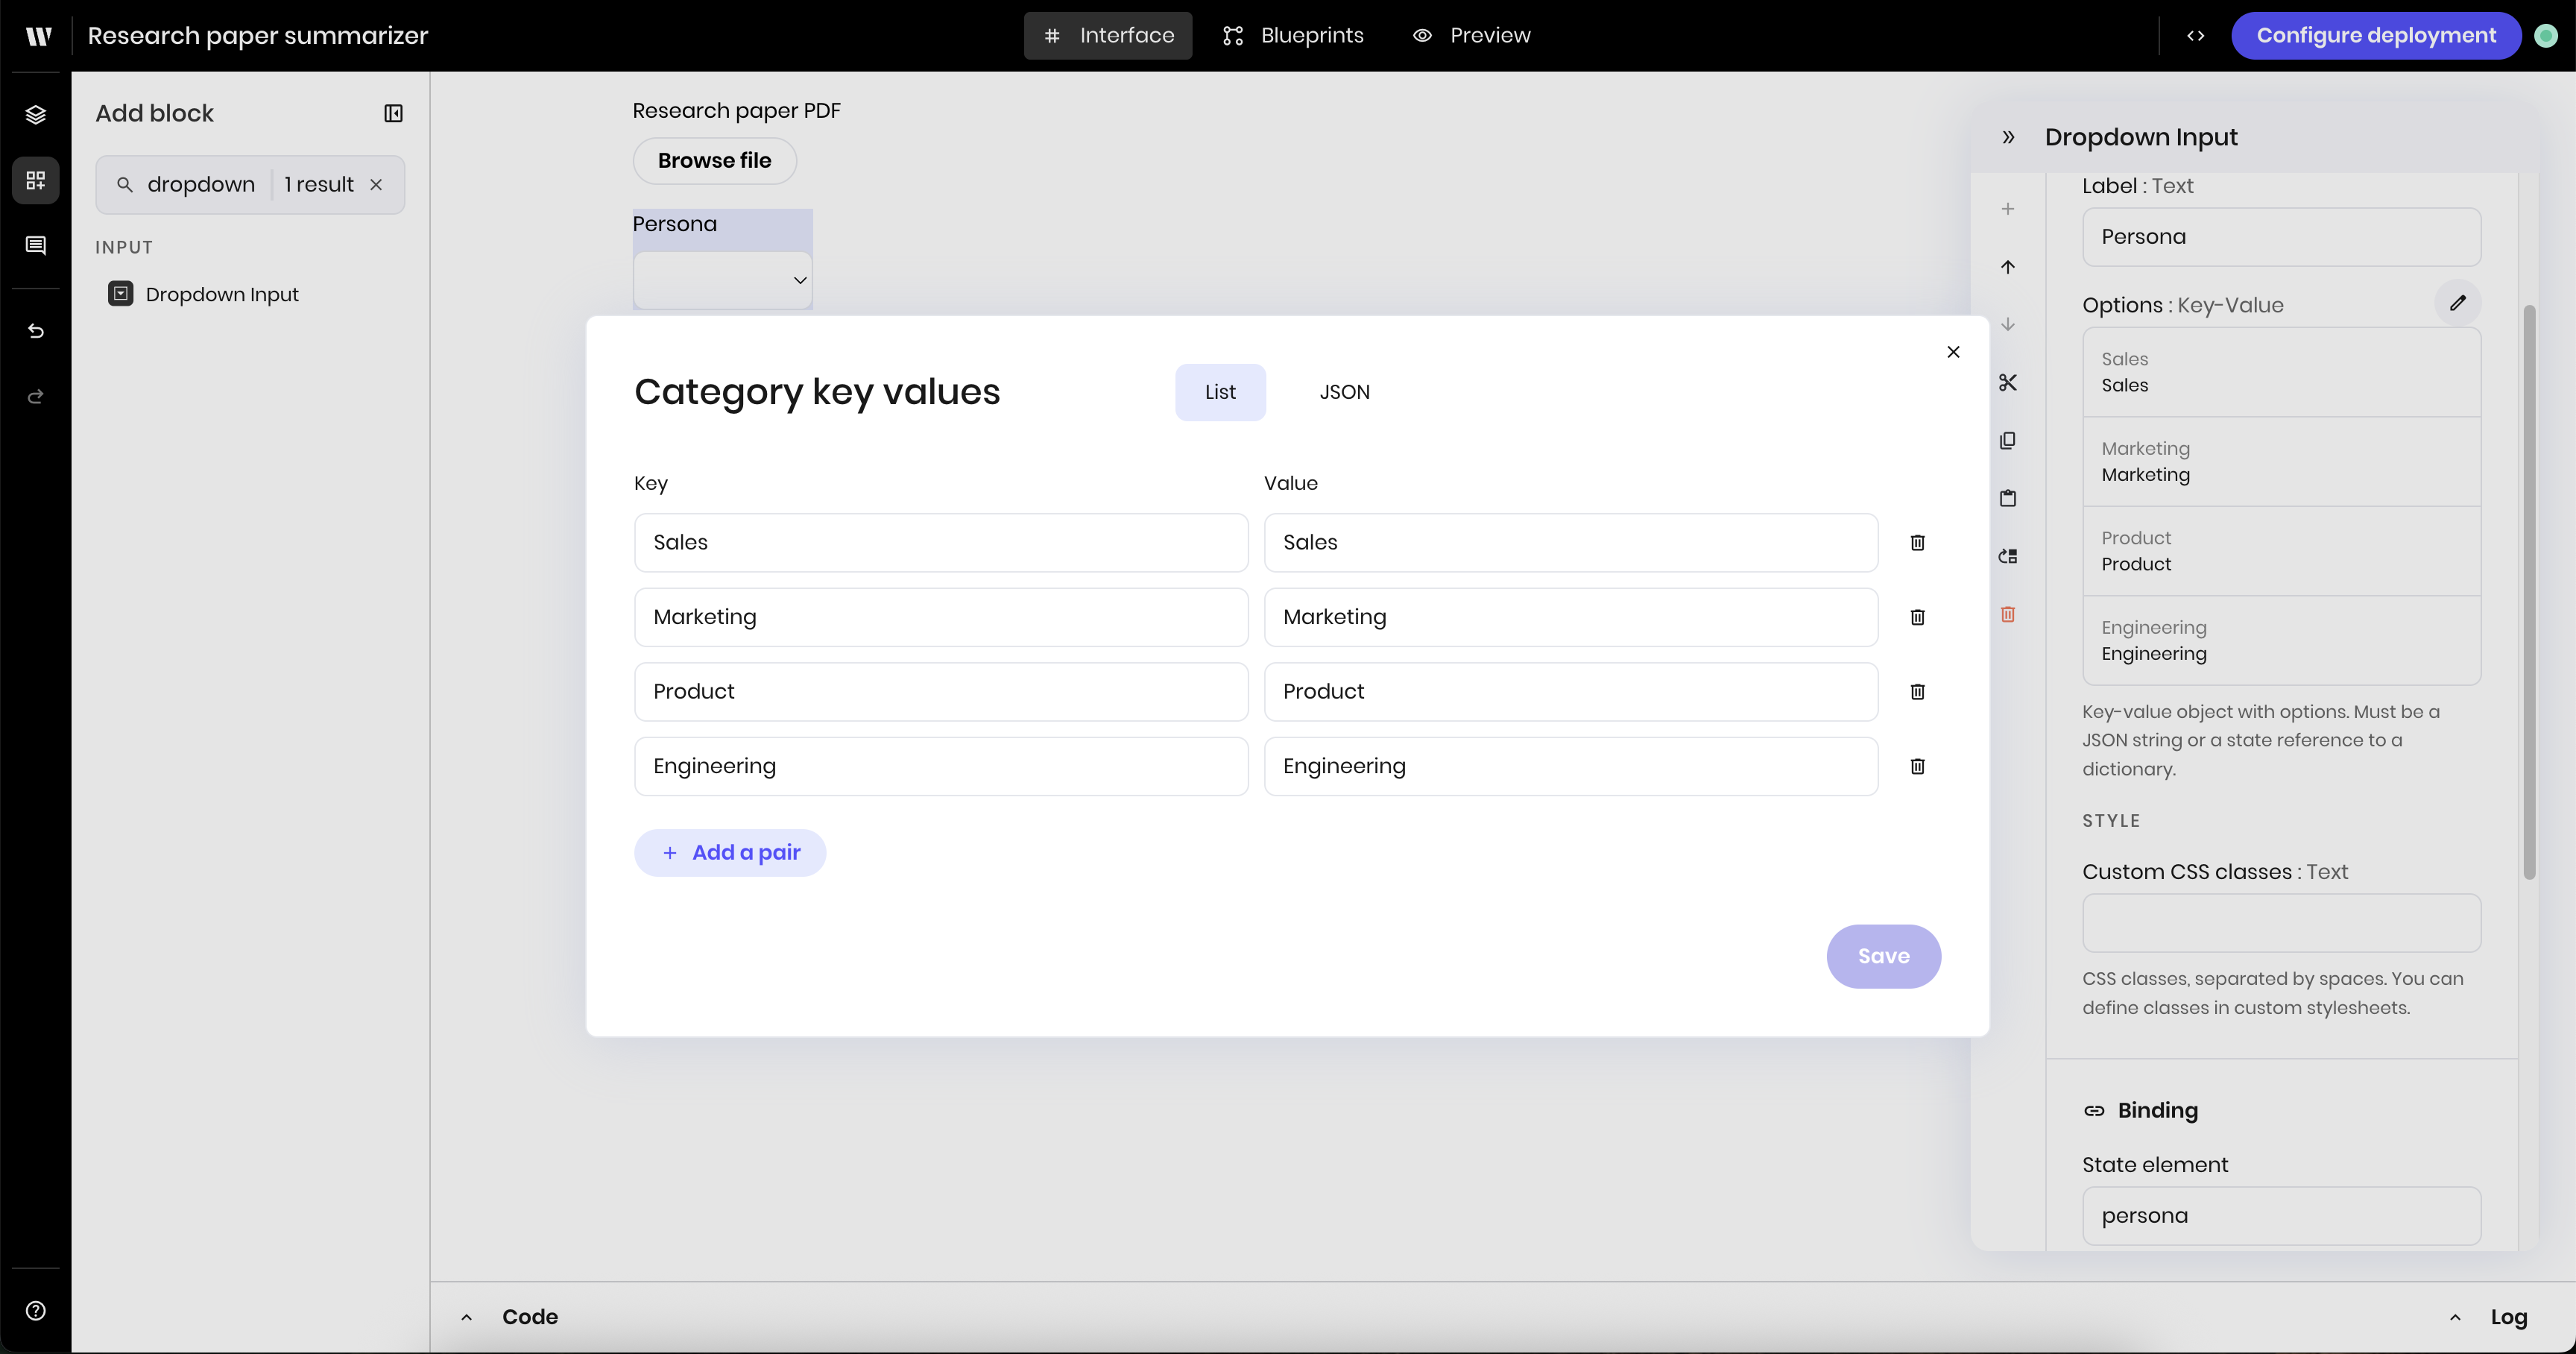
3
Add a button to start the summarization process
Add a Button block to the canvas. In the block’s configuration panel, update the following fields:
-
Text:
Summarize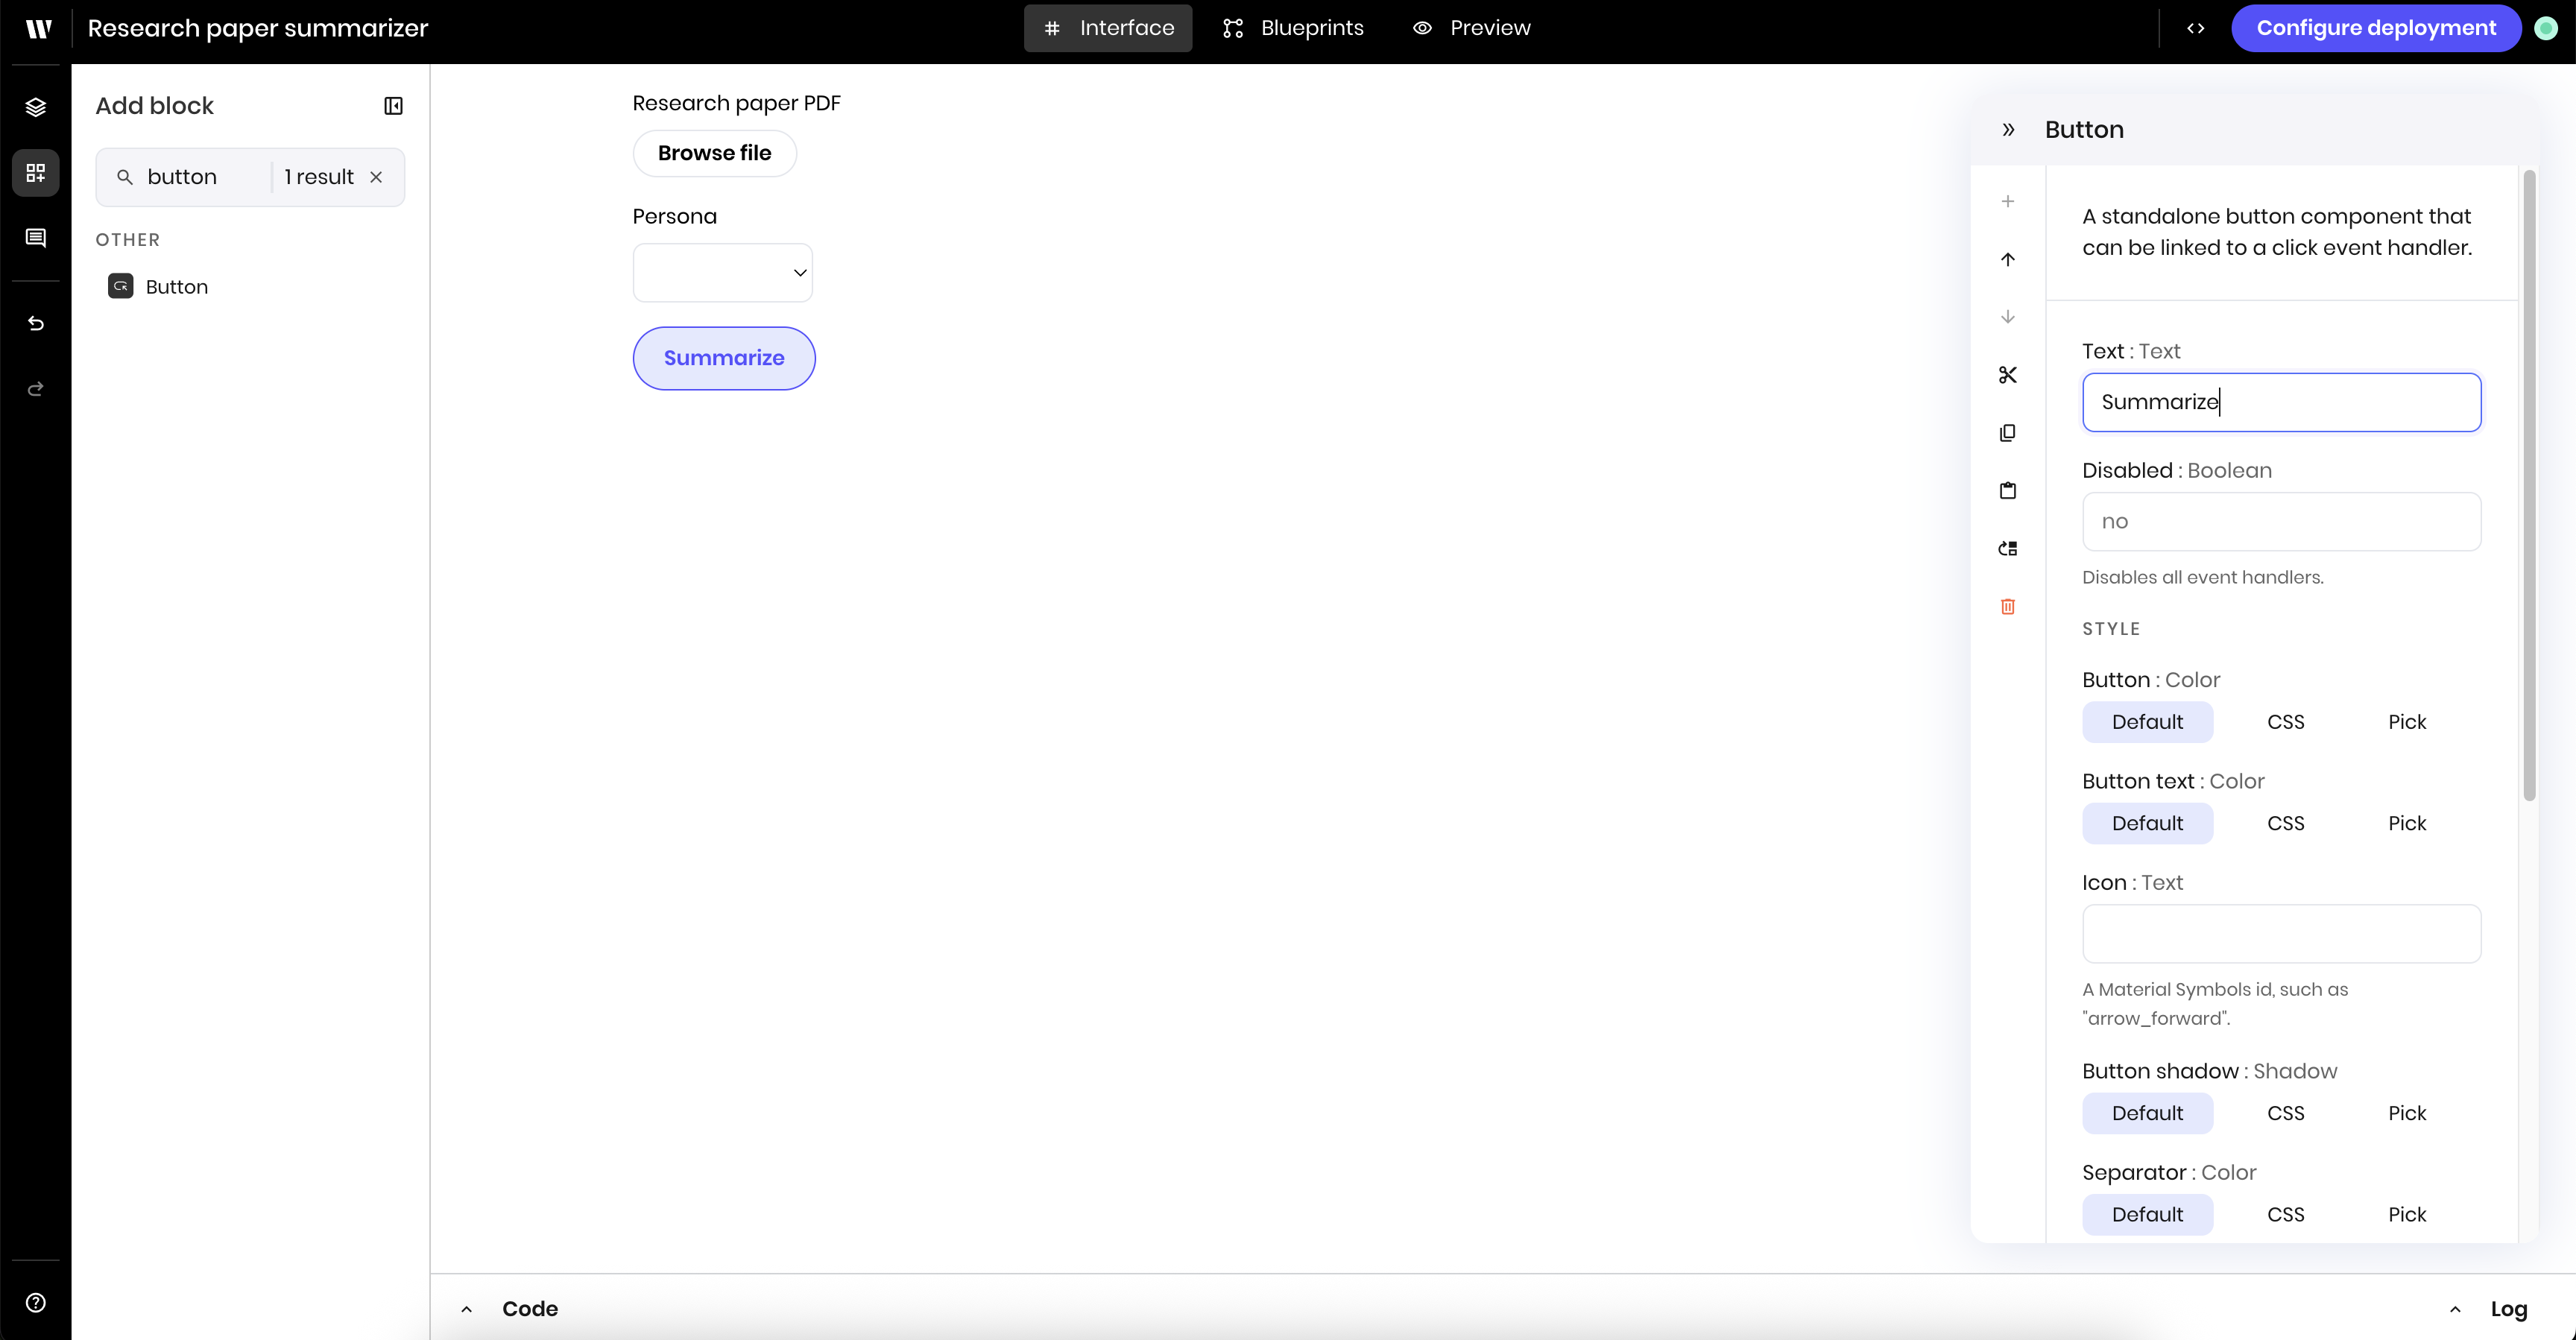
4
Add a message block to indicate that the file is in progress
Add a Message block to the canvas, which will display a message to the user indicating that the summarization is in progress. In the block’s configuration panel, update the following fields:
-
Message:
@{status}. This will display the status message from the agent’s state. You use this variable name in the blueprint to update the status message in the UI.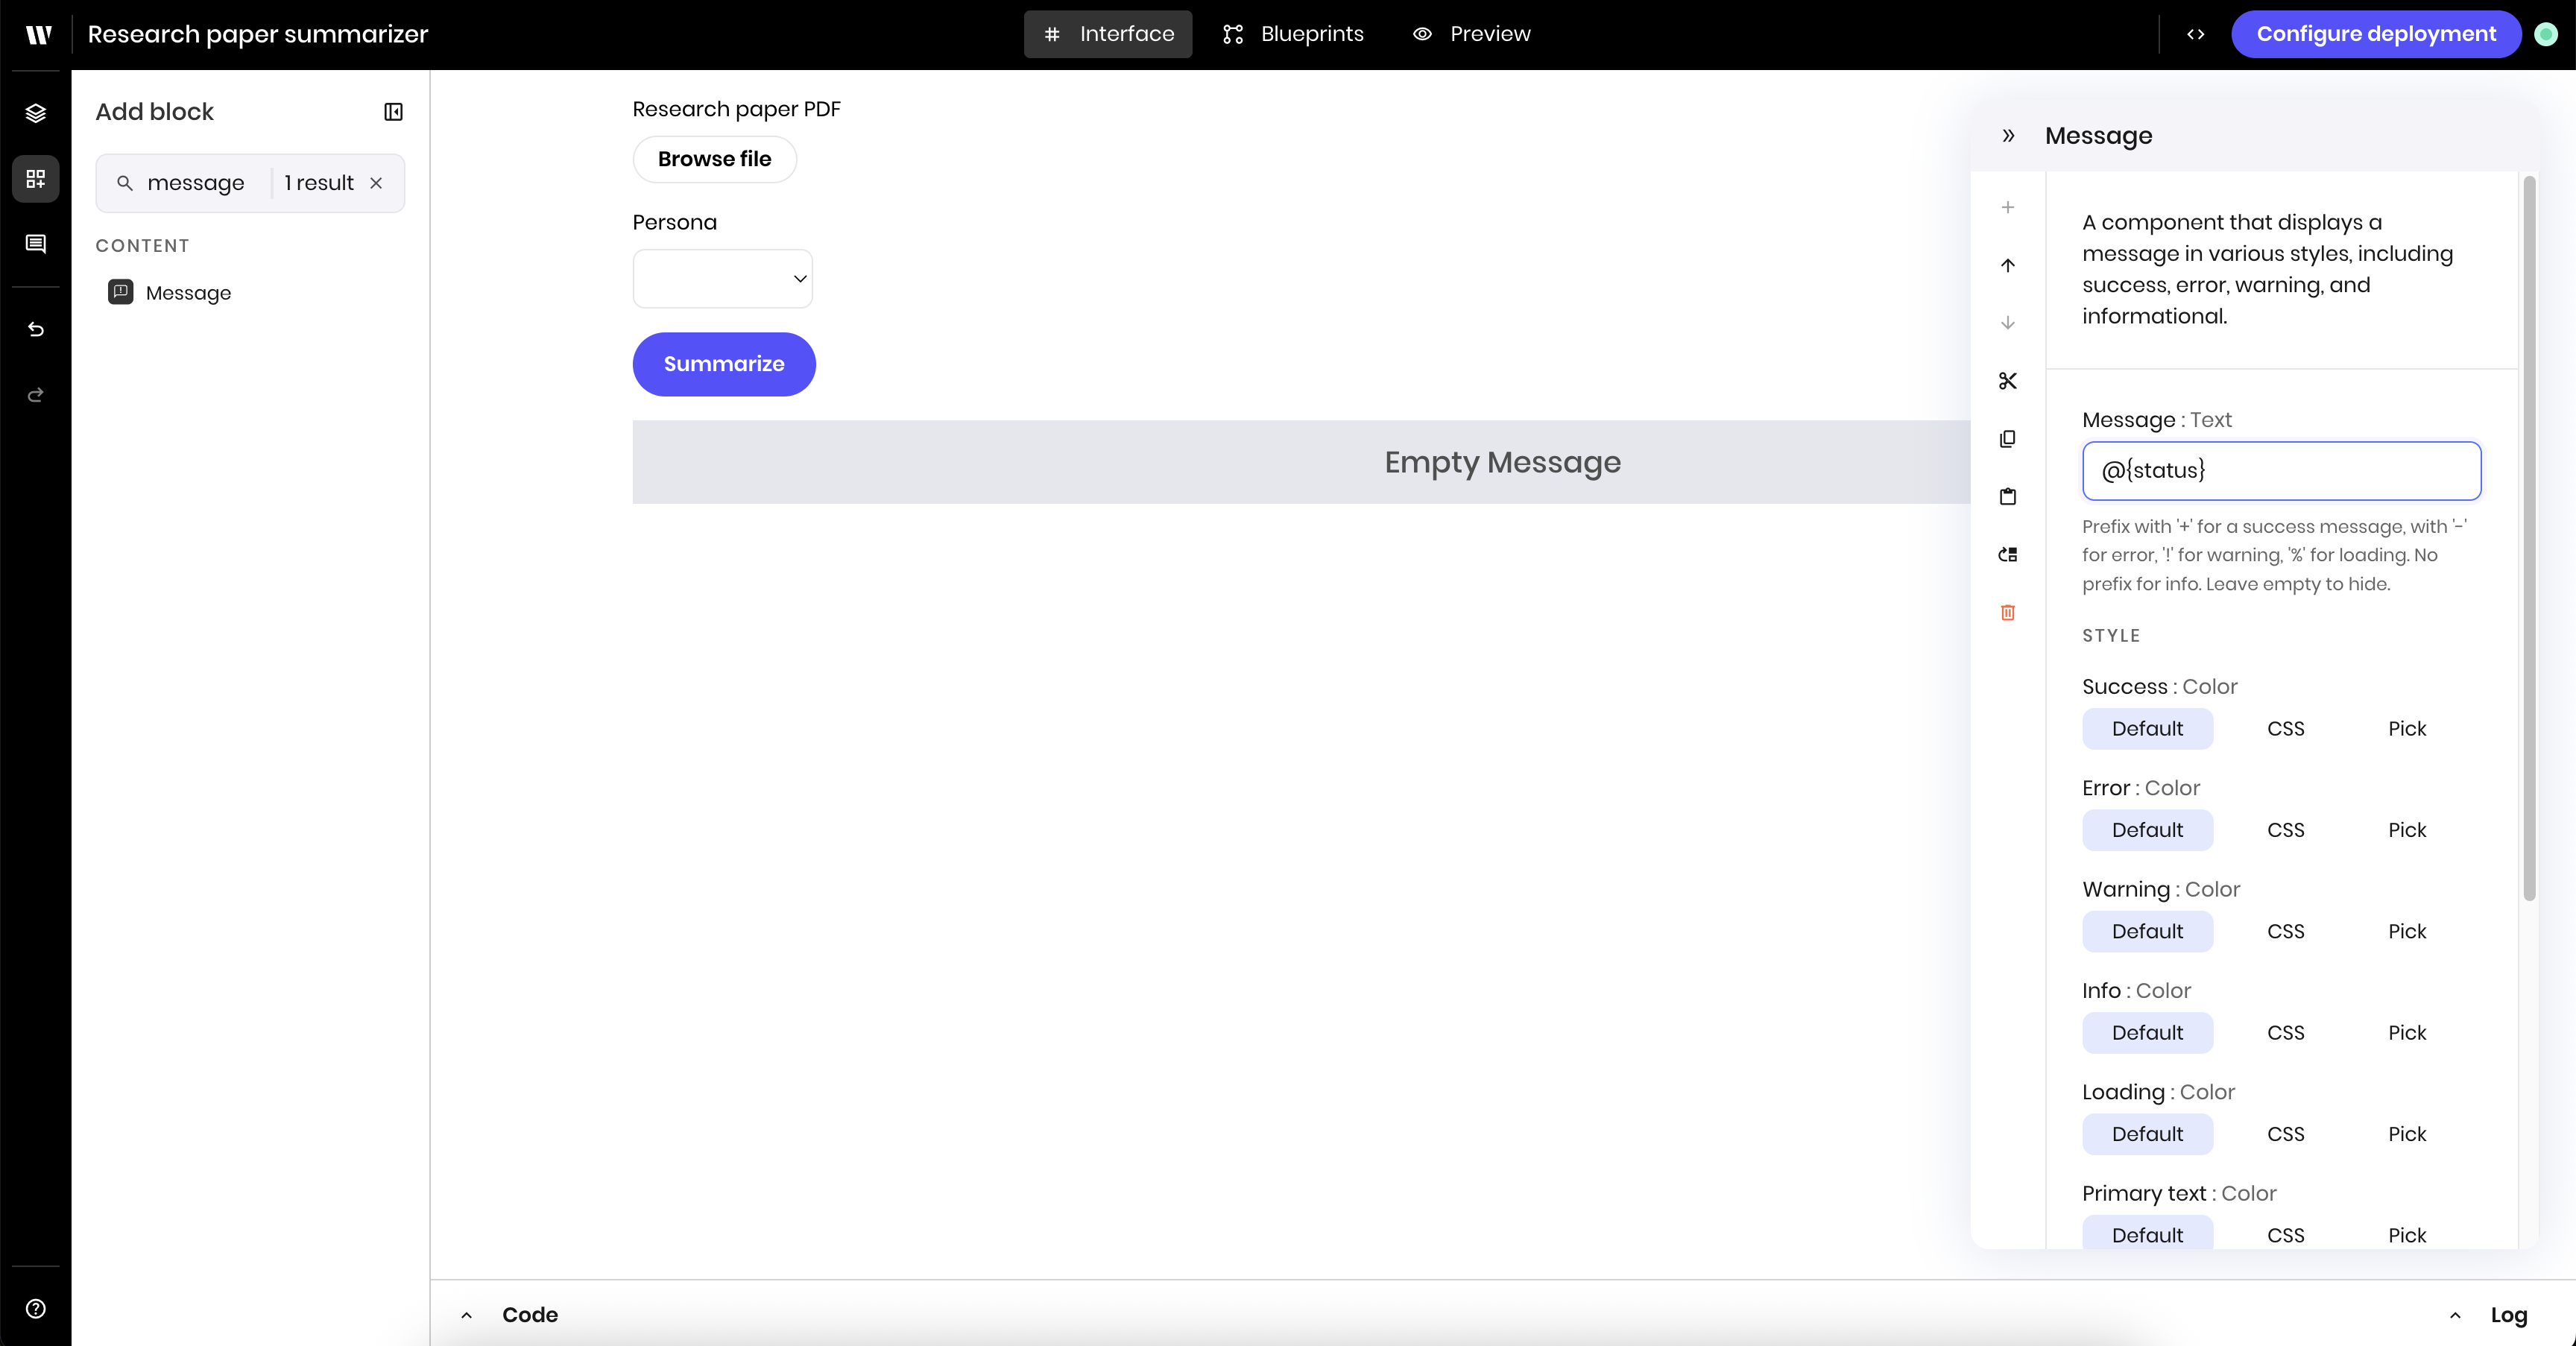
5
Add a text block to display the results
Finally, add a Text block to the canvas, which will display the summary results. In the block’s configuration panel, update the following fields:
-
Text:
@{summary}. This will display the summary results from the agent’s state. You use this name in the blueprint to display the summary results in the UI. -
Use markdown:
yes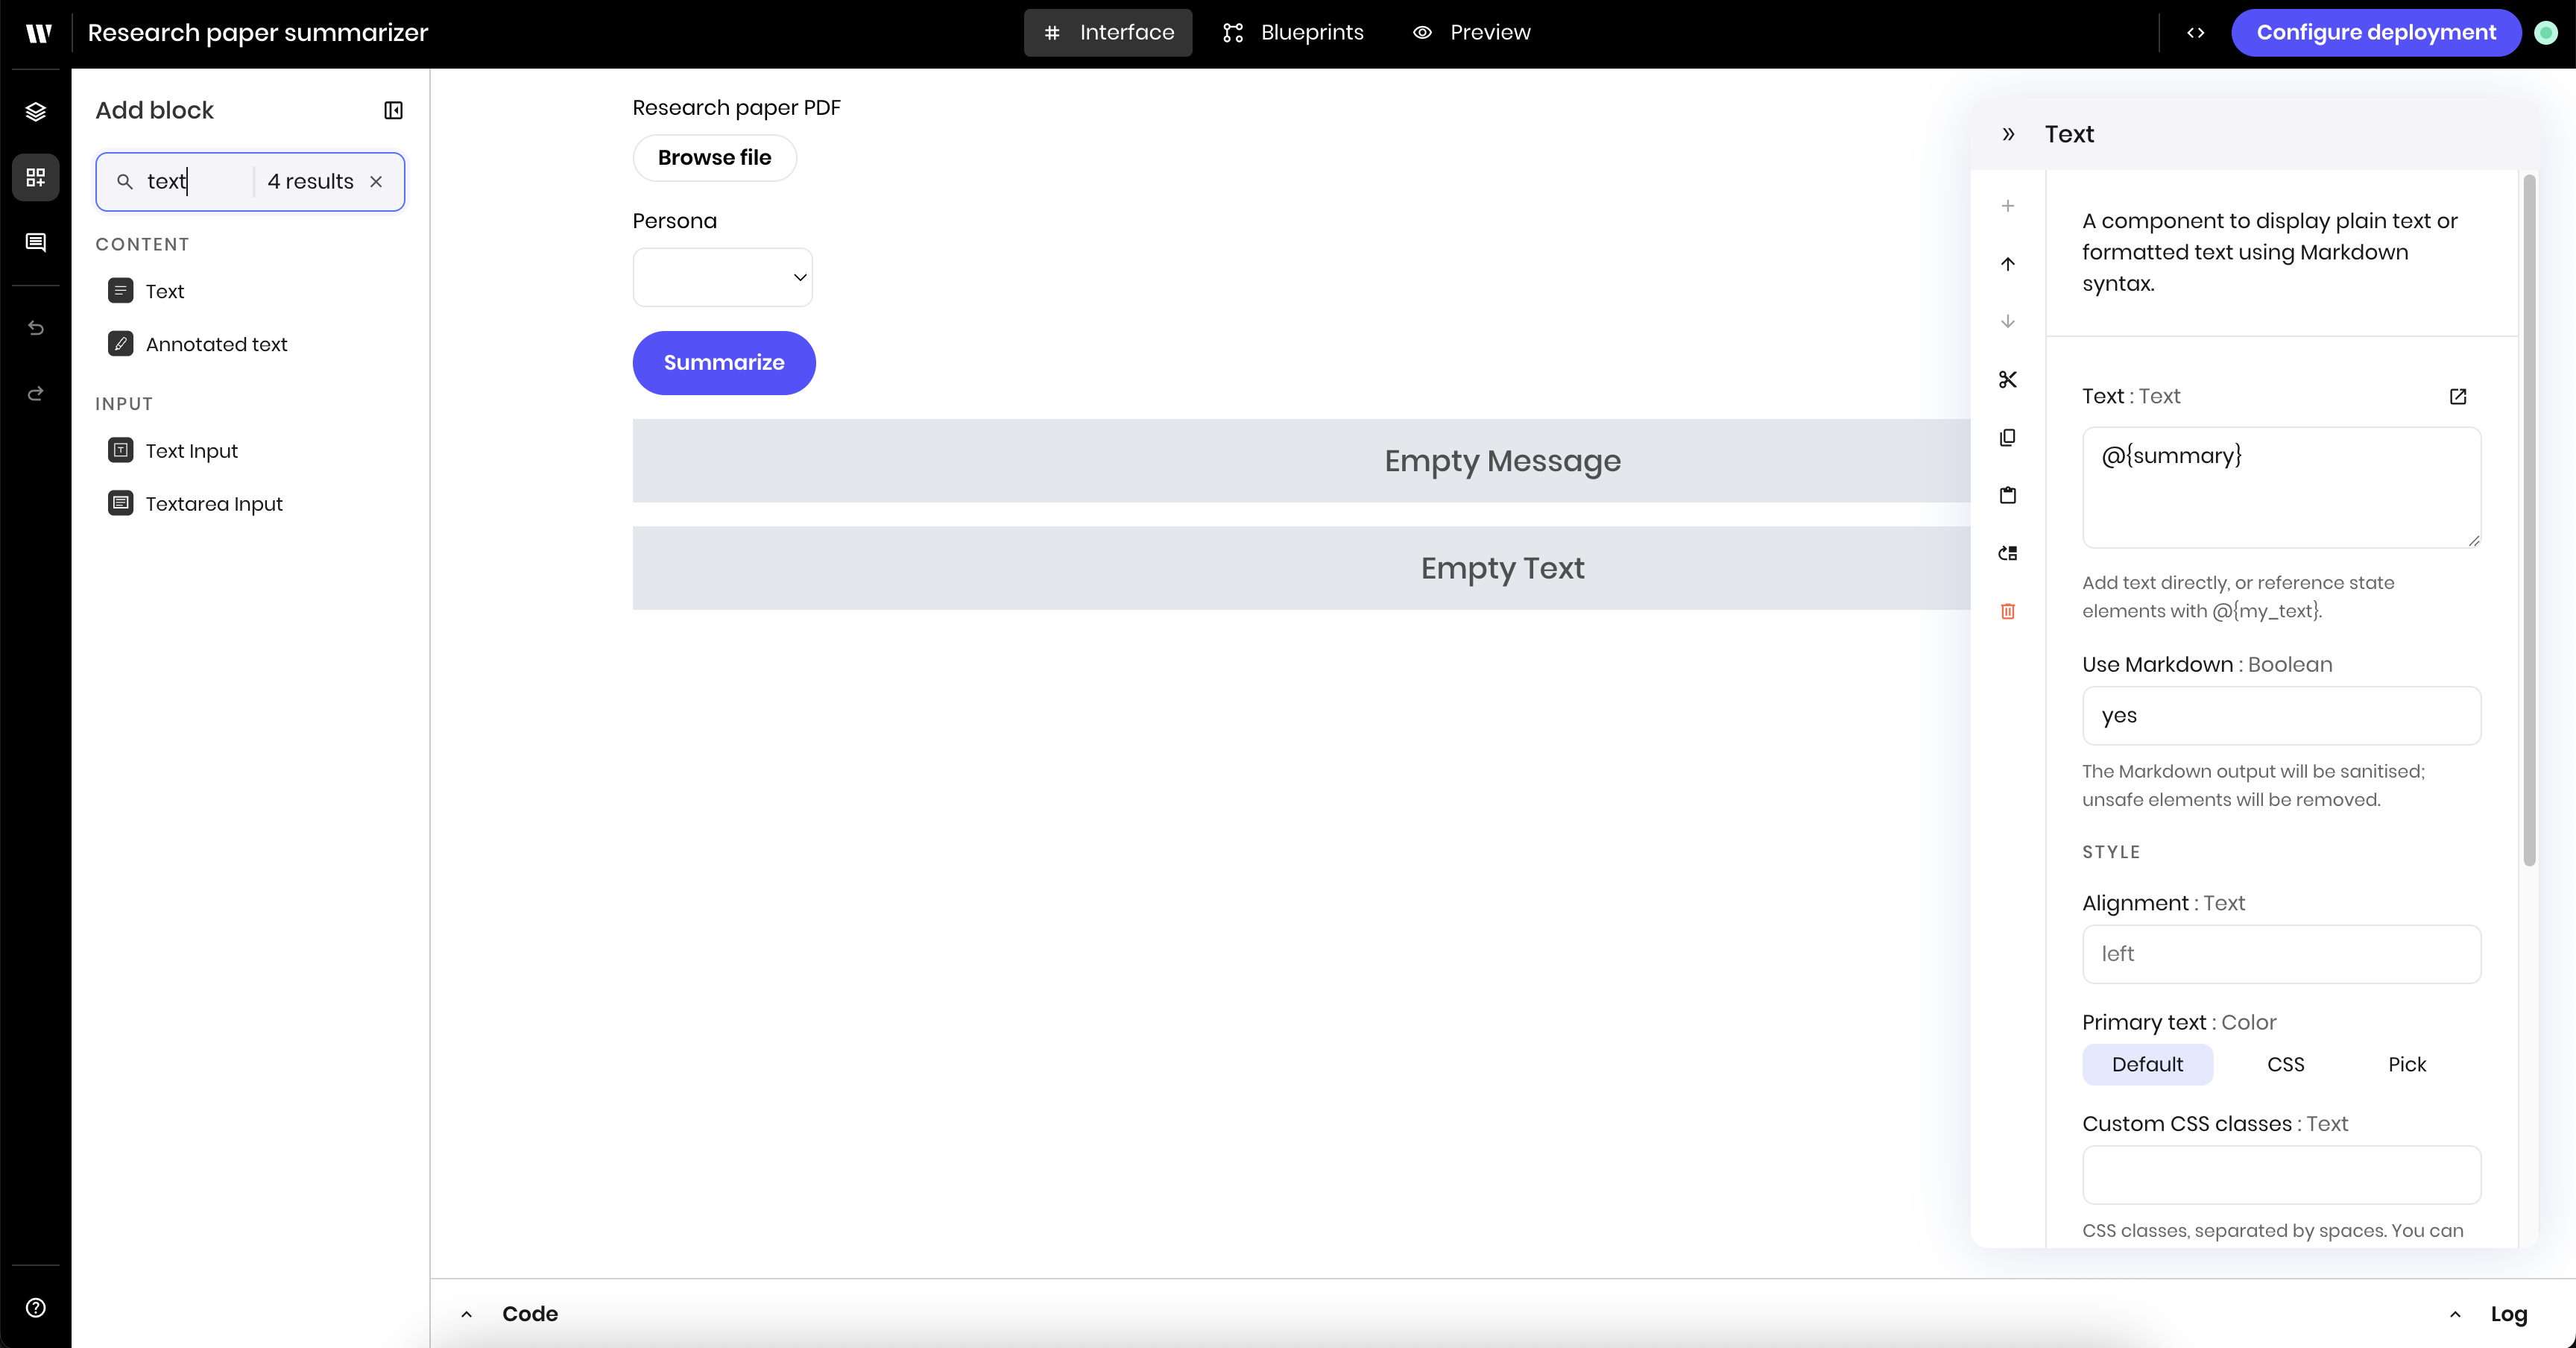
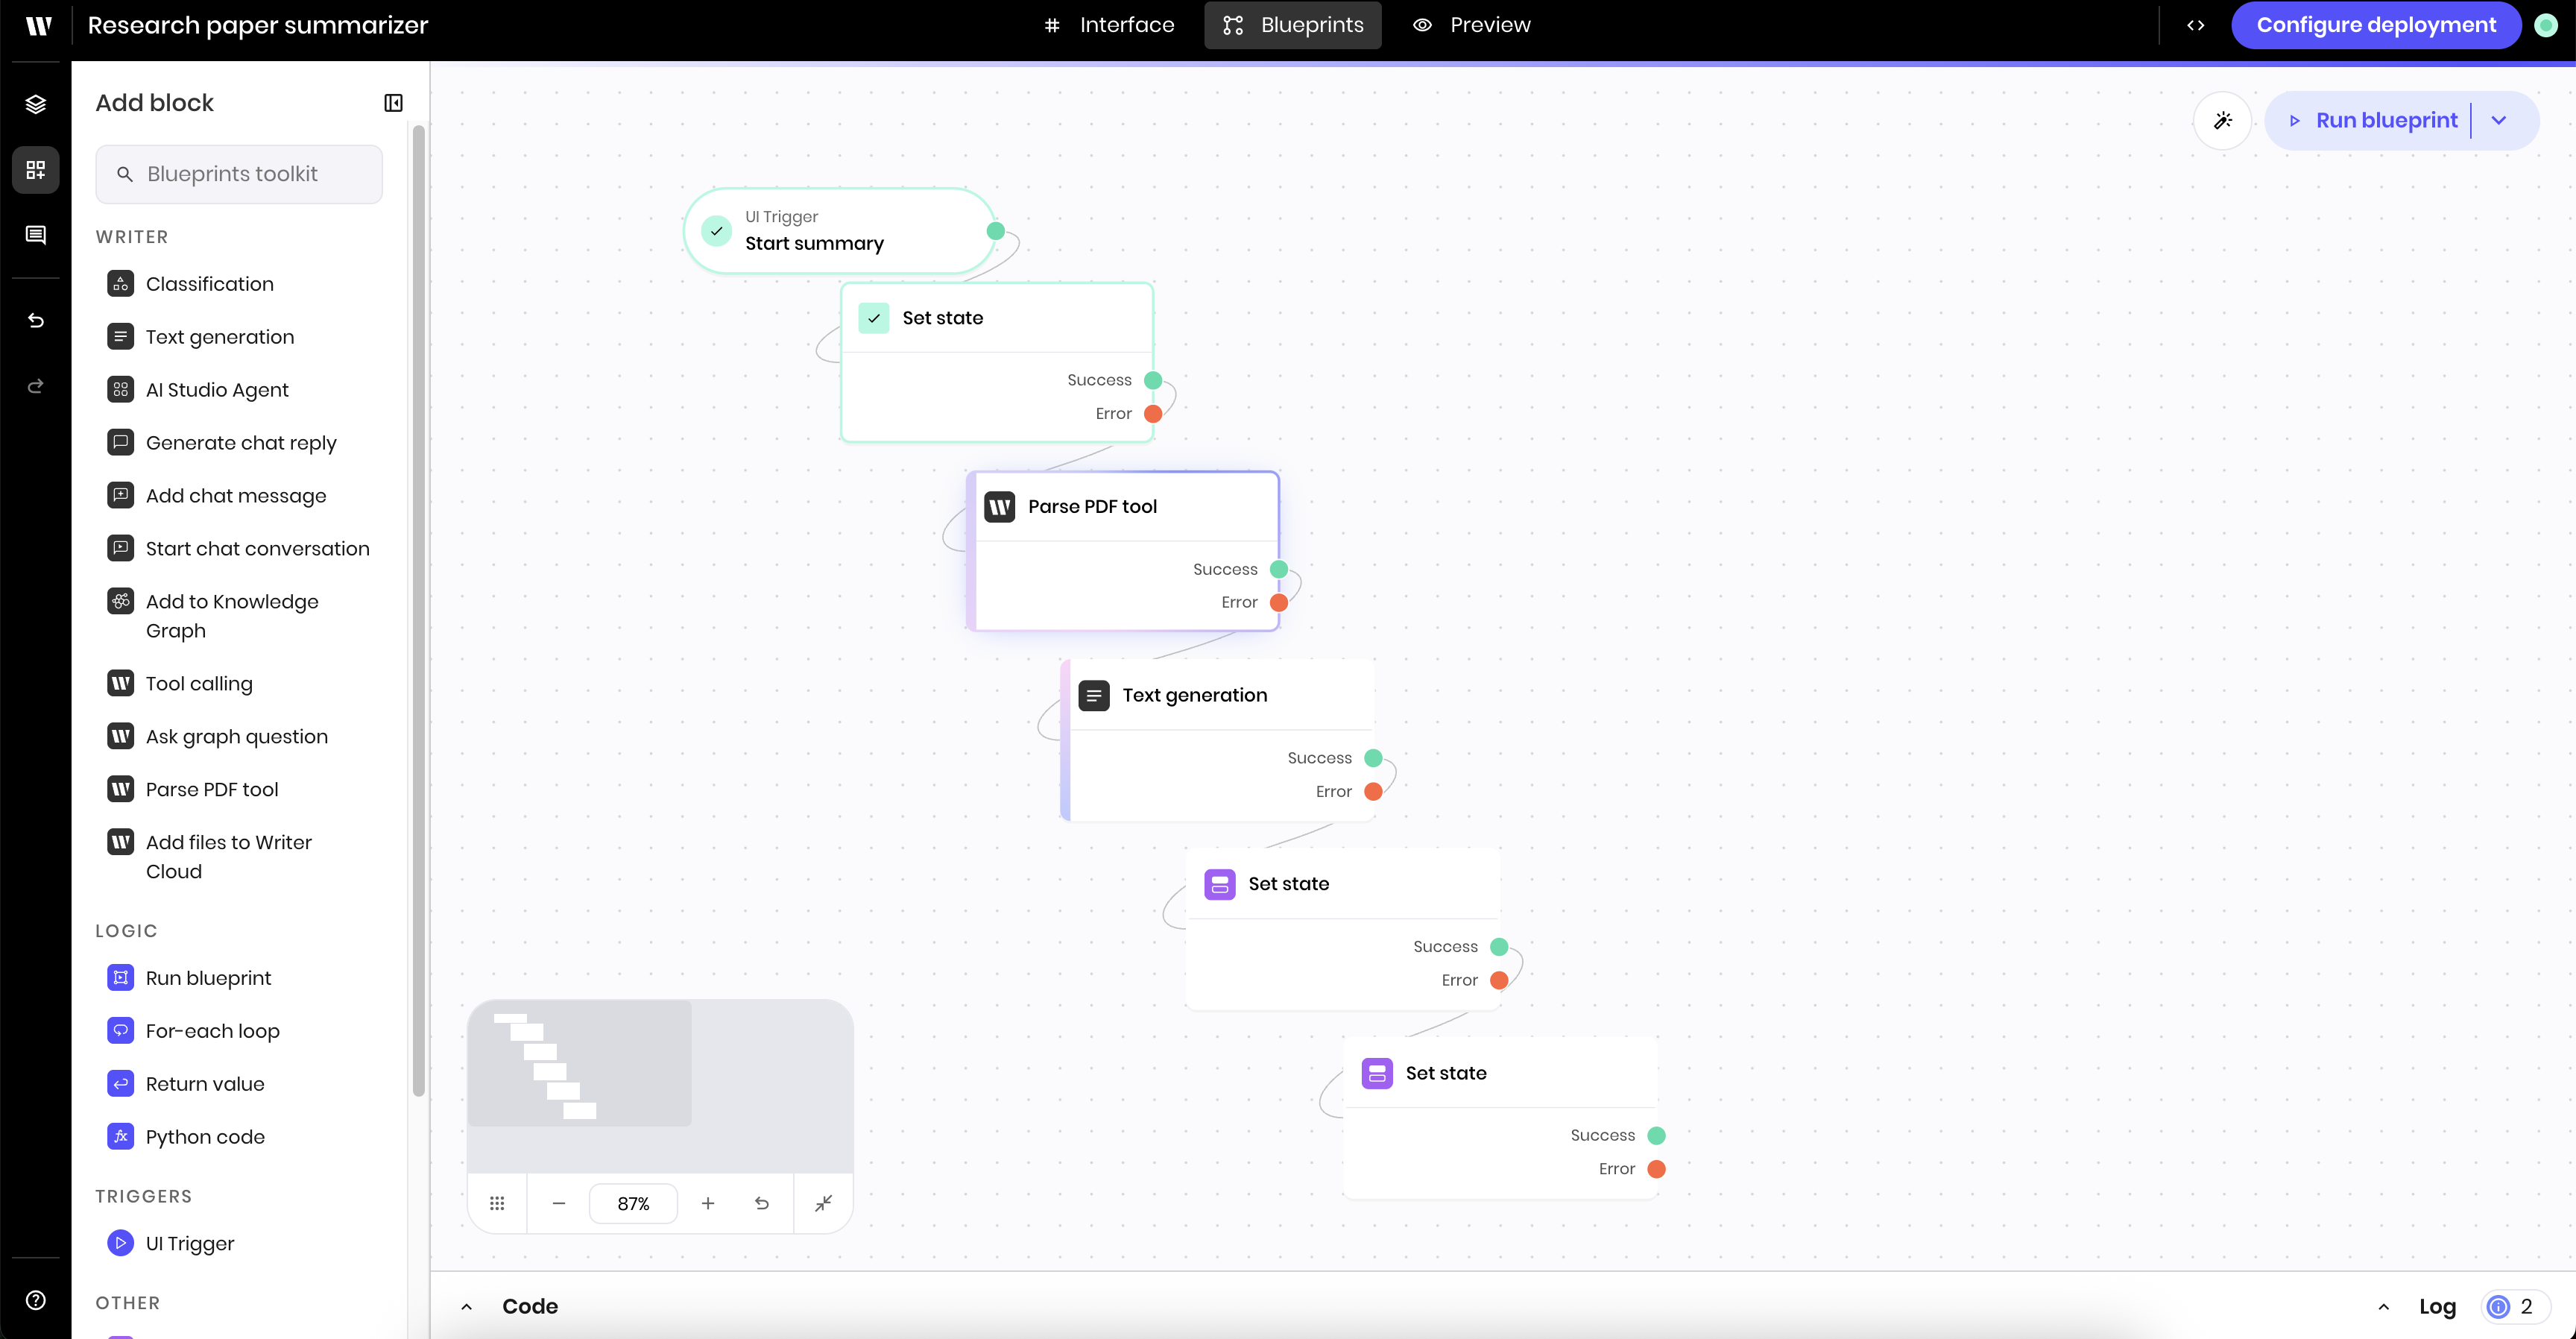
Build the blueprints
The agent has two blueprints:- One for uploading a file to Writer cloud when a user adds a file to the file input block
- One for parsing the file and summarizing it when a user clicks the button to start summarizing
First blueprint: Upload file to Writer cloud
Before you can work with the content of a PDF file in a blueprint, you need to upload it to the Writer Cloud with the Add files to Writer Cloud block. Once you’ve uploaded the file, you can access it in the blueprint using the uploaded file’s ID and perform operations like parsing the PDF and providing that information to a text generation block.1
Add a UI trigger for file input
Add a UI trigger block to the canvas. This triggers the blueprint when a user adds or changes the file in the file input block.In the block’s configuration panel, update the following fields:
-
Alias:
File upload. This is optional, but helps to identify the trigger in the blueprint. -
Component Id: Select the
File Inputcomponent from the dropdown of UI blocks -
Event type:
wf-file-change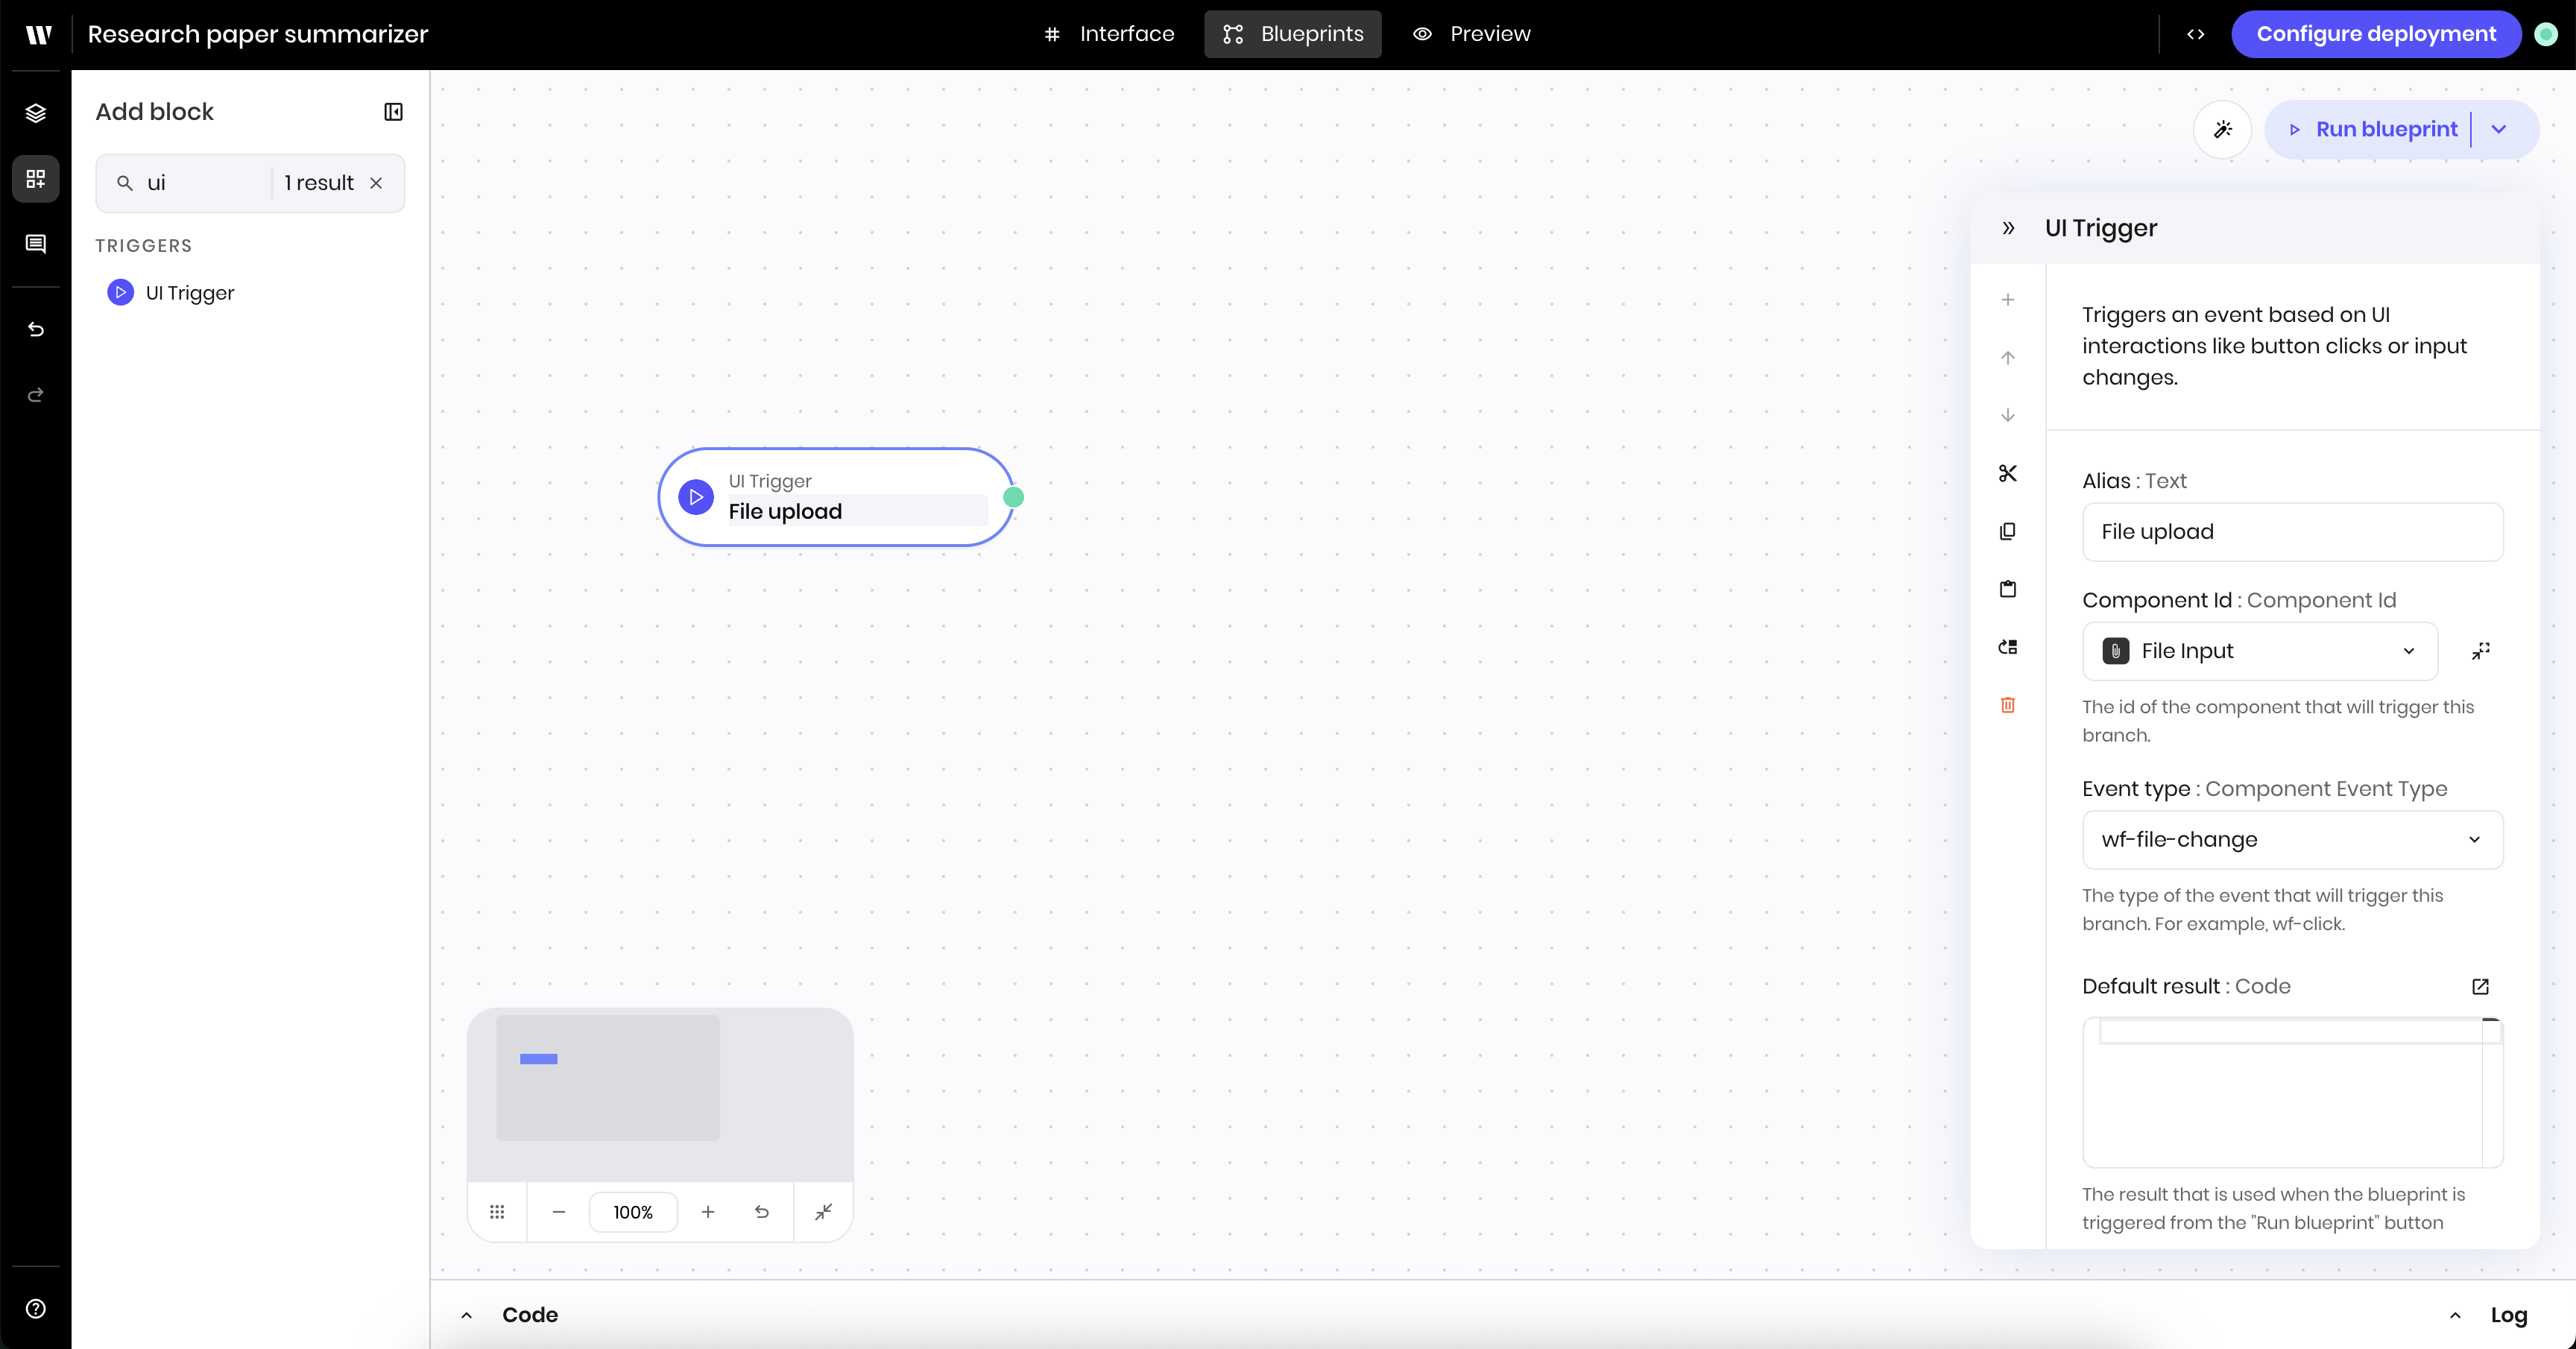
2
Add a block to add files to Writer Cloud
Add a Add files to Writer Cloud block to the canvas. This block uploads the file to Writer Cloud.In the block’s configuration panel, update the following fields:
-
Files:
@{payload}. This references the payload provided by the preceding UI trigger. The payload contains the file that was uploaded to the file input block.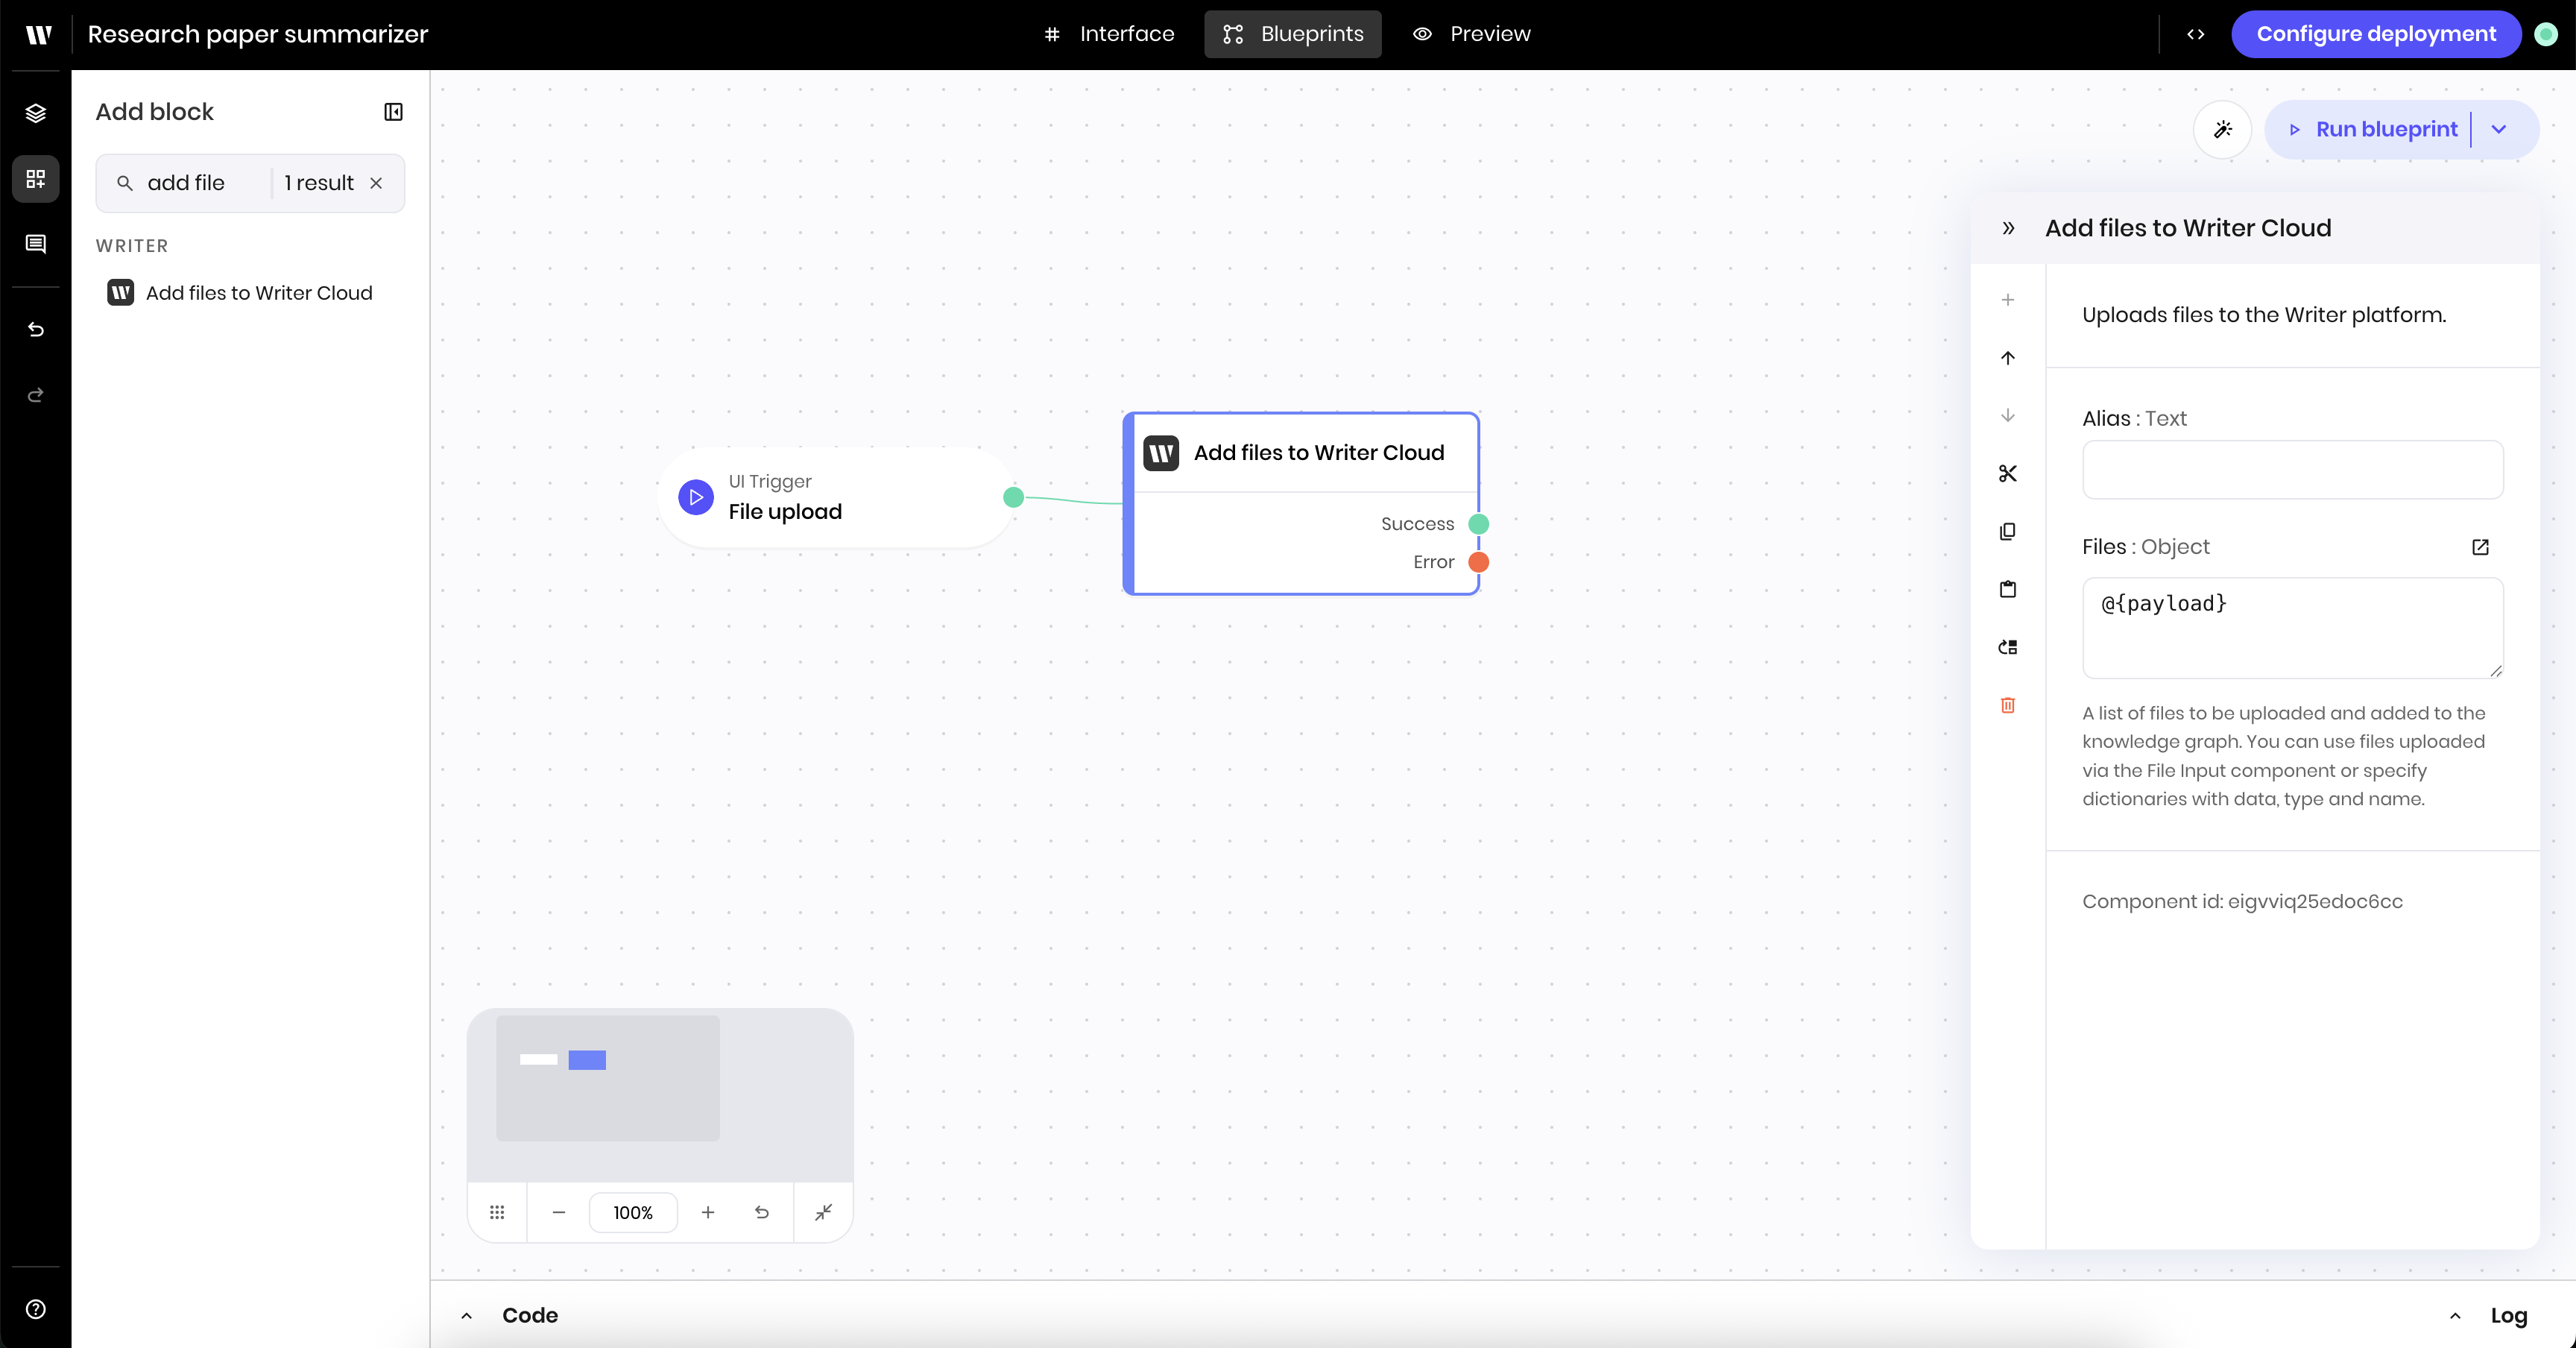
3
Add the uploaded file information to the state
Finally, add a Set state block to the canvas. This block takes the results from the Add files to Writer Cloud block and stores it in the state as the
file_info state variable. This is the information about the uploaded file, specifically the id of the file in Writer Cloud, that will be used in the next blueprint.In the block’s configuration panel, update the following fields:-
Link variable:
file_info -
Value type:
text -
Value:
@{result}. This references theresultfrom the previous block, which is the information about the uploaded file.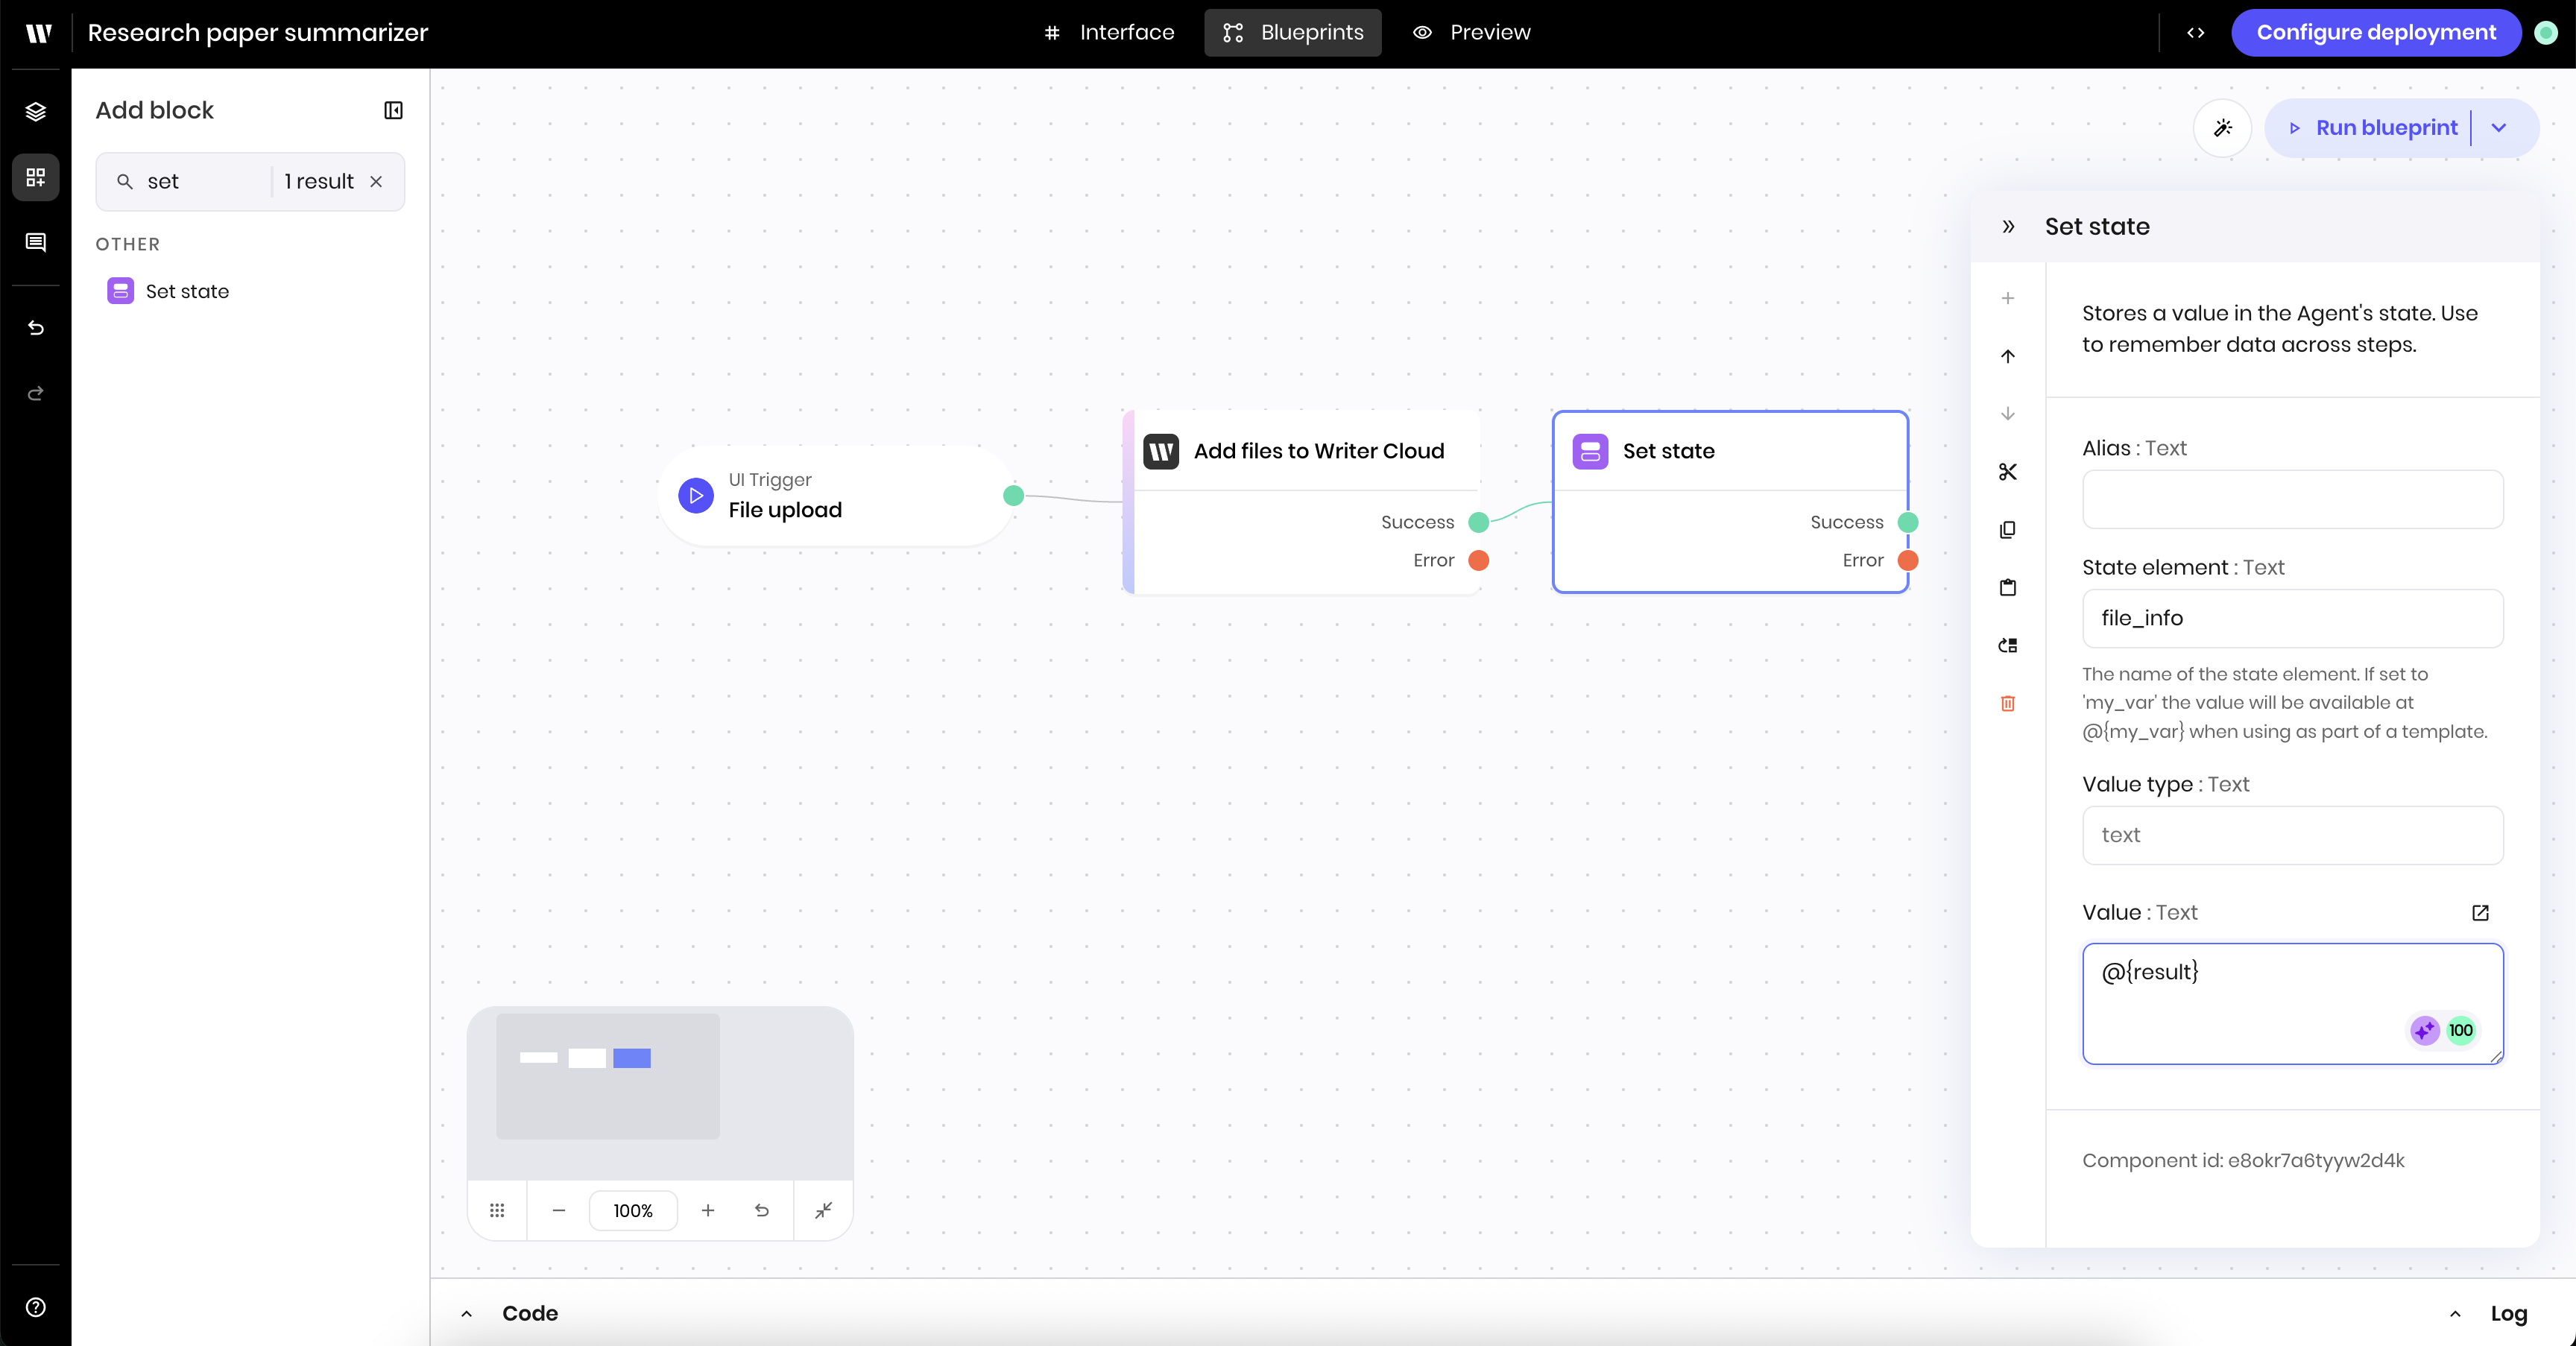
Second blueprint: Parse and summarize the file
Once you’ve uploaded the file to the Writer Cloud, you can parse the PDF and provide the file’s content to a text generation block.1
Add a new blueprint
First, add a new blueprint to the canvas. Navigate to the Blueprint Layers section in the sidebar and click + Add blueprint at the bottom of the blueprint layers outline.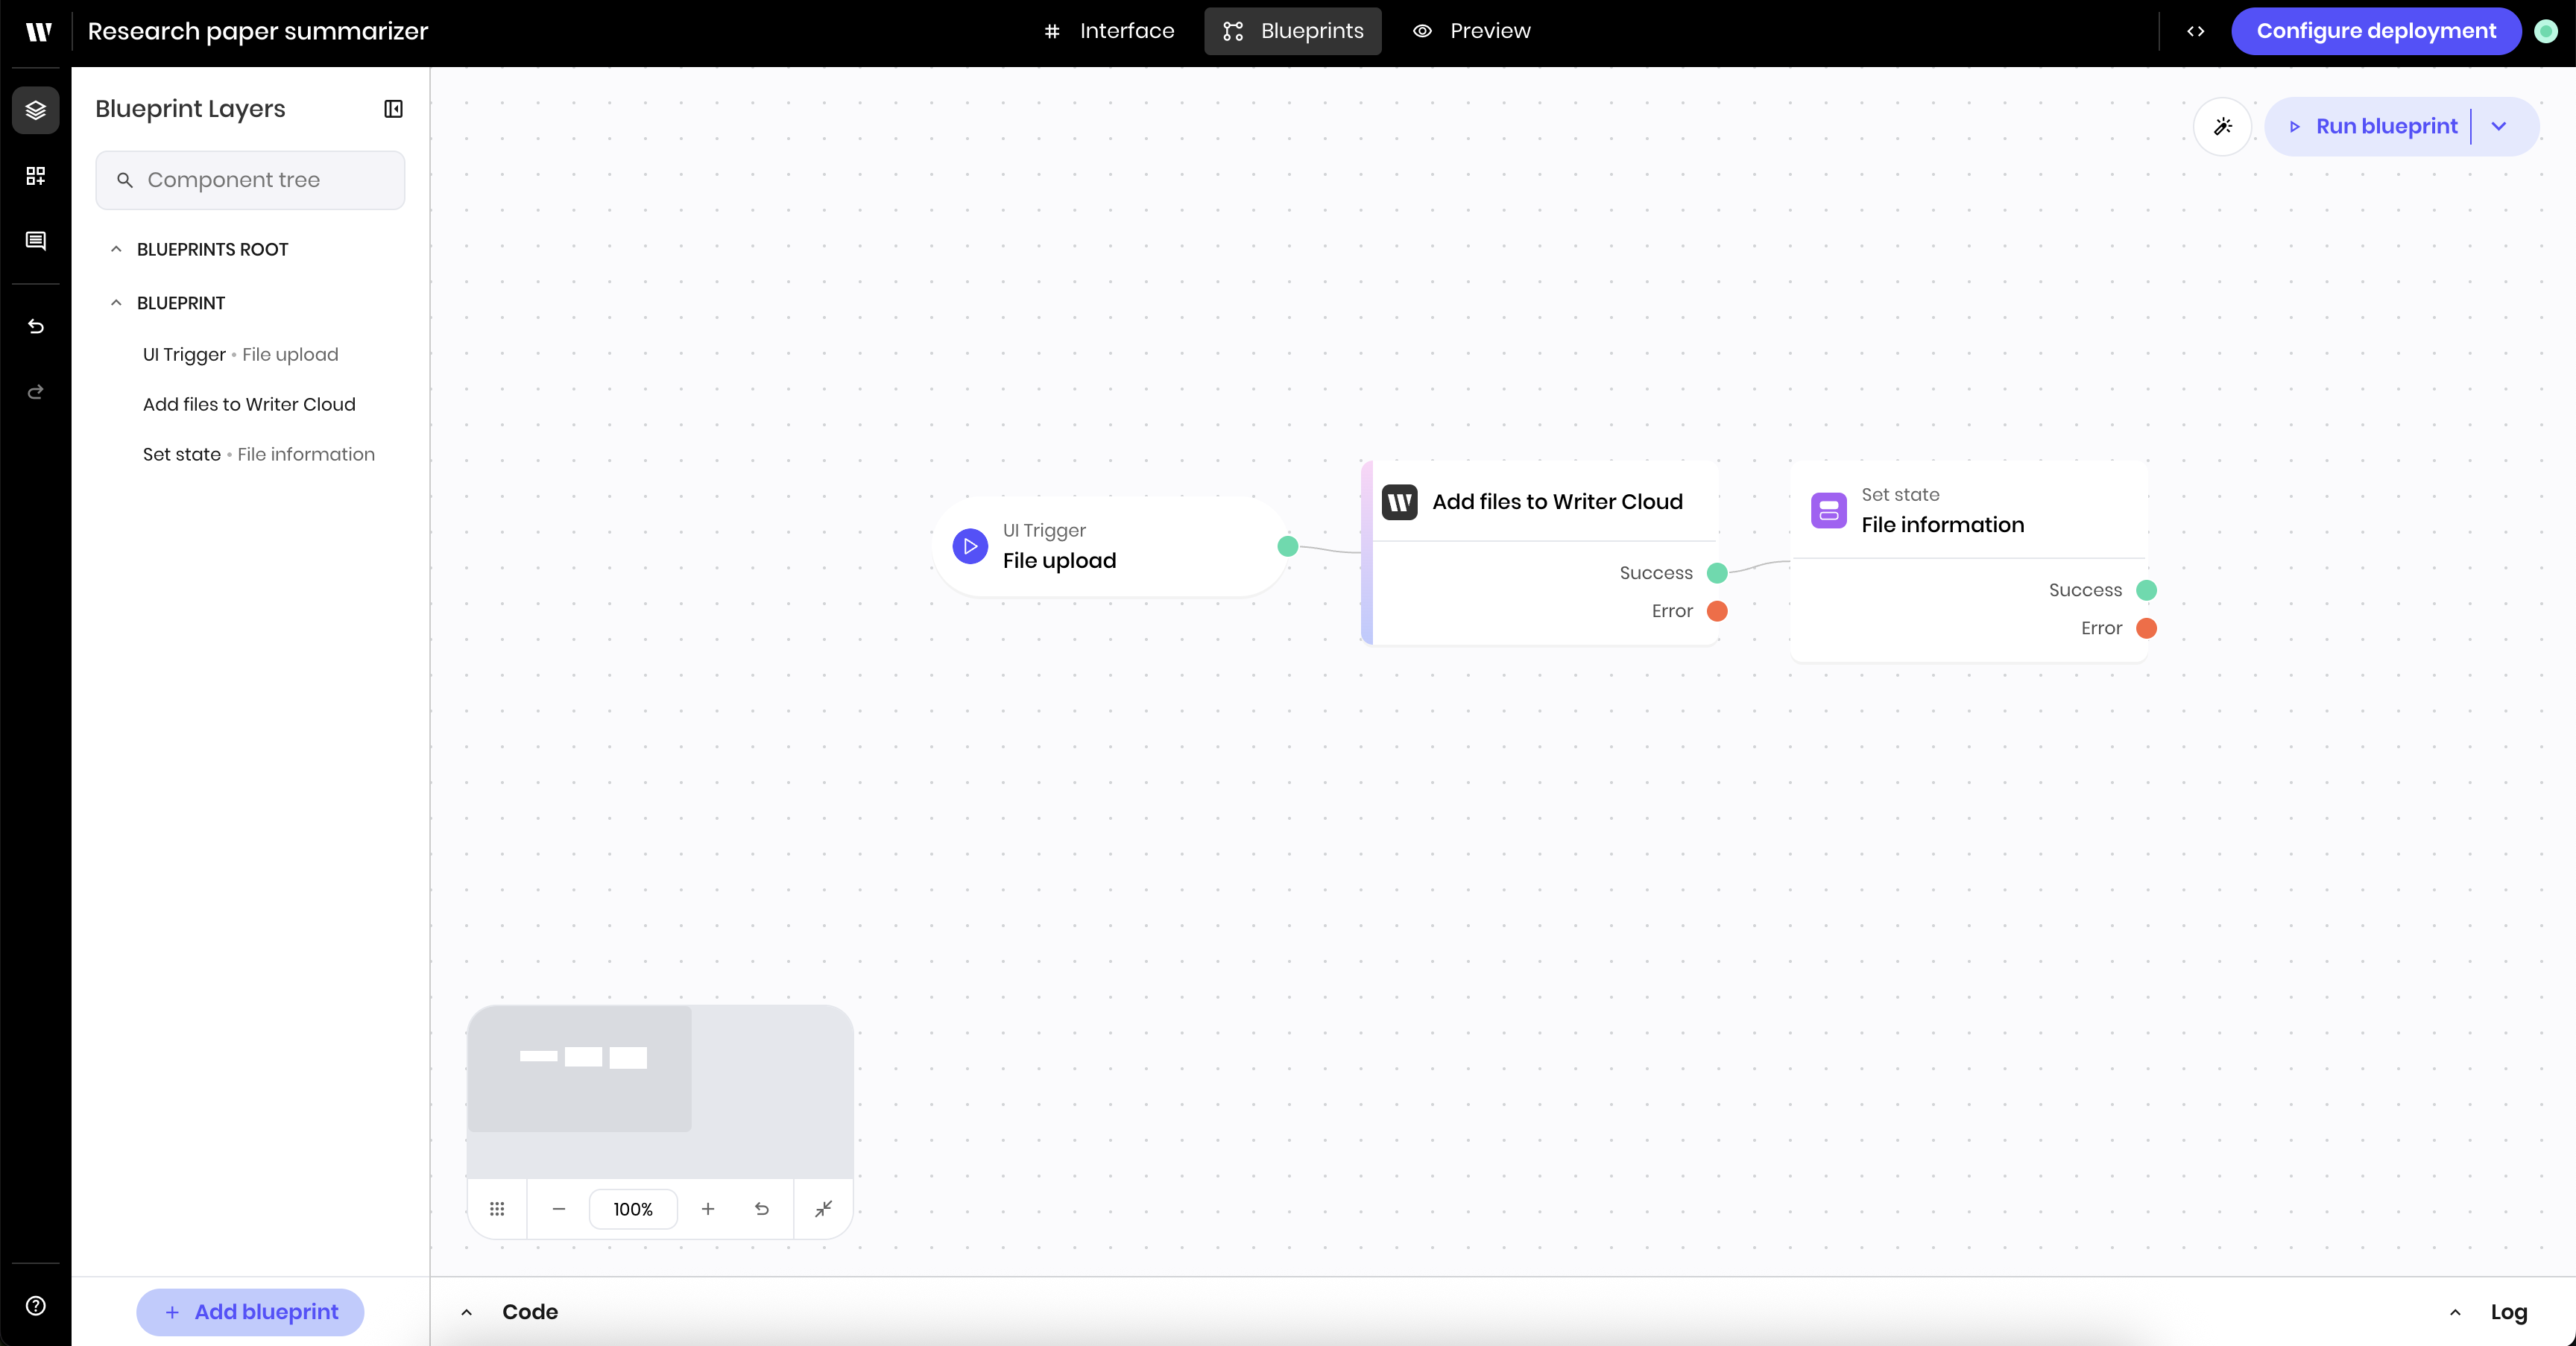
2
Add a UI trigger for the button to start summarizing
Navigate back to the Add Block section of the Agent Builder and add a UI trigger block to the new blueprint. This triggers the blueprint when a user clicks the button to start summarizing.In the block’s configuration panel, update the following fields:
-
Alias:
Start summary(optional, to make the trigger easier to identify) -
Component Id: Select the
Summarizebutton component from the dropdown of UI blocks -
Event type:
wf-click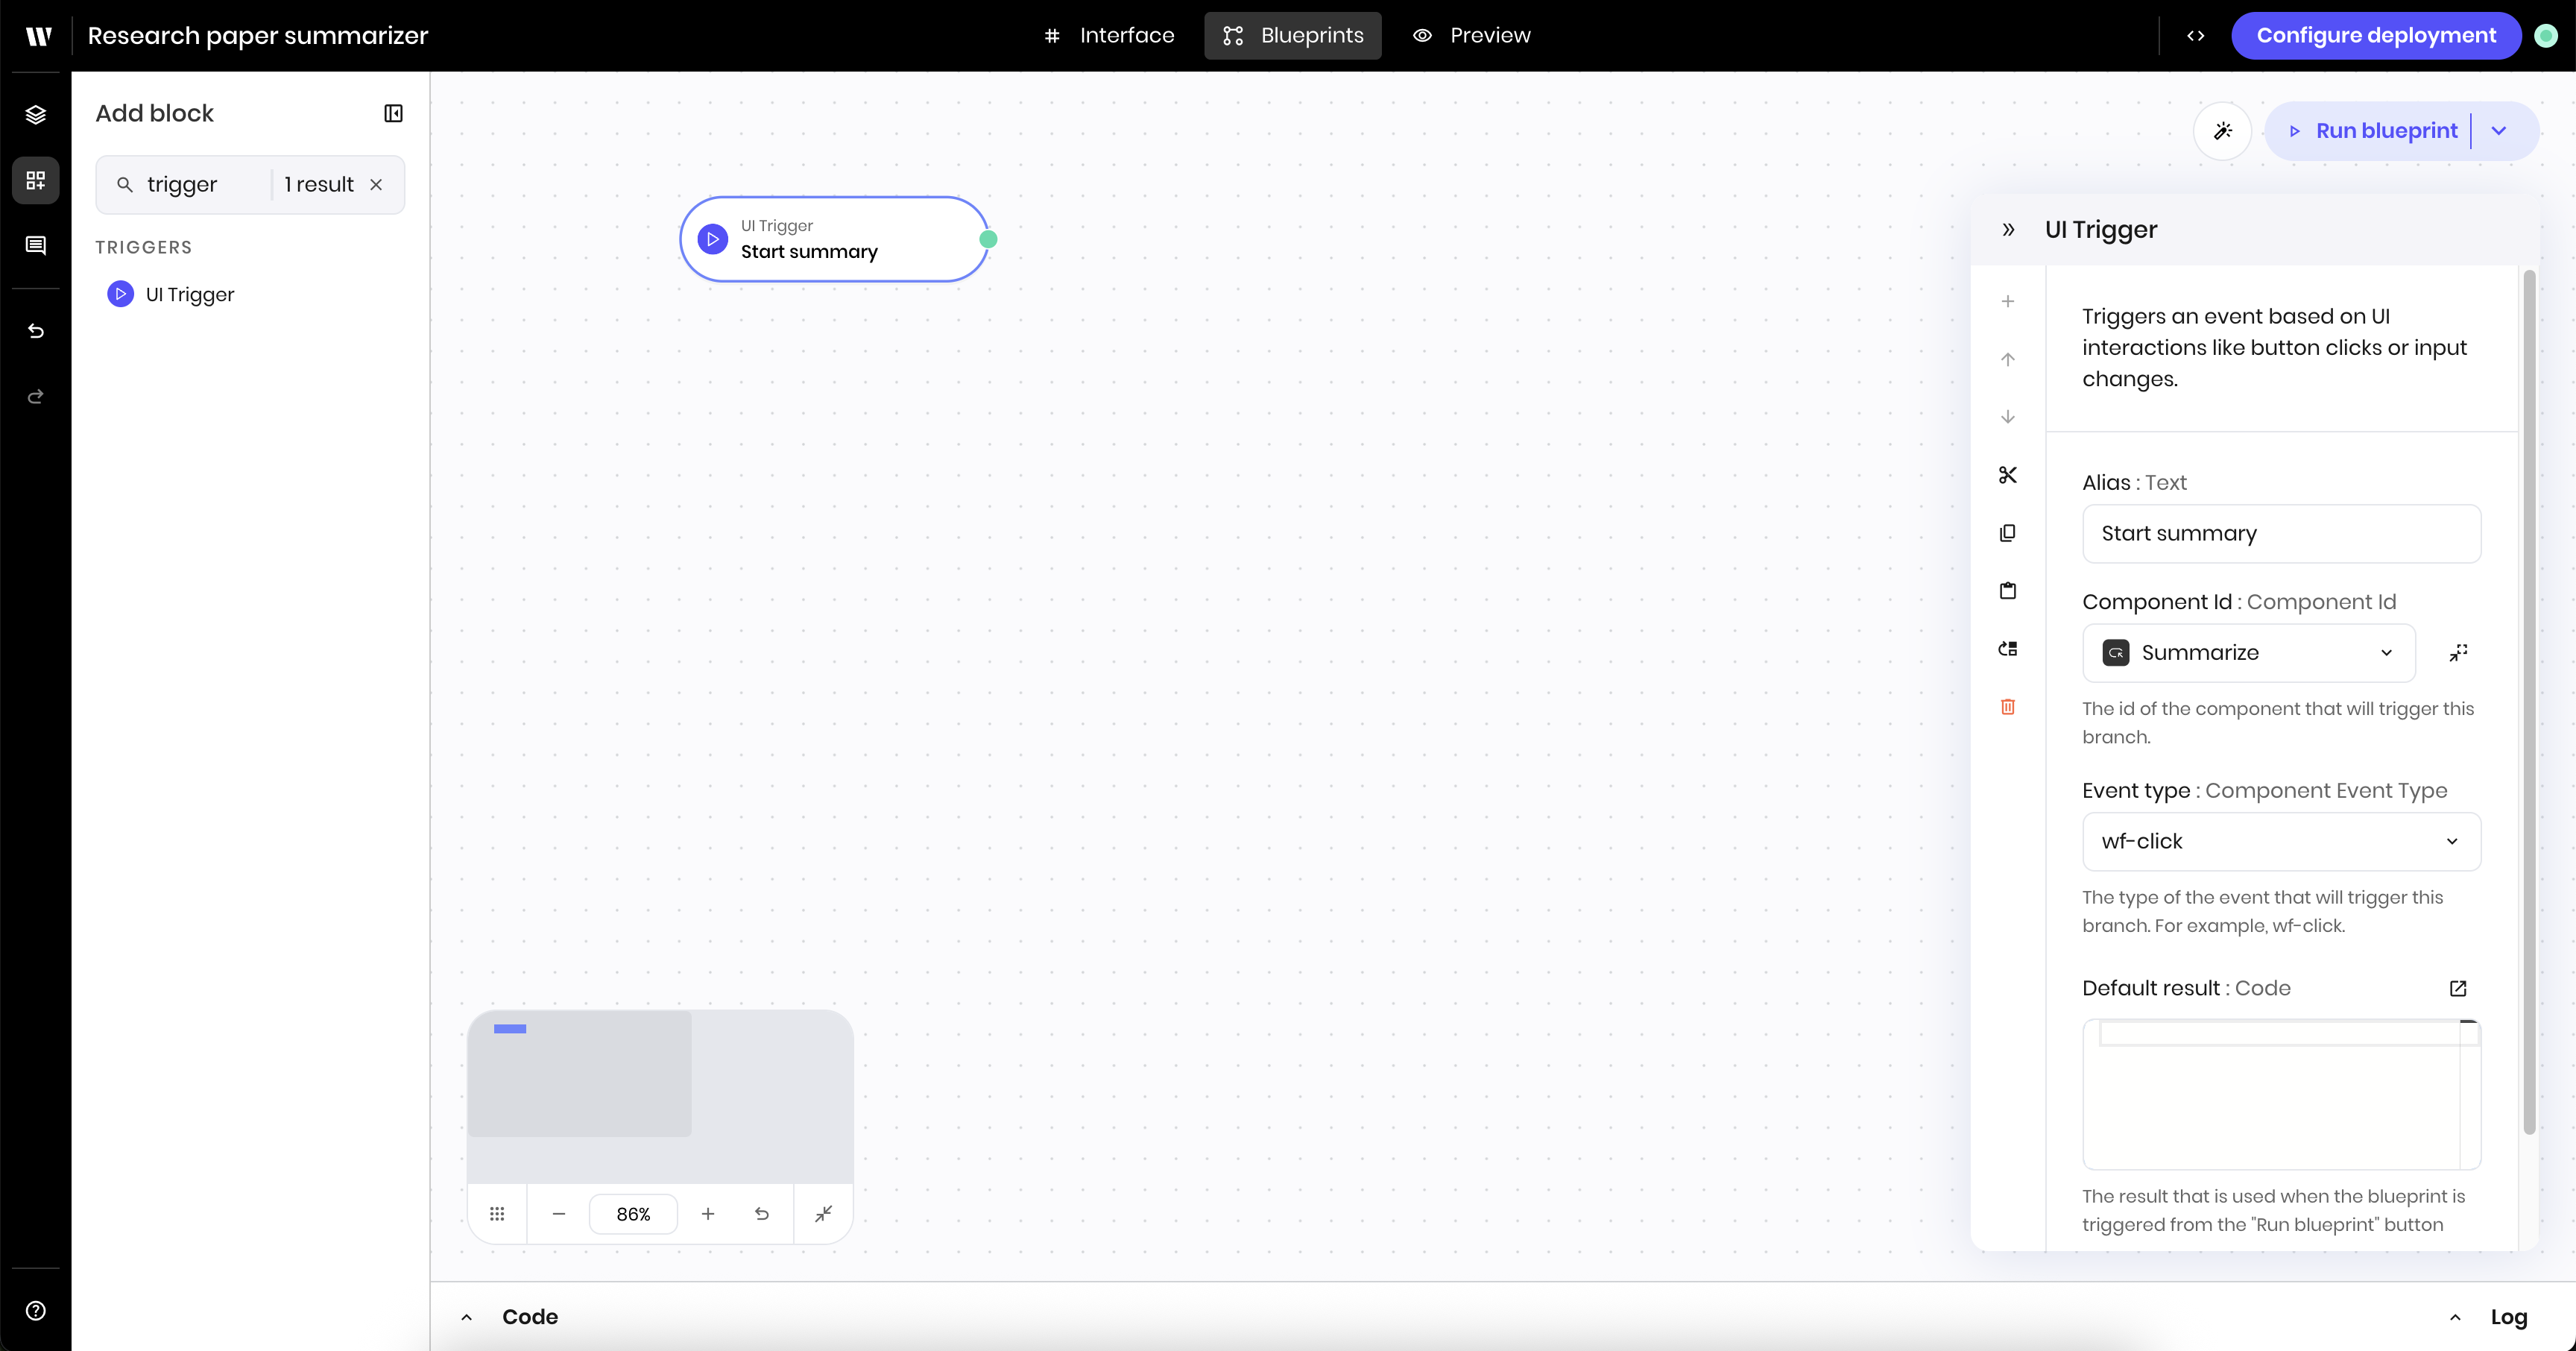
3
Update the status message
Add a Set state block to the canvas. This block updates the status message in the state to indicate that the summarization is in progress. The message will appear in the UI message block.In the block’s configuration panel, update the following fields:
-
Link variable:
status -
Value type:
text -
Value:
%Summarizing.... The%symbol creates an animated spinning icon when the message appears in the UI.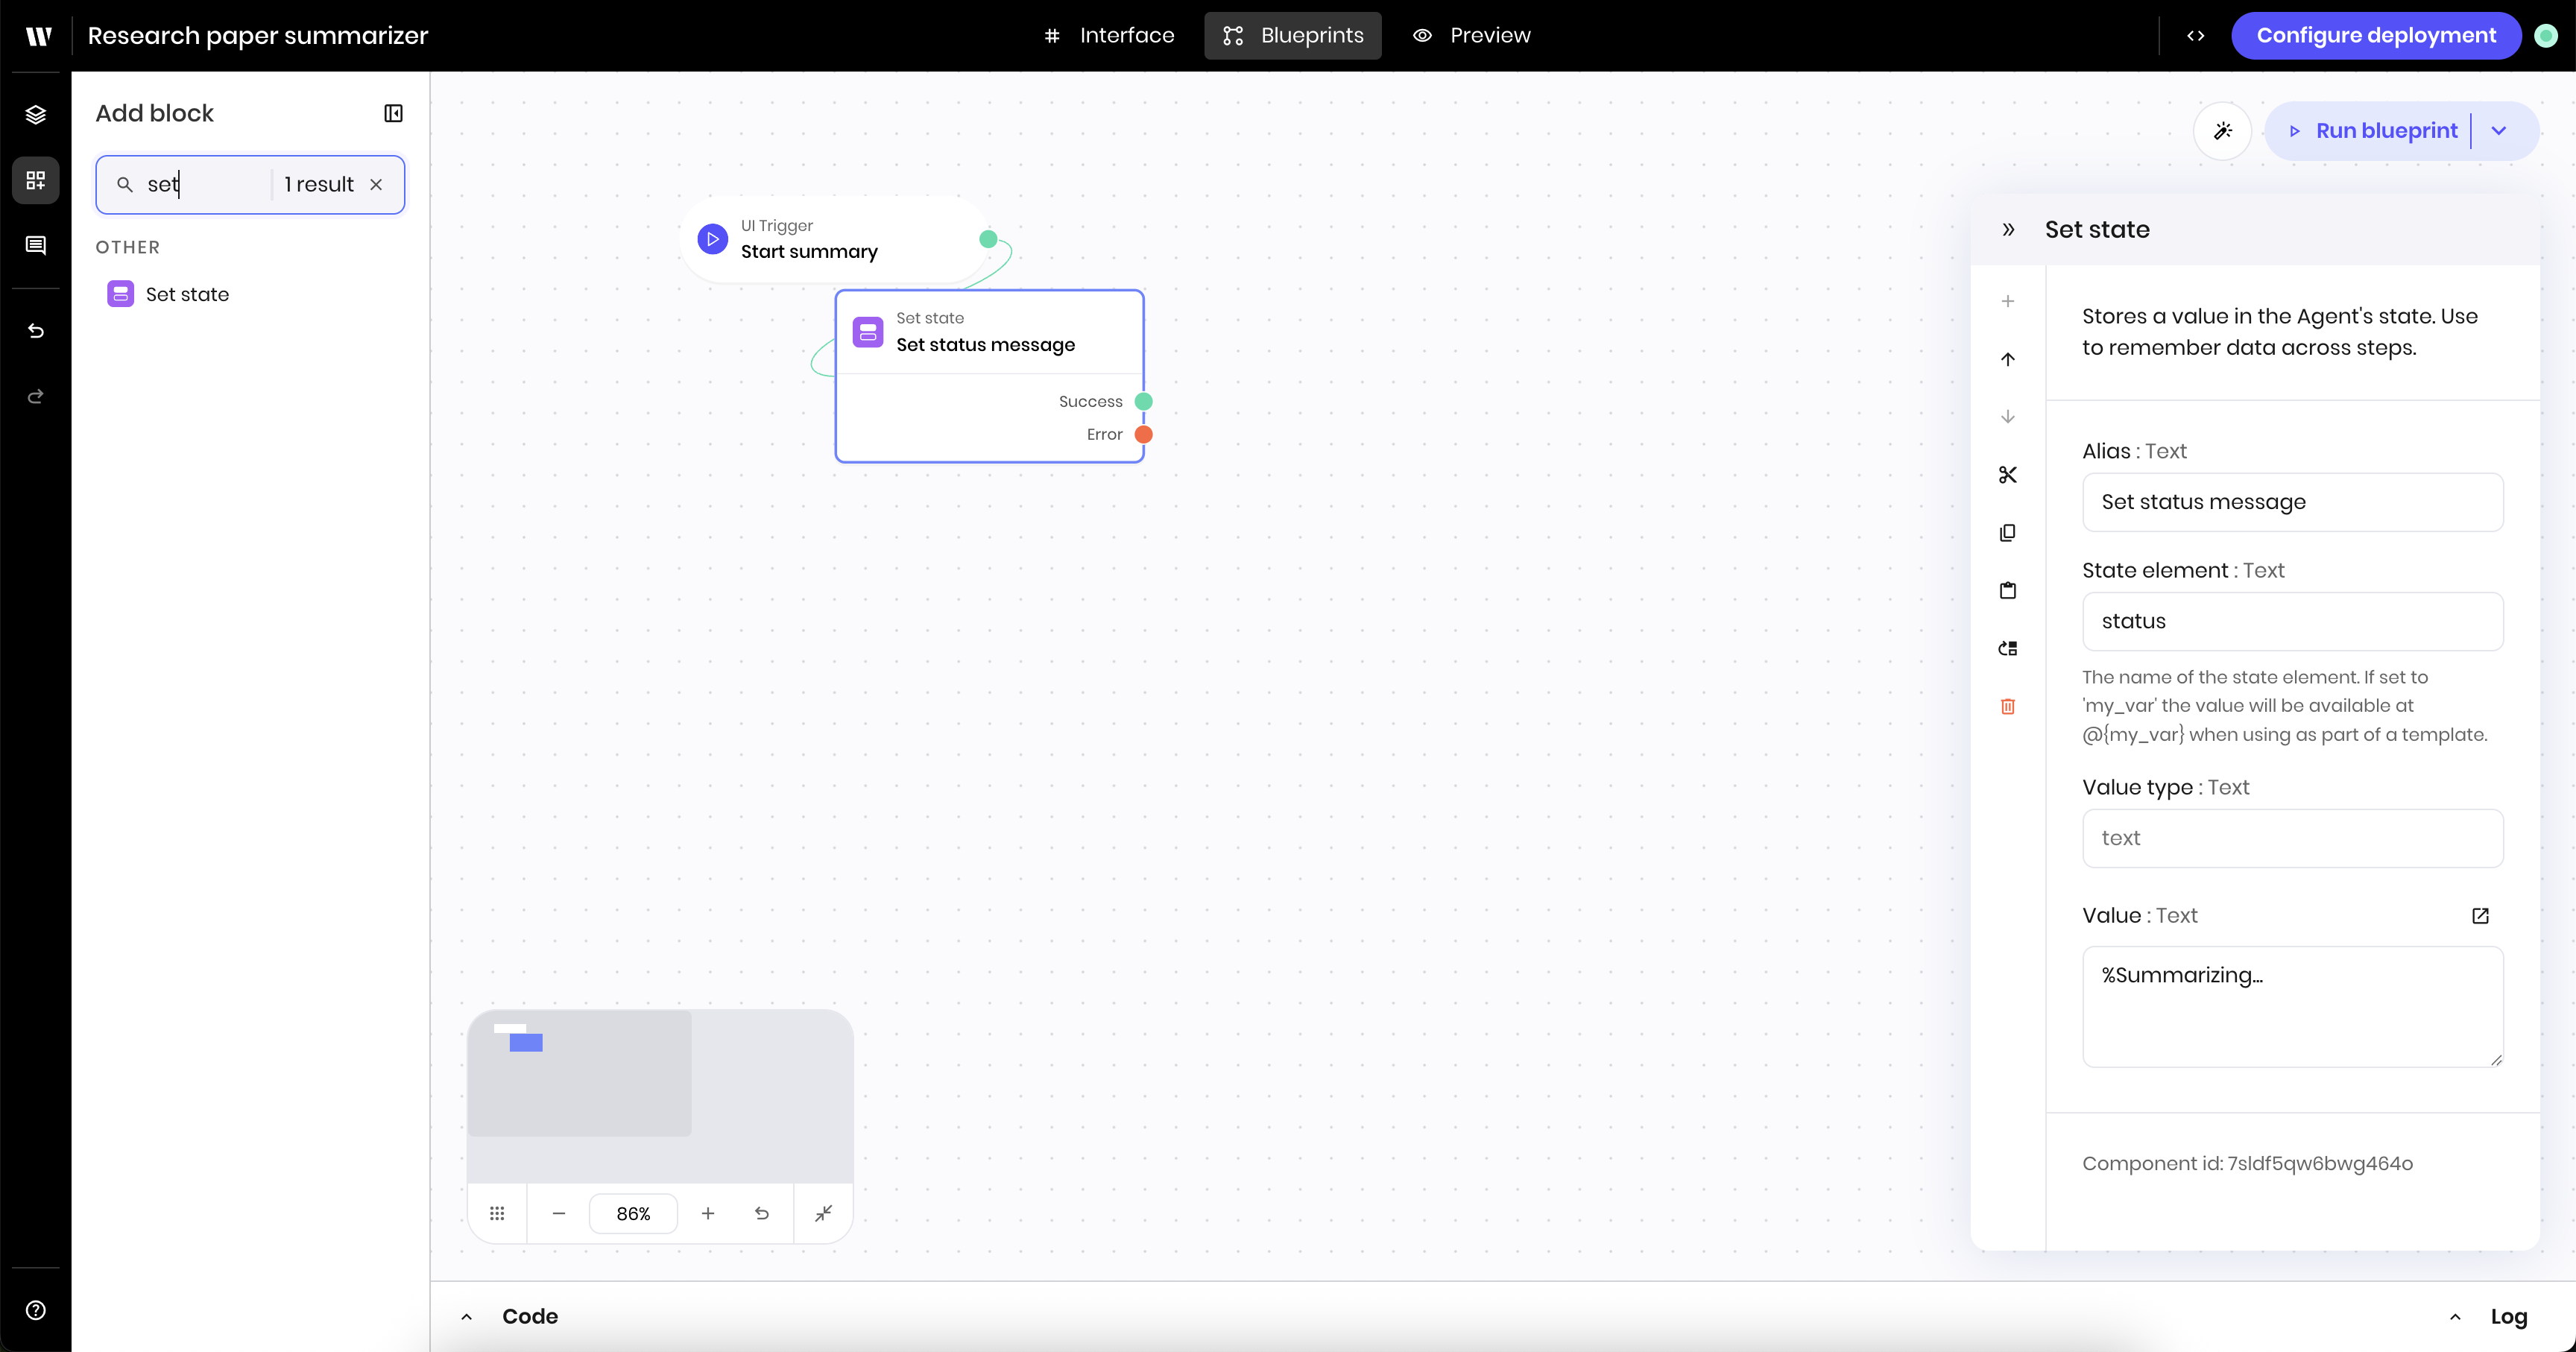
4
Add a block to parse the uploaded PDF file
Add a Parse PDF Tool block to the canvas. This block parses the uploaded PDF file so that the agent can generate a summary of the file.In the block’s configuration panel, update the following fields: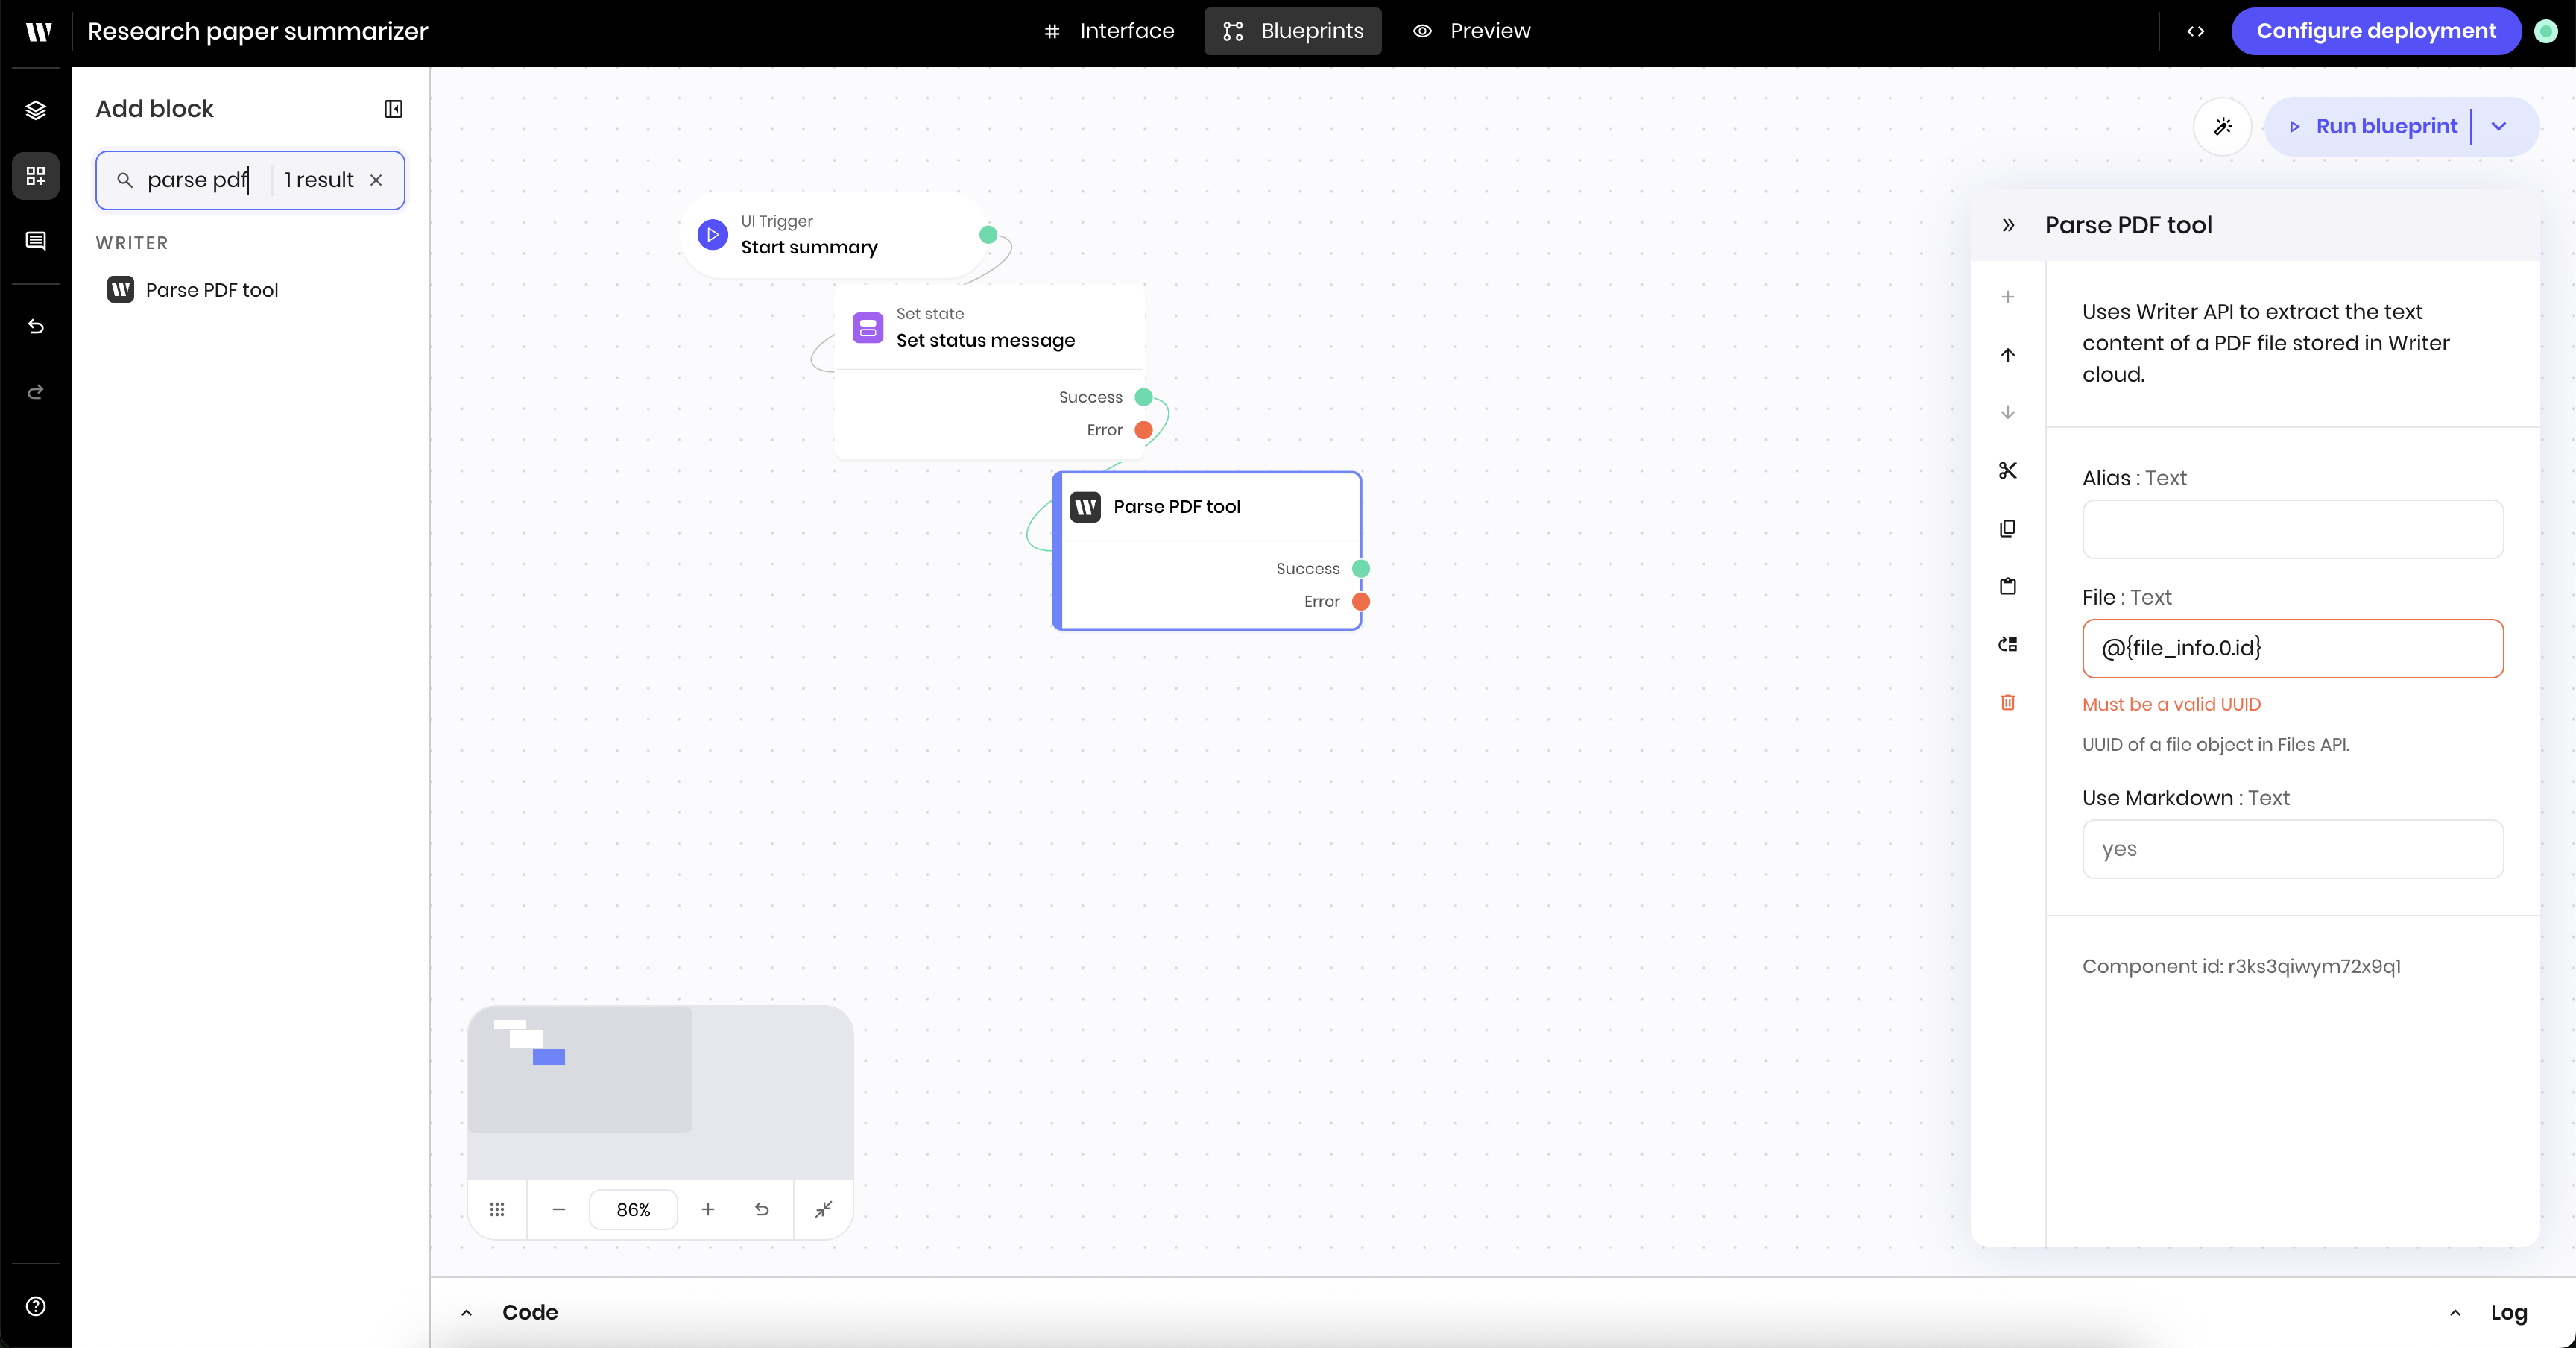
- File:
@{file_info.0.id}. This references thefile_infostate variable you defined in the first blueprint and specifically access theidof the uploaded file.
5
Add a block to generate a summary of the parsed file
Add a Text generation block to the canvas. This block generates text with a Palmyra LLM based on a prompt.In the block’s configuration panel, update the following fields: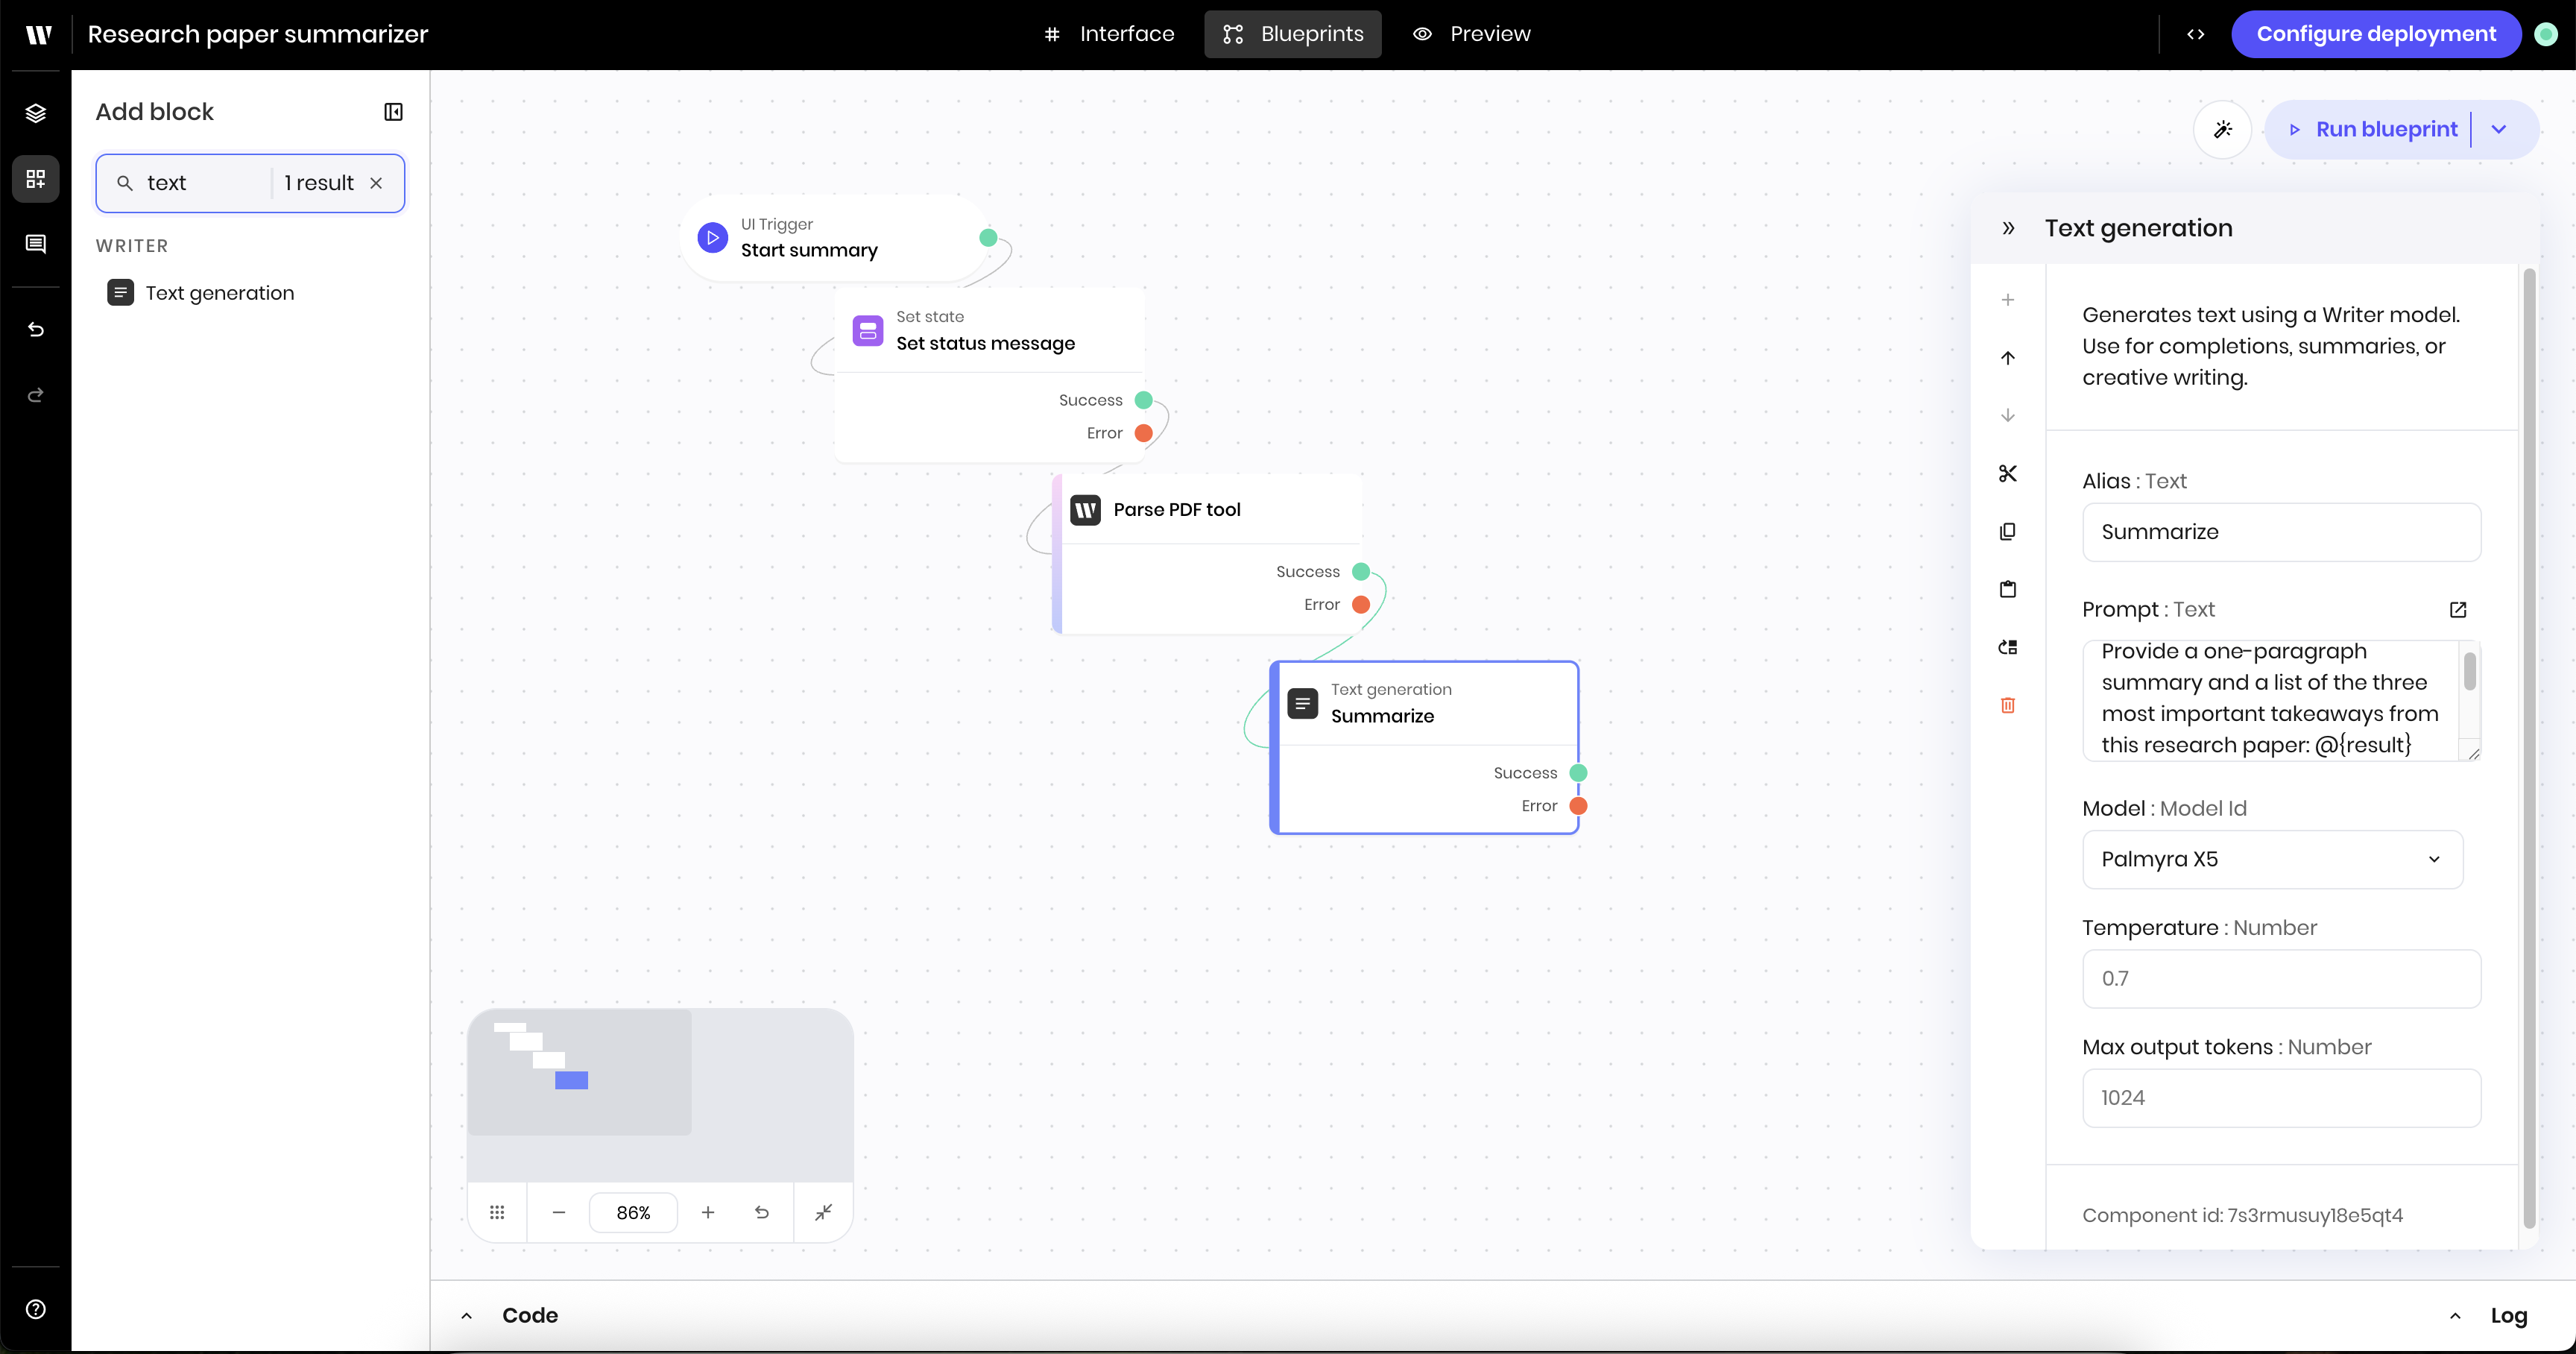
- Prompt:
Provide a one-paragraph summary and a list of the three most important takeaways from this research paper: @{result}. Provide the summary for the user persona @{persona}.@{result}references theresultfrom the previous block, which is the parsed PDF file.@{persona}references thepersonastate variable you defined in the UI.
- Model:
Palmyra X5
6
Add the summary results to the state
Add a Set state block to the canvas. This block takes the results from the previous text generation block and stores it in the state as the
summary state variable.In the block’s configuration panel, update the following fields:-
Link variable:
summary -
Value type:
text -
Value:
@{result}. This references theresultfrom the previous block, which is the summary of the parsed PDF file.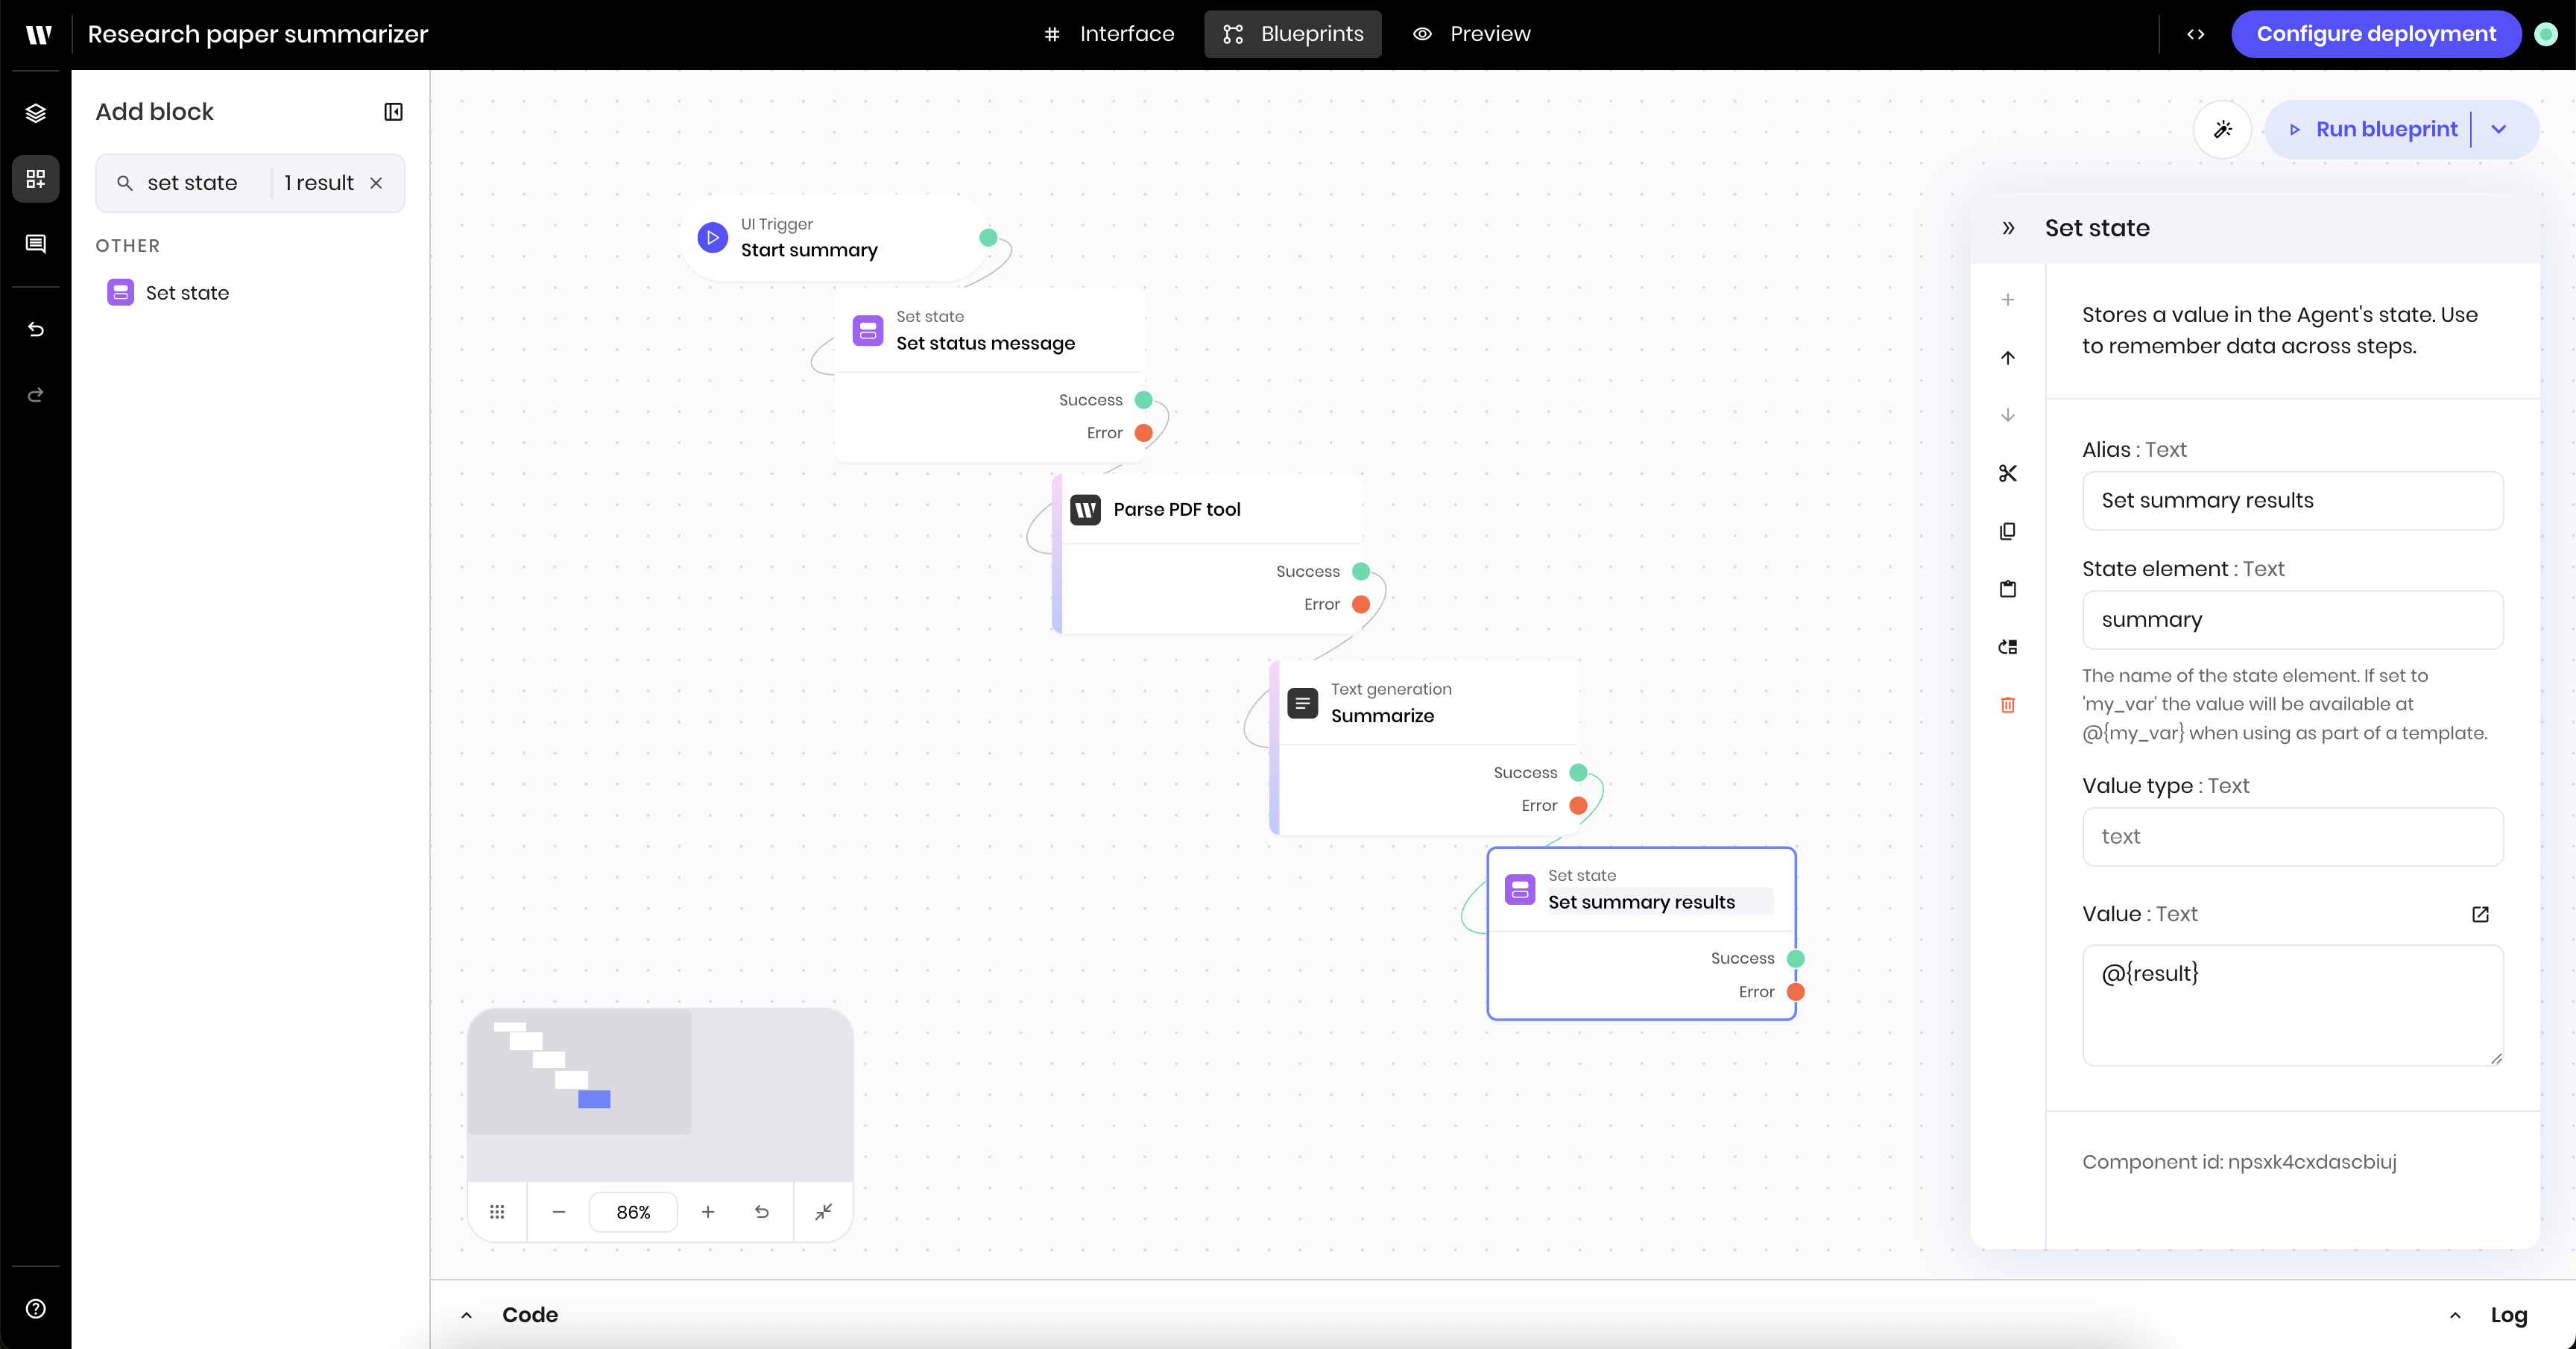
7
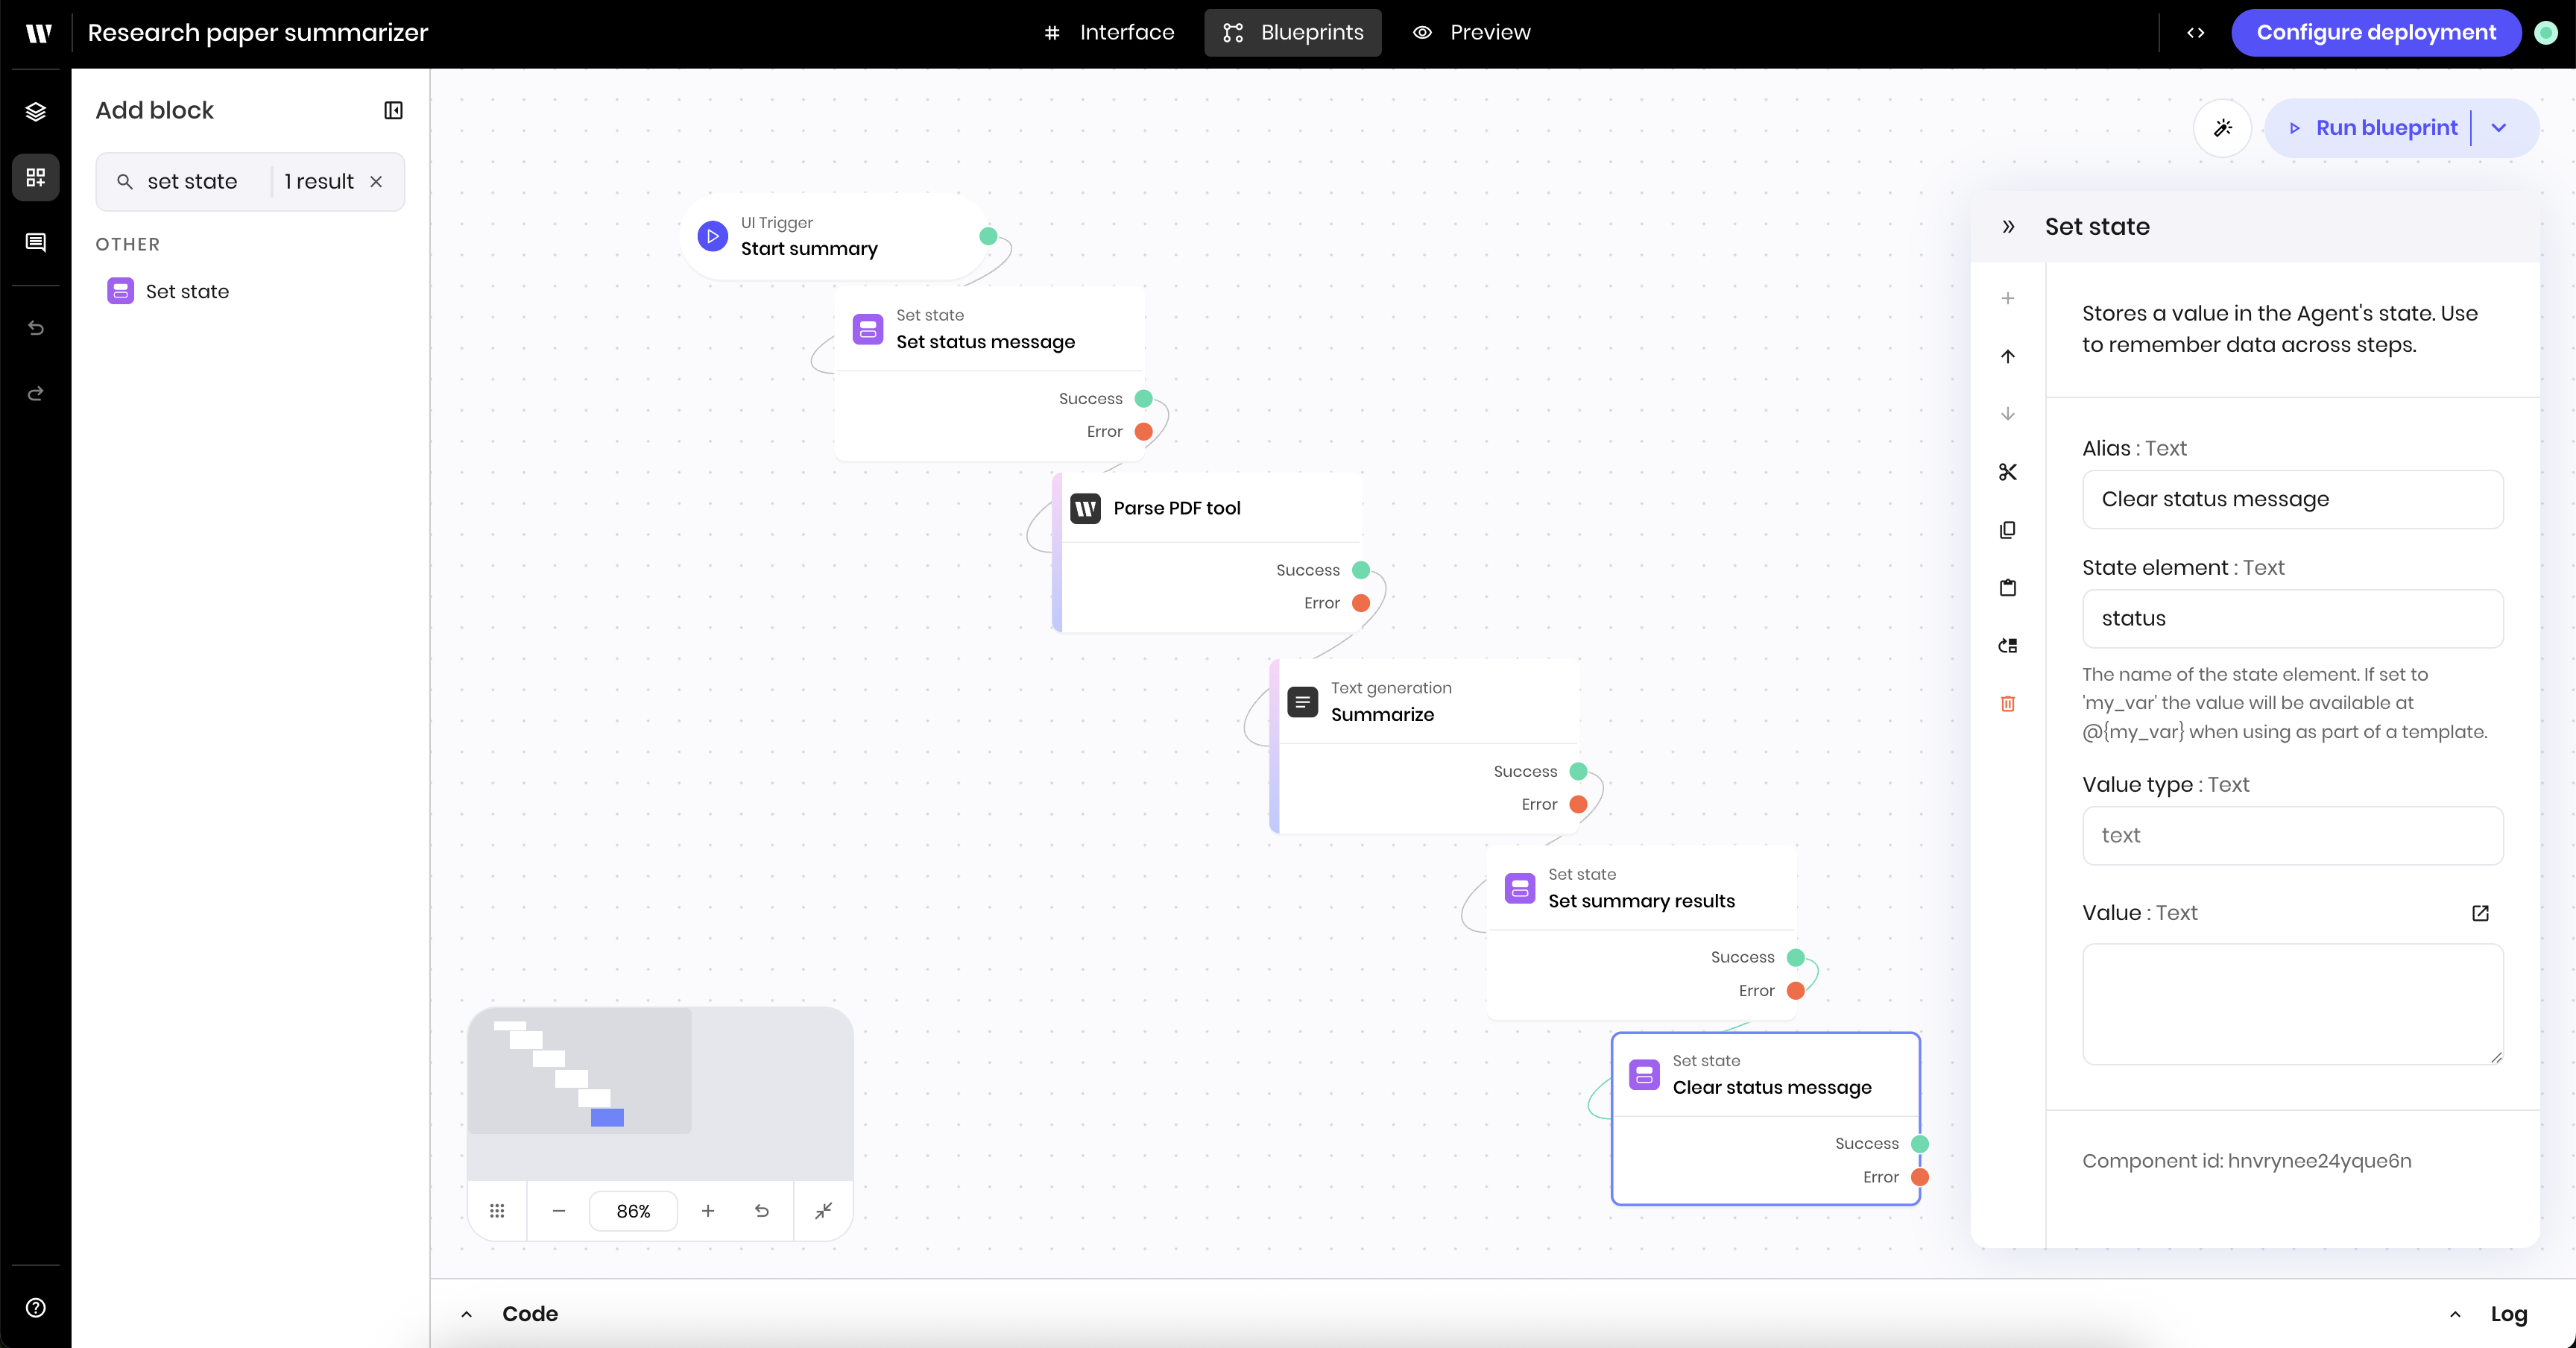
Clear the status message from the state
Finally, add a Set state block to the canvas to clear the status message from the state.In the block’s configuration panel, update the following fields:
-
Link variable:
status -
Value type:
text -
Value: Leave blank. This clears the status message from the state.
Preview the agent
Now that you’ve built the agent, you can preview it.- Navigate to the Preview tab in the Agent Builder.
- Add a PDF file to the file input block and select a persona from the dropdown.
- Click the Summarize button to start the summarization process.
- You should see the status message update to
%Summarizing...and the summary results appear in the text block.