- Adding a Chatbot block to the UI
- Adding a Chat reply block to the blueprint
- Connecting a Knowledge Graph to the chatbot
If you are unfamiliar with Agent Builder interface, check out the Agent Builder Quickstart.
Build the UI
The UI for the agent contains a single Chatbot block. This block handles the full UI for the chatbot, including the chat interface and the chat messages.1
Add a Chatbot block to the UI
Drag and drop a Chatbot component onto the Interface.In the block’s configuration panel, set the following fields:
-
Conversation:
@{chat}. This is the state variable that stores the chat conversation. -
Assistant initials:
AI. This is the text that appears next to the assistant’s messages in the chat. -
User initials:
YOU. This is the text that appears next to the user’s messages in the chat. -
Use markdown:
no. You can change this toyesif you want to parse Markdown formatting in messages. -
Enable file upload:
no. This disables the file uploads in the chatbot. -
Placeholder:
Type your message here.. This is the text that appears in the input field when it’s empty.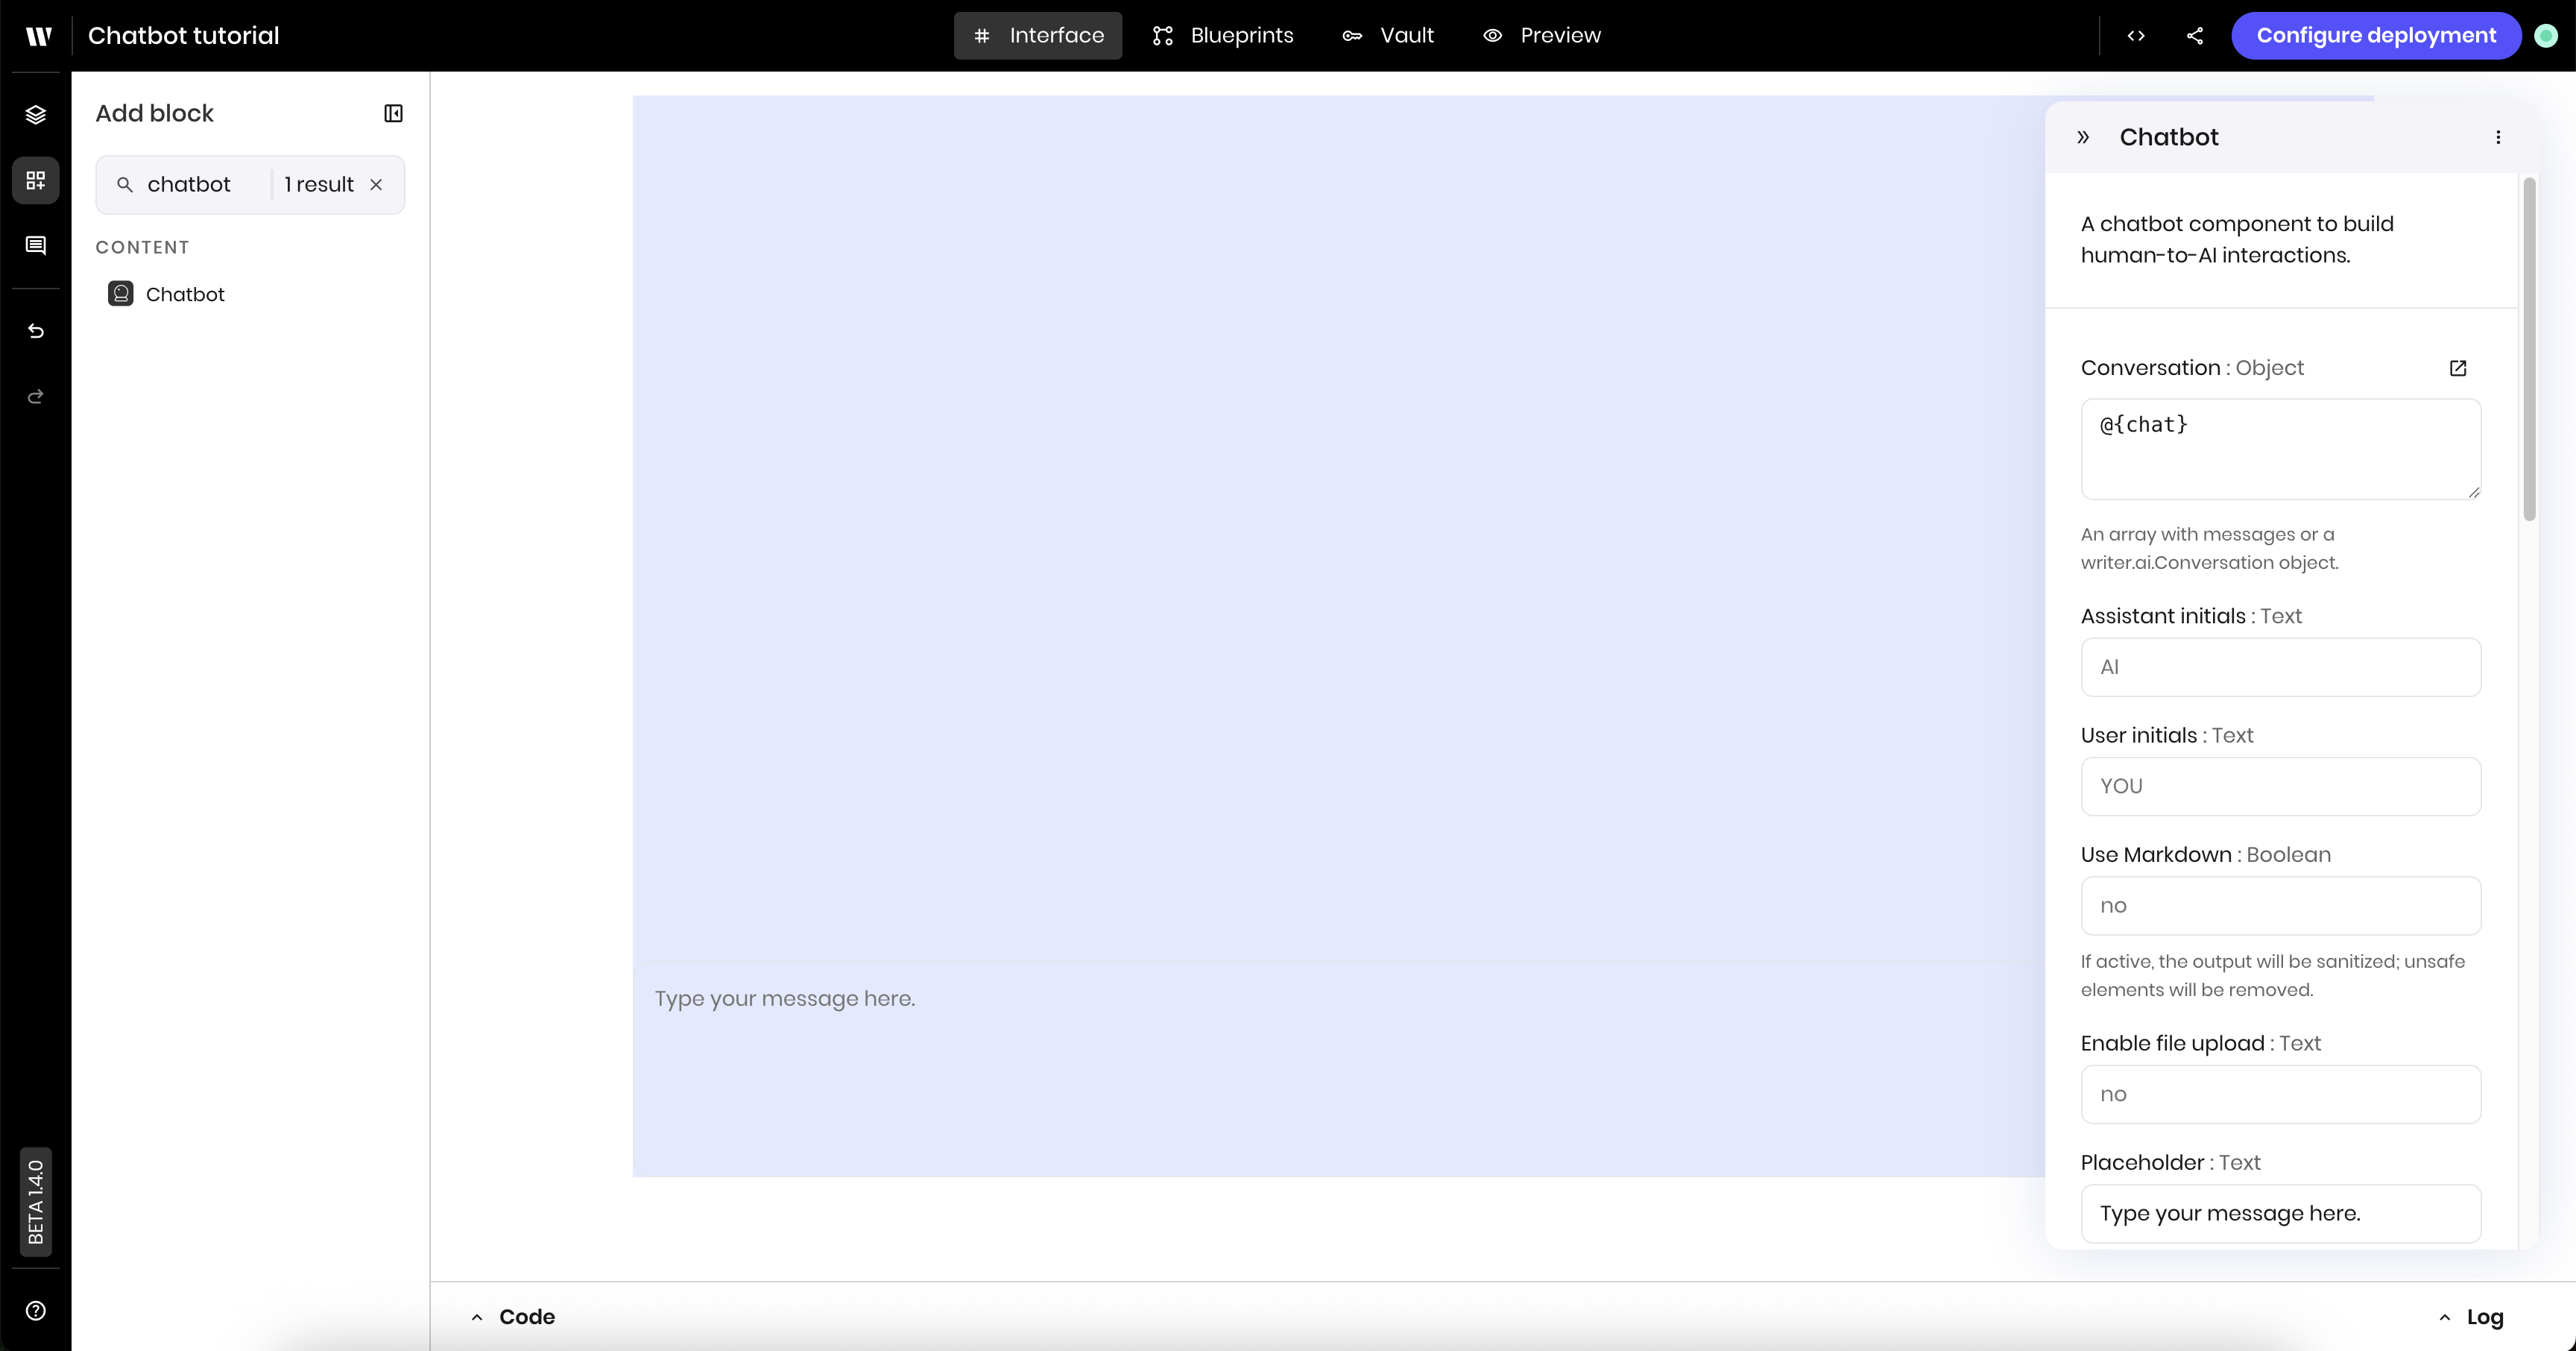
Build the blueprint
The blueprint for the agent contains the following blocks:- UI trigger block to run the blueprint when a user enters a chat message
- Chat reply block to manage the conversation and generate a response to the user’s message
1
Add a UI trigger for the chat message event
To run the blueprint when a user enters a chat message, add a UI trigger block to the canvas. In the block’s configuration panel, update the following fields:
-
Component Id: select the
Chatbotcomponent from the dropdown of UI blocks -
Event type:
wf-chatbot-message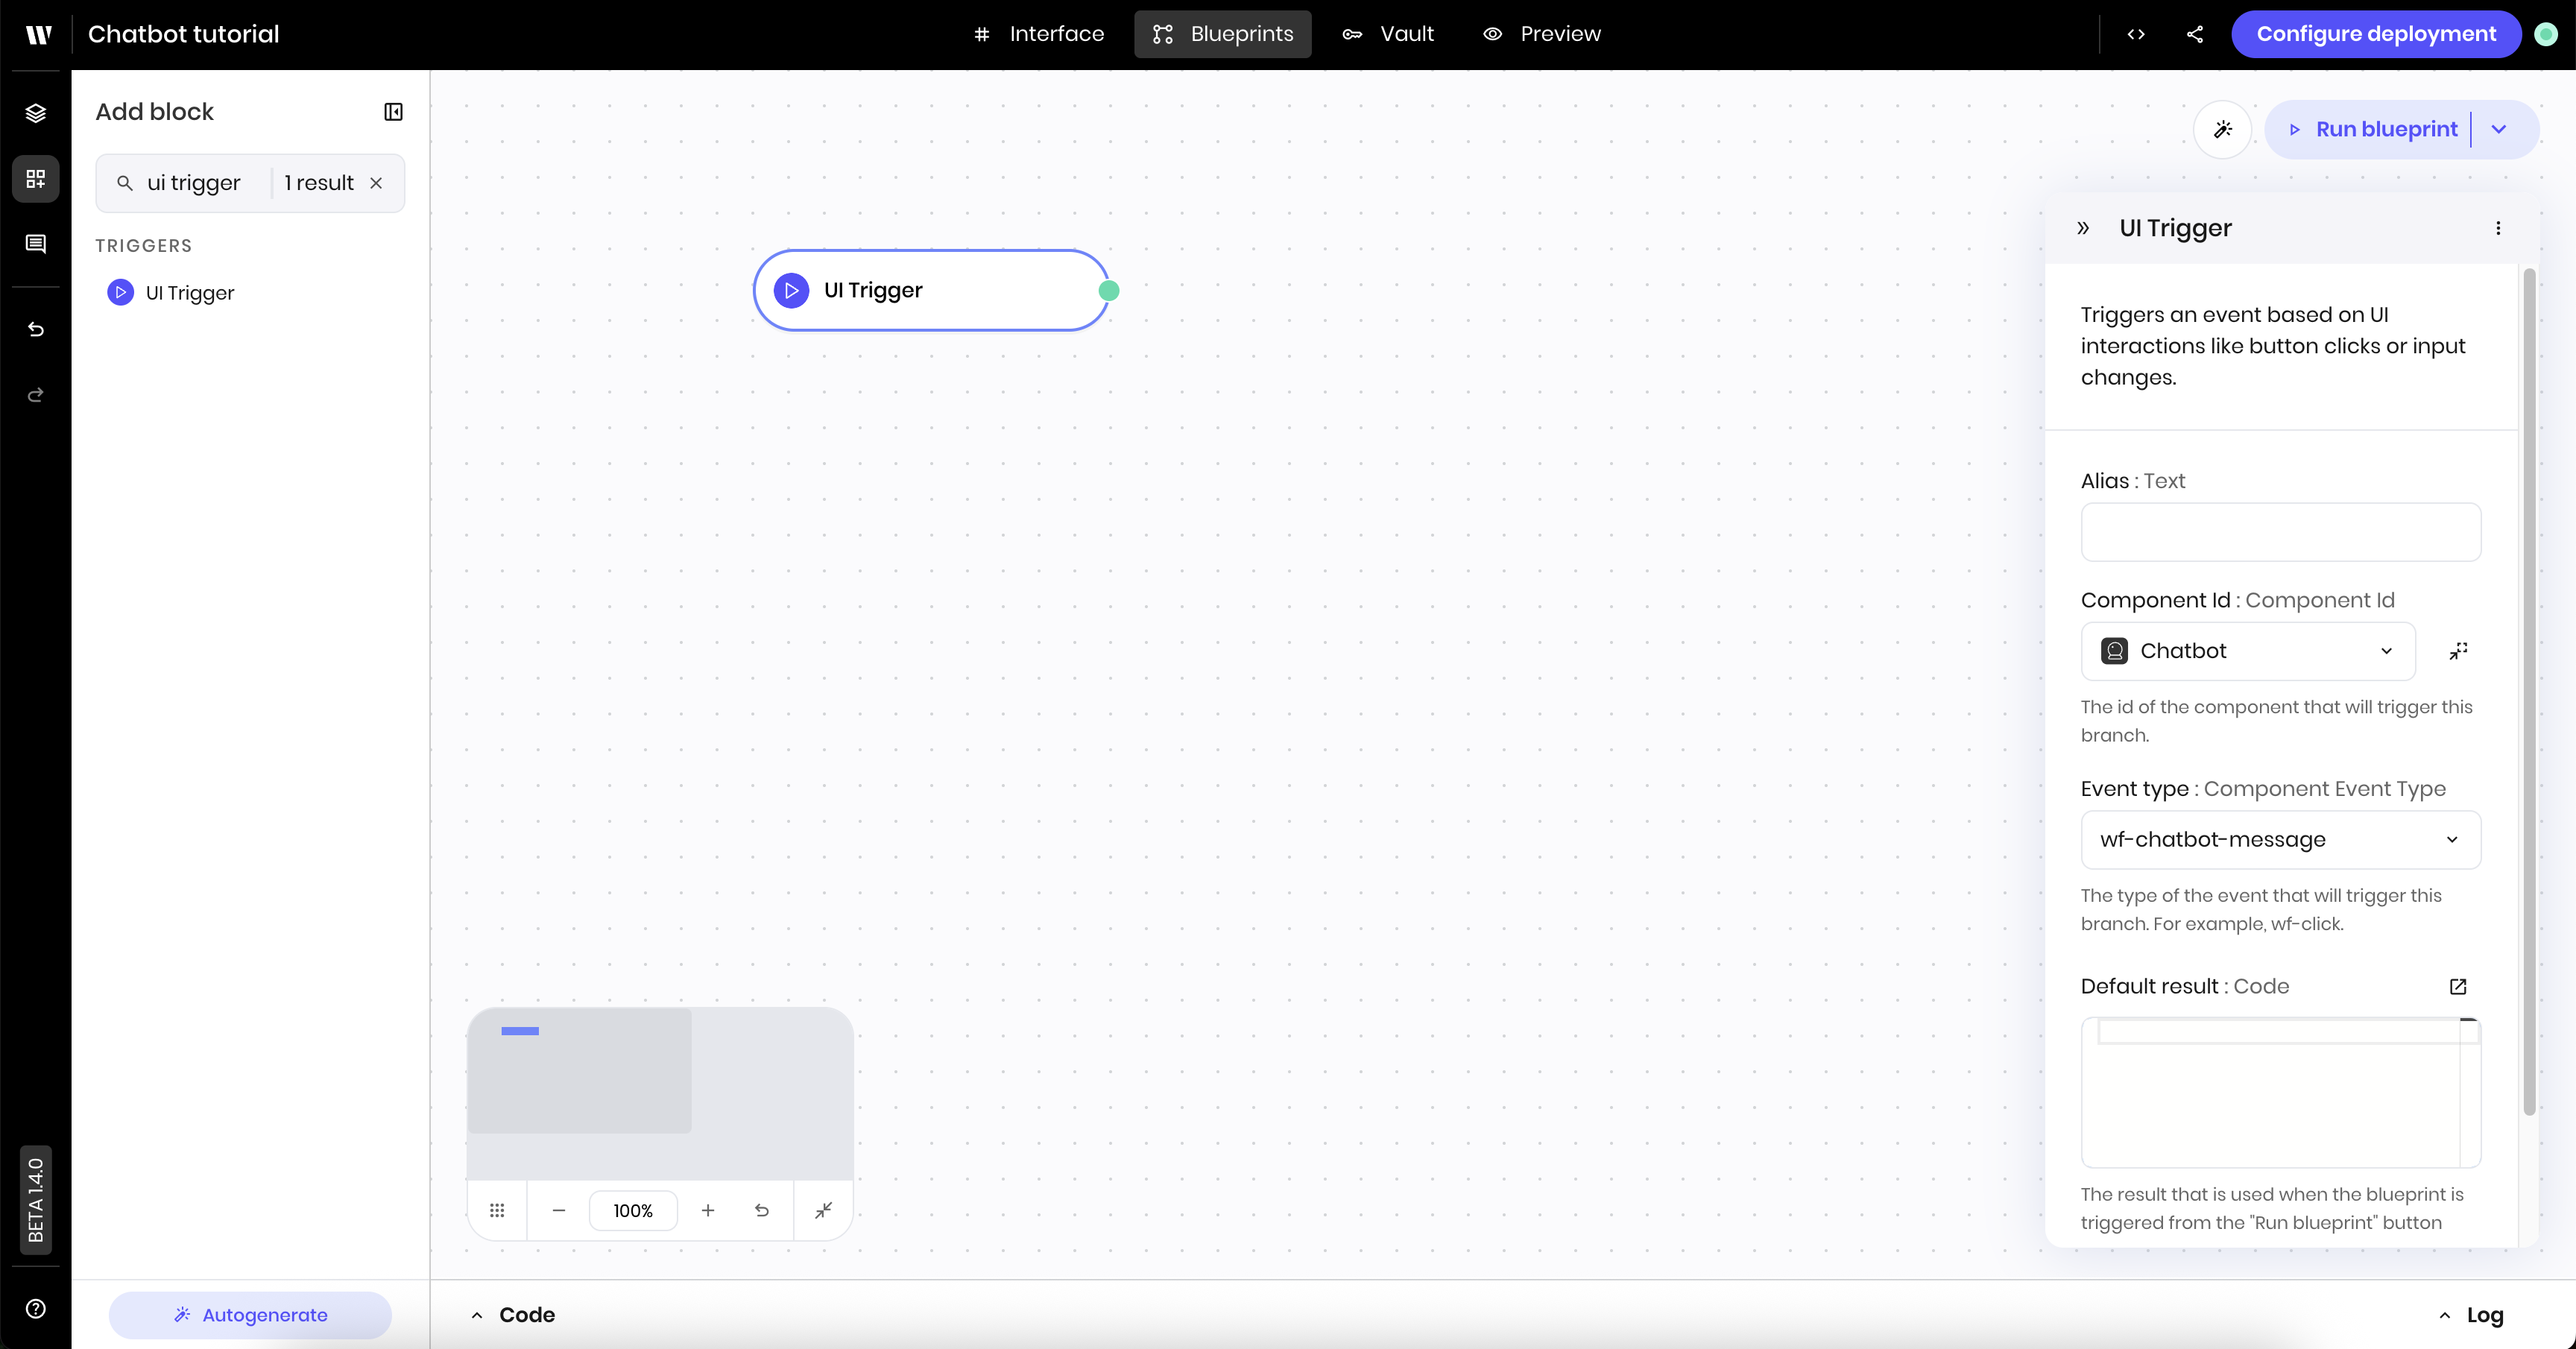
2
Add a Chat reply block
Add a Chat reply block to the canvas, which runs after the UI trigger block. This block manages the chat conversation, including the chat messages and the chat history.Connect the UI trigger block to the Chat reply block by dragging a line from the green dot on the UI trigger block to the Chat reply block.In the Chat reply block’s configuration panel, set the following fields:
- Conversation object:
chat - System prompt: This provides the context for the chat conversation and gives instructions to the model about how to act or respond. The example below uses a system prompt that instructs the model to act as a helpful assistant regarding Writer’s developer platform. System prompts help the model understand the context of the chat conversation and the goals of the chatbot. Learn more in Prompting strategies.
-
Message:
@{payload}. This is the message that the user sends to the chatbot that triggers the blueprint to run.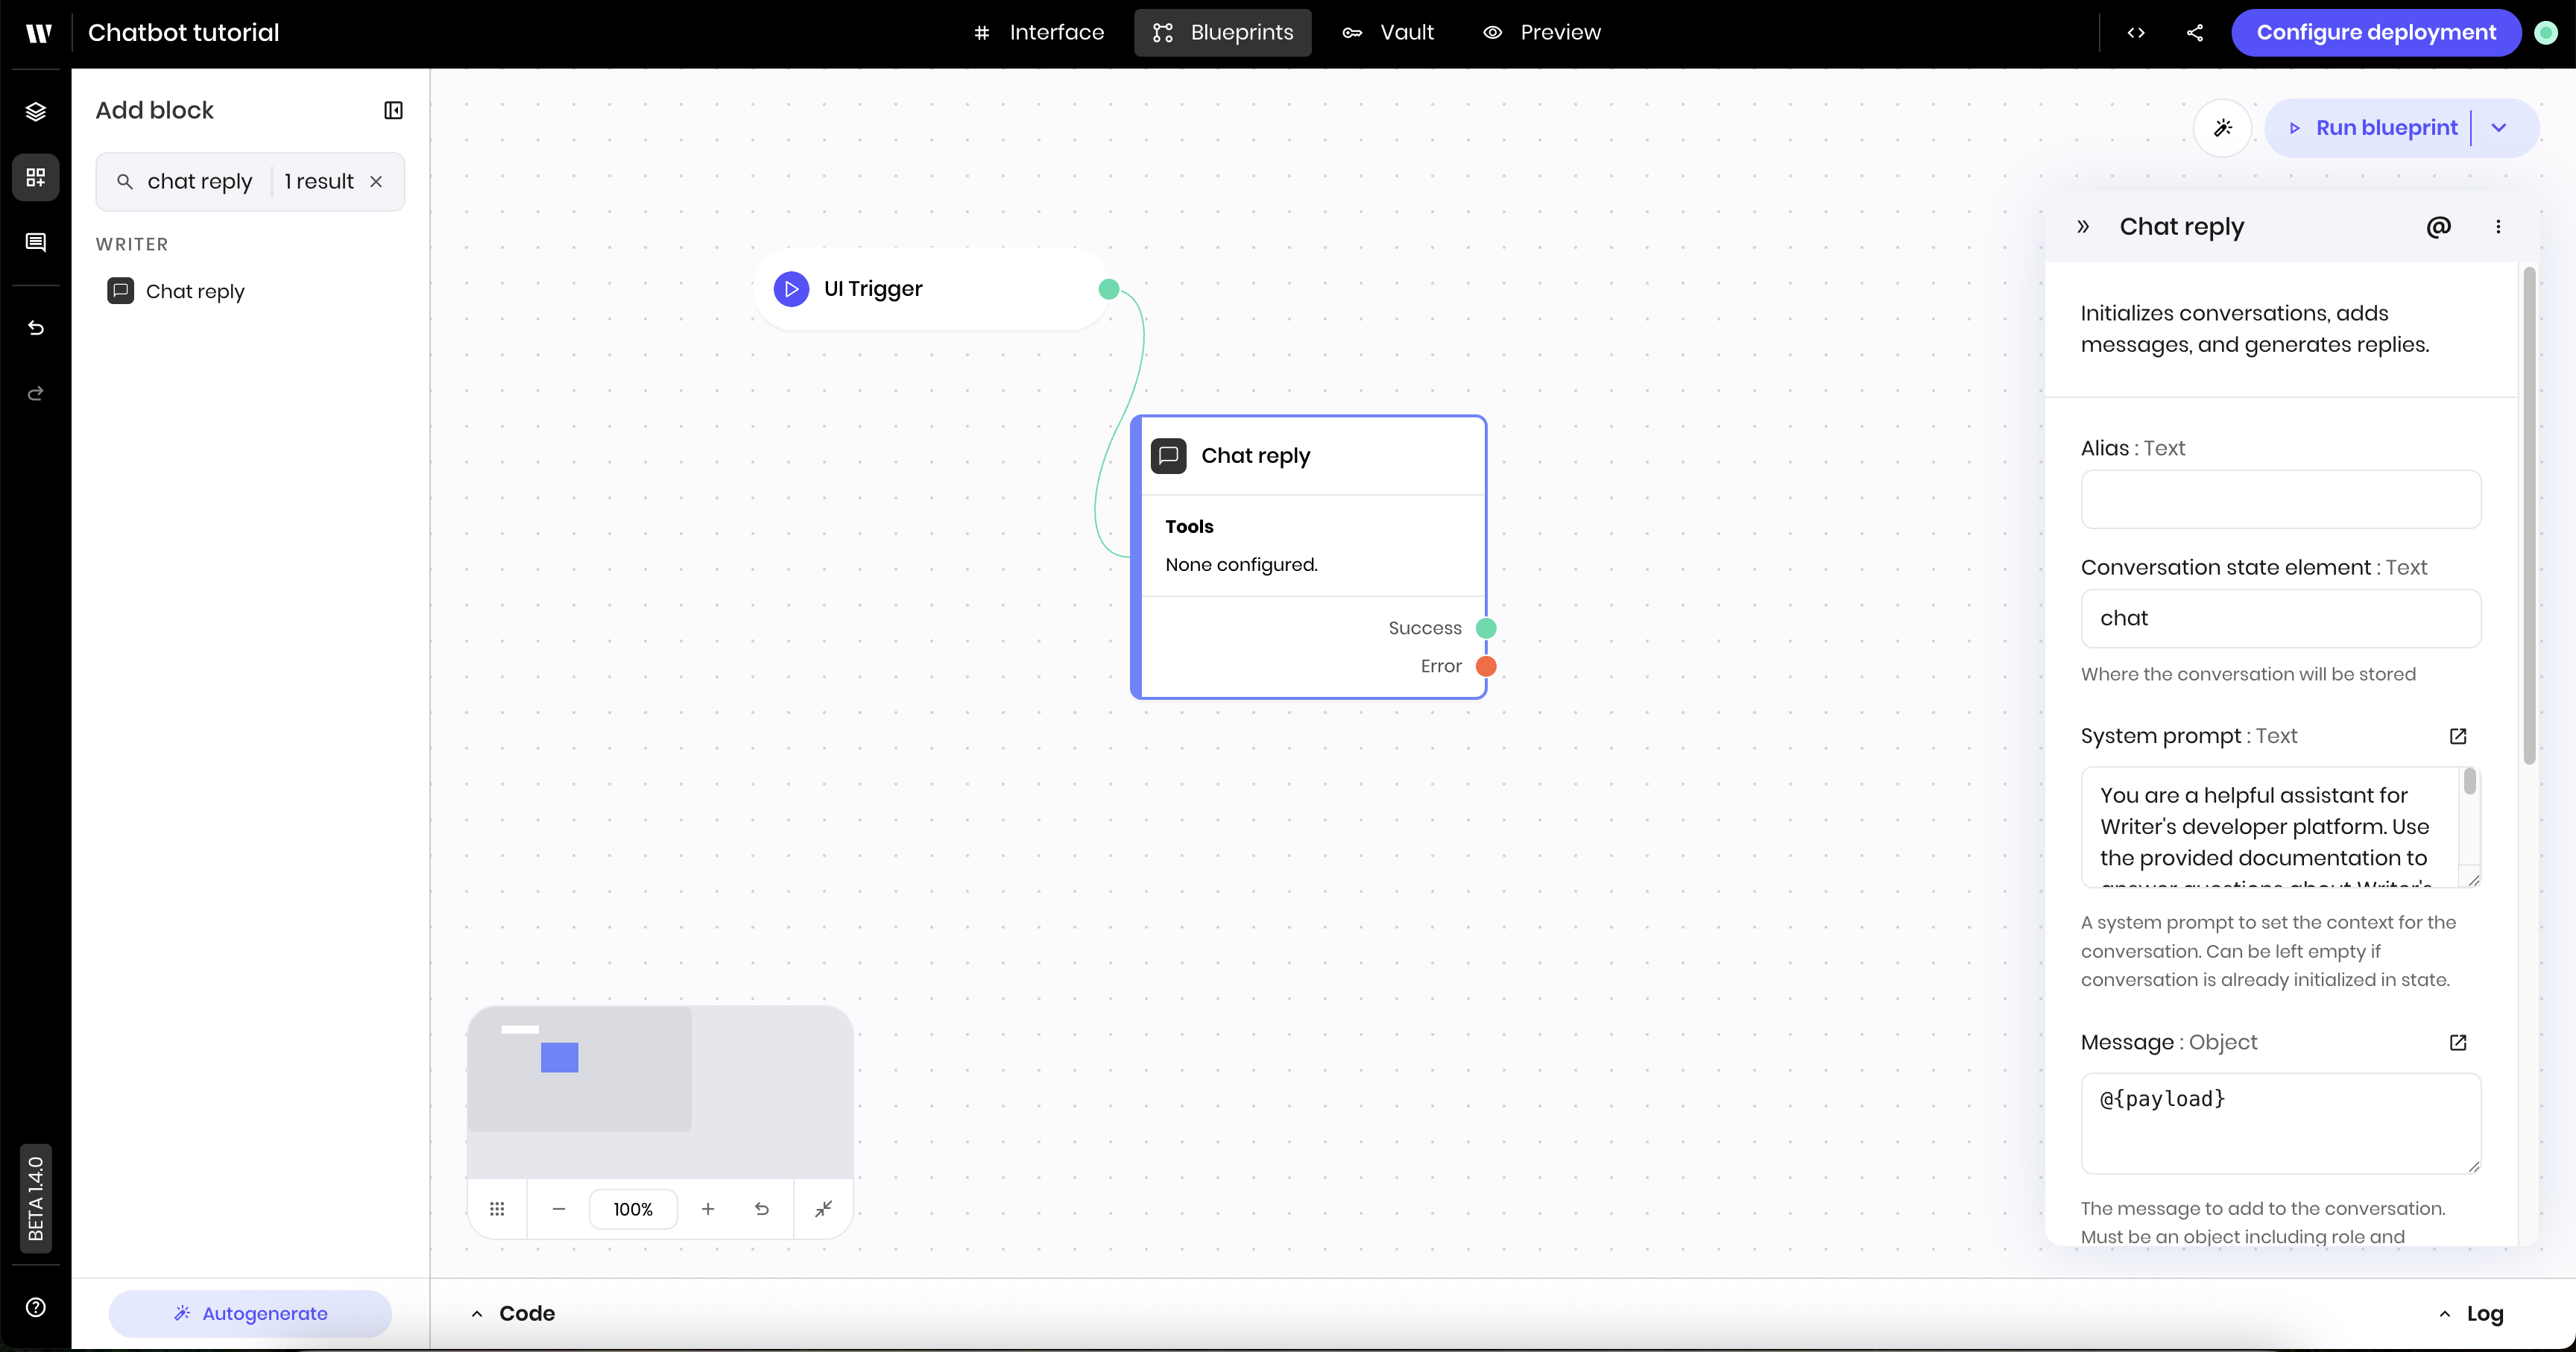
Preview the agent
To preview the agent, navigate to the Preview tab. Type a message in the chatbot and see the response from the model.Connect a Knowledge Graph to the chatbot
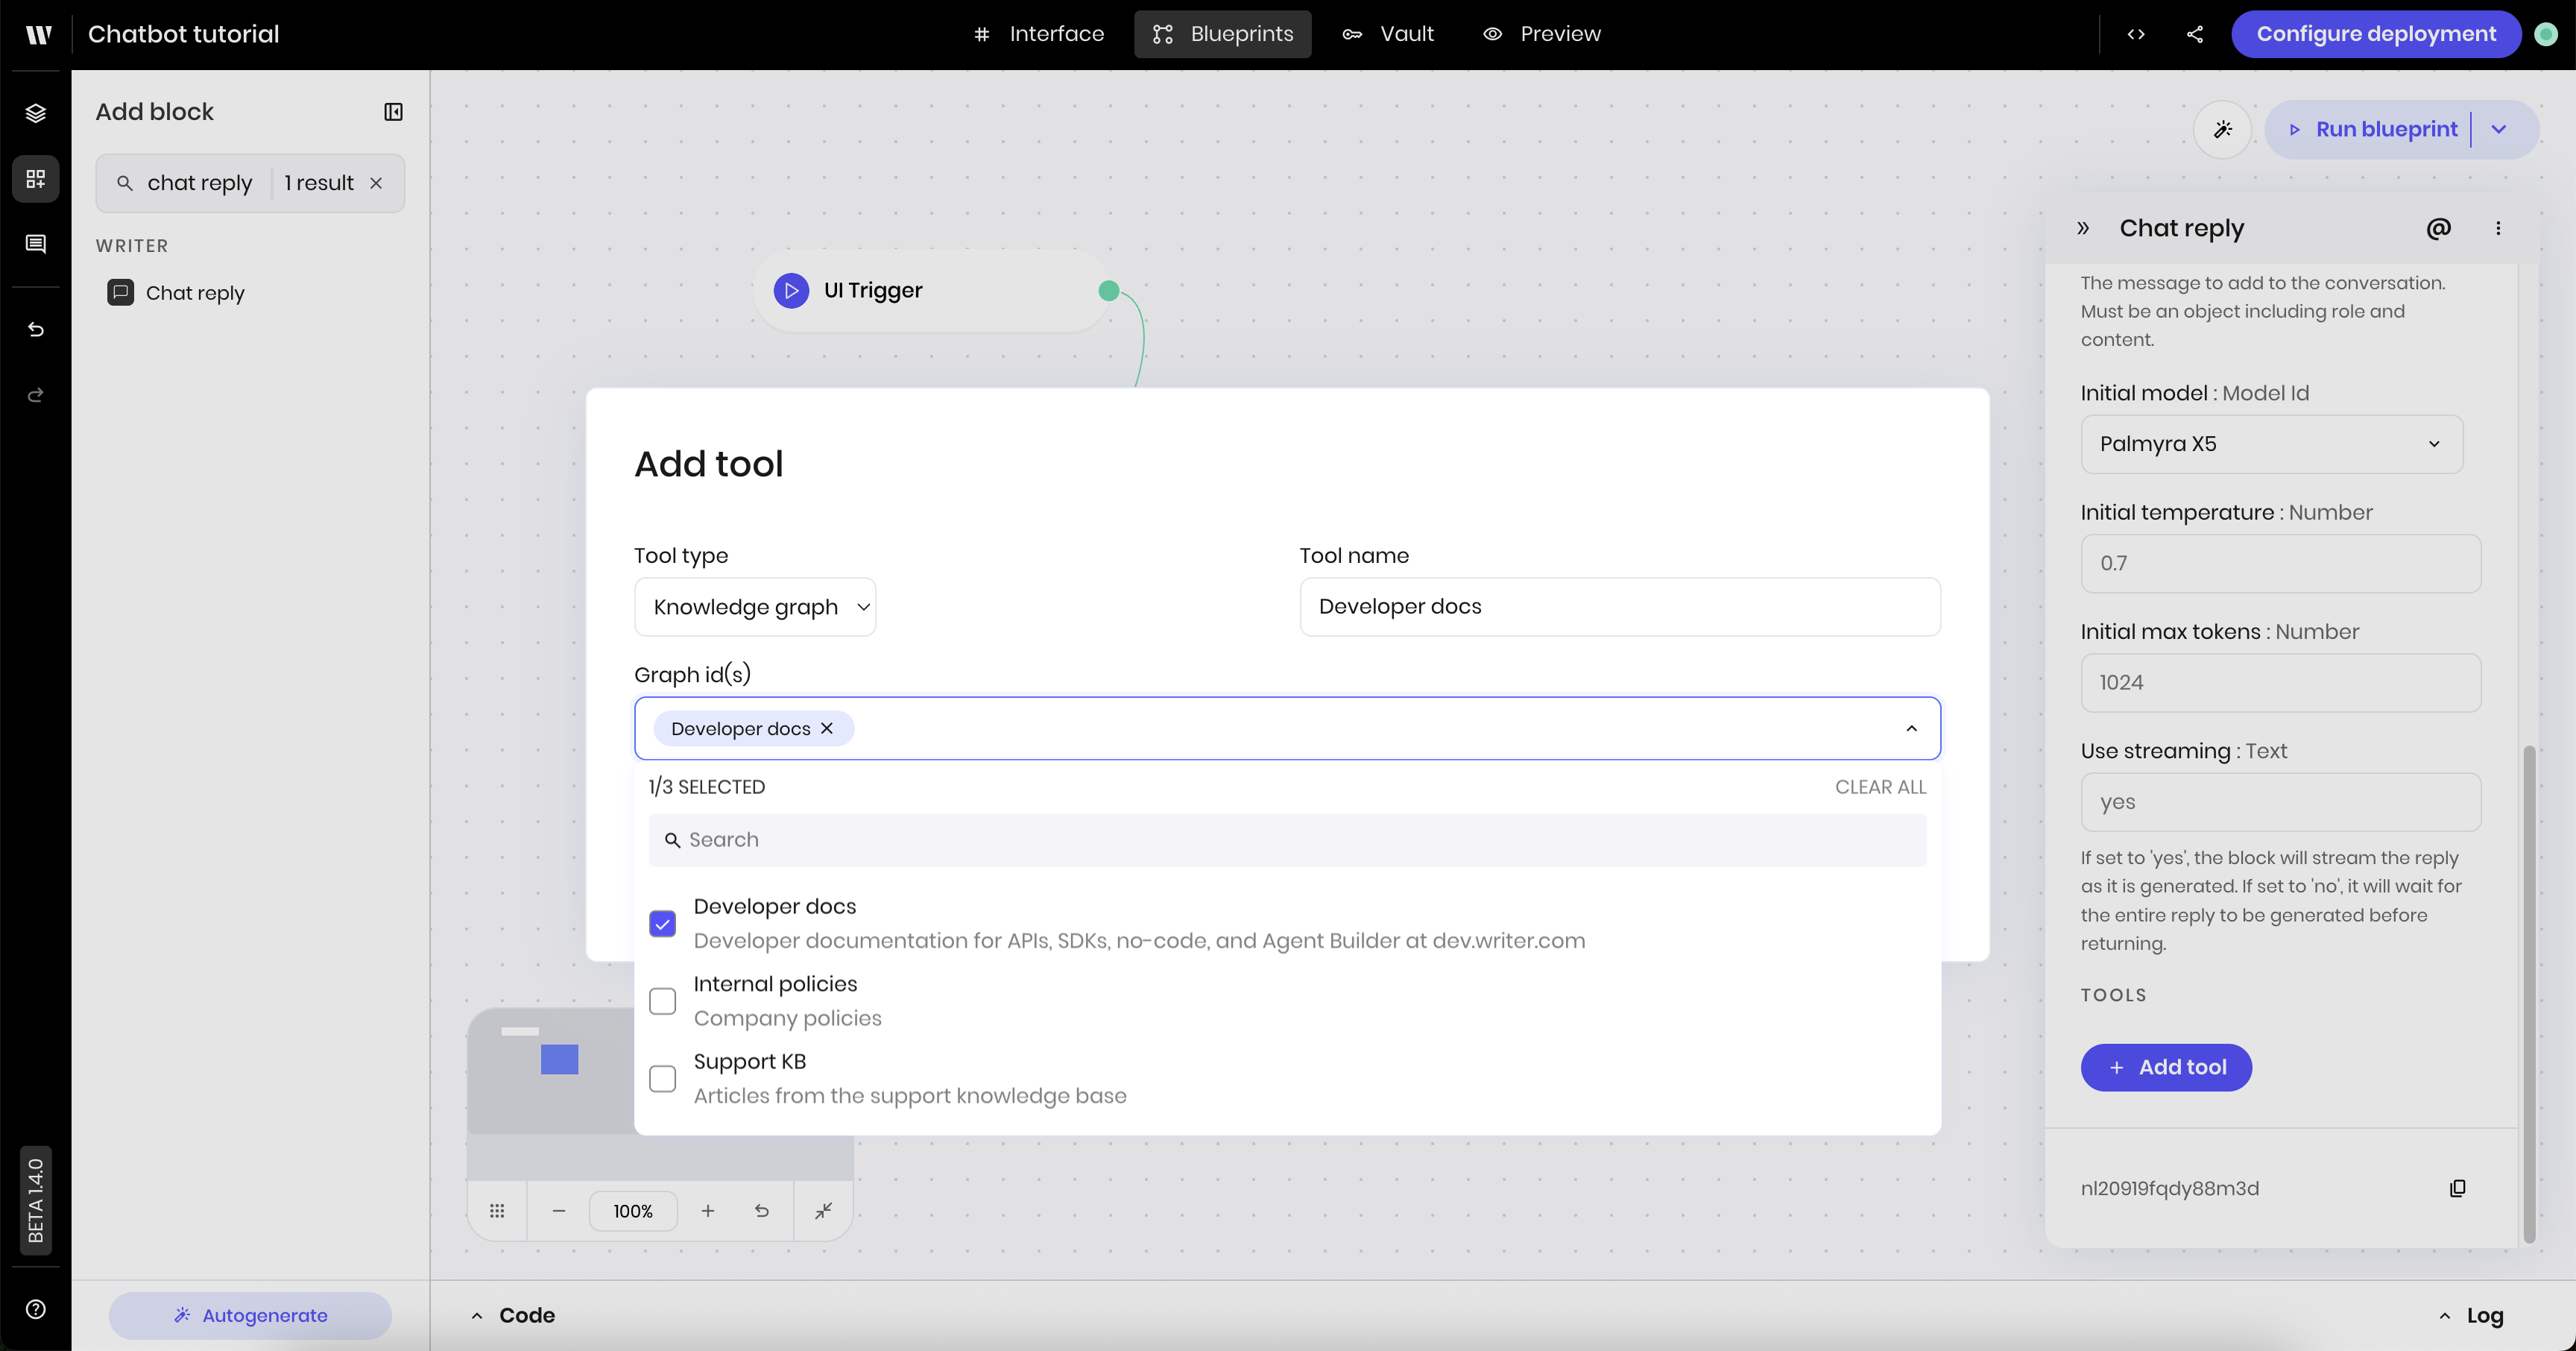
You can connect one or more Knowledge Graphs to the chatbot to answer questions about data related to your business or a specific dataset. To connect a Knowledge Graph to the chatbot, update the Chat reply block.1
Update the Chat reply block
- Click the Chat reply block to open its configuration panel
- Click the + Add tool button under Tools
- Select “Knowledge graph” under Tool type
- Under Graph id(s), select one or more Knowledge Graphs you want to connect to the chatbot. The example below connects the chatbot to a Knowledge Graph that contains developer docs and a Knowledge Graph connected to the support center.
-
Click Save to save the changes.