Overview
A Repeater takes a list or dictionary and creates a copy of its child components for each item in that data. Inside the Repeater, you can access:@{item}: the current item’s value@{itemId}: the current item’s index, for arrays, or key, for dictionaries
When to use Repeaters
Repeaters are useful for displaying:- Lists of files, tasks, or messages
- Search results or product catalogs
- User-generated content like comments or reviews
- Data from APIs or structured output
- Any collection where you don’t know the exact number of items
Example: Display a list of items
This example starts with a small use case to dynamically display whatever a user selects from a select input.
Set up the select input
The select input allows the user to select multiple items from a list. You’ll use it to select the items to display in the Repeater.Add the select input to the agent
First, add a Select input block to the agent’s interface. This is the input that will be used to select the items to display in the Repeater.Update the following settings:
- Label:
Items - Under Options, add a few key-value pairs as options for the dropdown. For example:
- Key: Apple, Value: Apple
- Key: Berry, Value: Berry
- Key: Cherry, Value: Cherry
- Link variable under Binding:
list
When you define the options for the select input, the values are what the user sees in the select dropdown, and the keys are what will be stored in the state variable.
Add the Repeater
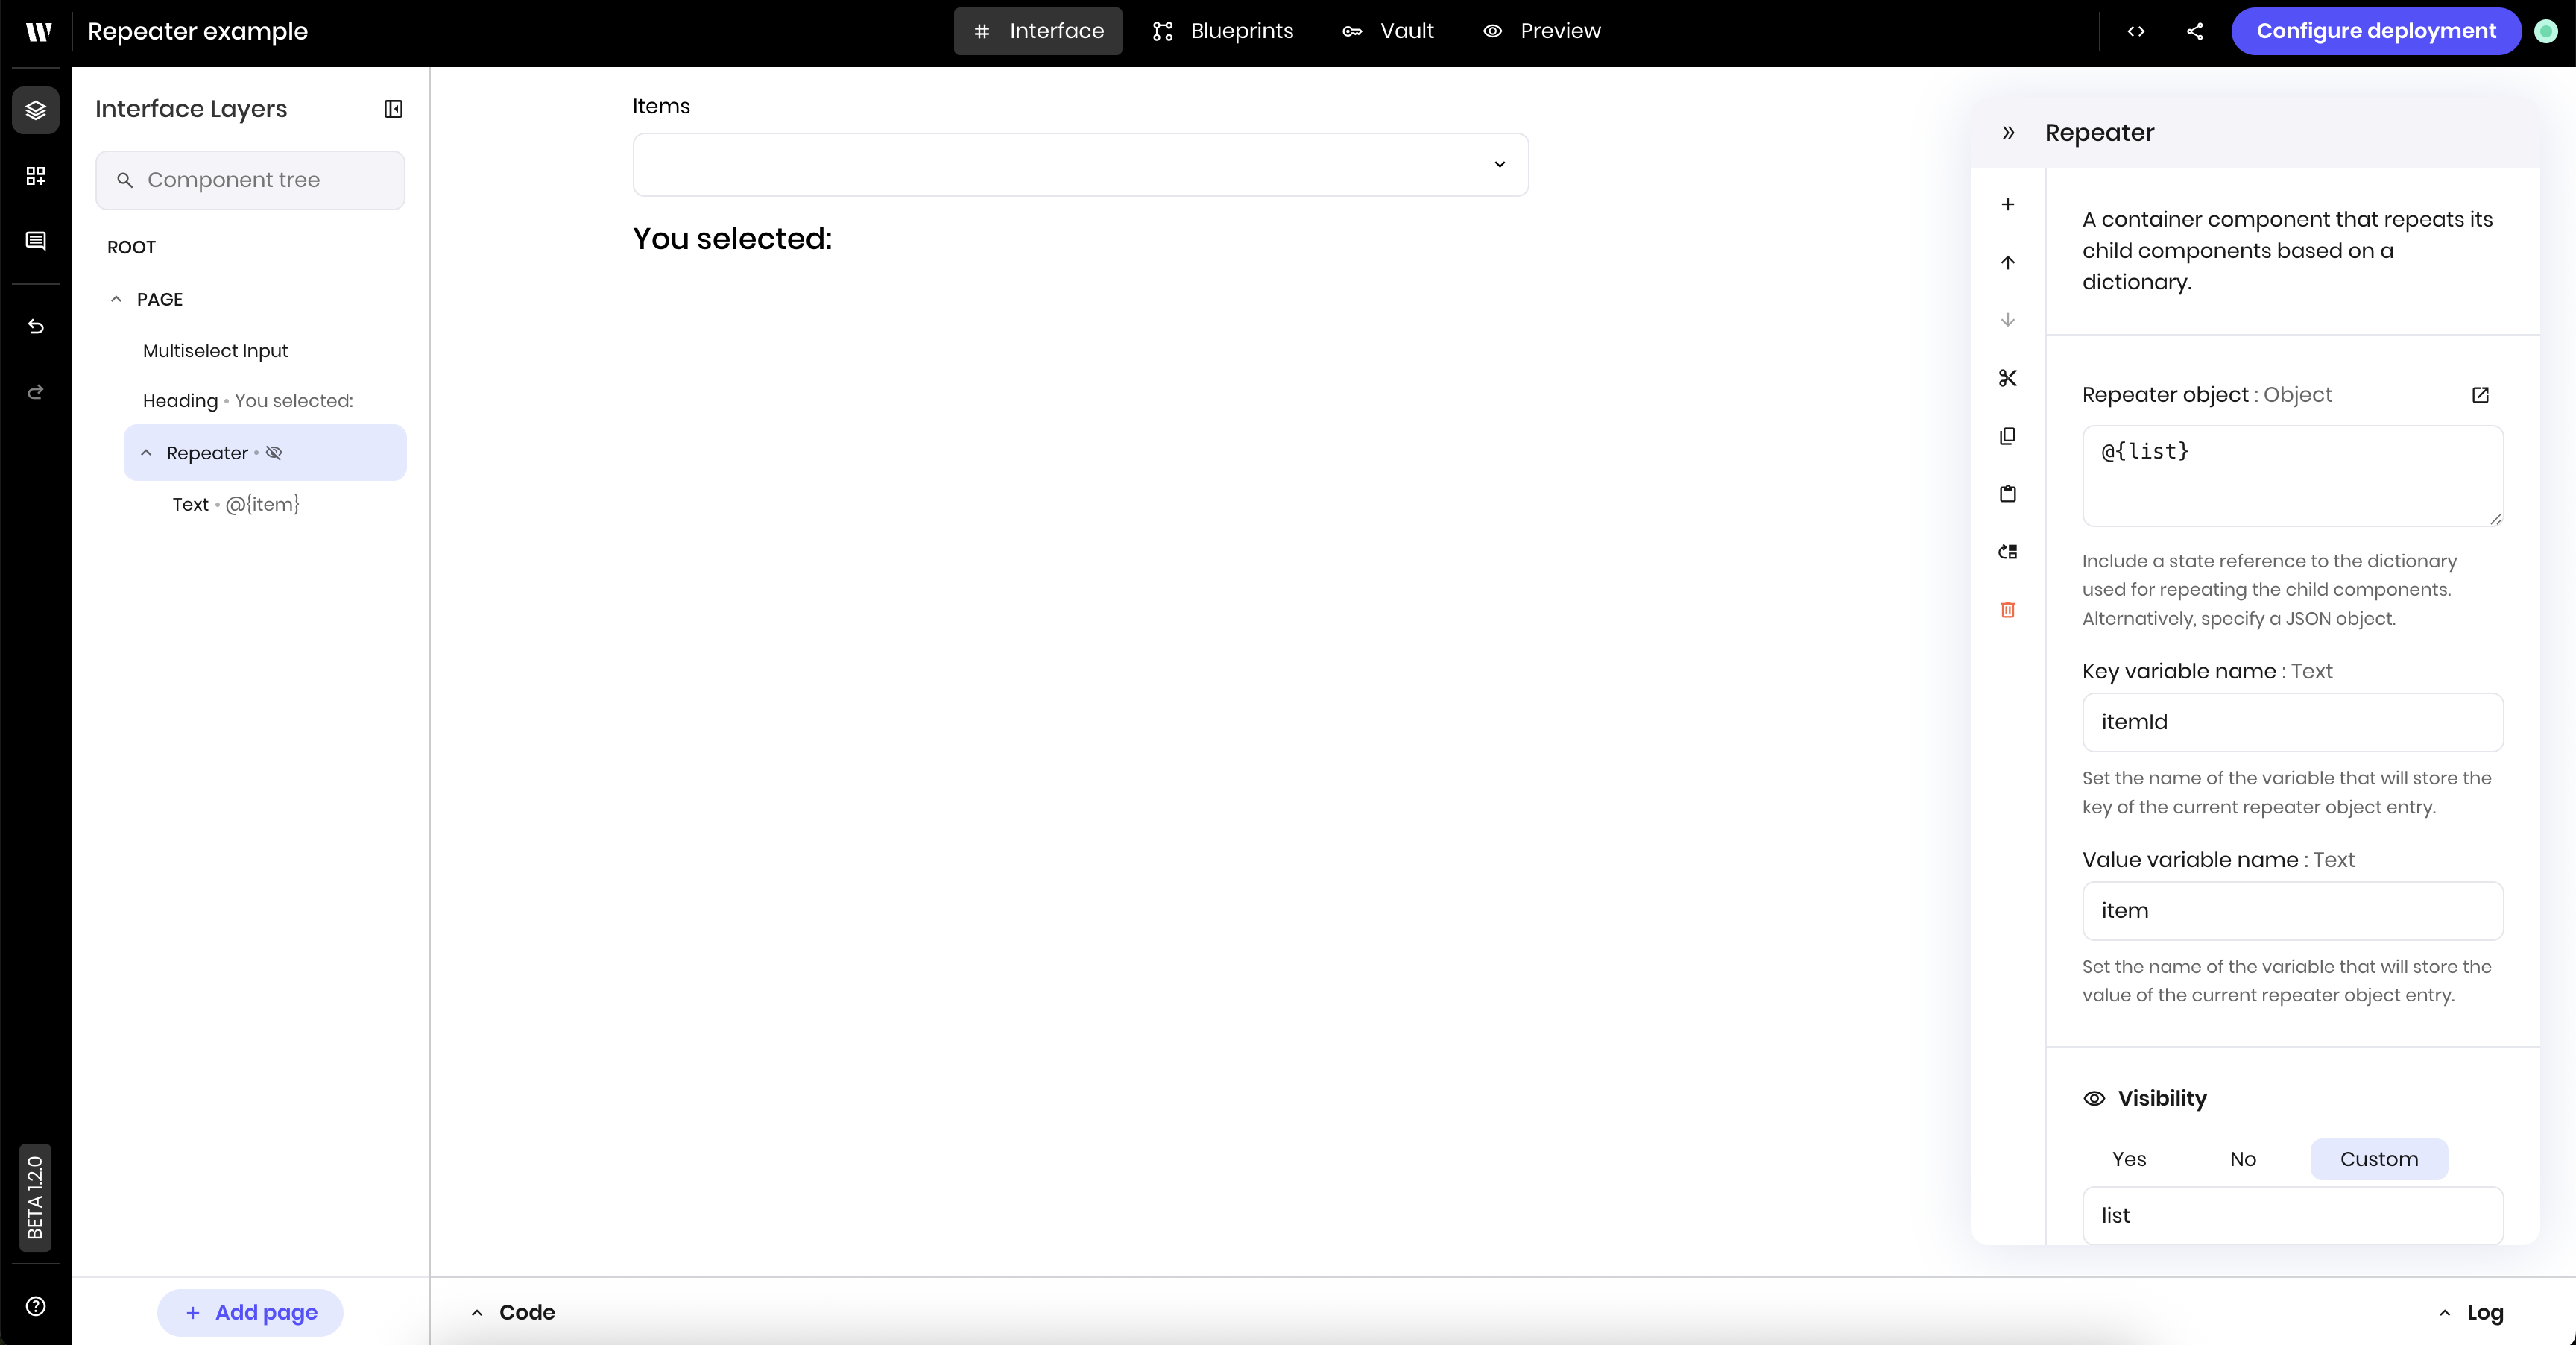
The Repeater displays a list of items dynamically. You’ll use it to display the items selected from the select input.Add a Repeater component
Add a Repeater component to your page. Update the following settings: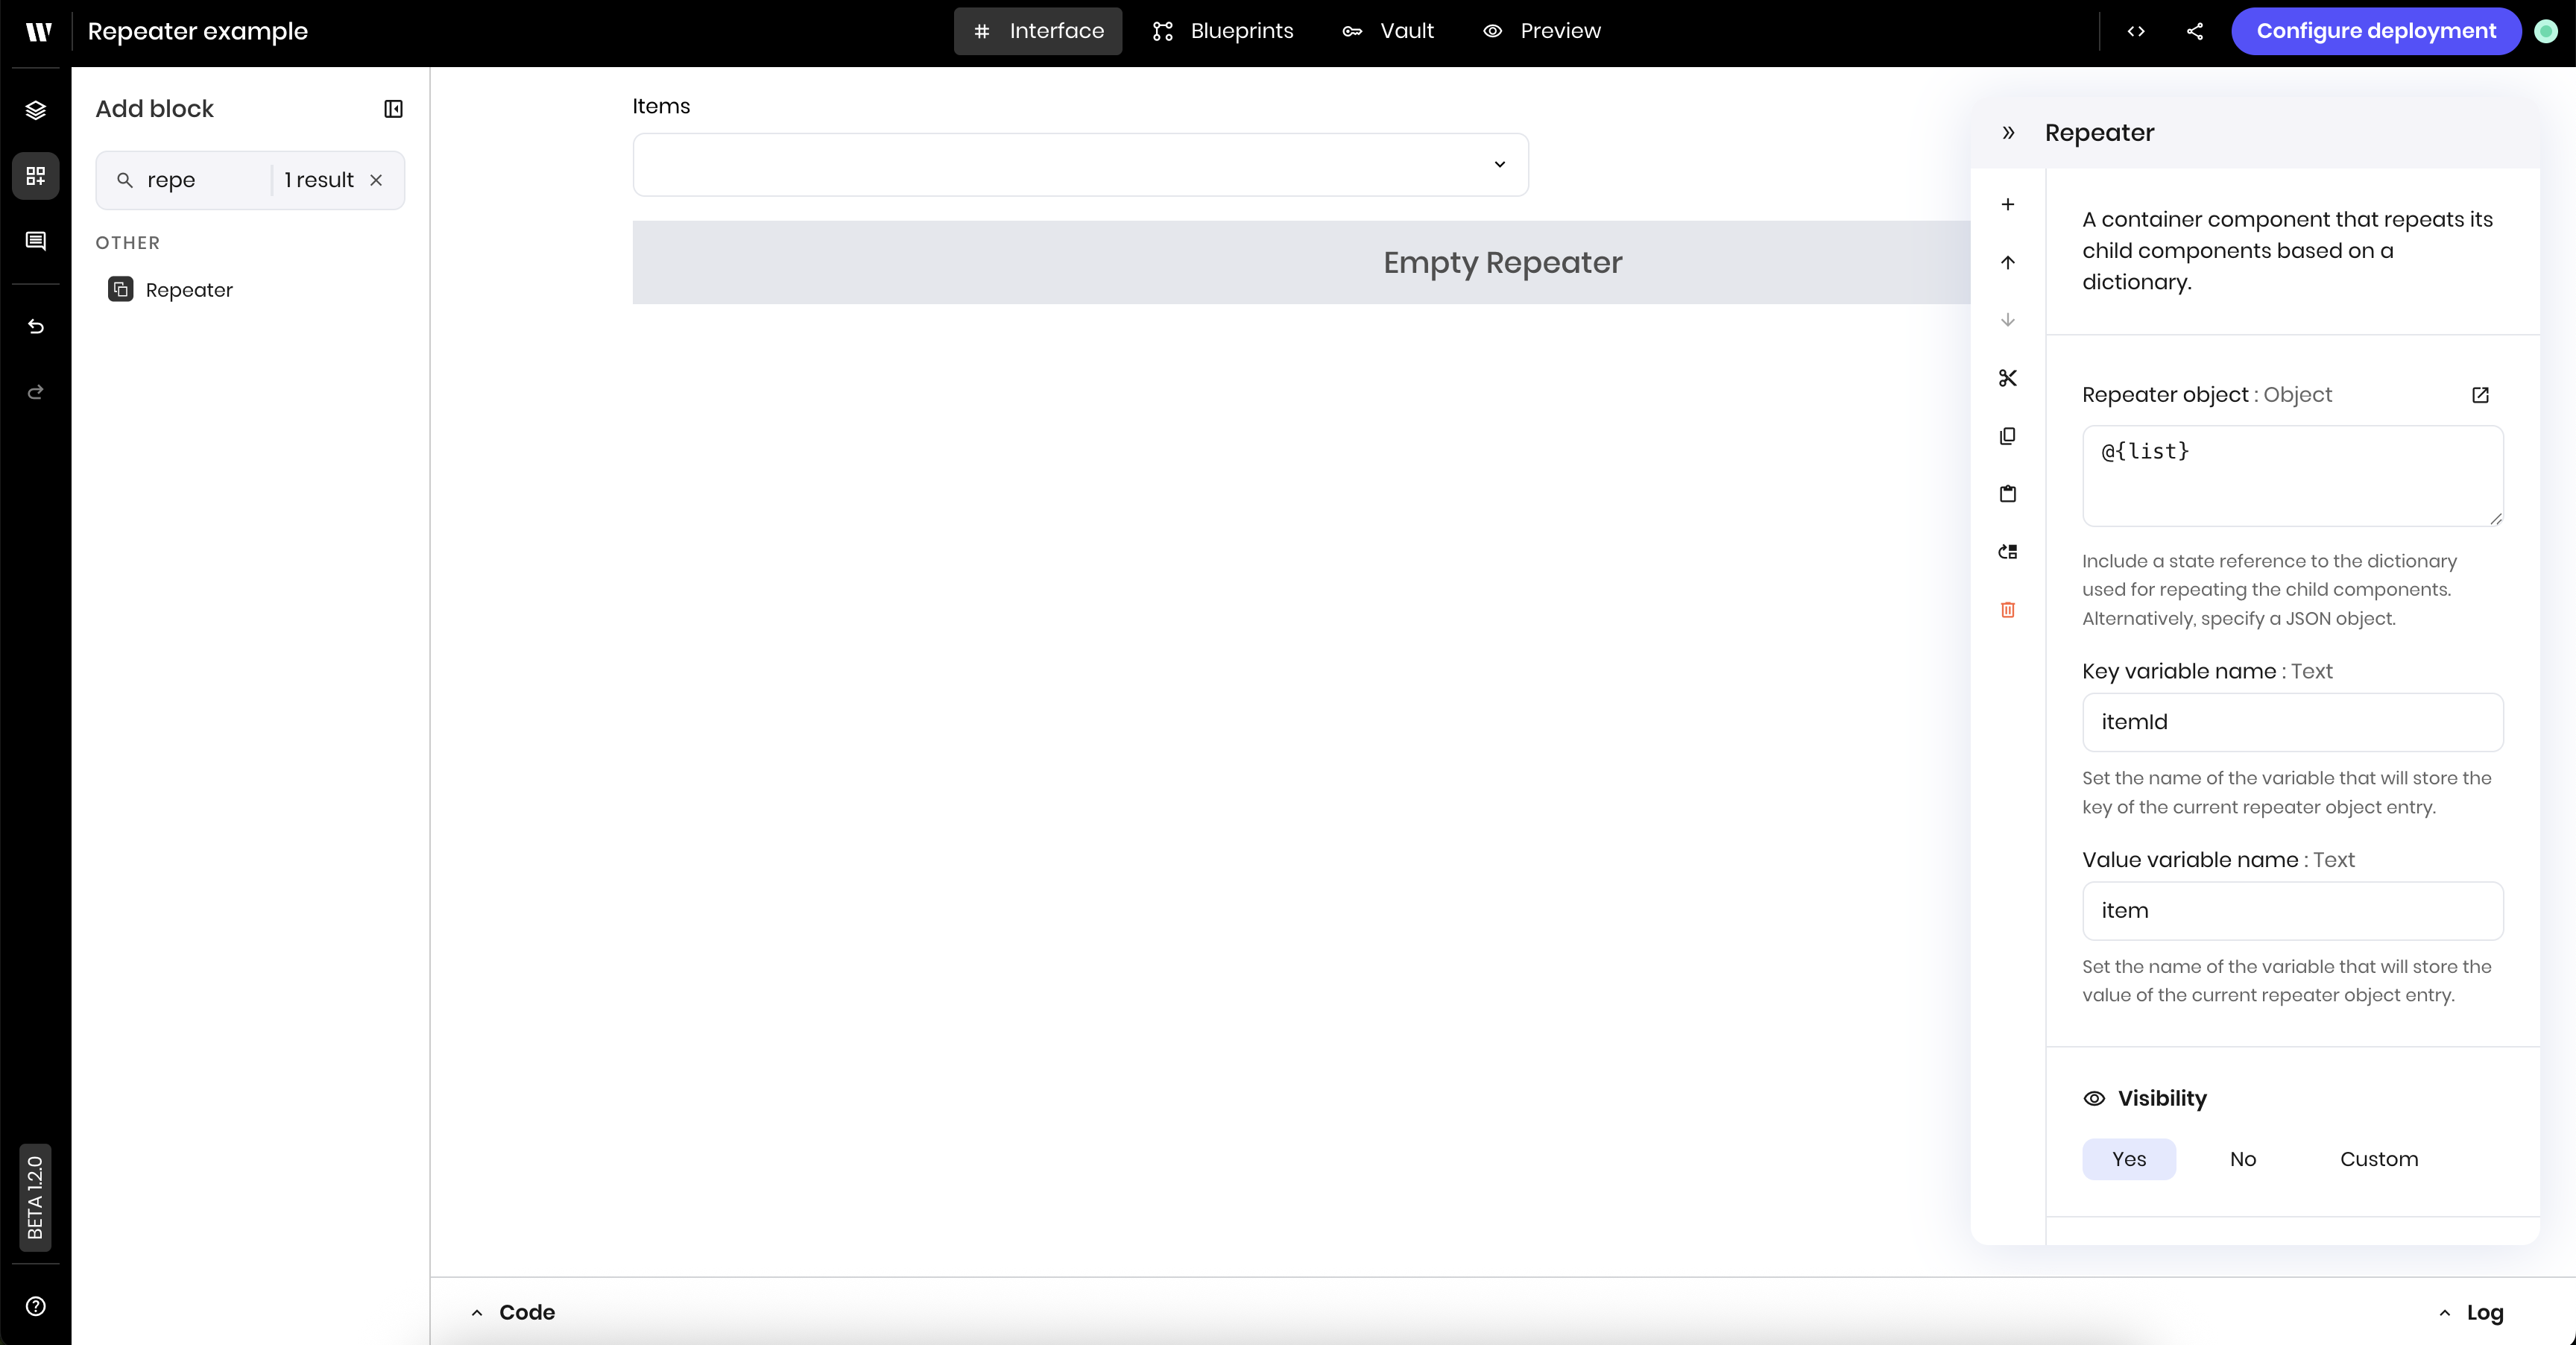
- Repeater object:
@{list}. This is the list of items to display in the Repeater.
itemId and item. These are the variable names you use to access the current item’s index and value within the Repeater. You can change them to anything you want. In this example, you’ll use the default names.Add a Text component inside the Repeater
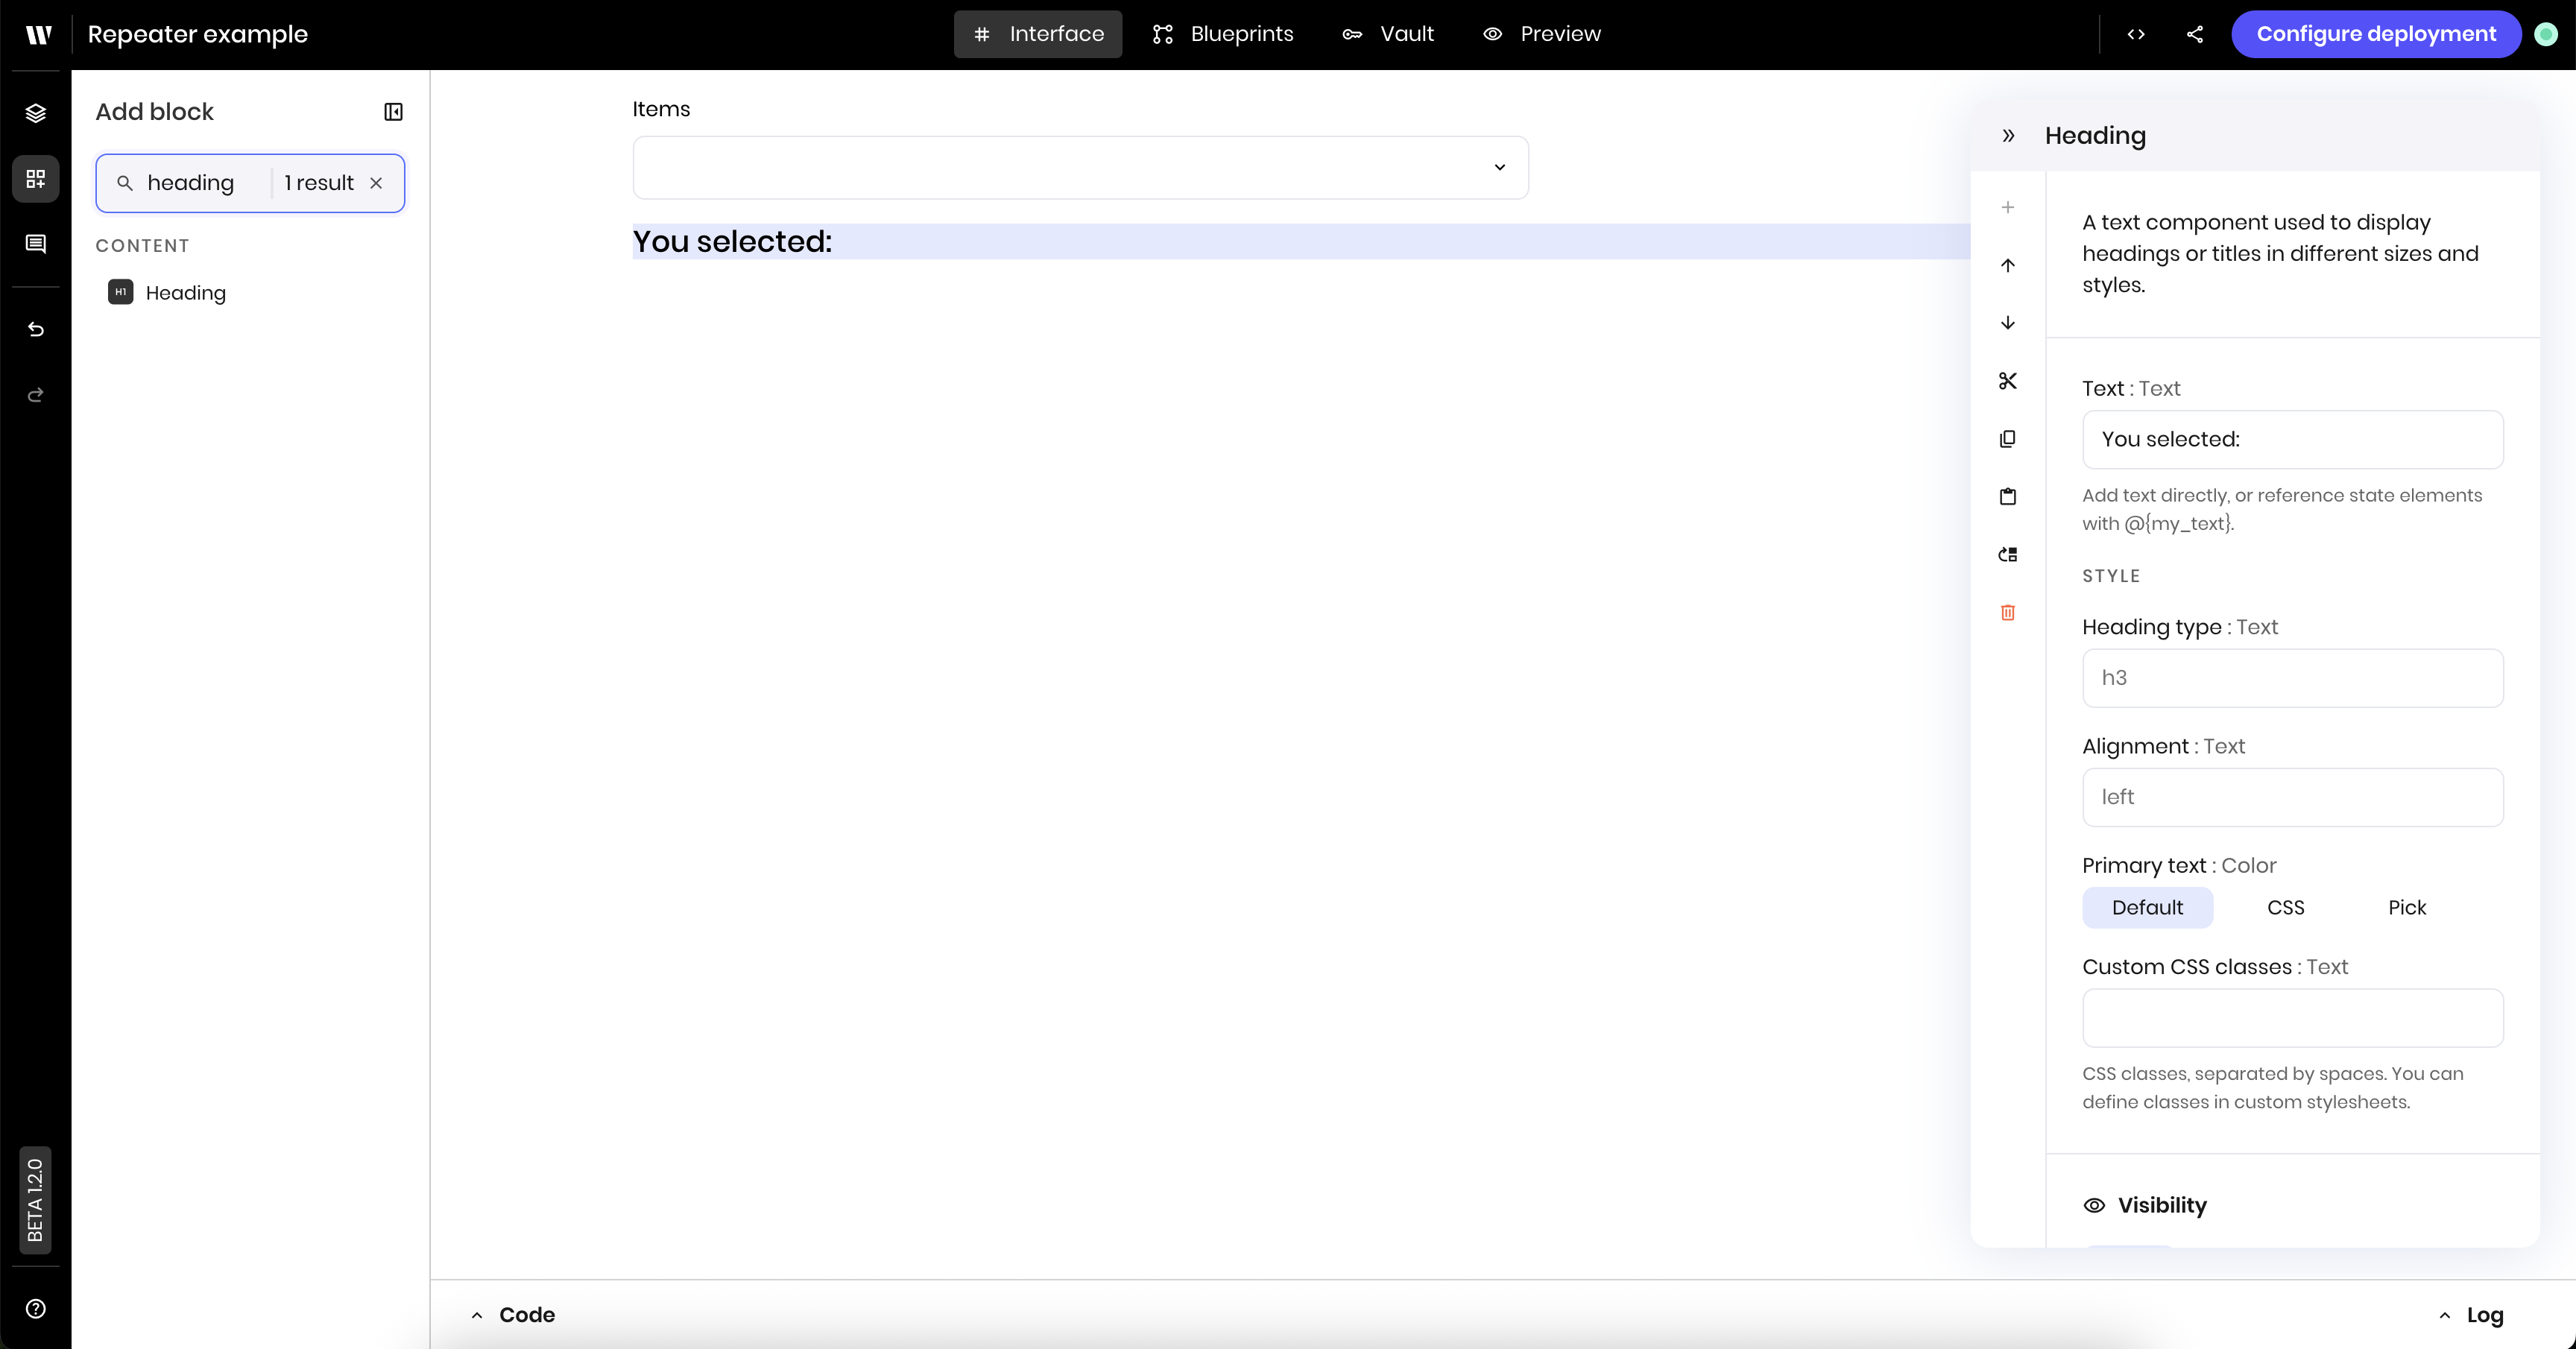
Drag a Text component inside the Repeater.Inside the text component, set the text to 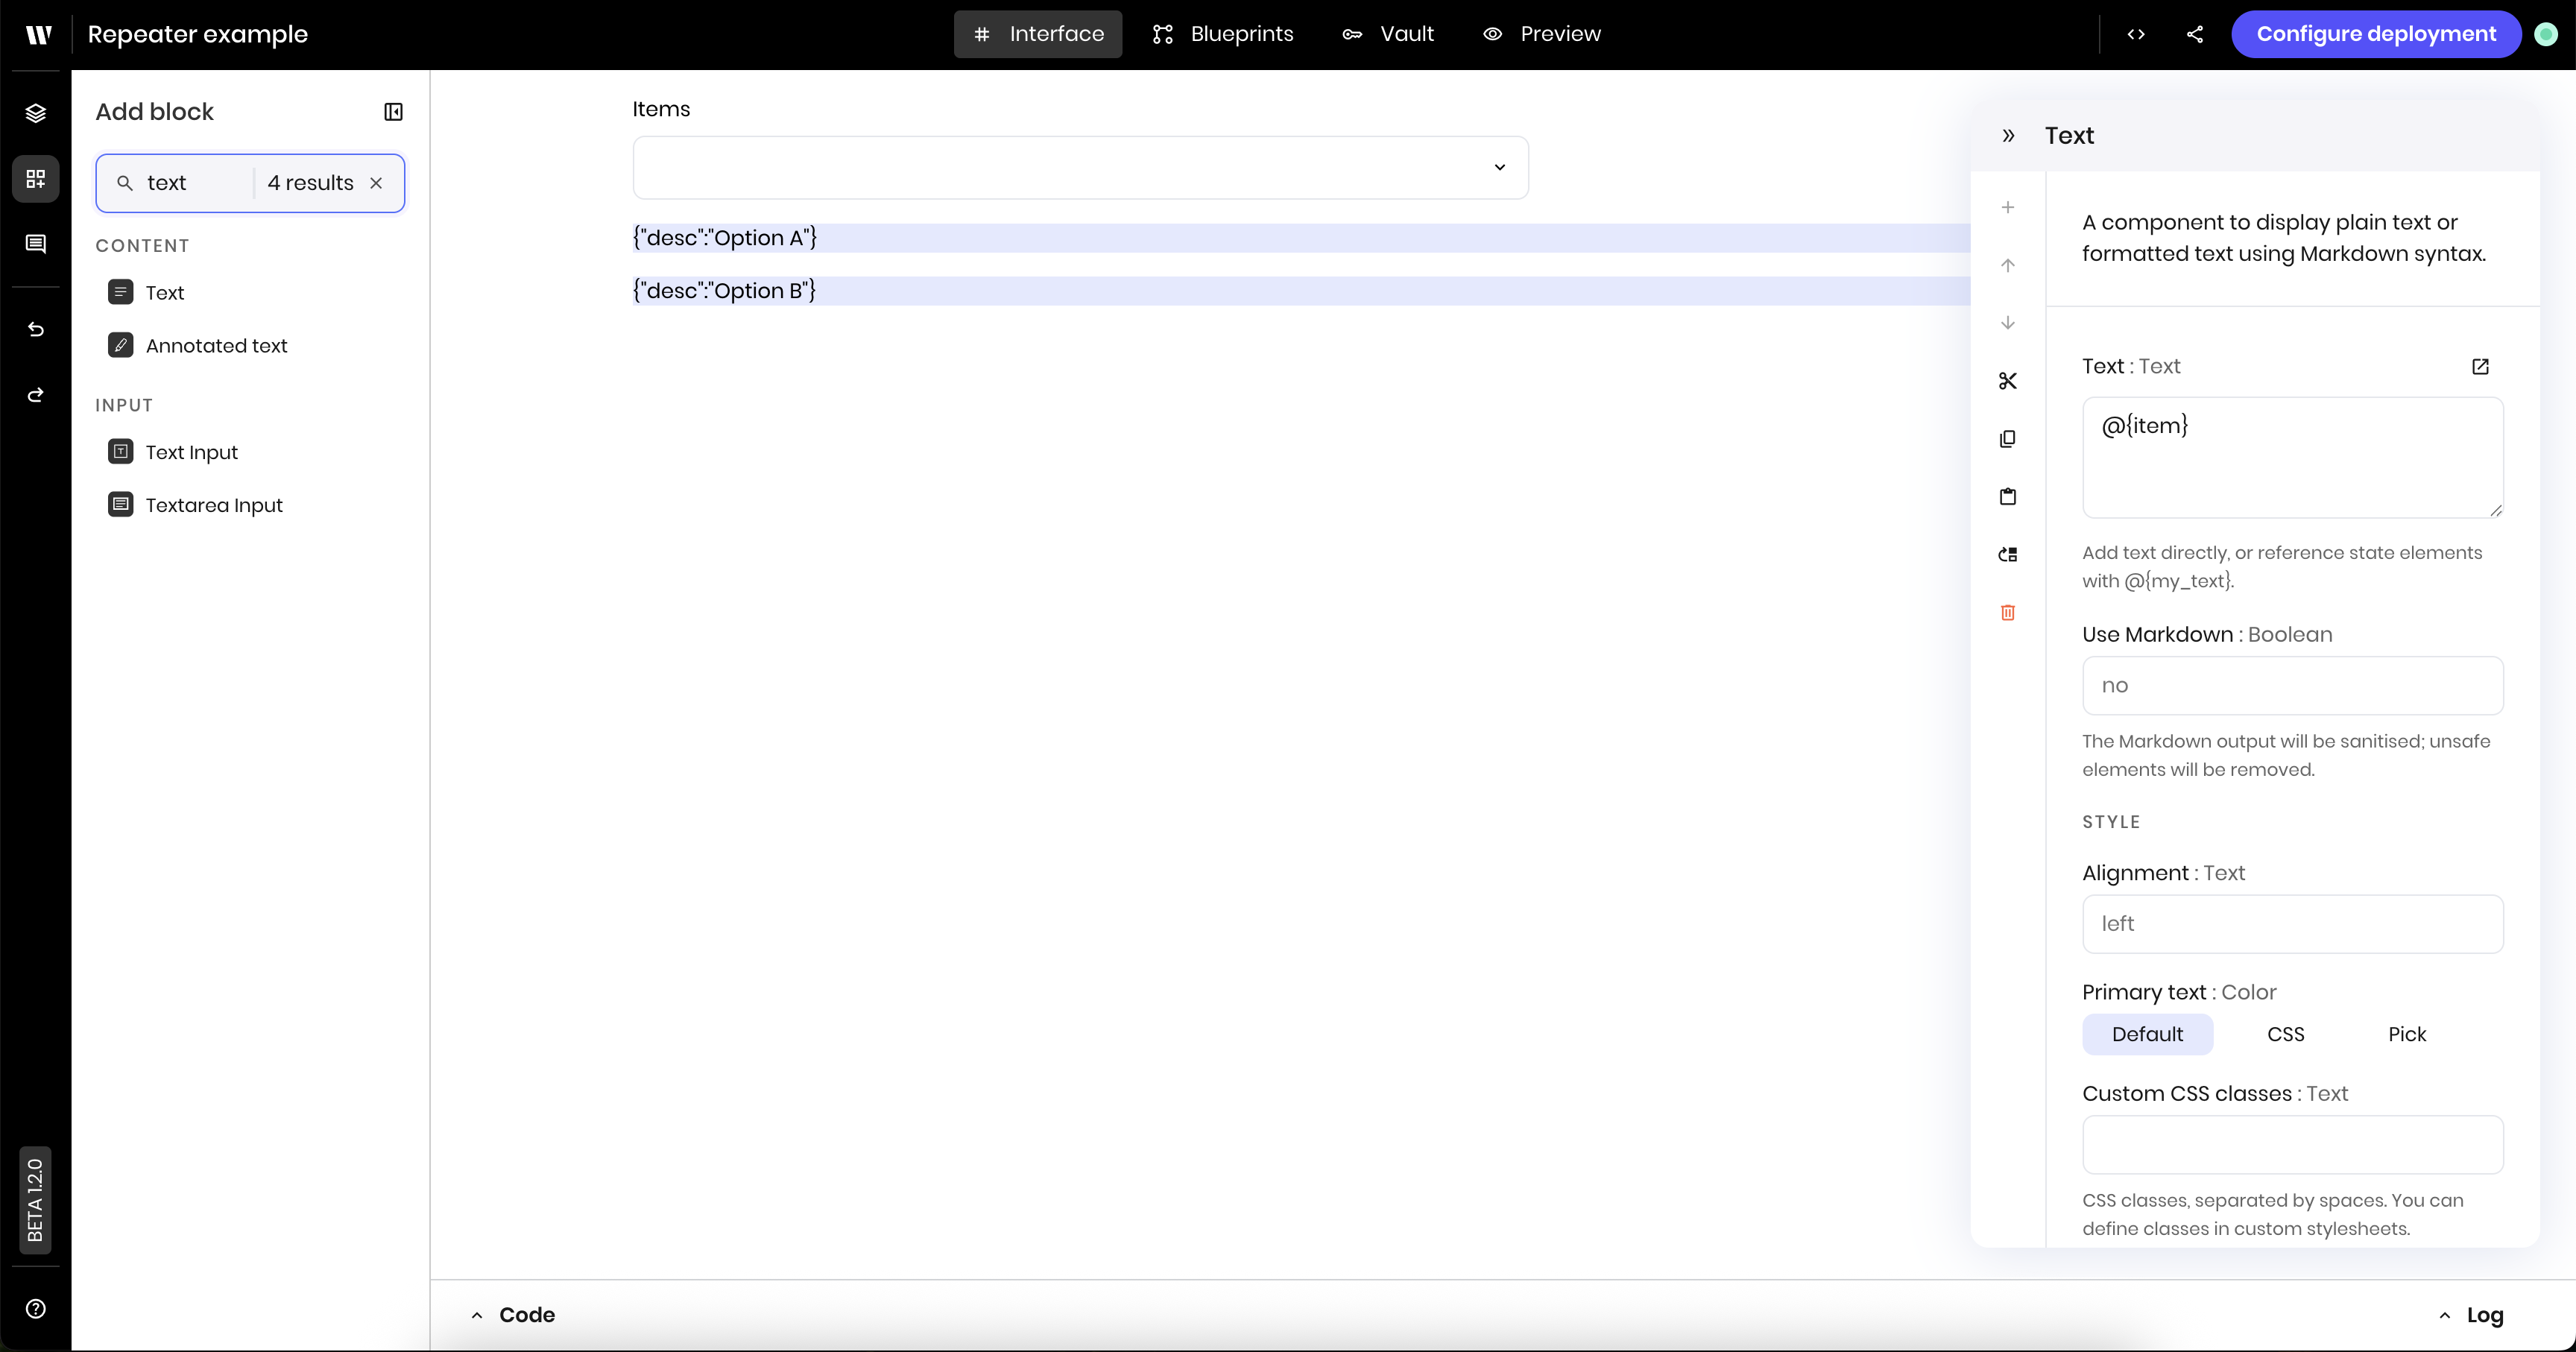
@{item} to display the value of the current item in the Repeater.When the list state variable is empty, the text displays placeholder text. When the user selects items from the multiselect input, the text displays the selected items.Update the Repeater's visibility
Once you add components to a Repeater, you can no longer see the parent Repeater component in the agent’s interface view. You can find and edit the invisible component from the Interface Layers tab.
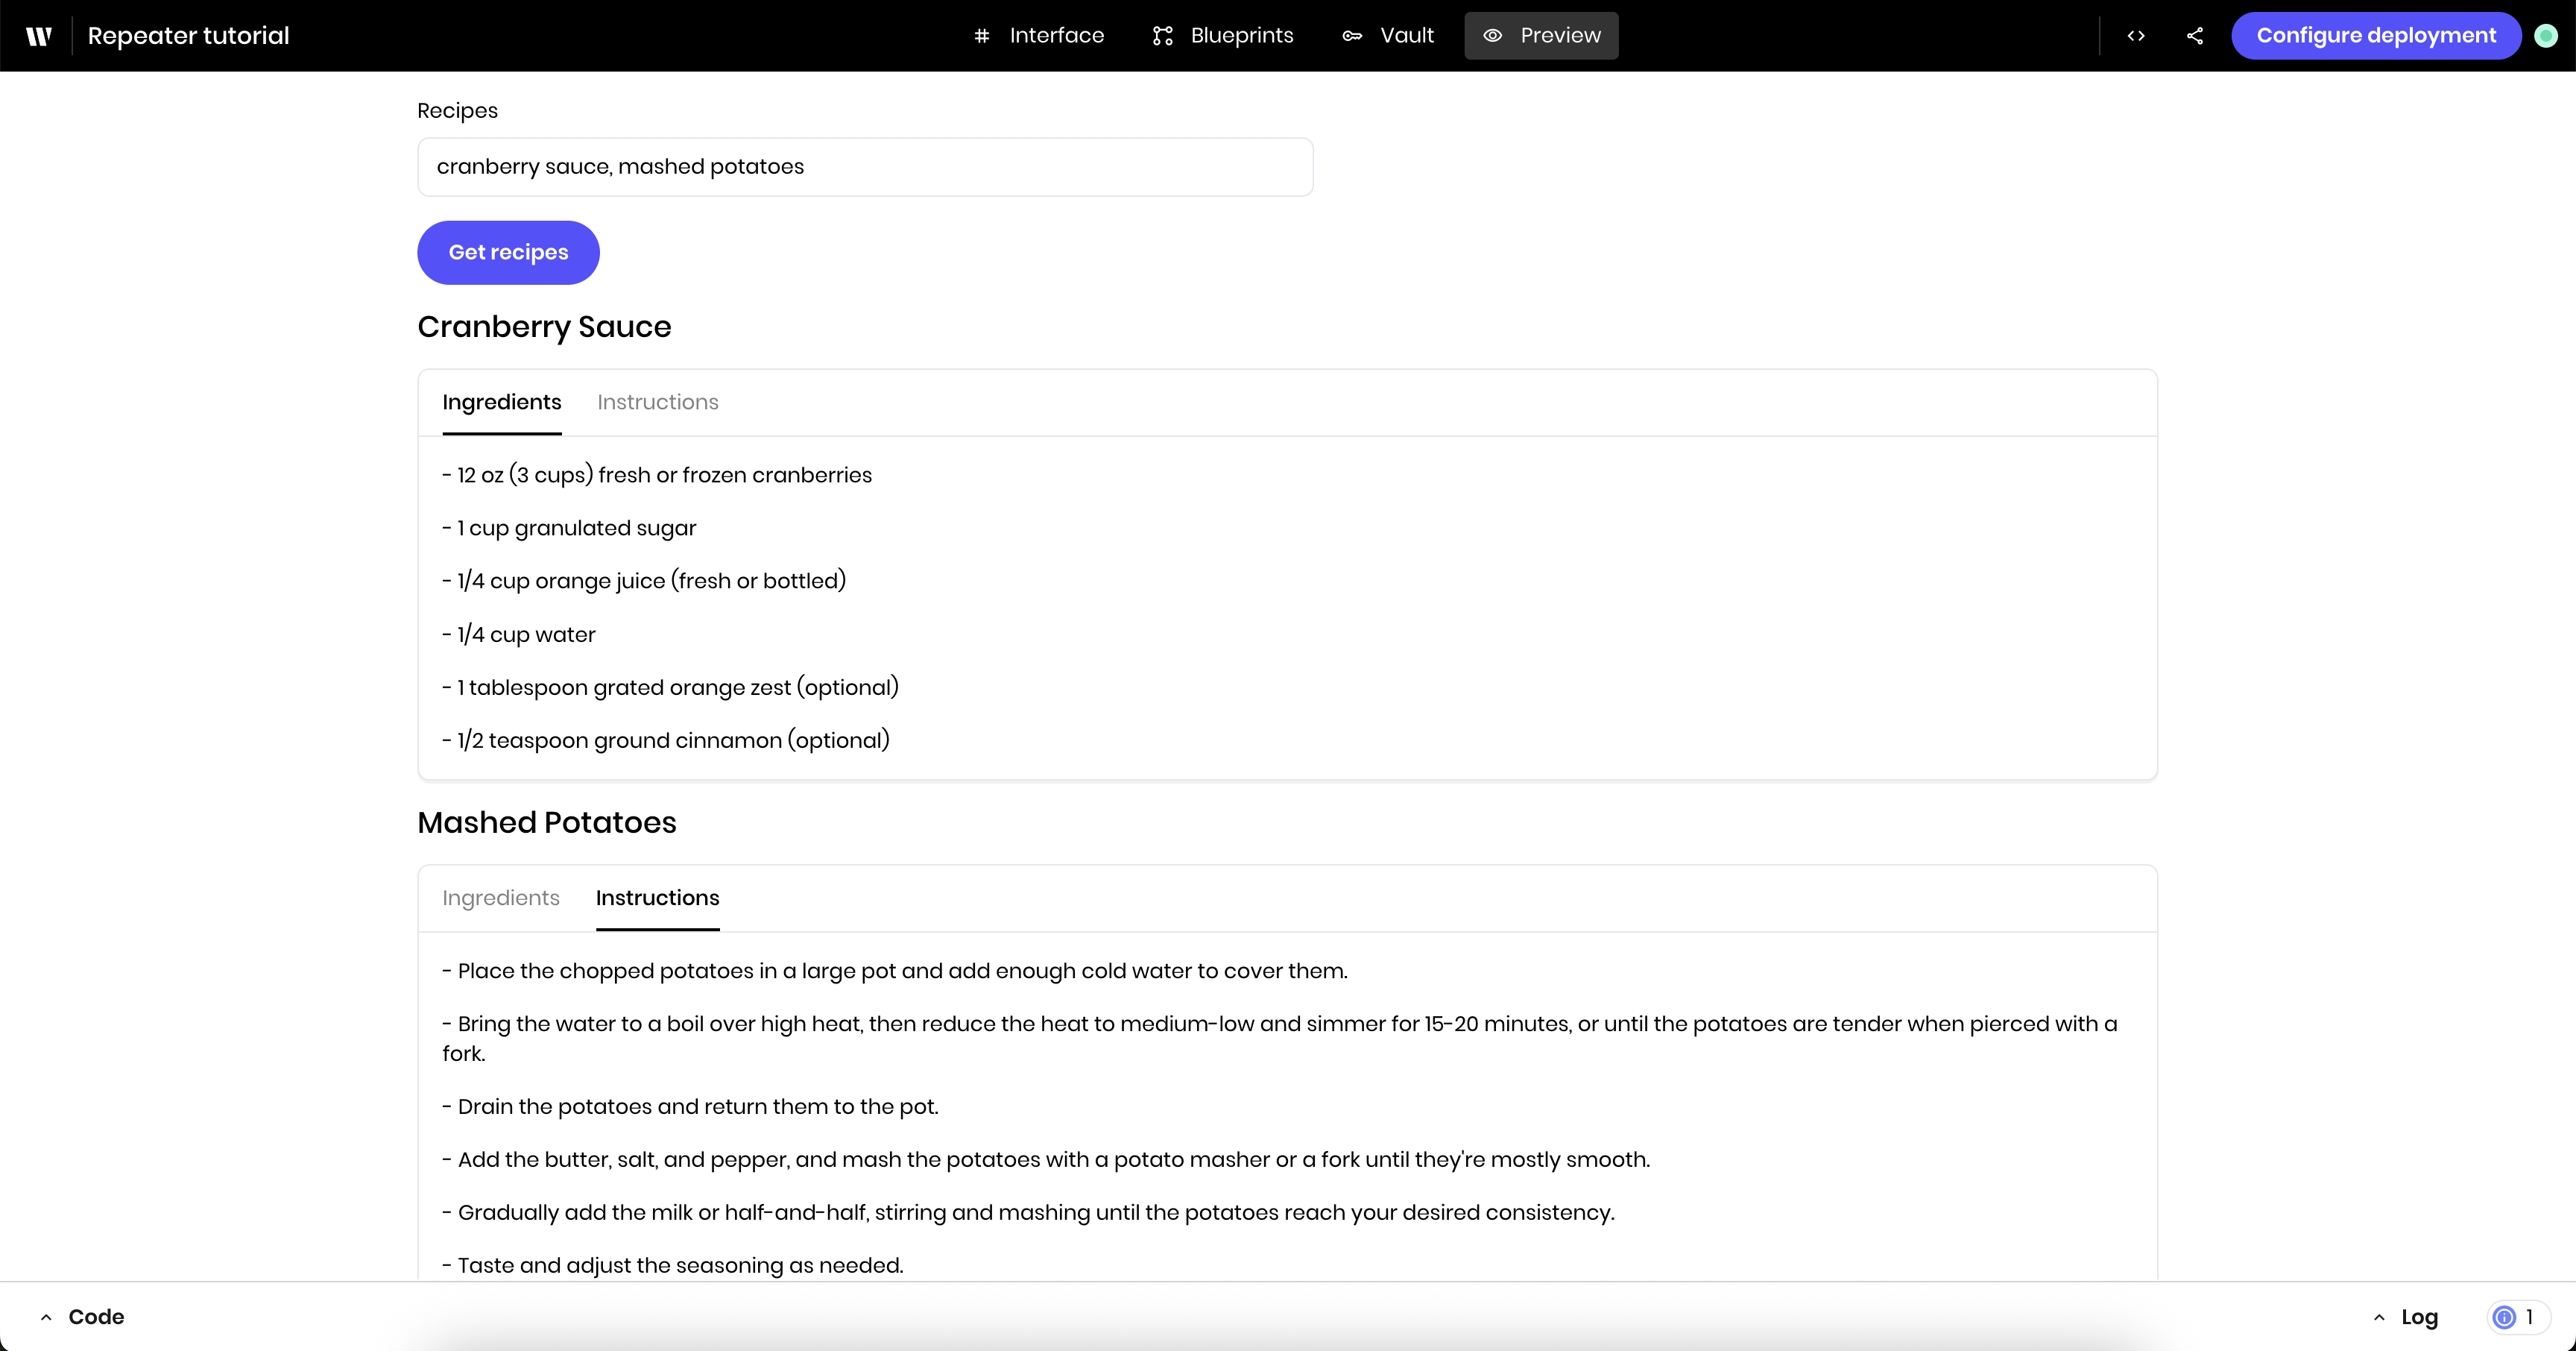
list. This ensures the Repeater is only visible when the user has selected at least one item from the select input and the list state variable isn’t empty.Tutorial: Build a recipe generator with Repeaters
This tutorial uses multiple Repeaters to display a list of recipes based on user input.- Accepts a list of dish names from the user
- Generates complete recipes in the blueprint using AI structured output
- Displays each recipe in an organized, tabbed layout using nested Repeaters
Part 1: Set up a minimal UI and the blueprint
First, you’ll set up a minimal UI and the blueprint. This UI won’t use any Repeaters yet, but it will be the foundation for the recipe generator.Create the input interface
Add a Text Input
Add a Text Input to your page. Update the following settings:
- Label:
Recipes - Placeholder text:
Enter dish names (e.g., "Pizza, Chocolate Chip Cookies, Tacos") - Link variable under Binding:
request

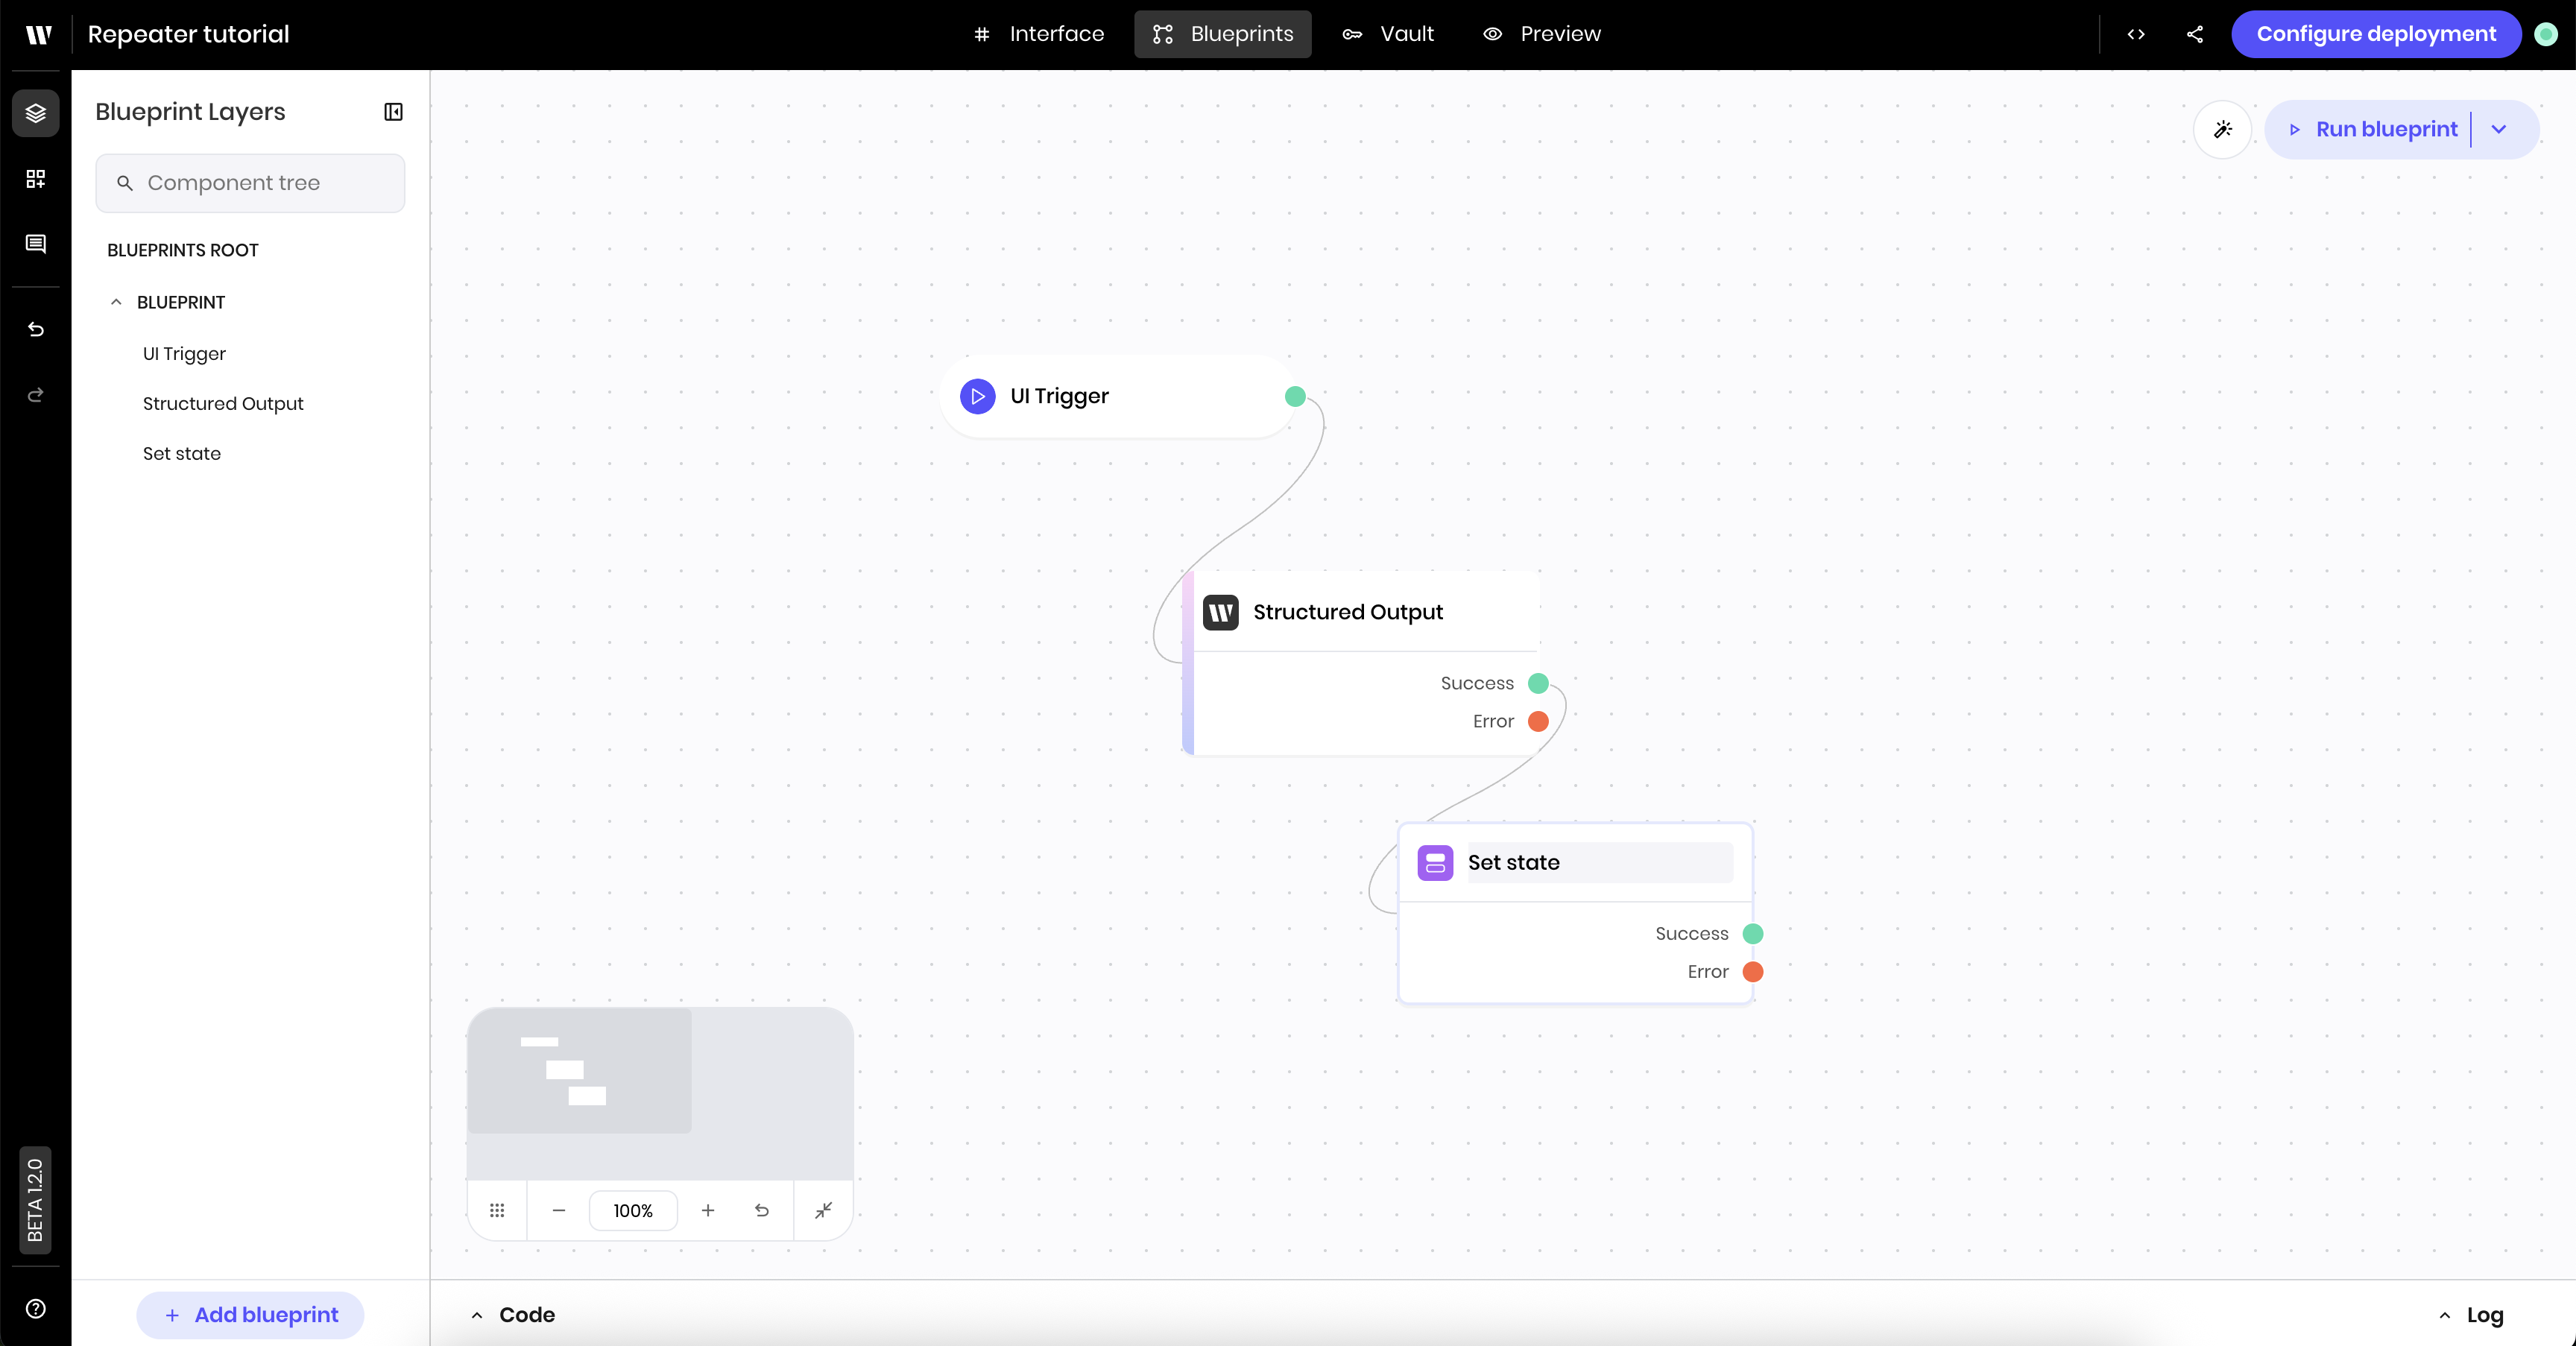
Build the blueprint
The blueprint contains three blocks:- UI Trigger to trigger the blueprint when a user clicks the Get recipes button
- Structured Output block to generate the recipes and provide structured output that the Repeaters can use
- Set State block to store the recipes in the state variable
recipes
Add a UI Trigger block
Add a UI Trigger block to your blueprint. Update the following settings:
- Component Id: Select the Get recipes button
- Action:
wf-click
Add a Structured Output block
Add a Structured Output block to your blueprint. Update the following settings:
-
Prompt:
-
JSON Schema: The JSON schema below defines the structure of the recipes as a list of recipe objects. Each recipe object has a name, ingredients, and steps. The Repeaters will use this schema to display the recipes.
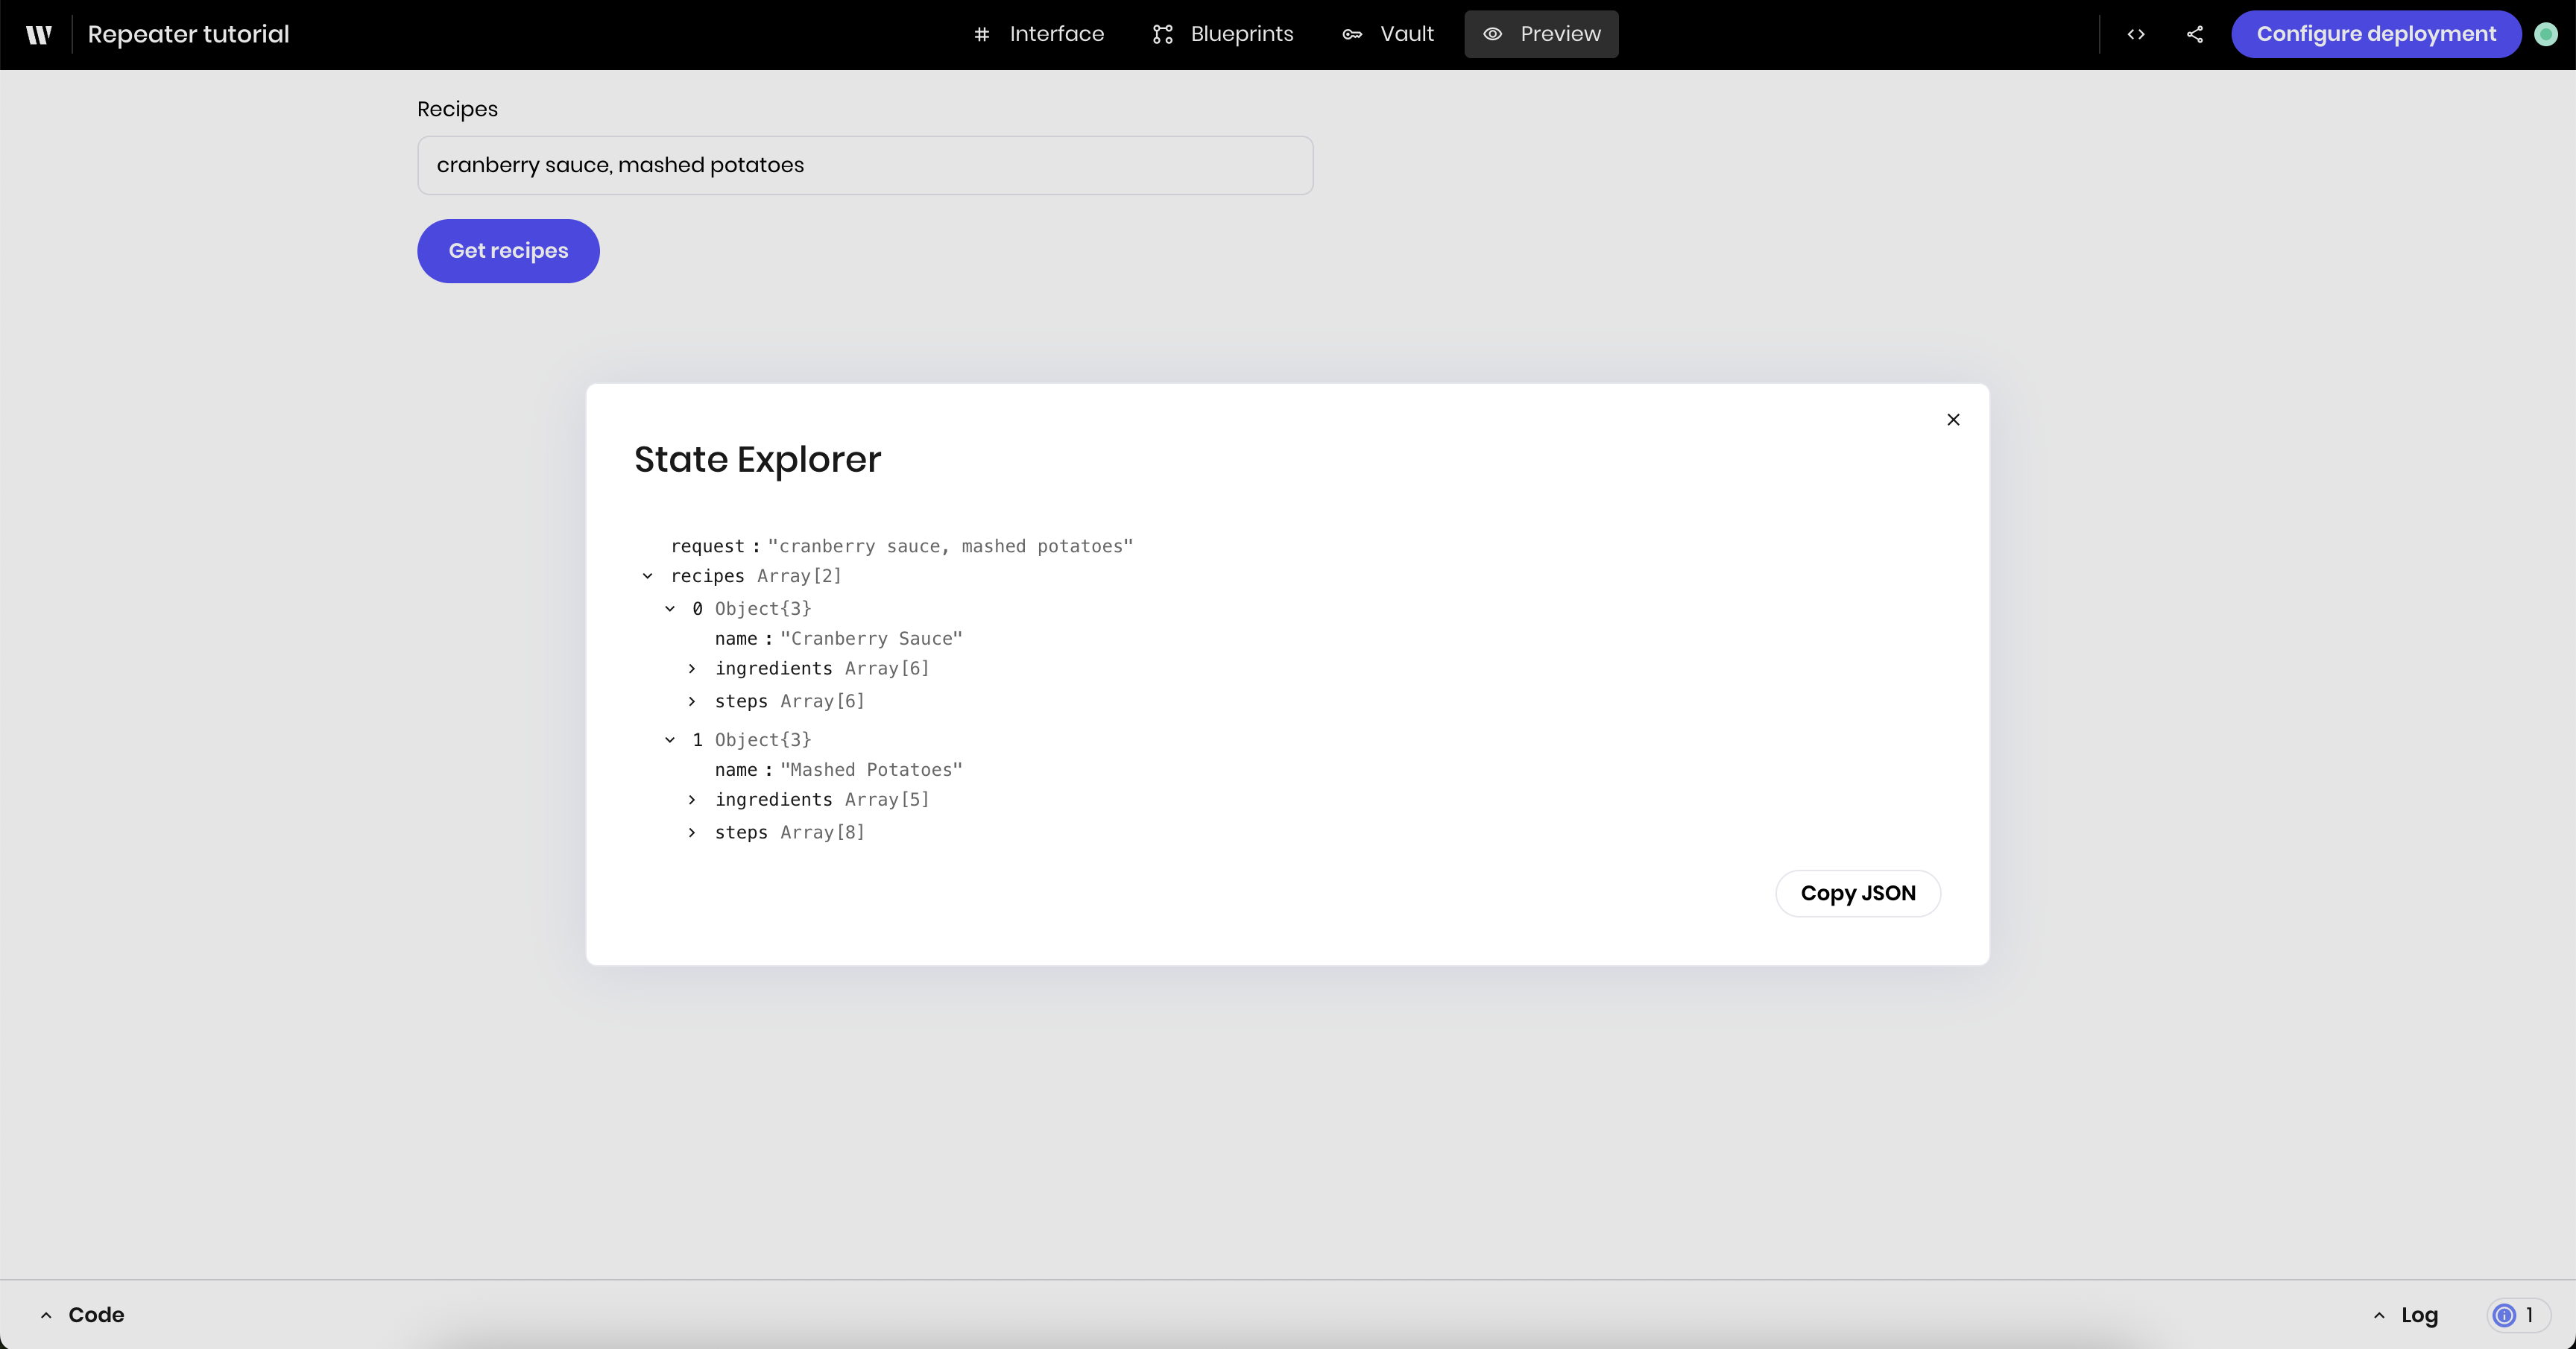
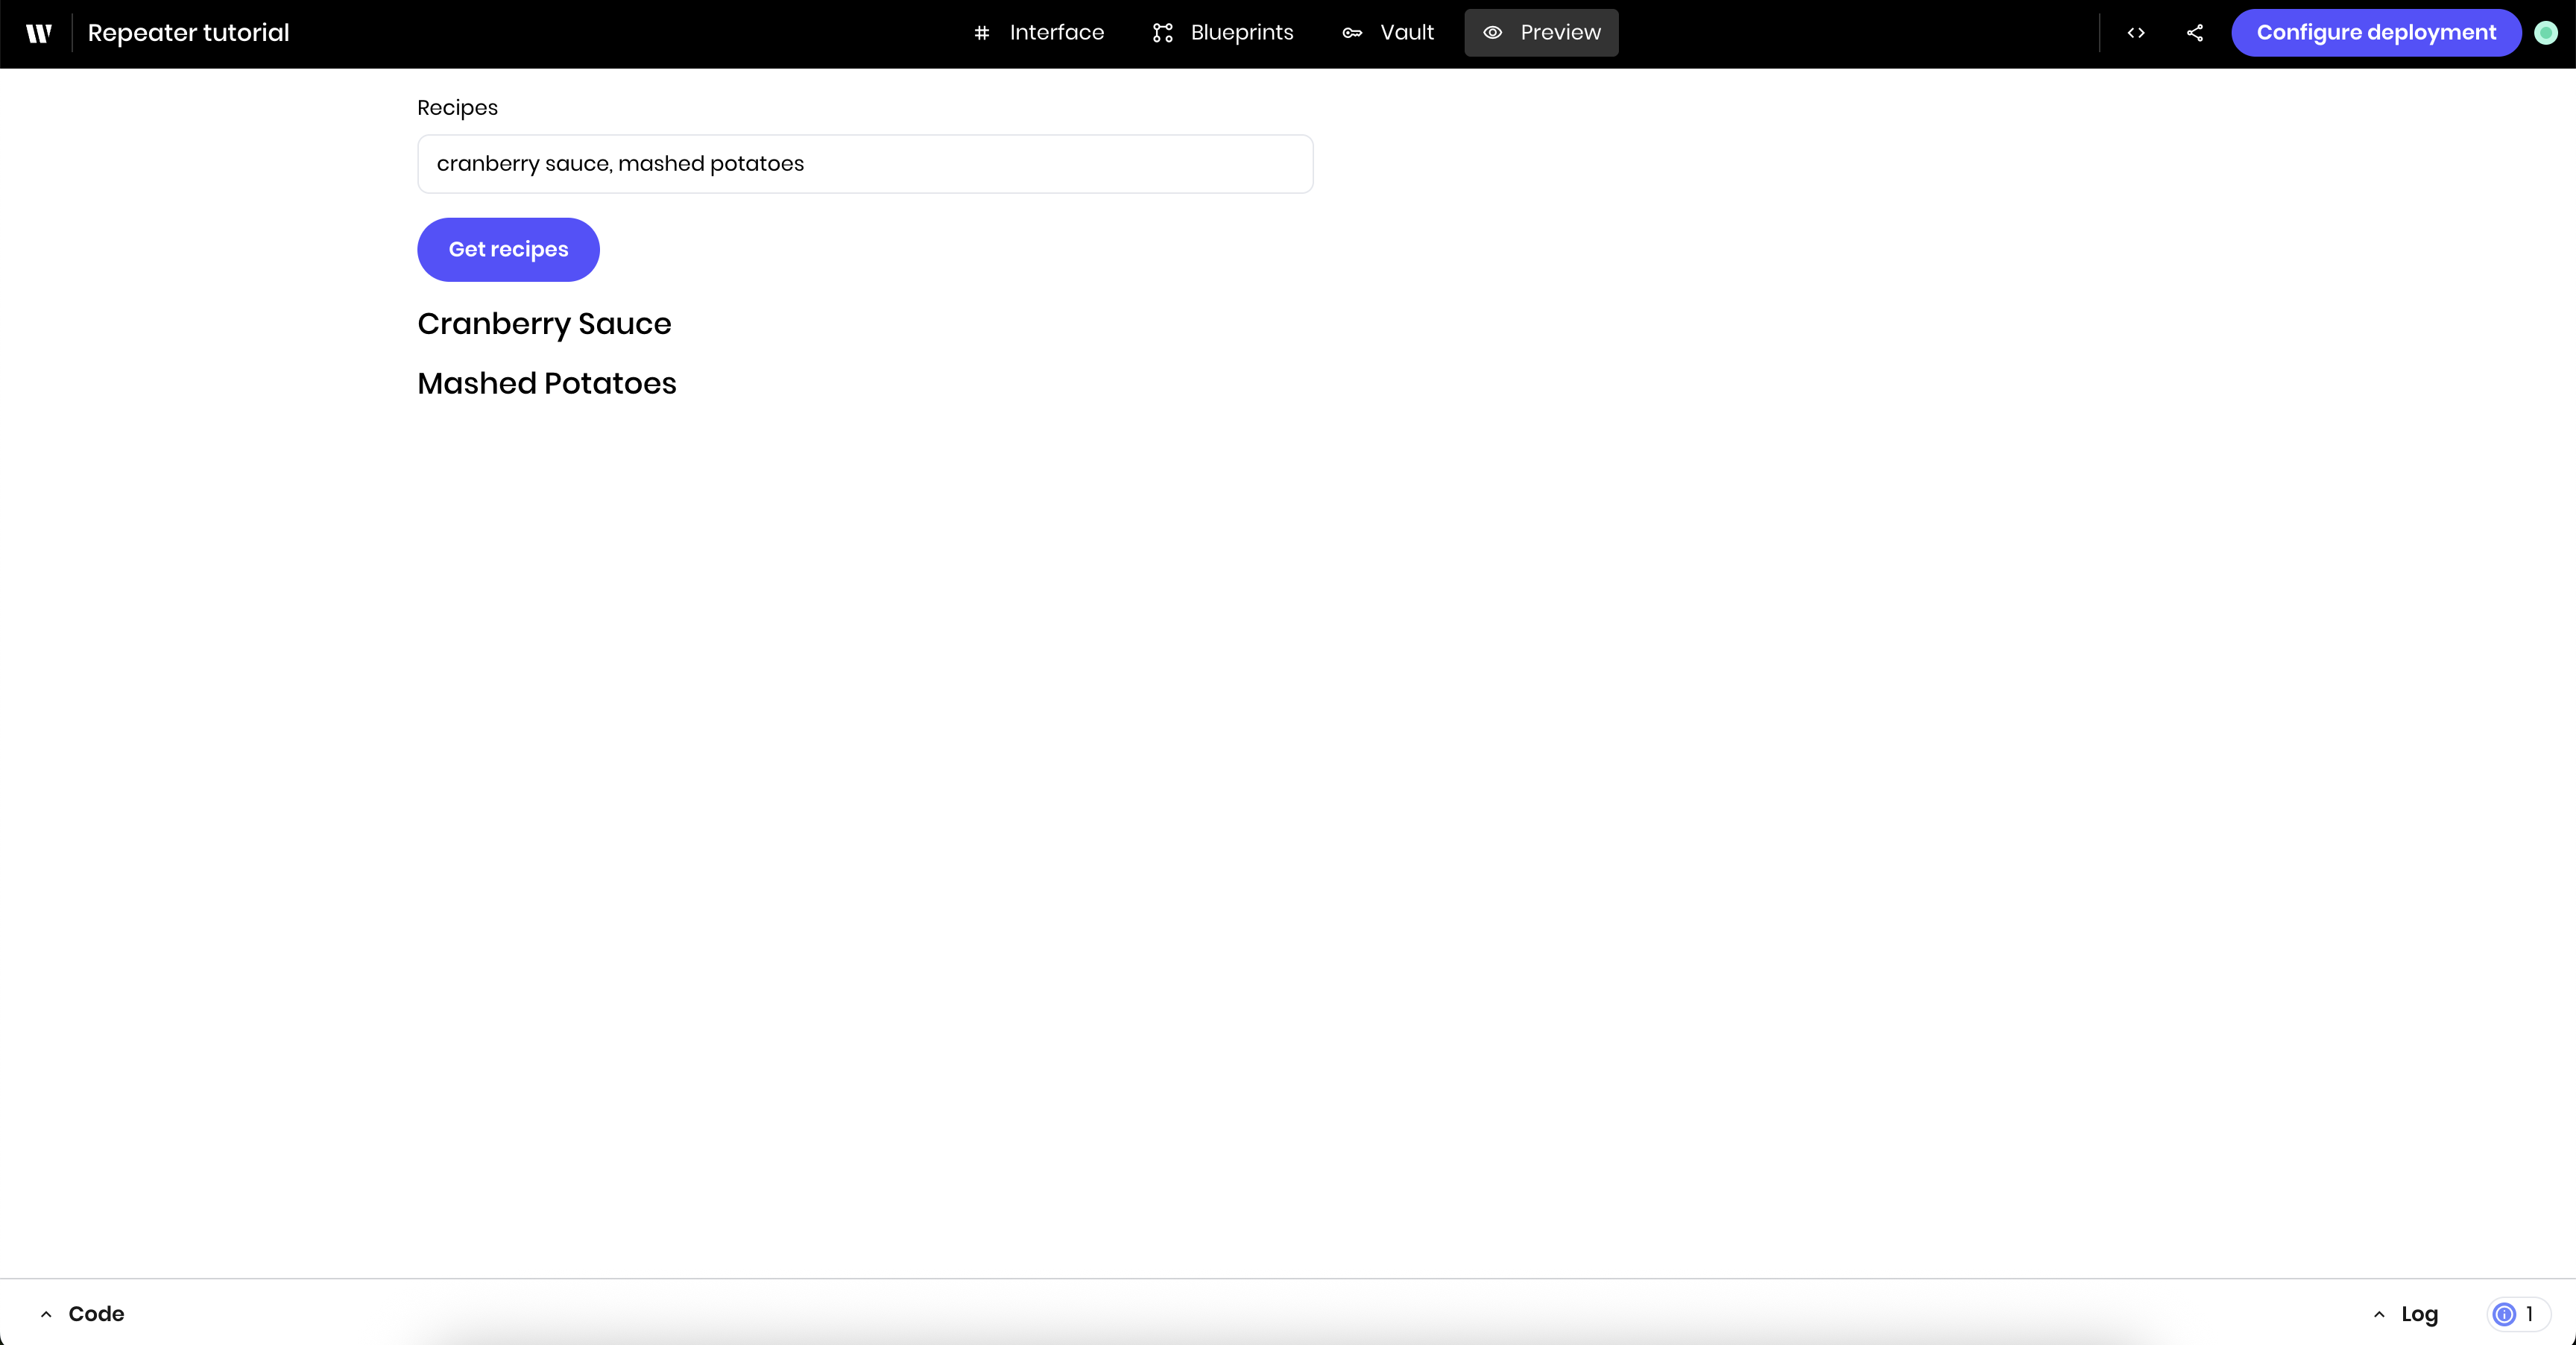
Test the blueprint
Now you can test that the blueprint works before you add the Repeaters. Navigate to the Preview tab to test the blueprint. Enter something like “Pizza, Chocolate Chip Cookies” in the text input and click the Get recipes button. You should see therequest and the structured output in the result state variables in your state before moving to the next step.
Part 2: Add the main recipe Repeater
Navigate back to the Interface tab to continue building the recipe generator’s UI.Add a Repeater component
Add a Repeater component to your page. Update the following settings:
- Repeater object:
@{recipes}. This is the list of recipes you stored in therecipesstate variable.
Part 3: Add nested Repeaters for ingredients and steps
Now you’ll add nested Repeaters for ingredients and steps. You’ll use a Tab Container to display the ingredients and steps in separate tabs.Add a Tab Container inside the main Repeater
Add a Tab Container inside the Repeater by dragging it into the space that contains the heading. You can verify that the tab container is inside the Repeater by checking the Interface Layers sidebar.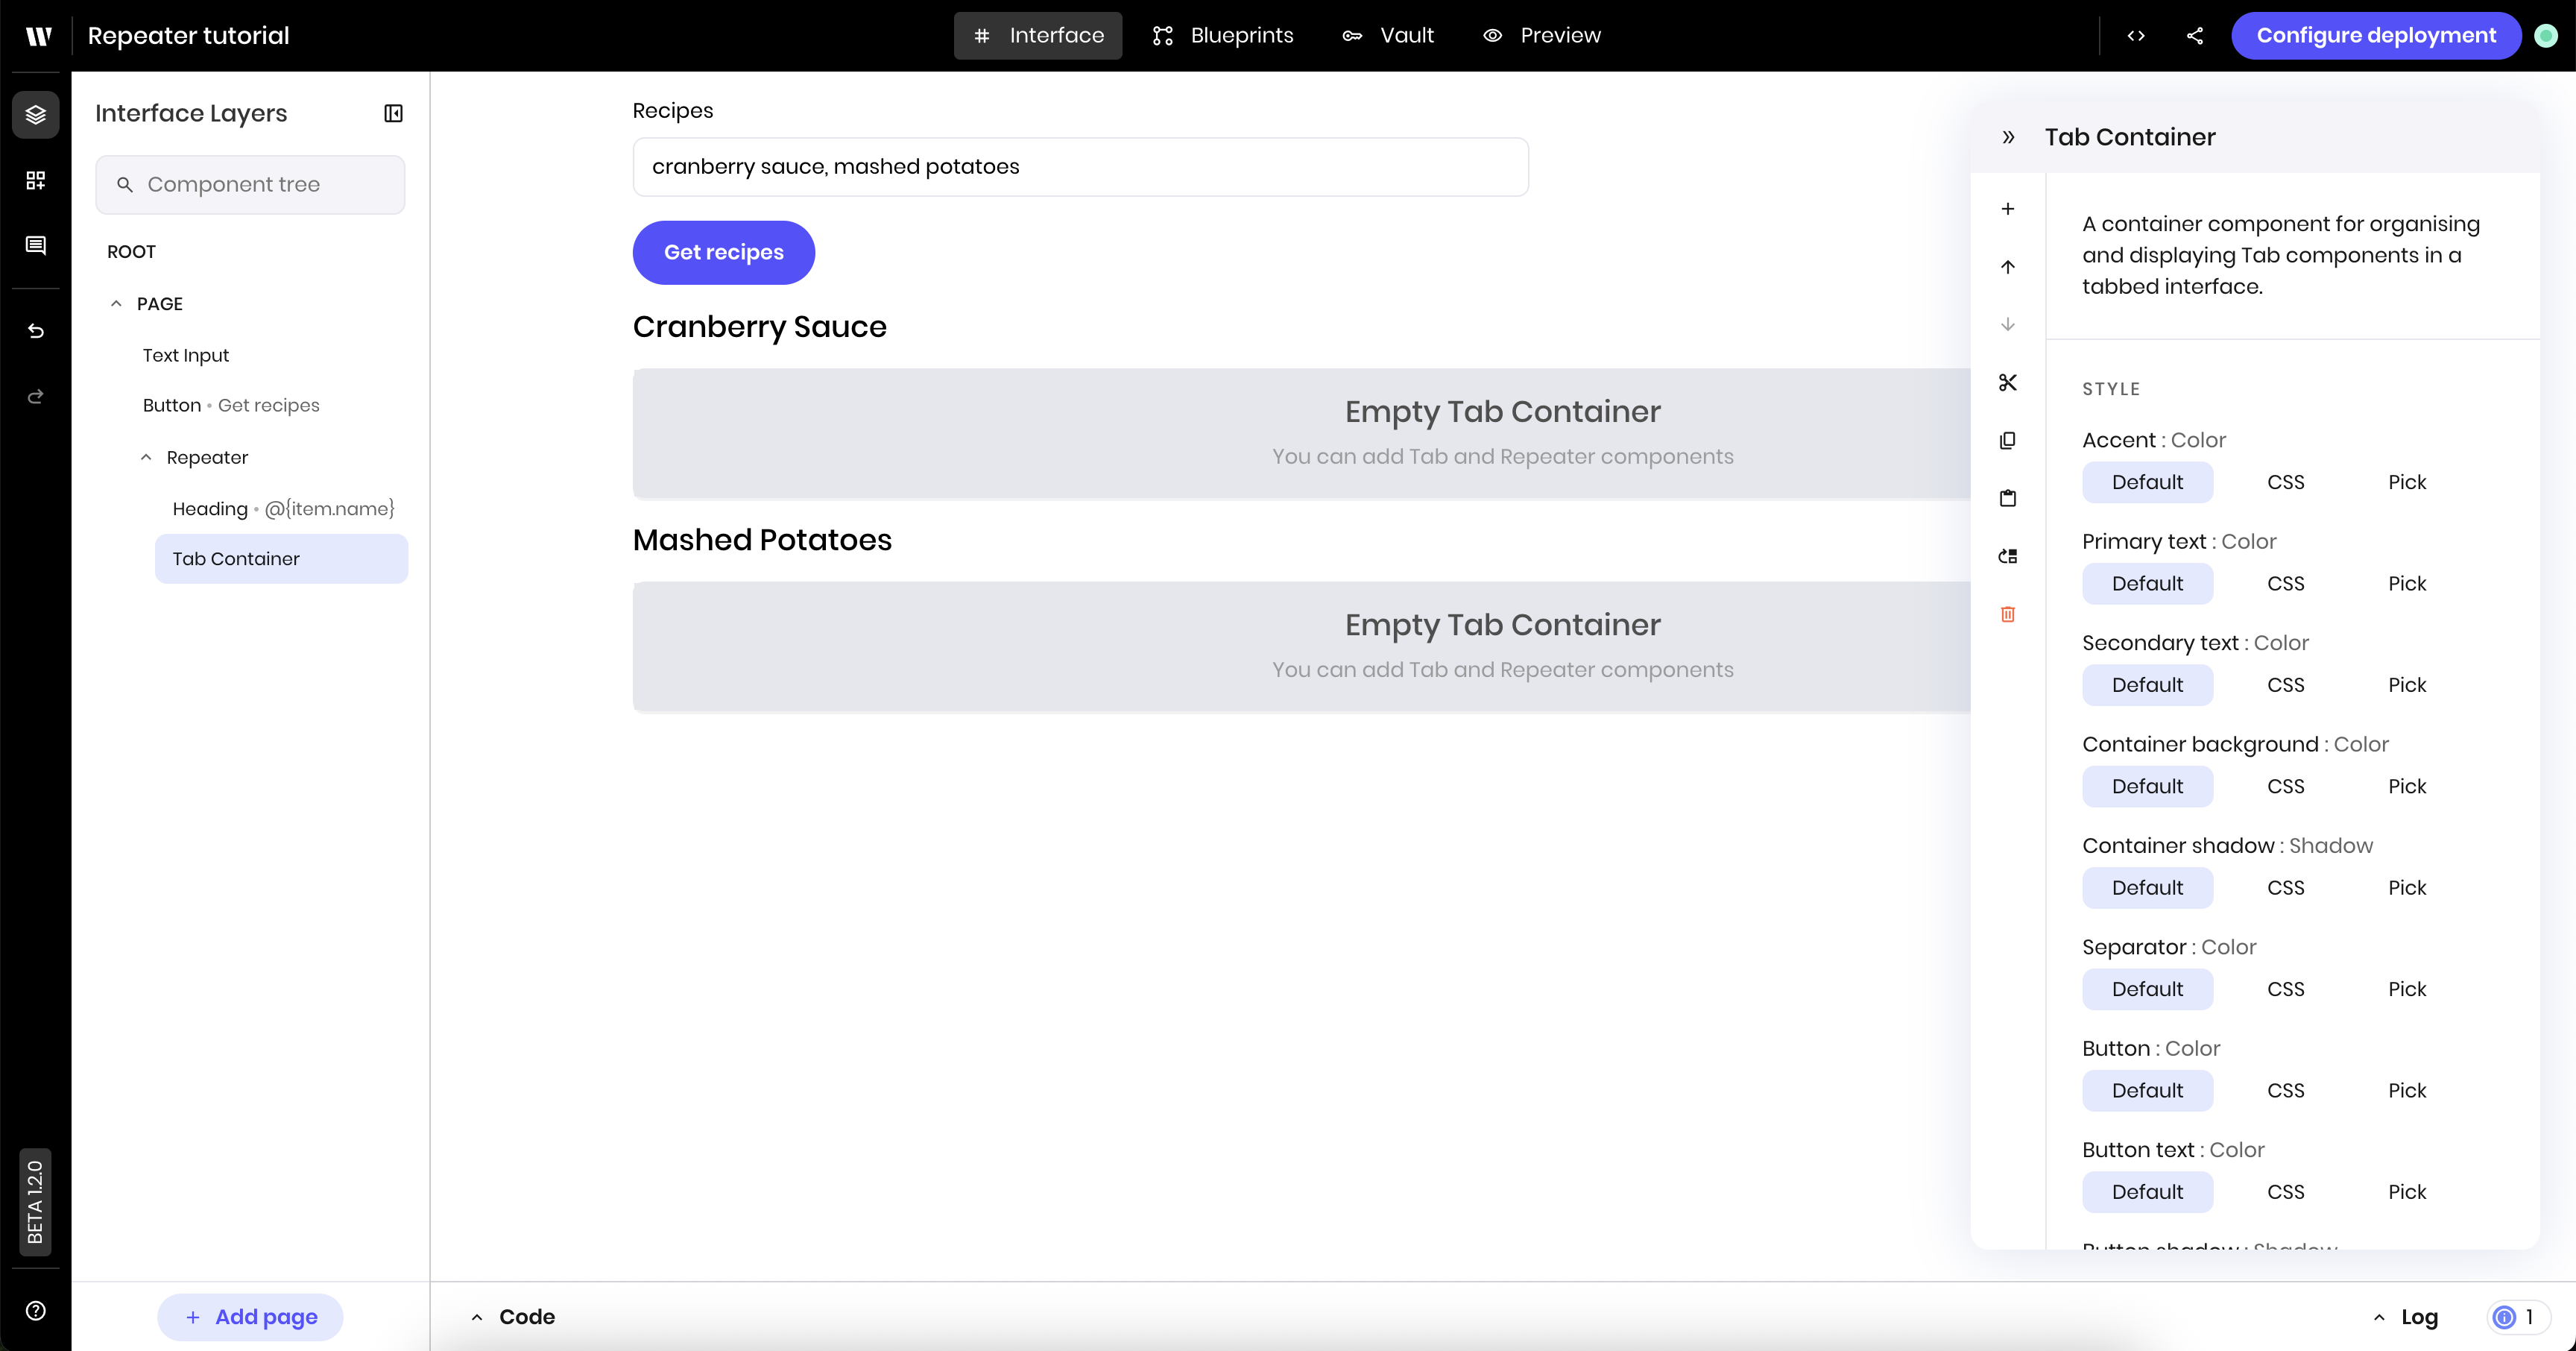
Create the first tab
Add a Tab component to the tab container. Update the following settings:
- Tab name: “Ingredients”
-
Repeater object:
@{item.ingredients}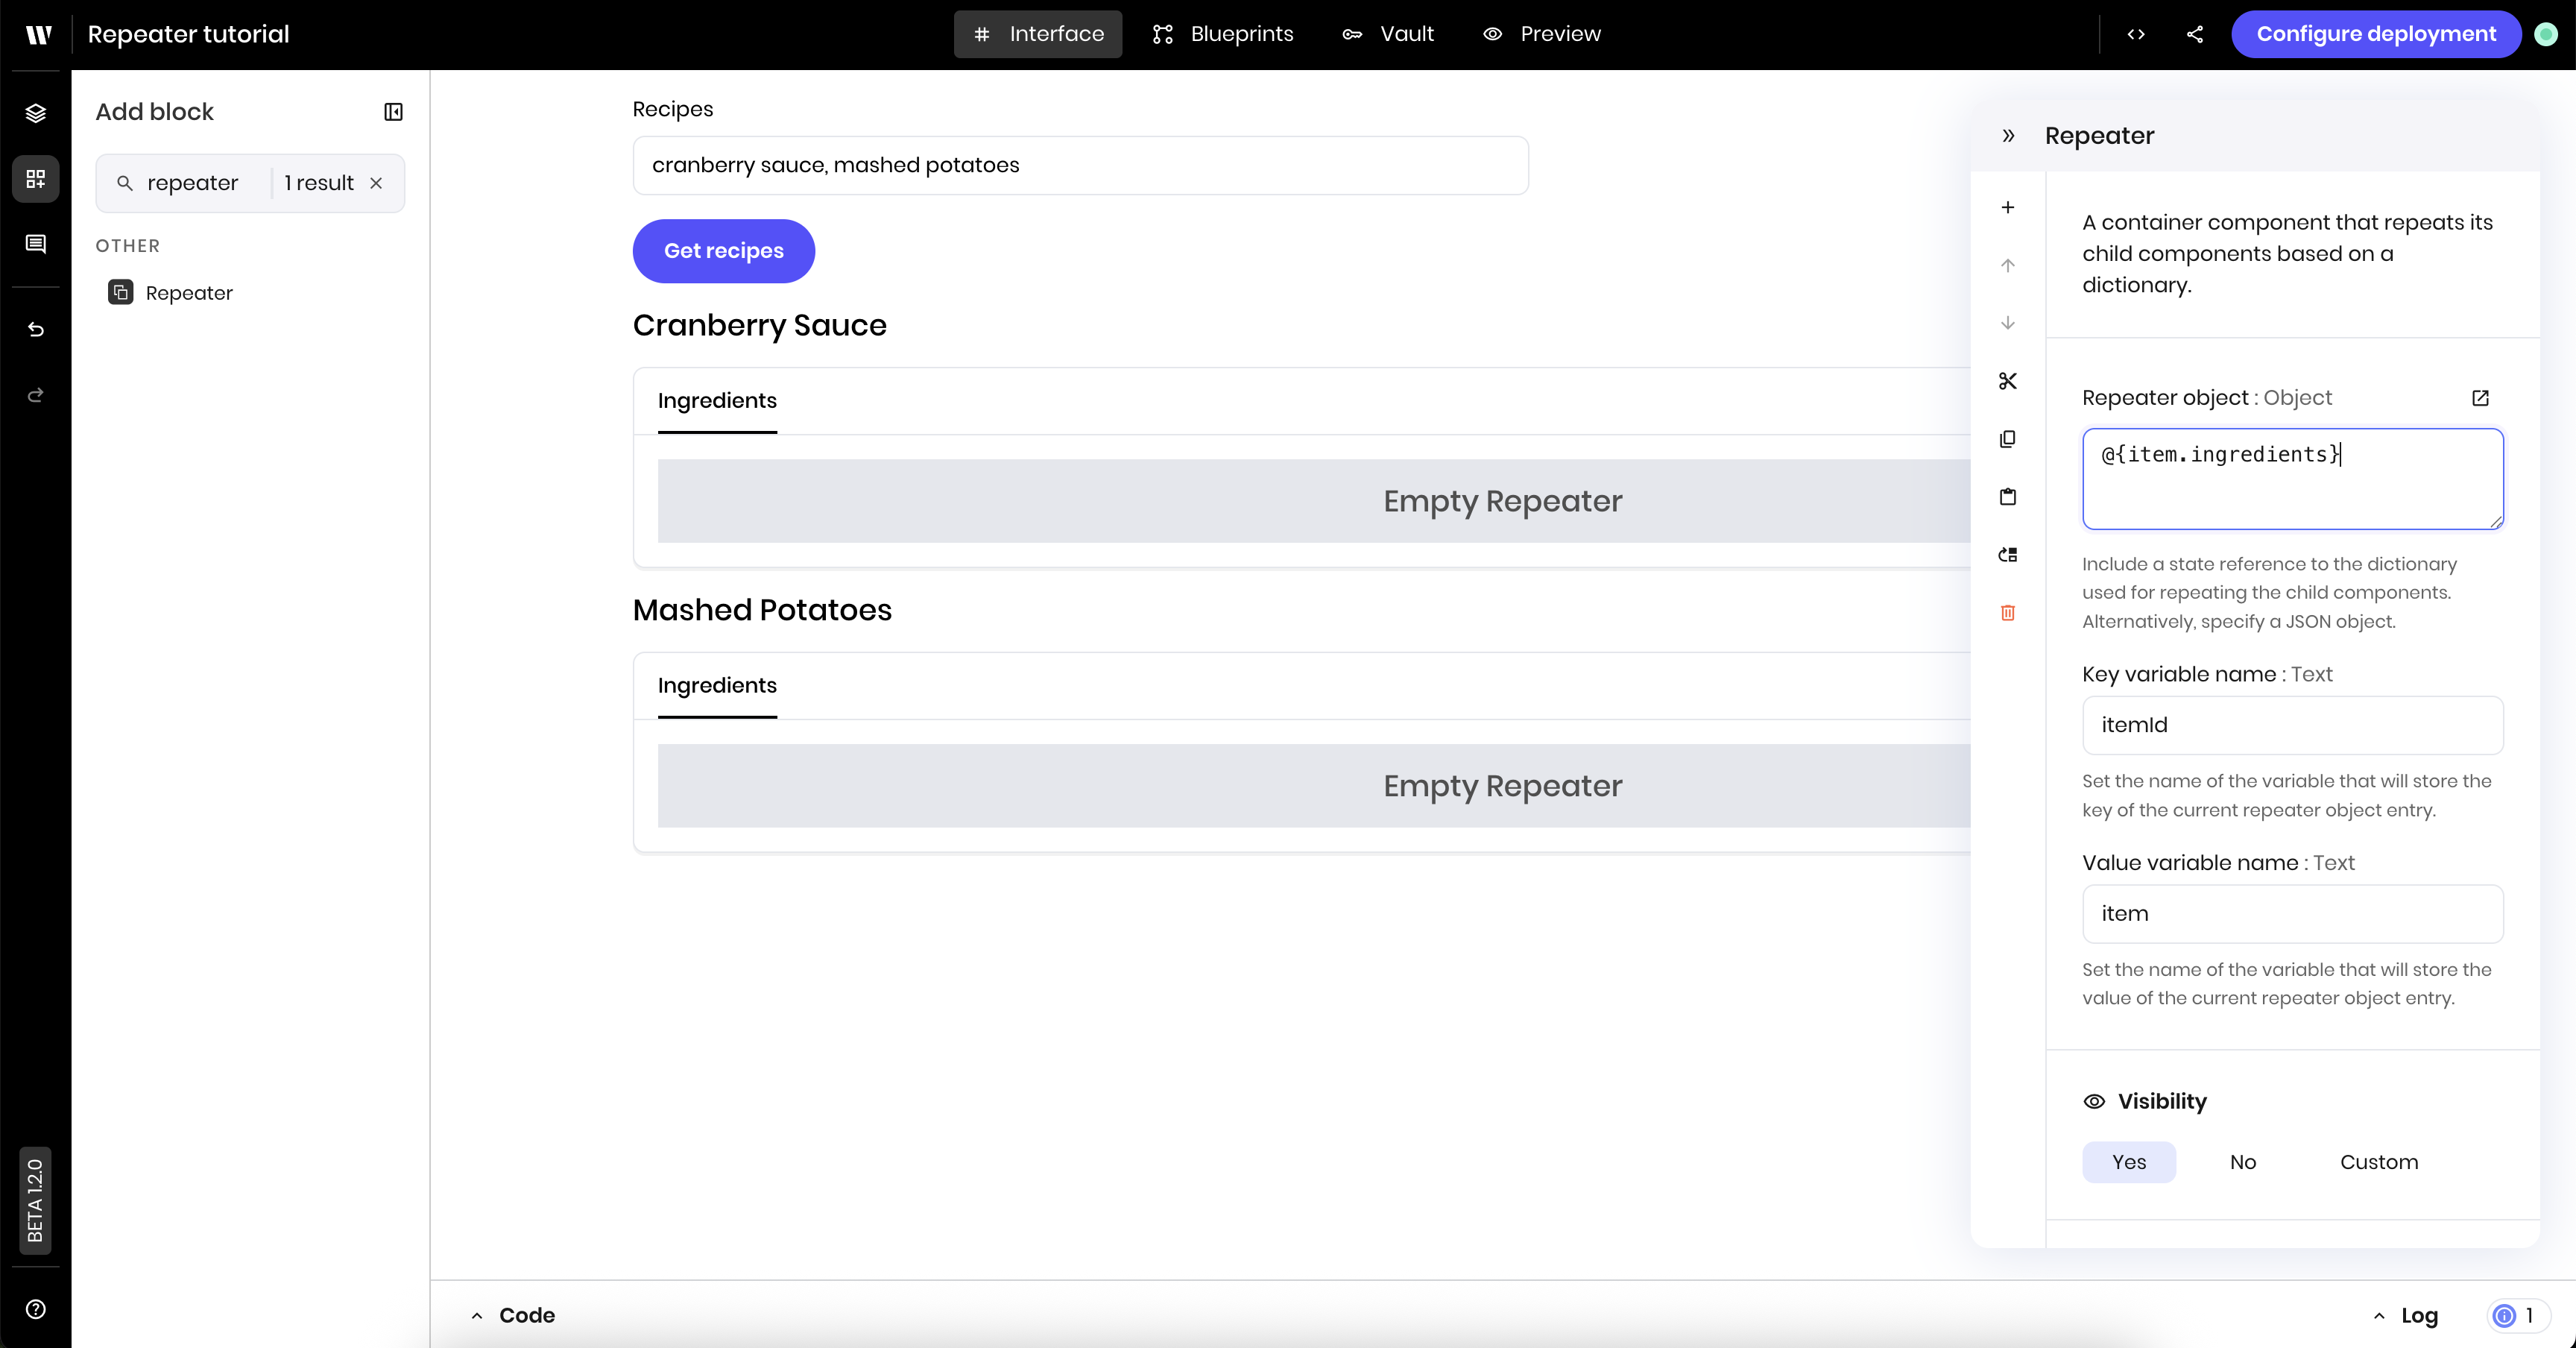
Add a Text component inside the first tab's Repeater
Add a Text component inside the first tab’s Repeater. Update the following settings:
-
Text:
- @{item}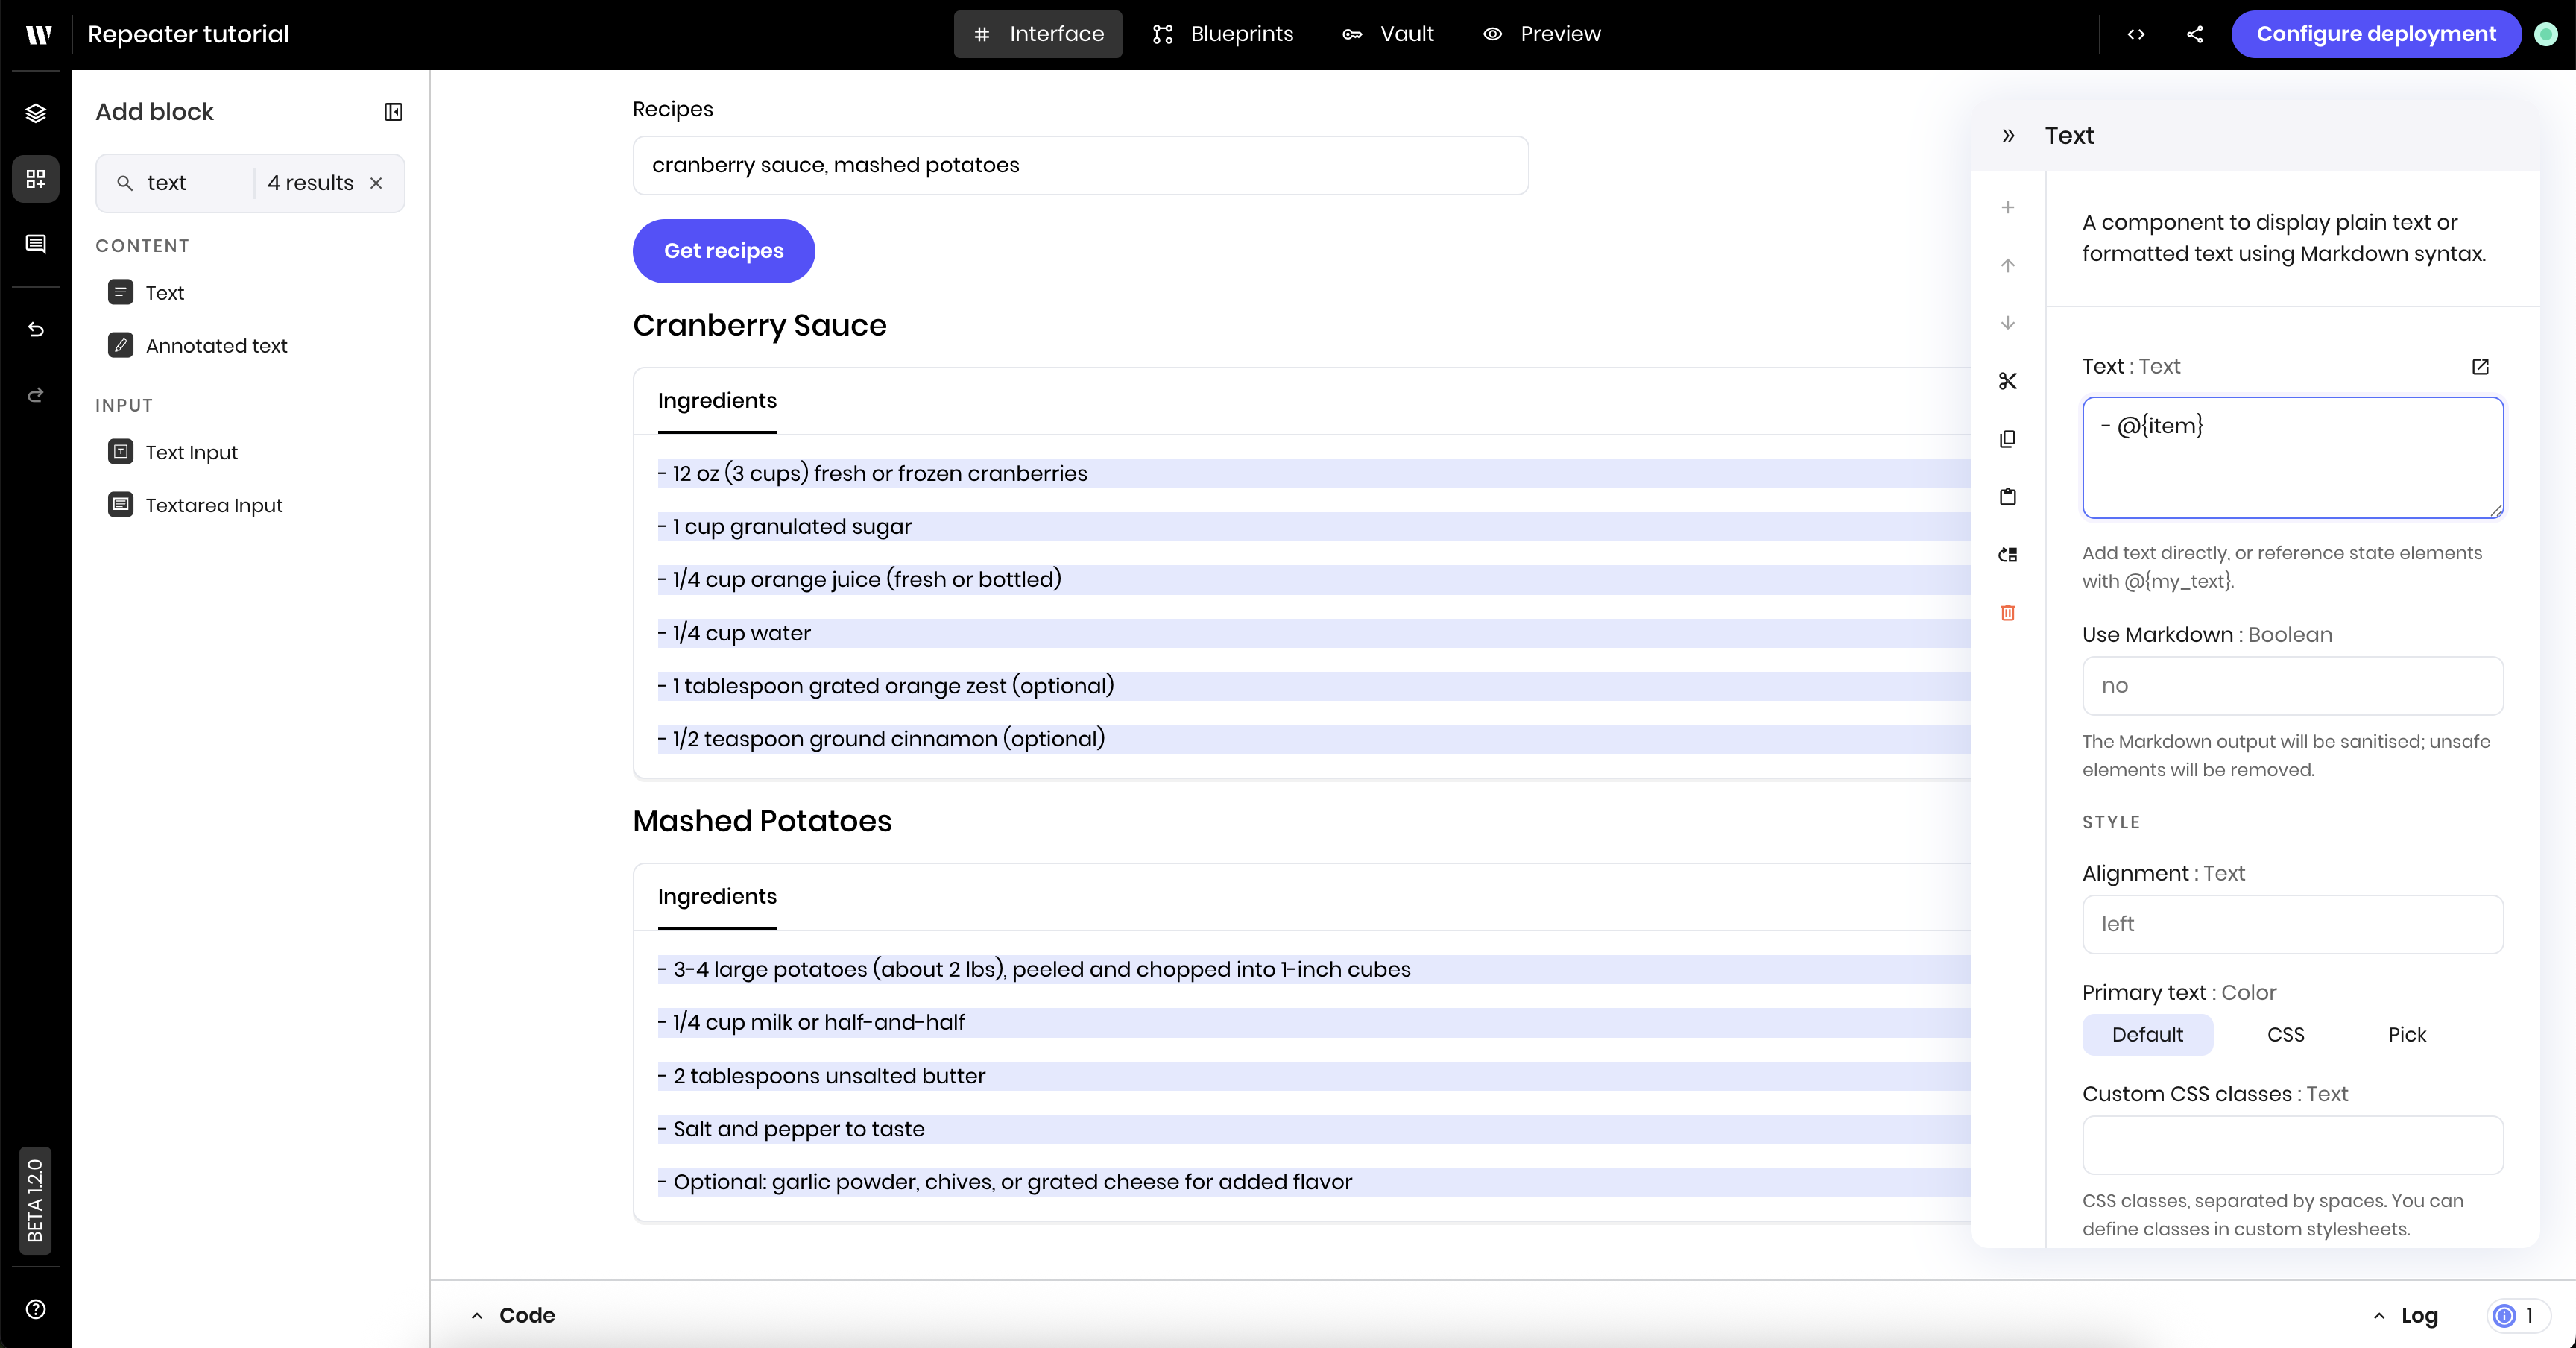
Create the second tab with a Repeater
Add a second Tab component to the tab container. Update the following settings:
- Tab name: “Instructions”
-
Repeater object:
@{item.steps}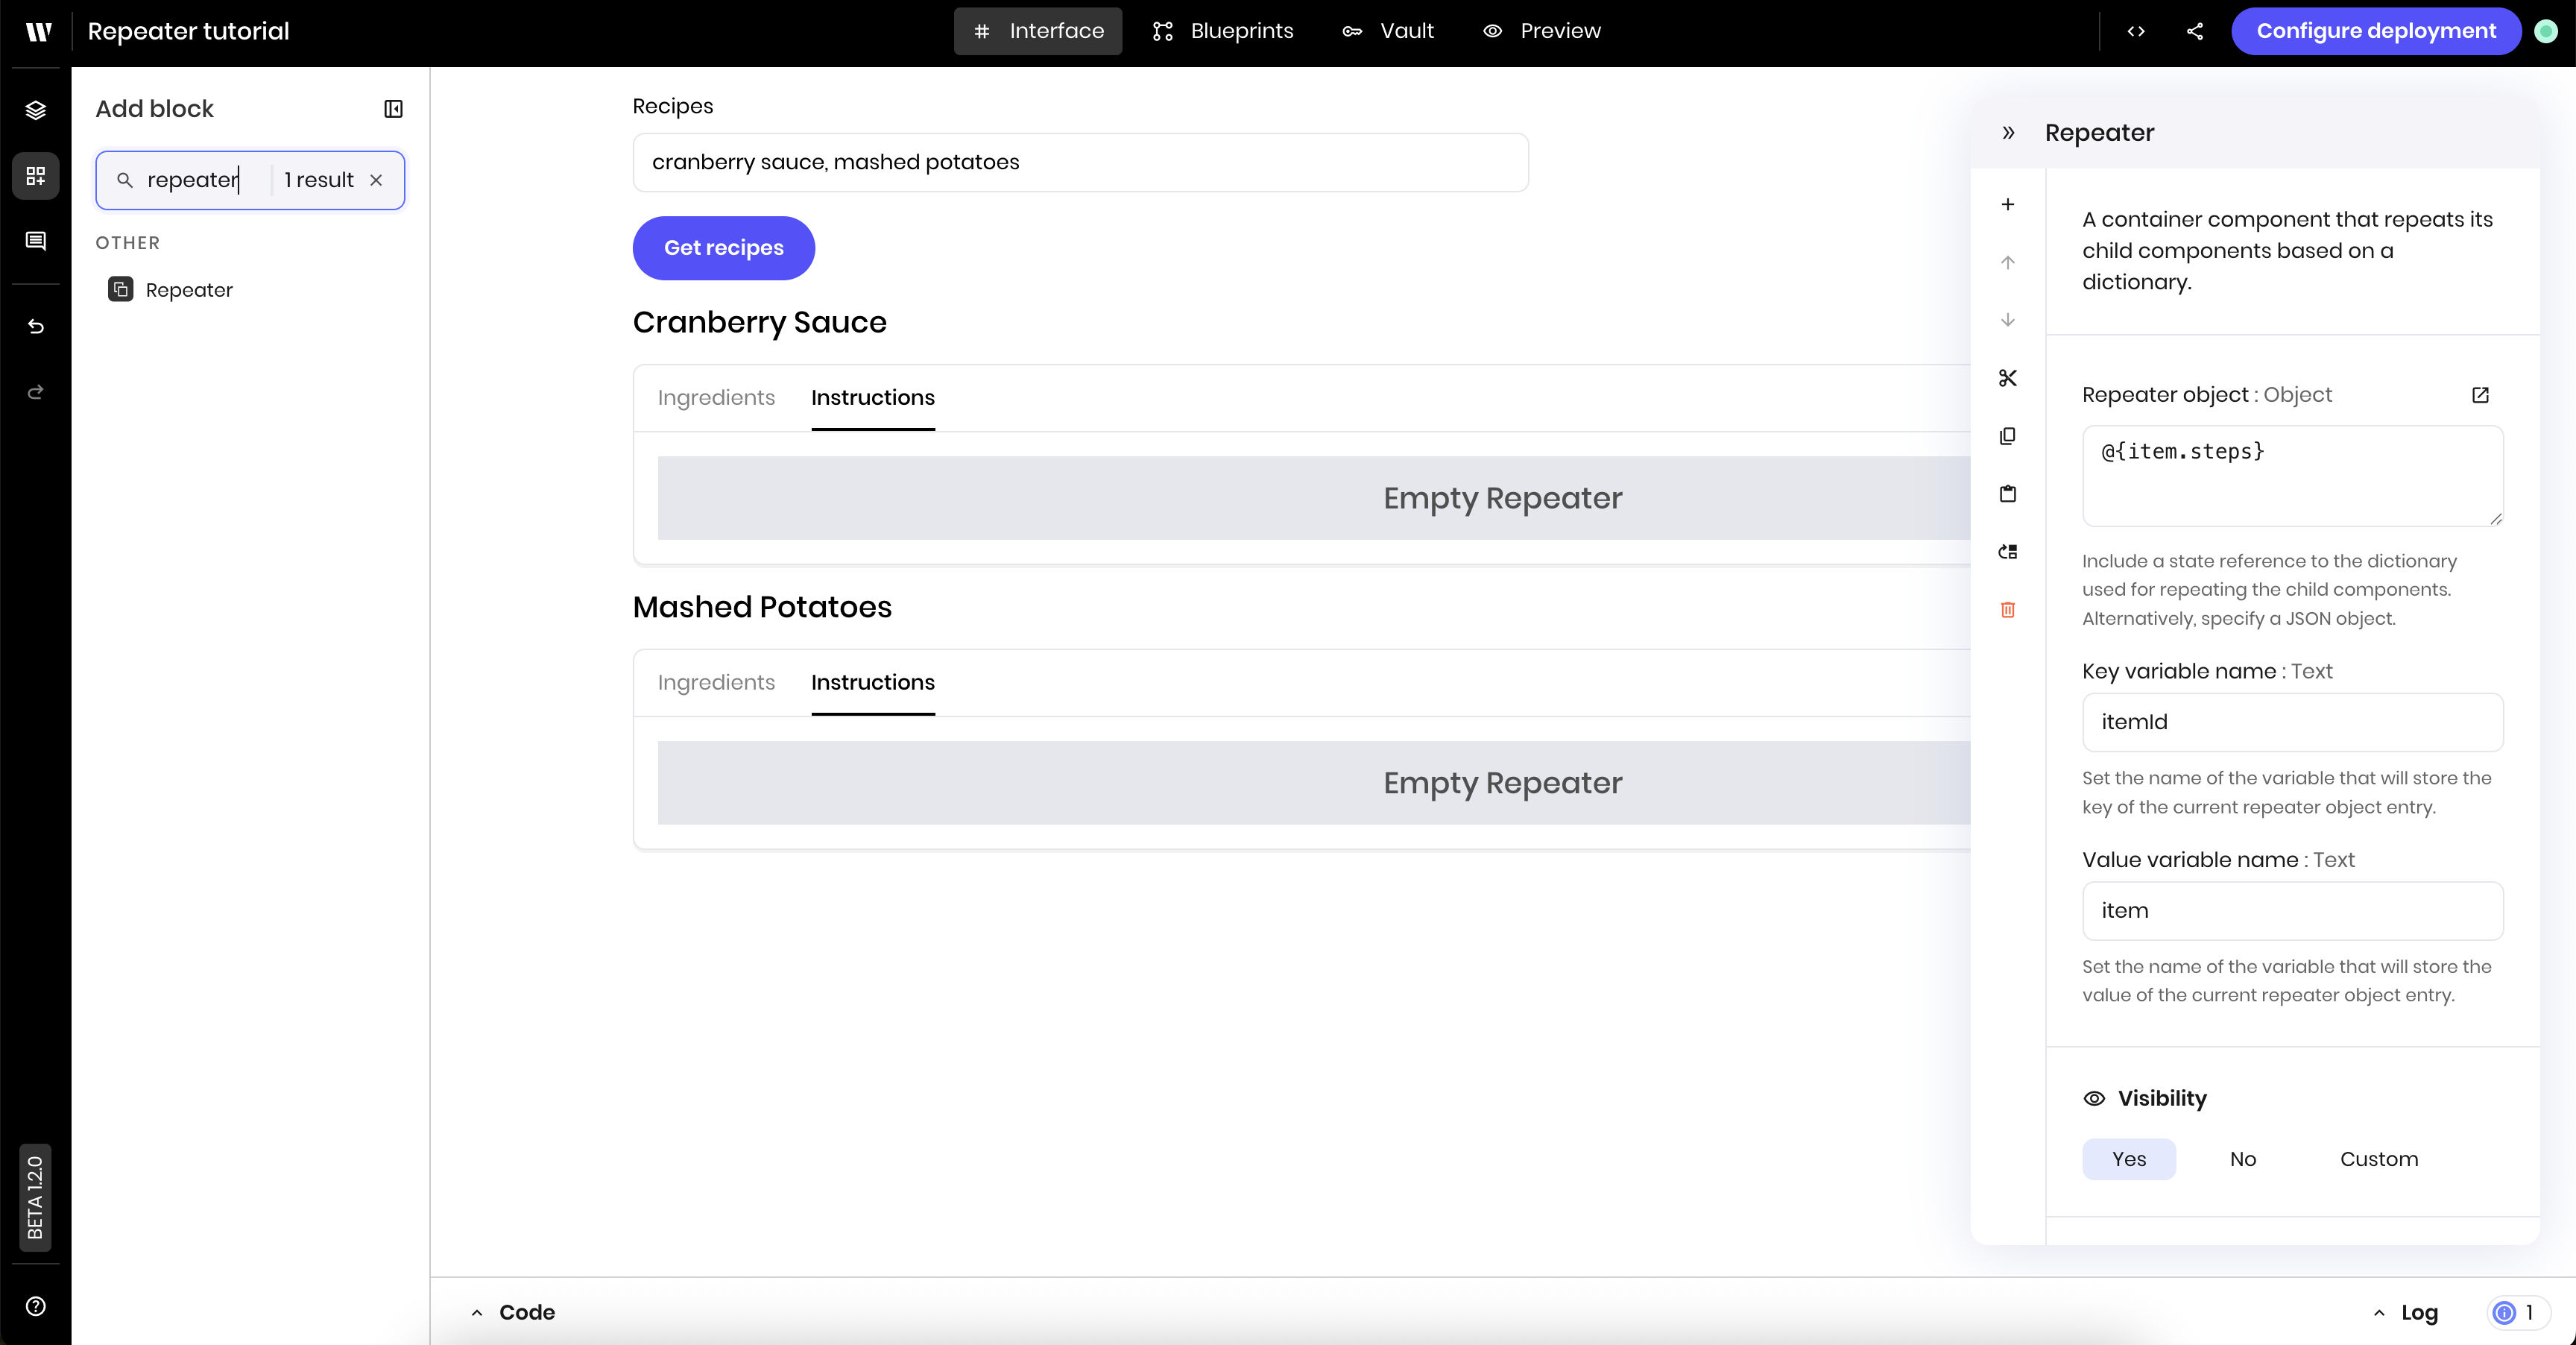
Add a Text component inside the second tab's Repeater
Add a Text component inside the second tab’s Repeater. Update the following settings:
-
Text:
- @{item}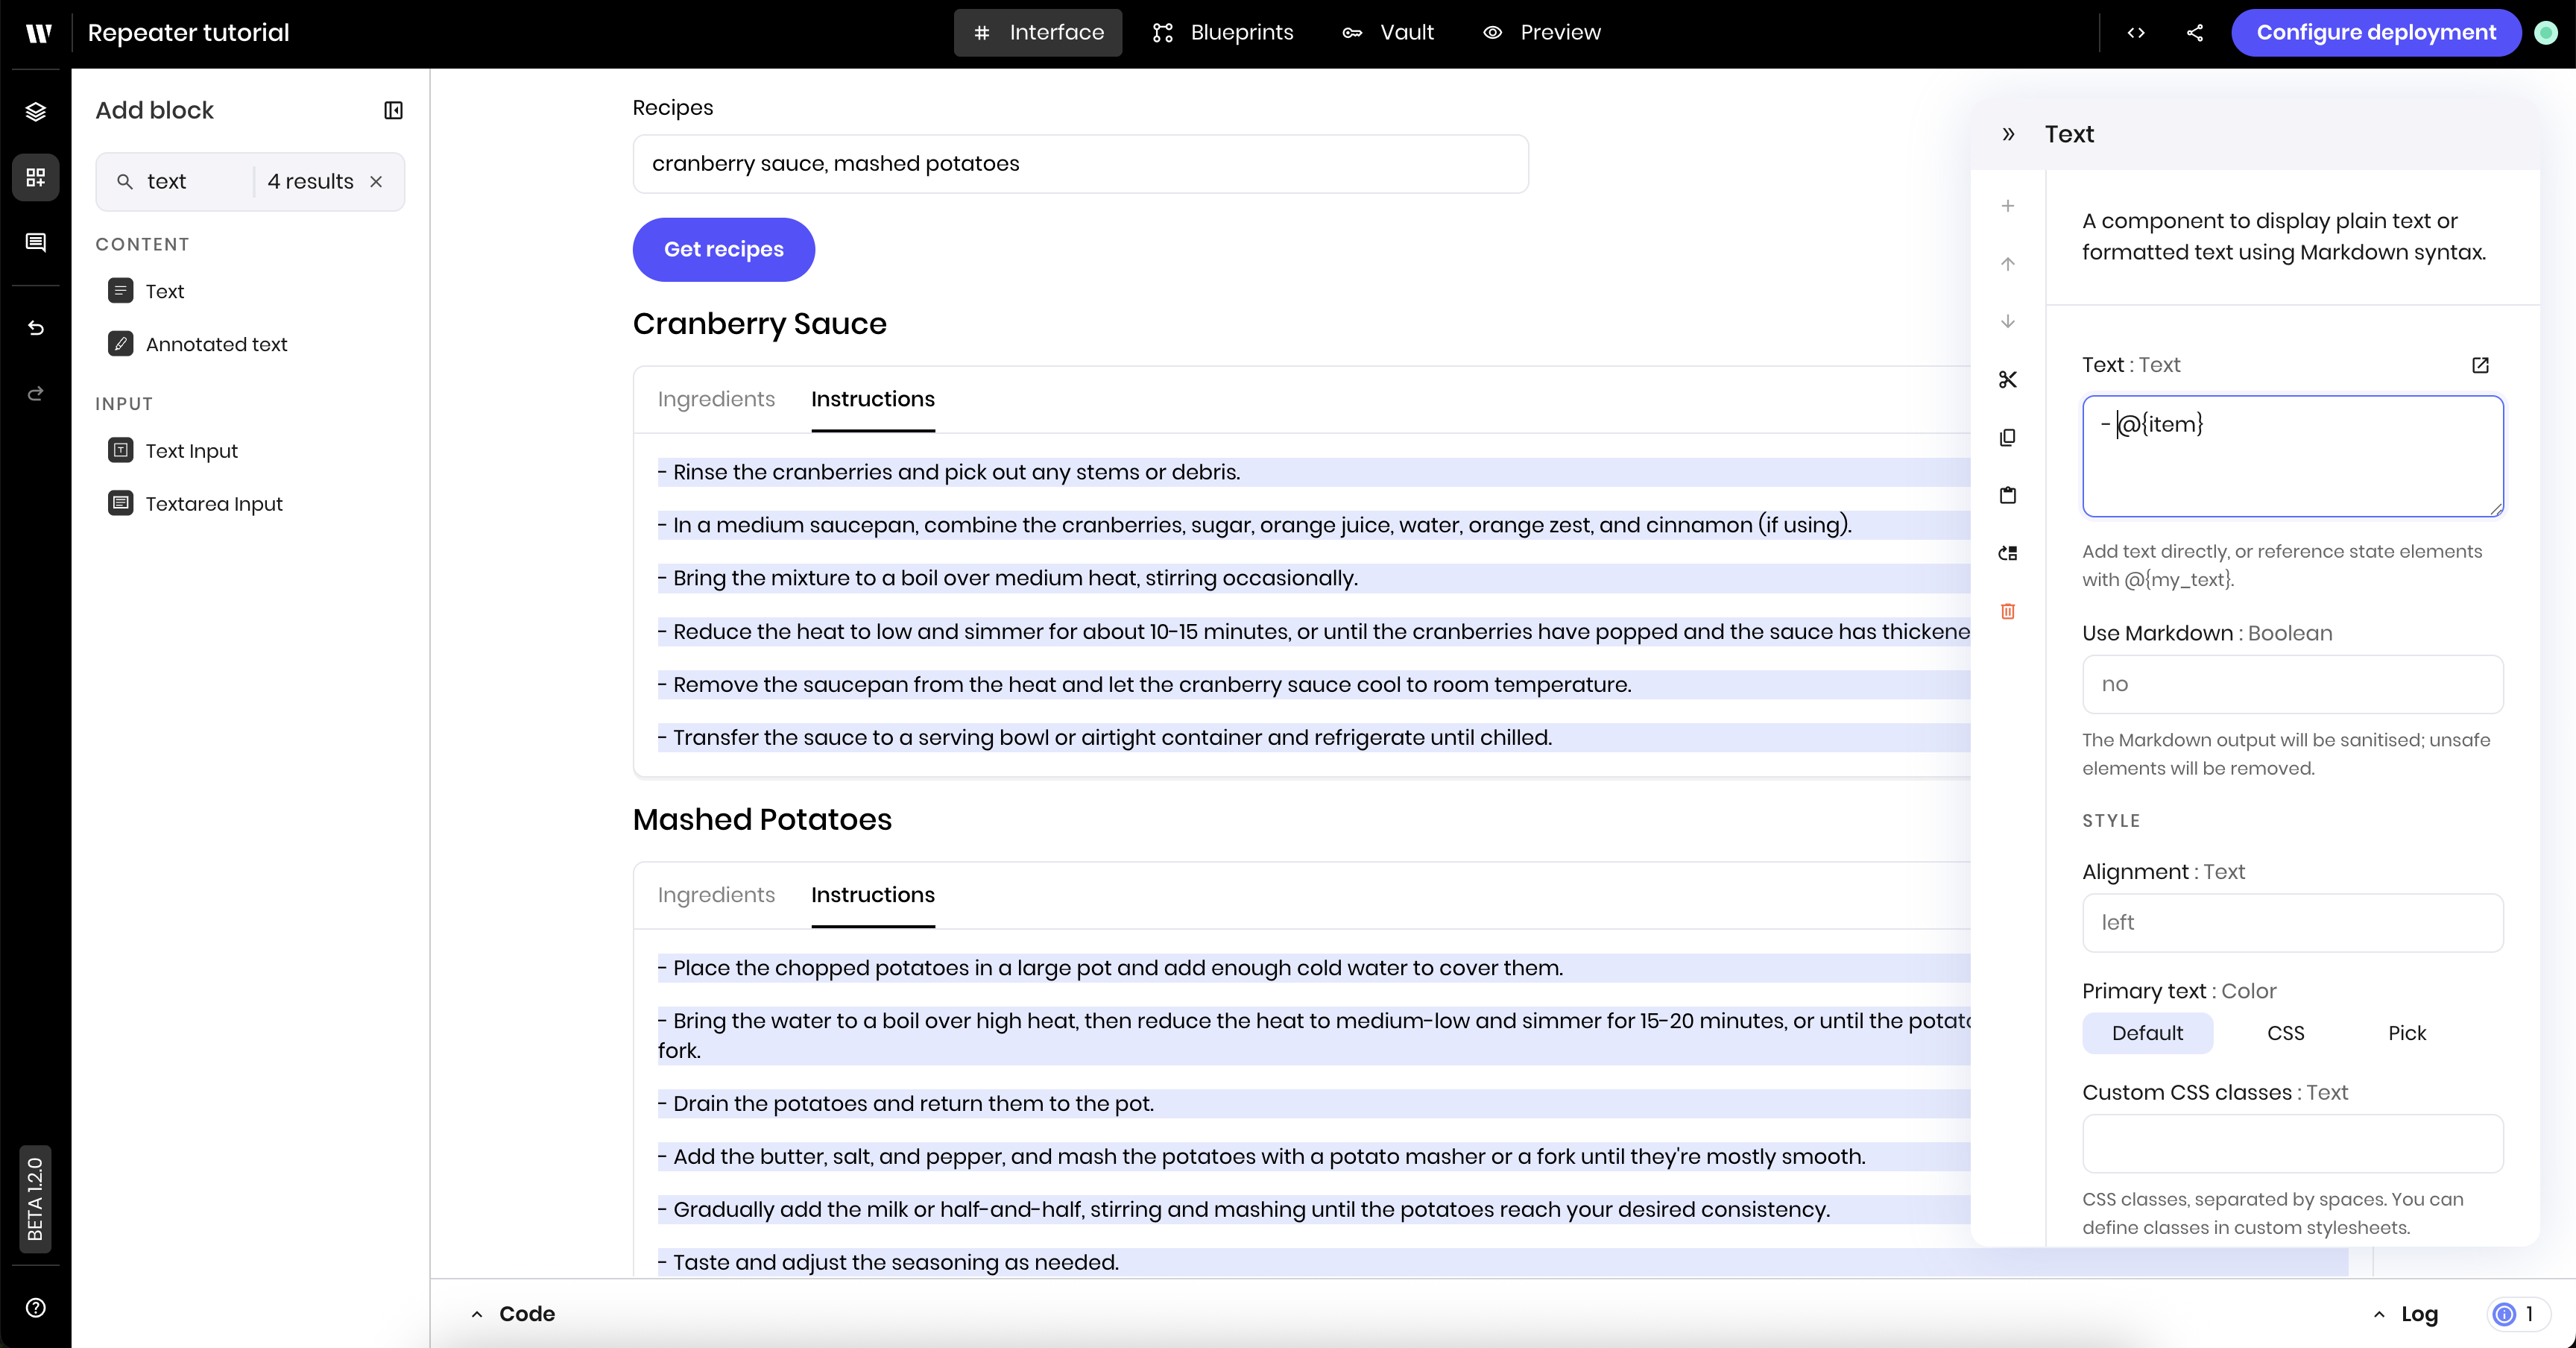
Update the Repeater's visibility
From the Interface Layers sidebar, click the first Repeater component, which contains the headings and tab components. Under Visibility in the main Repeater’s configuration menu, select Custom. Set the condition to 
recipes. This ensures the Repeater is only visible when the user has selected at least one recipe.Understanding nested Repeaters
In this tutorial, you used three different Repeaters:- Main Repeater: iterates over the recipes array (
@{recipes}) - Ingredients Repeater: iterates over each recipe’s ingredients array (
@{item.ingredients}). This Repeater is nested inside the main Repeater. - Steps Repeater: iterates over each recipe’s steps array (
@{item.steps})
@{item} context, so the inner Repeaters access individual ingredients and steps as @{item}, while the outer Repeater’s @{item} refers to the entire recipe object.
Next steps
Try extending this tutorial by:- Adding cooking time and difficulty level to the recipe schema
- Styling the recipe cards with colors and spacing
- Adding images or icons to make the recipes more visual
- Creating filters to show only certain types of recipes