Prerequisites
Before starting, ensure you have:- A Writer account: You don’t need an account to use Writer Framework, but you’ll need one to use the AI module. Sign up for a free account here.
- Python 3.9.2 or later: Use the installer from python.org.
- pip: This command-line application comes with Python and is used for installing Python packages, including those from Writer.
- A basic understanding of Python: You should be familiar with the basics of the language.
- Your favorite code editor (optional): There’s a code editor built into Writer for editing back-end code, but you can also use Visual Studio Code, Notepad++, Vim, Emacs, or any text editor made for programming if you prefer.
Setting up your project
Create a Writer app and get its API key
First, you’ll need to create a new app within Writer.Create the app in Writer
Log into Writer. From the Home screen, click on the Build an app button.
Copy your app's API key
On the next screen, titled How to deploy an application, you can get the API key for the app by clicking on the Reveal key button, located under the text Authenticate with an API key. Your complete API key will be displayed, and a “copy” button will appear. Click this button to copy the key; you’ll use it in the next step.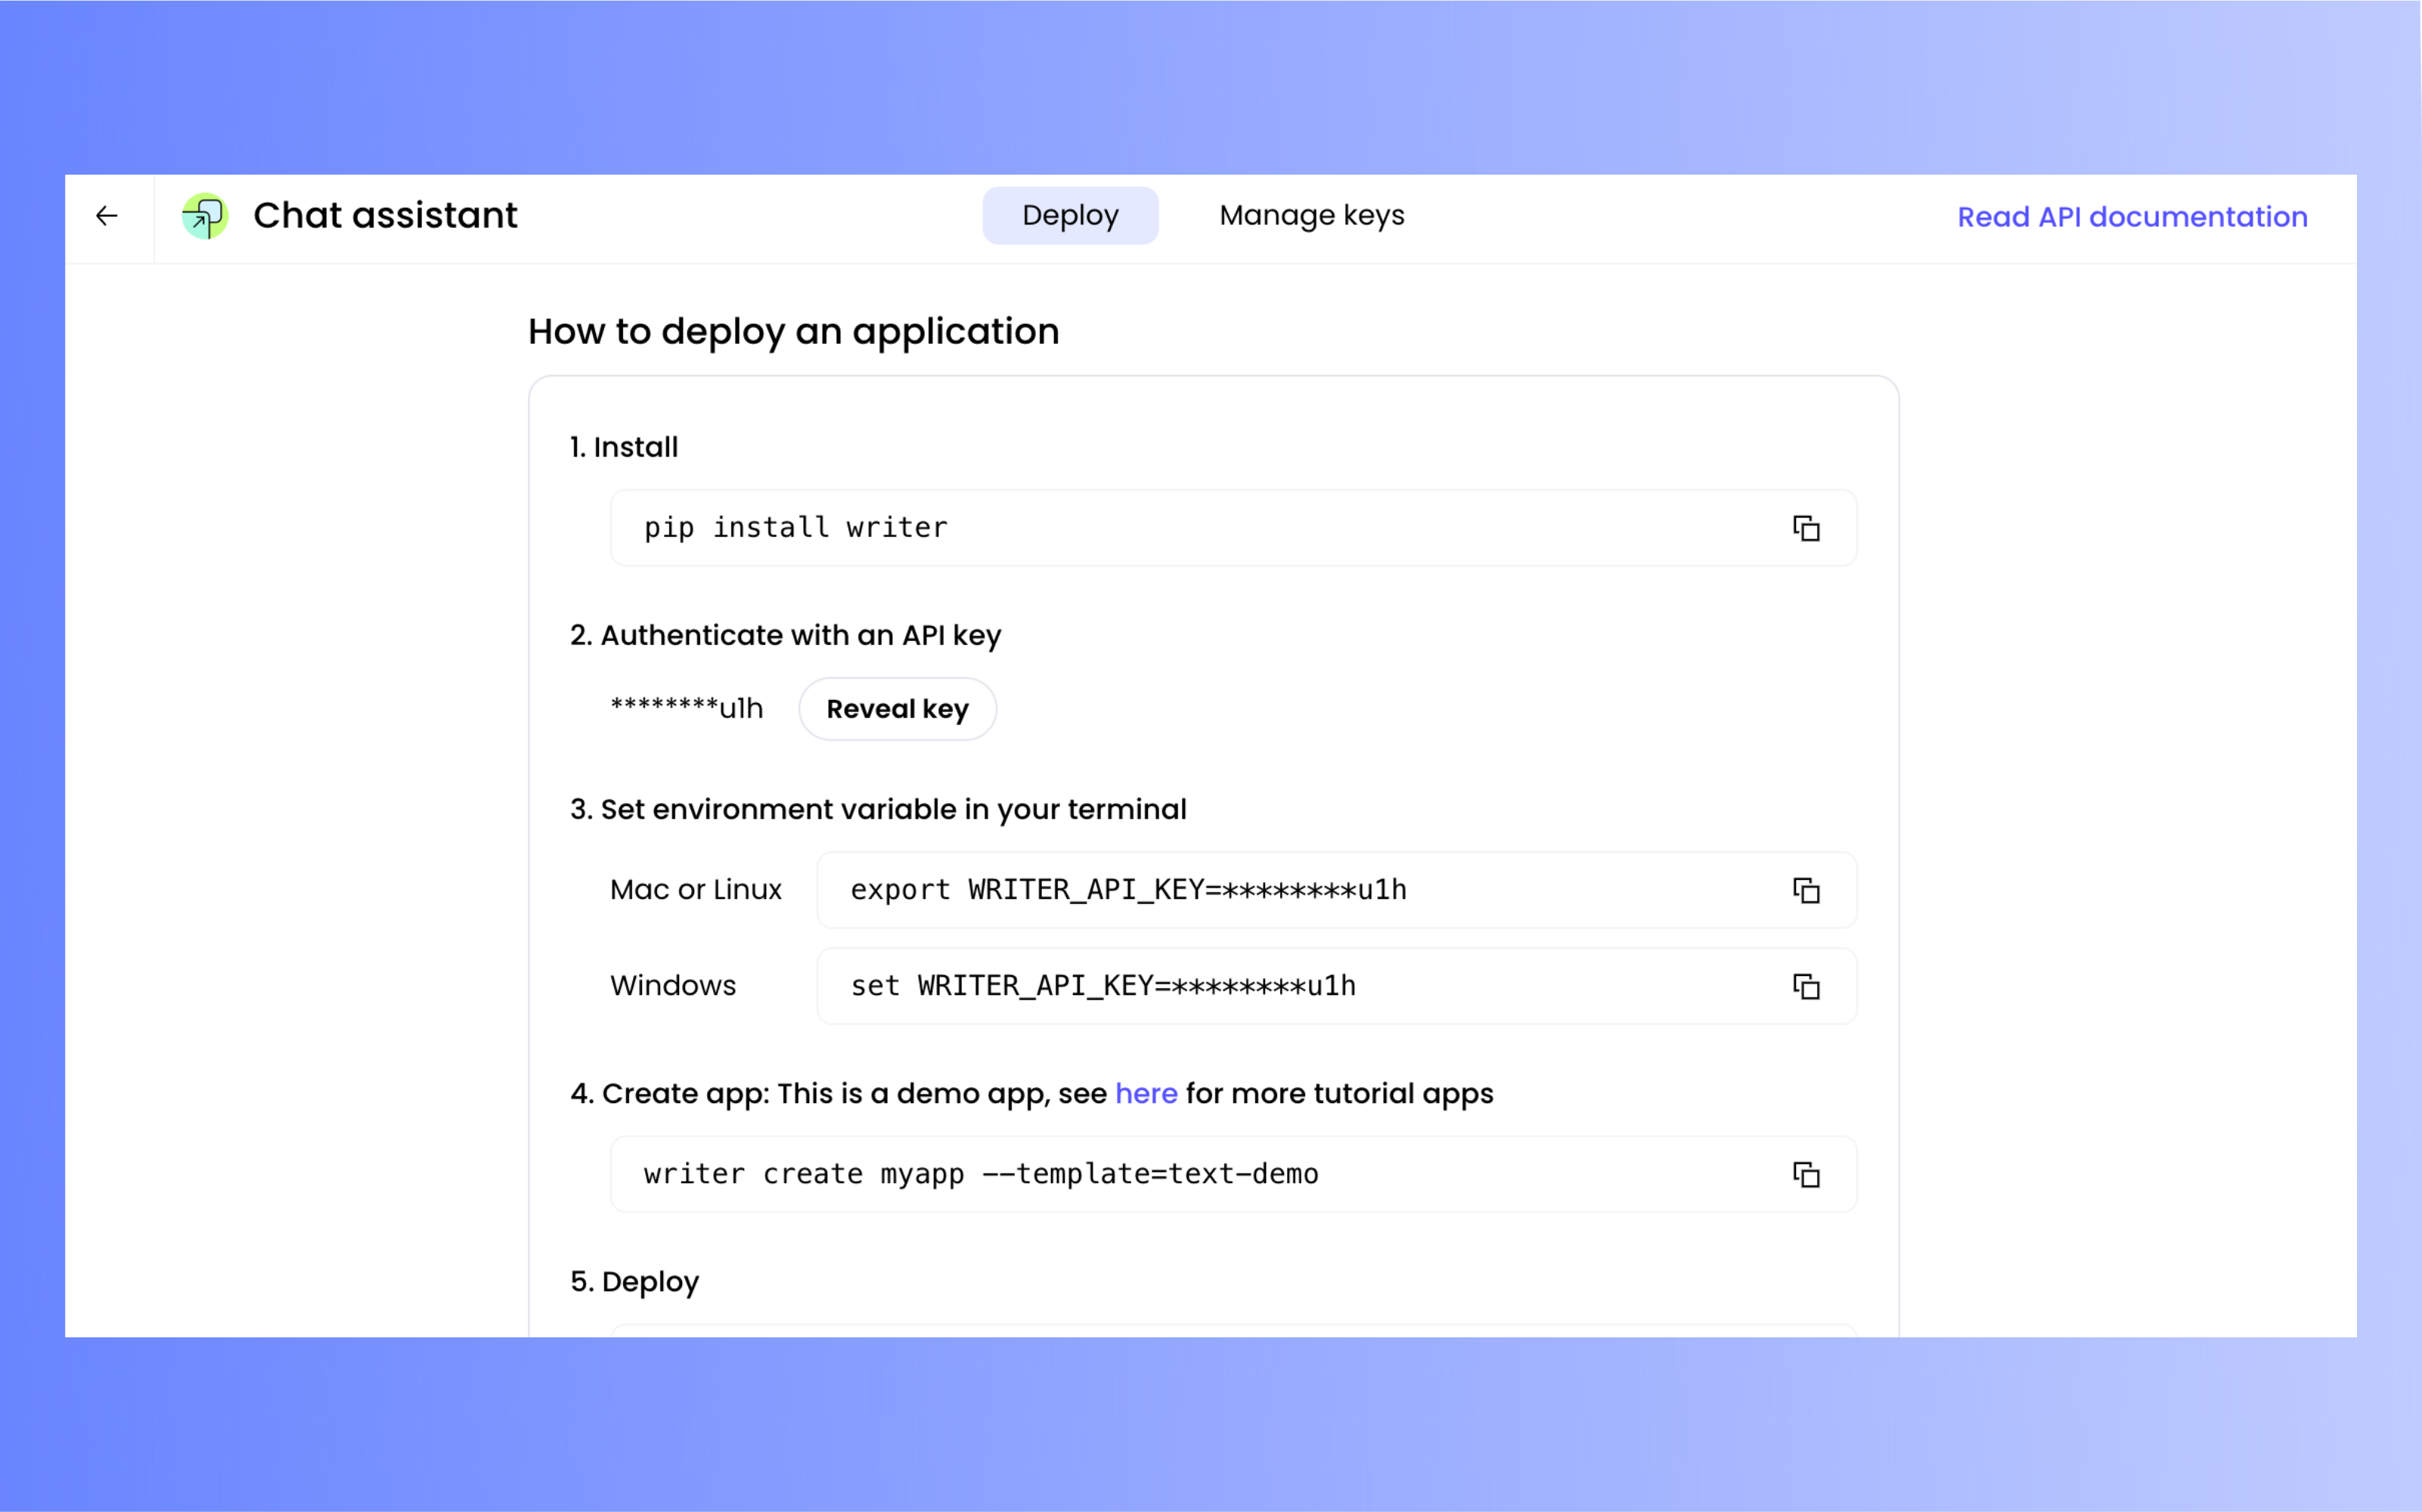
Set up your computer and create the app’s project
The next step is to set up the Writer Framework environment on your computer. You’ll do this by creating a directory for the project, installing dependencies, and creating the project for the application using a template.Open your terminal application
Open your terminal application. On macOS and Linux, this application goes by the name Terminal; on Windows, you can use either Windows PowerShell (which is preferred) or Command Prompt.
Install the dependencies
If you already have the
writer and python-dotenv packages installed on your computer, you can skip this step.writer and python-dotenv packages by entering the following commands in your terminal application:pip, the Python package installer, to install two packages:writer, which provides some command-line commands and enables Python code to interact with Writer and the Writer Framework.python-dotenv, which makes it easy to manage environment variables by loading them from a.envfile. This one is optional for this exercise, but you might find it useful when working on larger projects.
Set the API key environment variable
To pass your API key to the Writer Framework, you need to set an environment variable called The
WRITER_API_KEY.Select your operating system and terminal application below, then copy and paste the command into your terminal application, replacing [your_api_key] with the API key you copied earlier:WRITER_API_KEY environment variable will remain defined as long your terminal session is open (that is, until you close your terminal application’s window).Build the UI
Now that you’ve created the project, it’s time to define the UI. The Writer Framework’s drag-and-drop capabilities make it easy — even if you haven’t done much UI work before! The project editor is a web application that runs on your computer and enables you to define and edit your app’s user interface. Launch it by typing the following into your terminal application: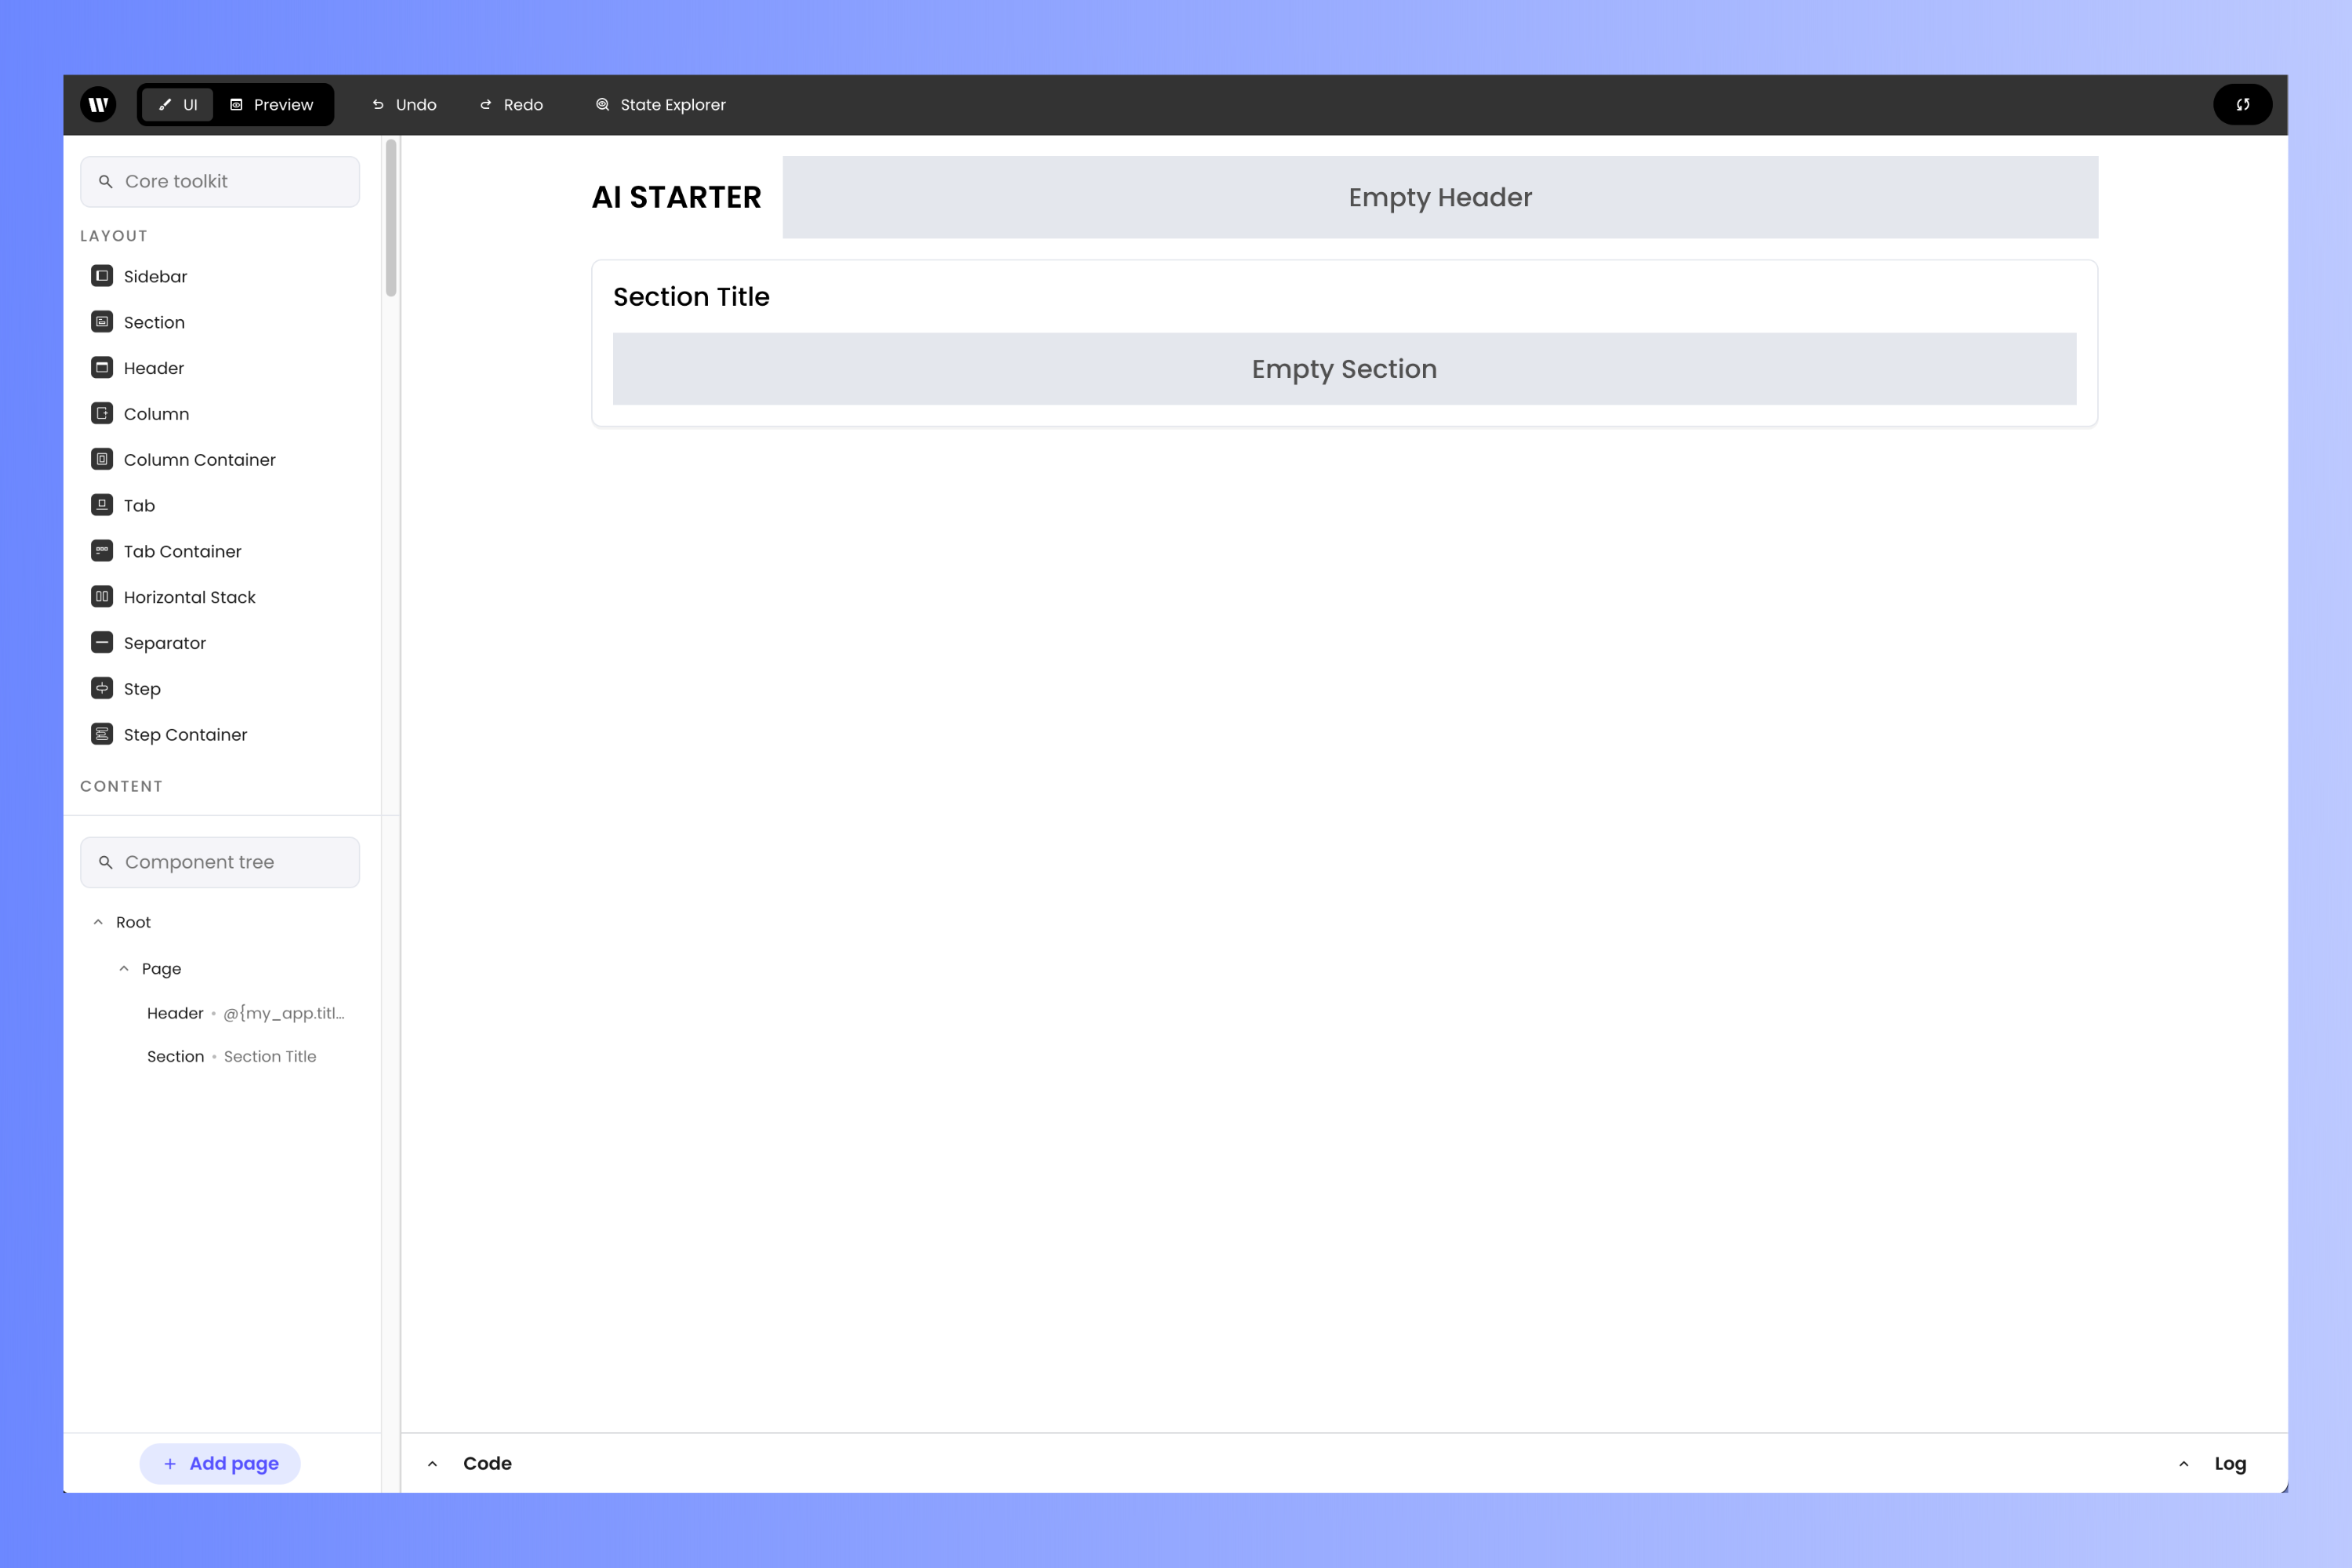
- The canvas is in the center. It displays the app’s user interface.
- The column on the left contains:
- The Core toolkit, which contains all the UI components. You define the user interface by dragging components from the Toolkit and placing them on the canvas.
- The Component tree, which shows the arrangement of the UI components on the canvas. It’s also useful for selecting items on the canvas, especially when it has a lot of UI components.
Examine the header
Select the Header component by clicking it — it’s the component at the top, containing the title AI STARTER and a gray area labeled Empty Header.When you click it, you’ll see the properties panel appear on the right side of the page. This lets you view and edit the properties of the selected component.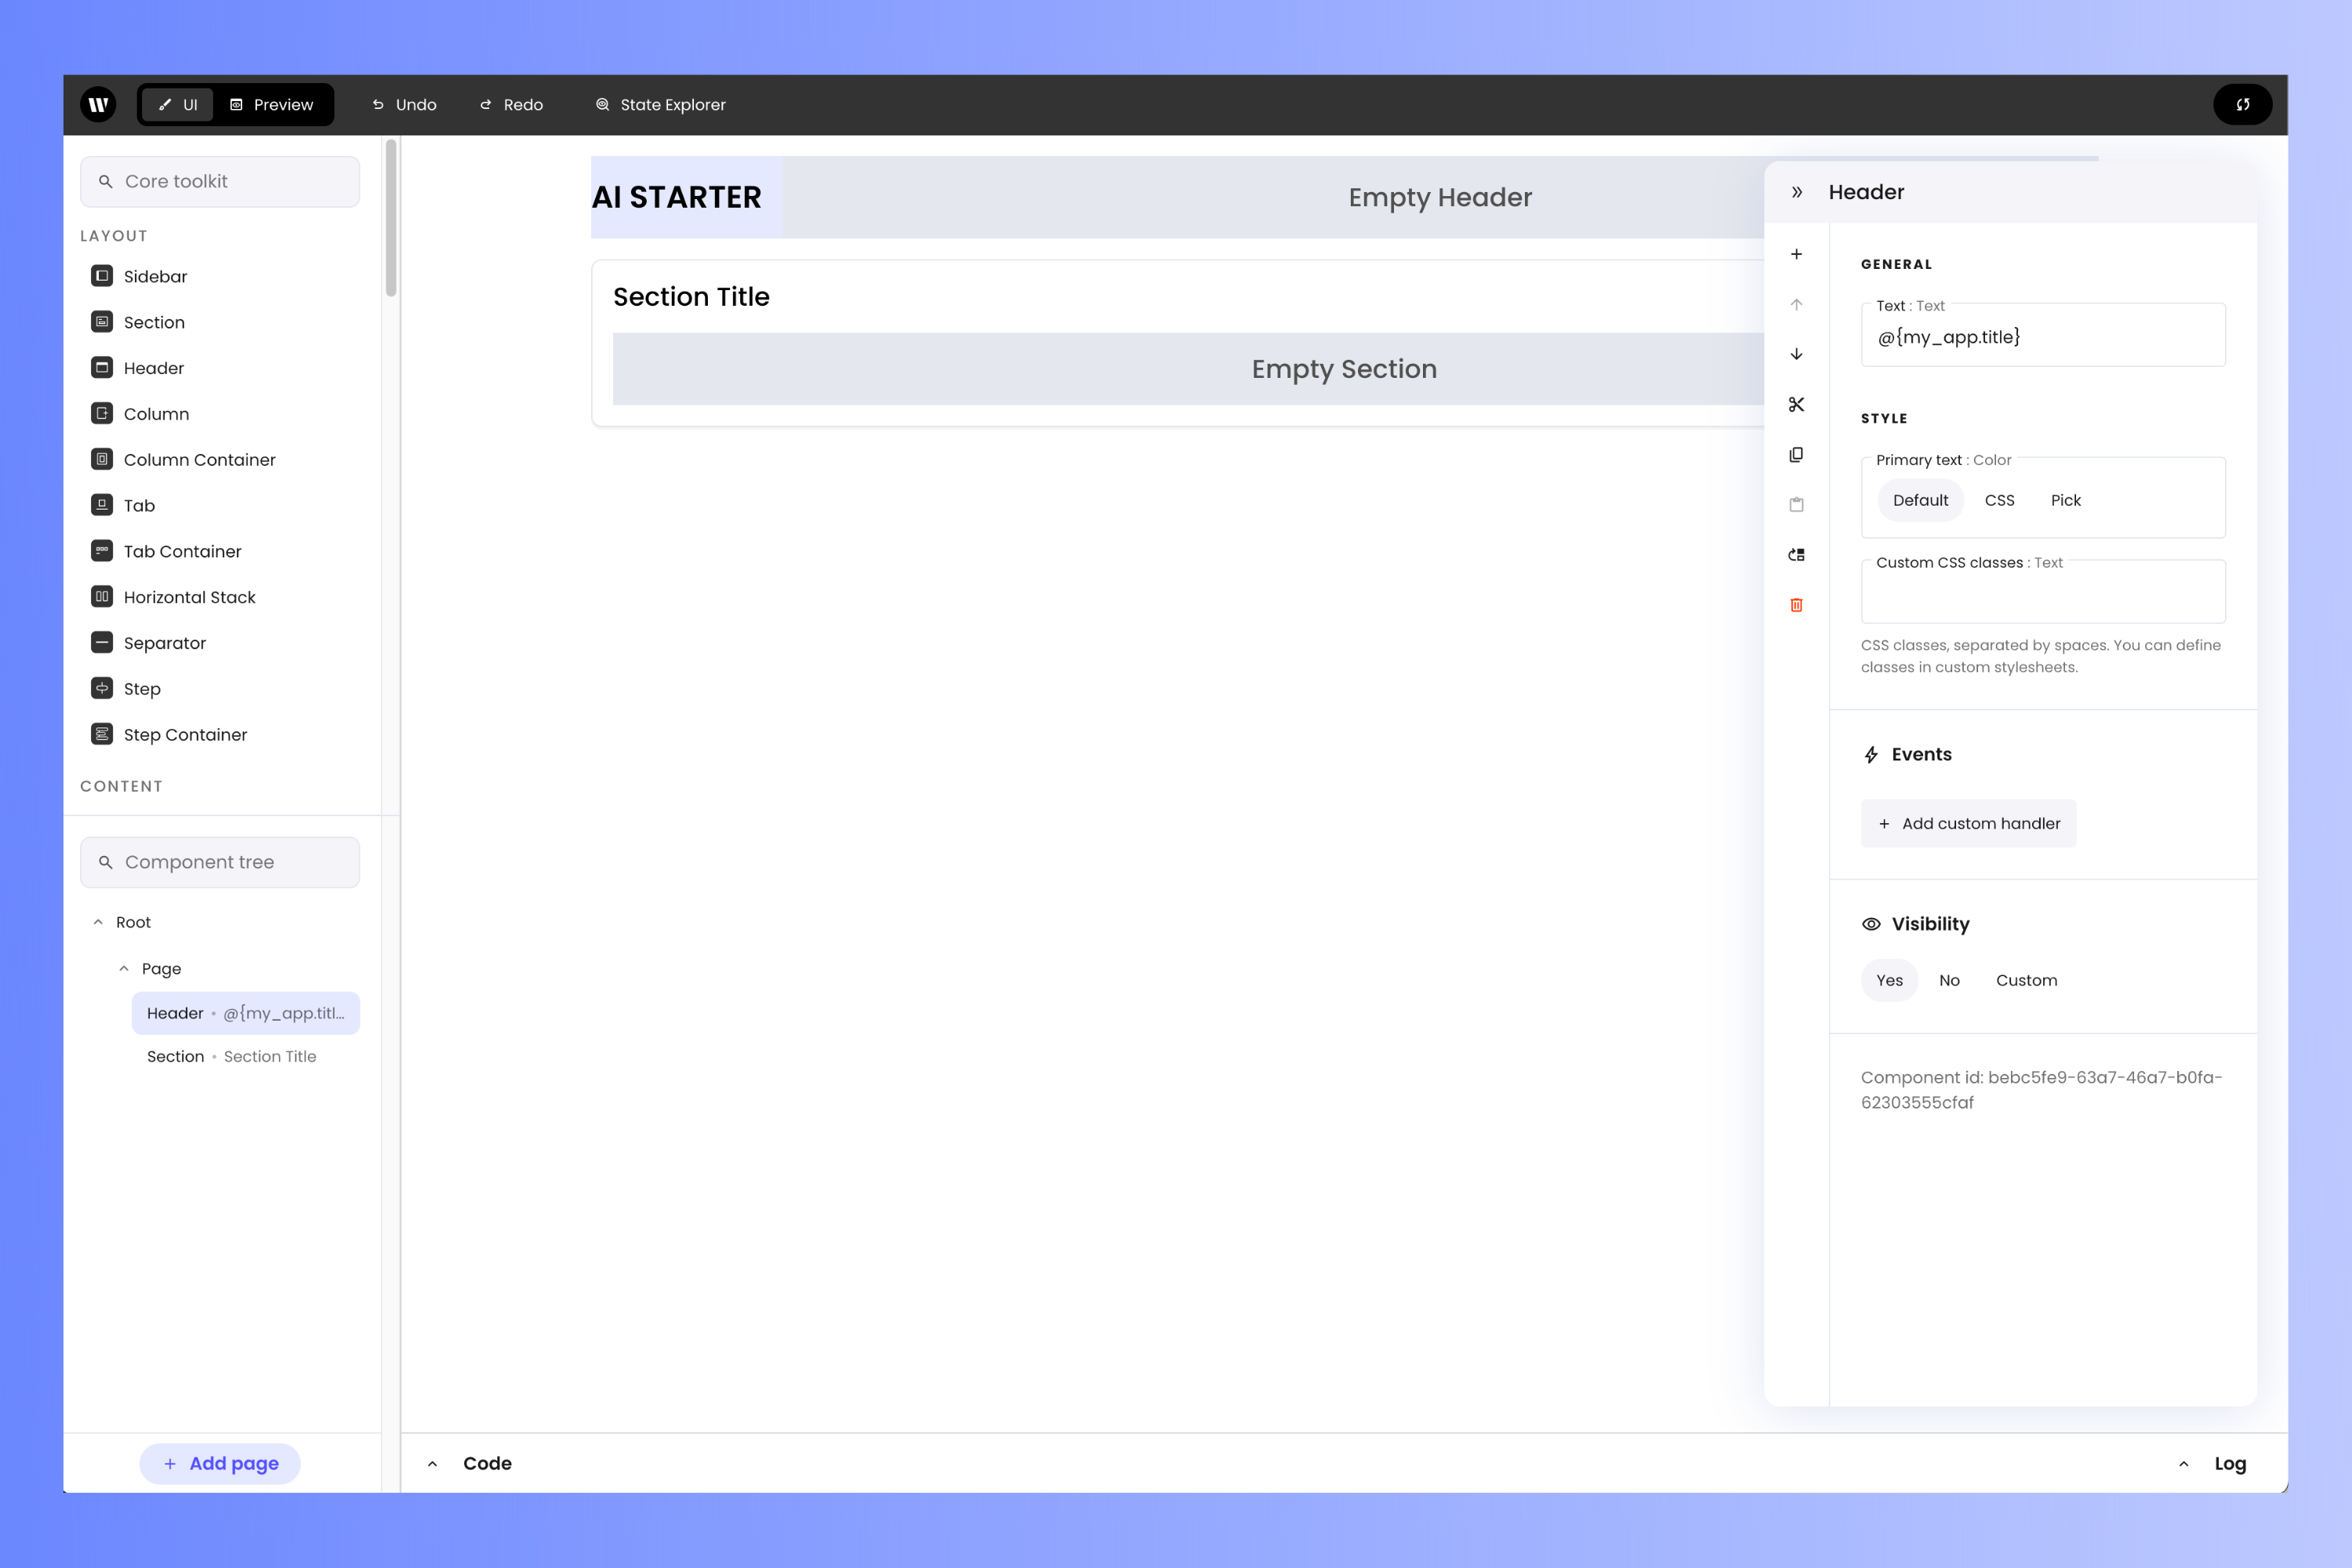
@{my_app.title}. The @{ and } indicate that my_app.title is a variable and that its contents should be the text displayed instead of the literal text “my_app.title”. You’ll set the value of this variable soon.Clear the Section's default title
Select the Section component by clicking it — it’s just below the Header component and contains the title Section Title and a gray area labeled Empty Section.In the properties panel, clear out the value of the Title property. This will remove the Section’s default title.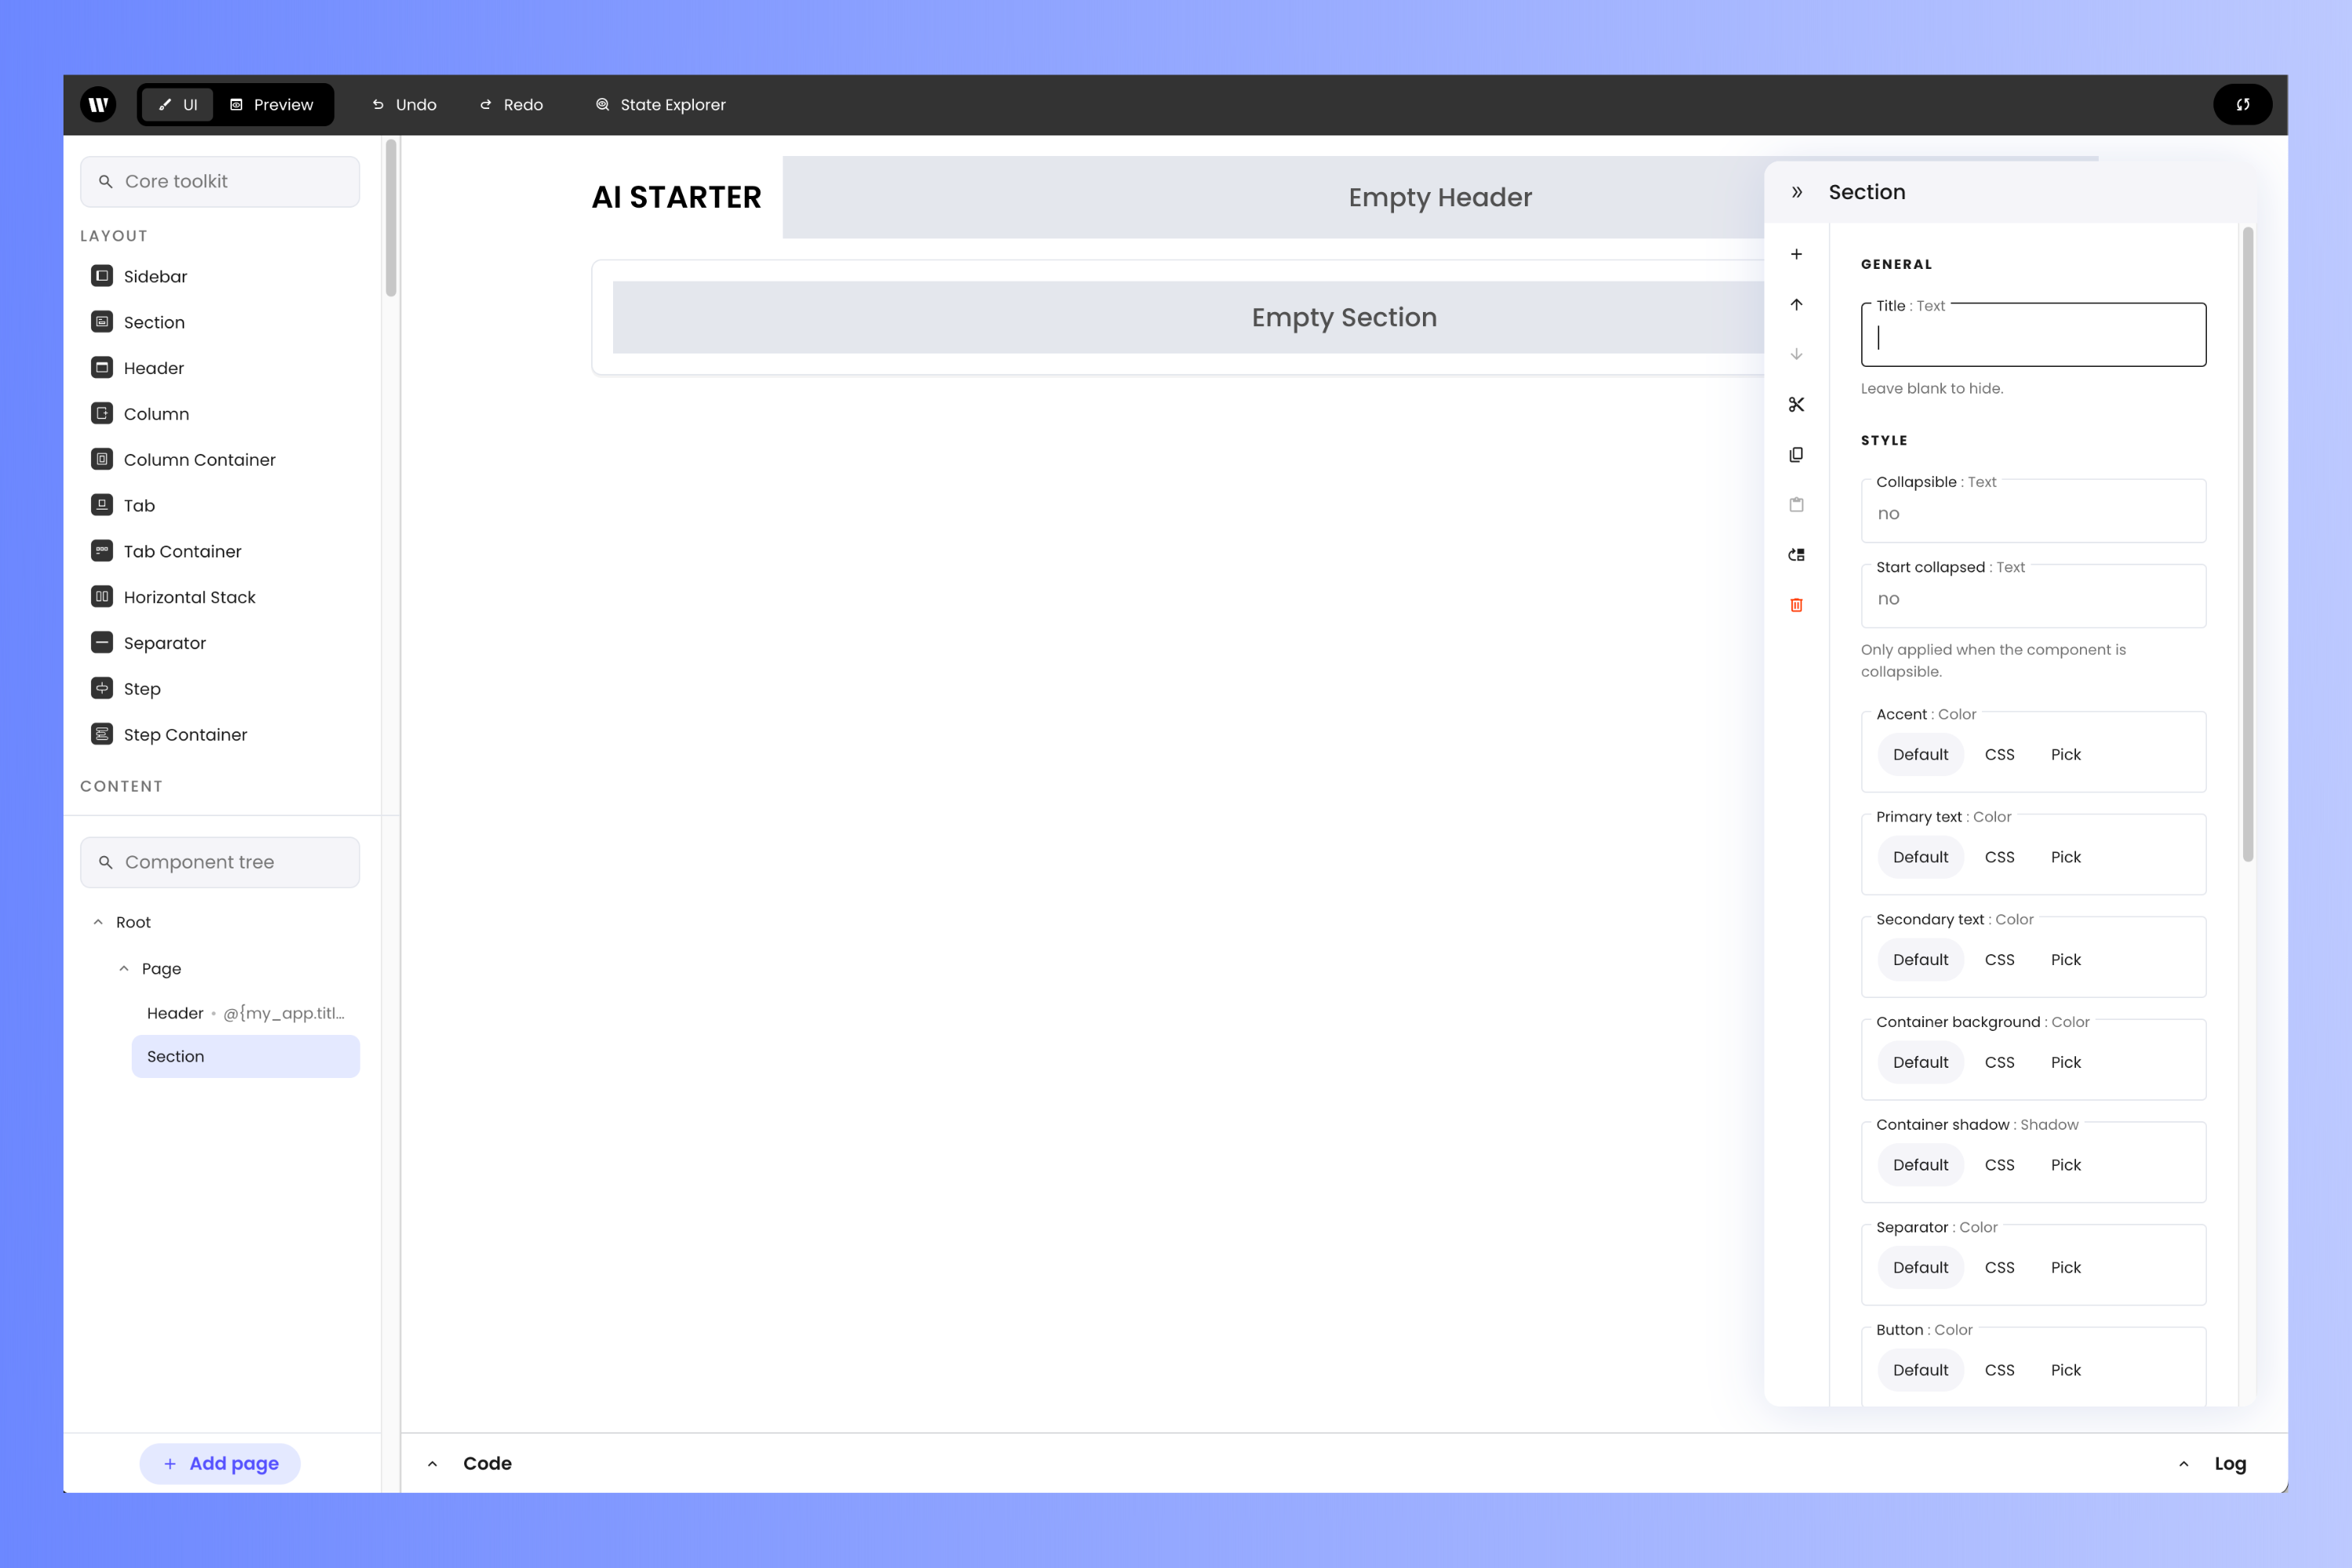
Add a Text component to the Section
Drag a Text component from the Core toolkit panel on the left (it’s under Content, and you may need to scroll down a little to find it) and into the Section. Sections can act as containers for other components.Select the Text component. In the properties panel, set the Text property to provide instructions or context for your chat assistant. Here’s an example: 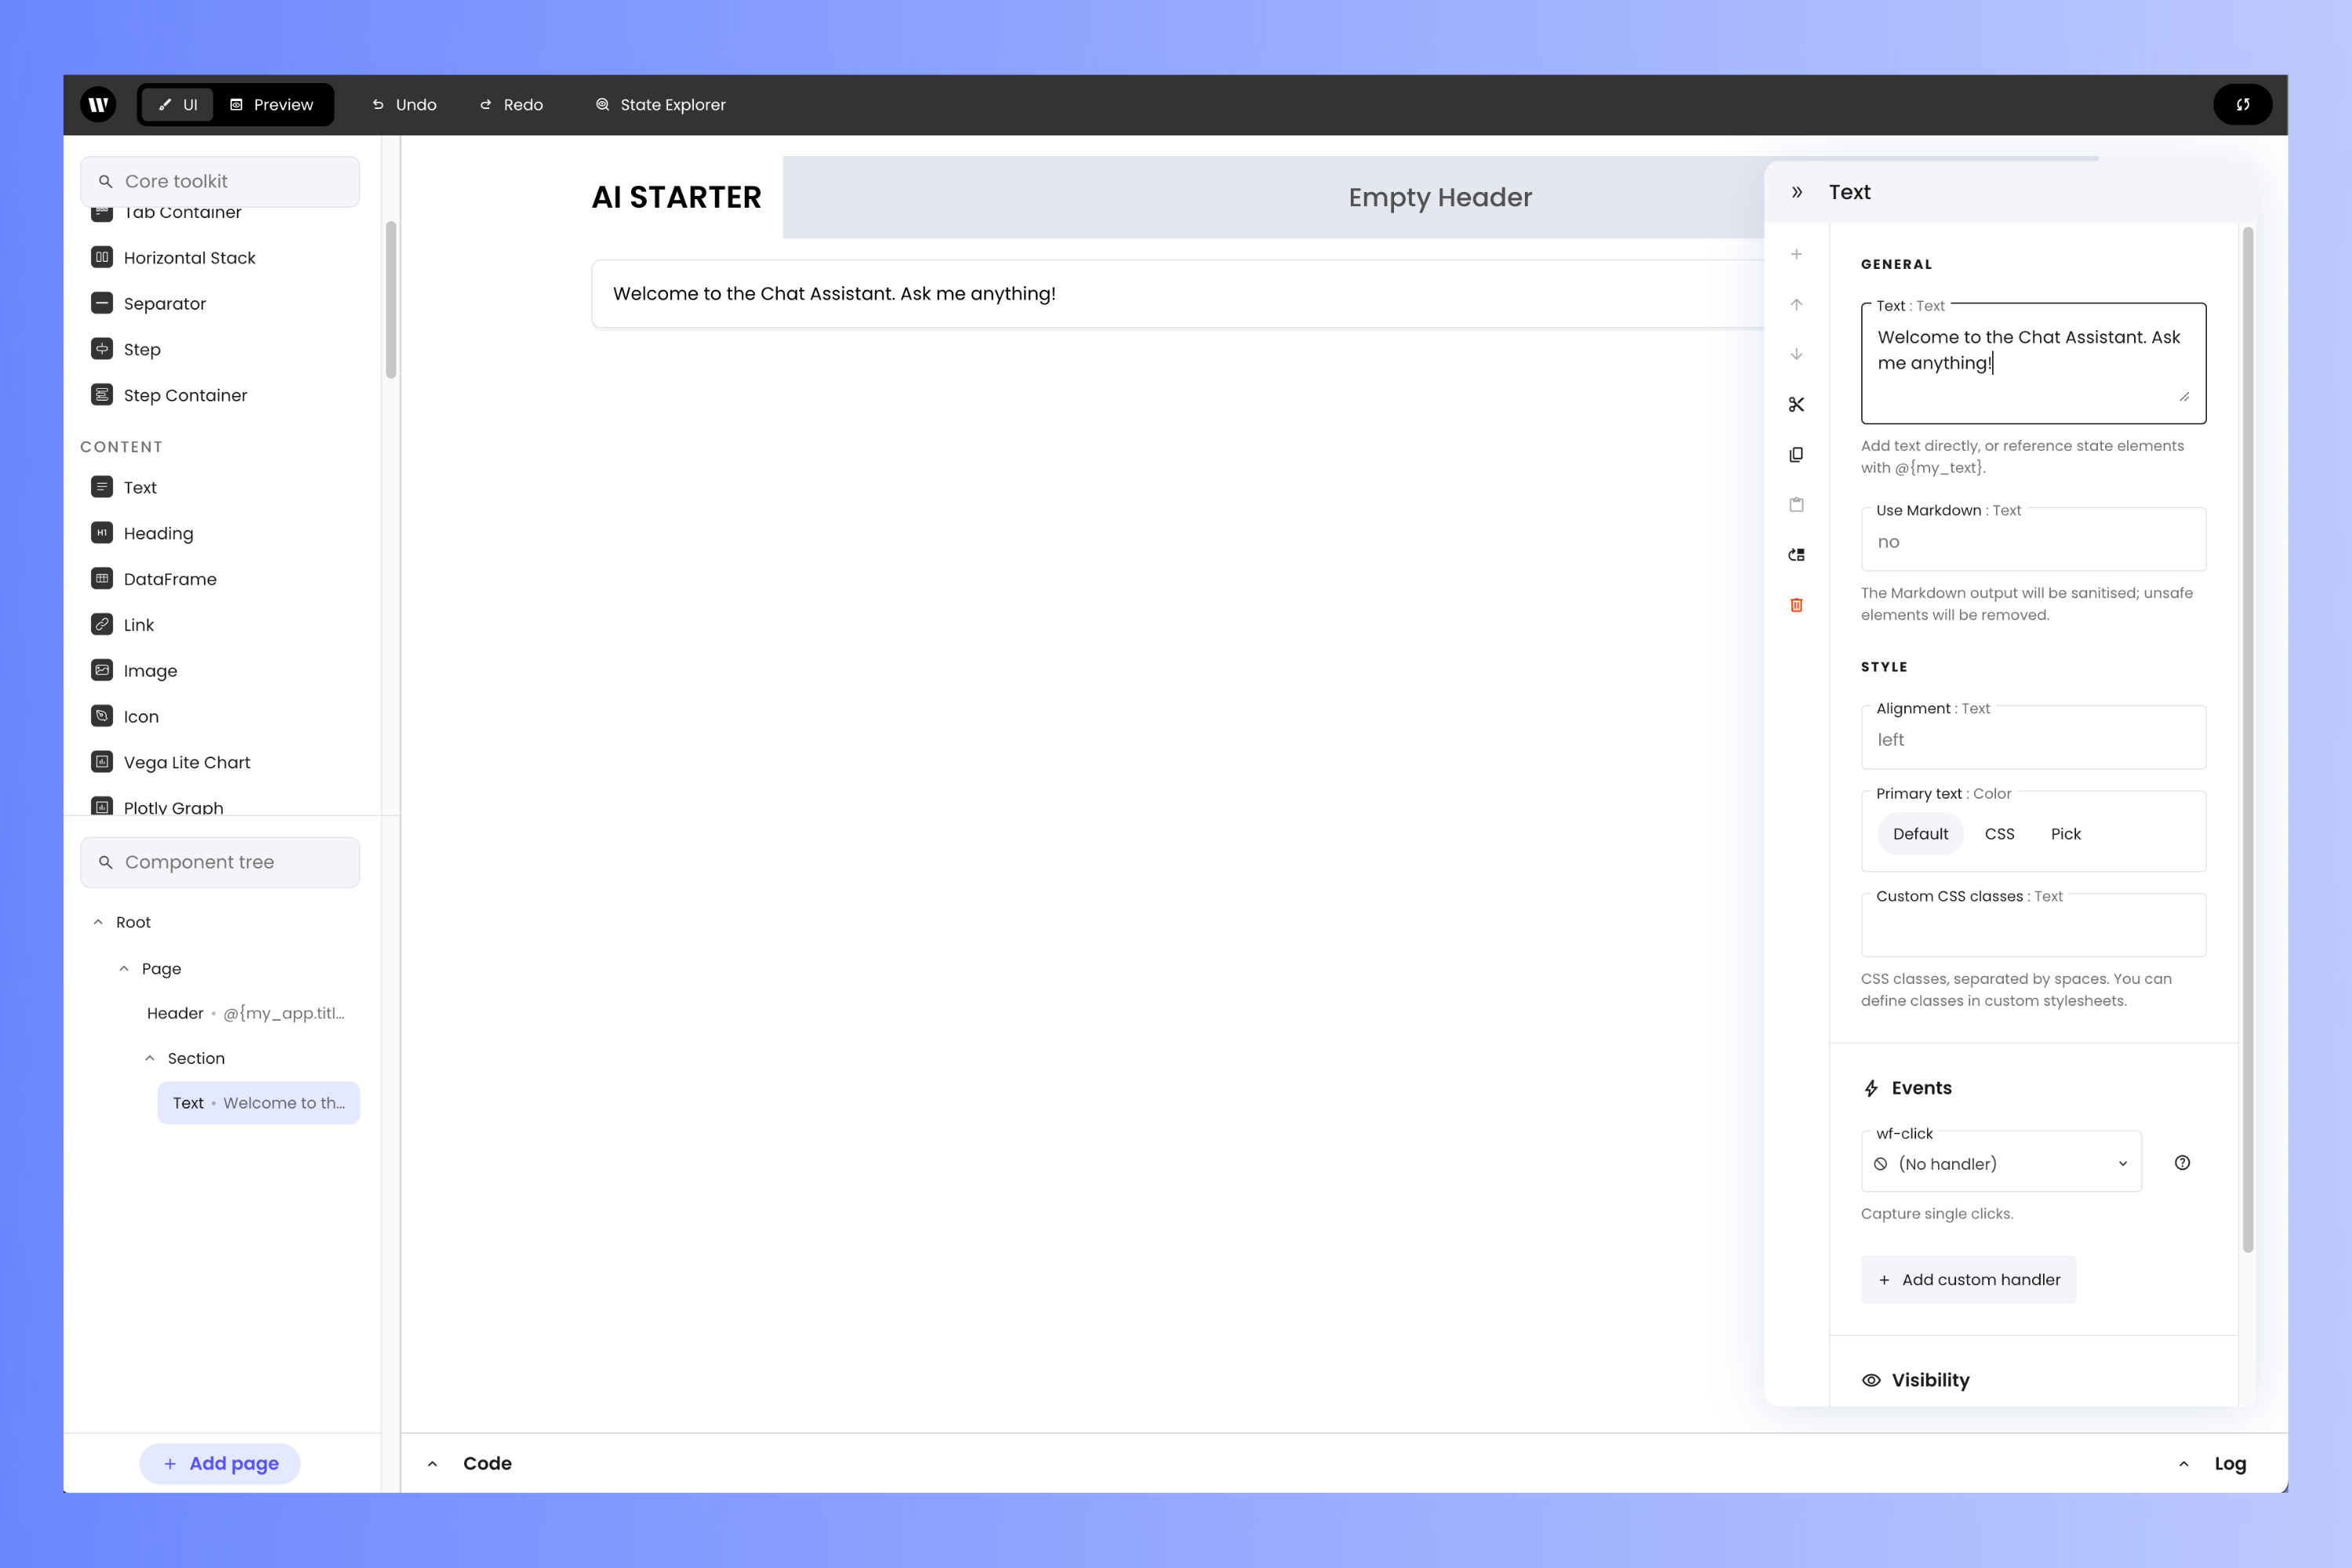
You can search for a specific component by using the search bar at the top of the Core toolkit panel.
Welcome to the Chat Assistant. Ask me anything!Add a Chatbot component to the Section
The heart of this app is the Chatbot component, a pre-built component that displays the conversation between the LLM and the user and provides a text field where the user can enter prompts.Drag a Chatbot component from the Core toolkit panel (it’s under Content) into the Section, just below the Text box.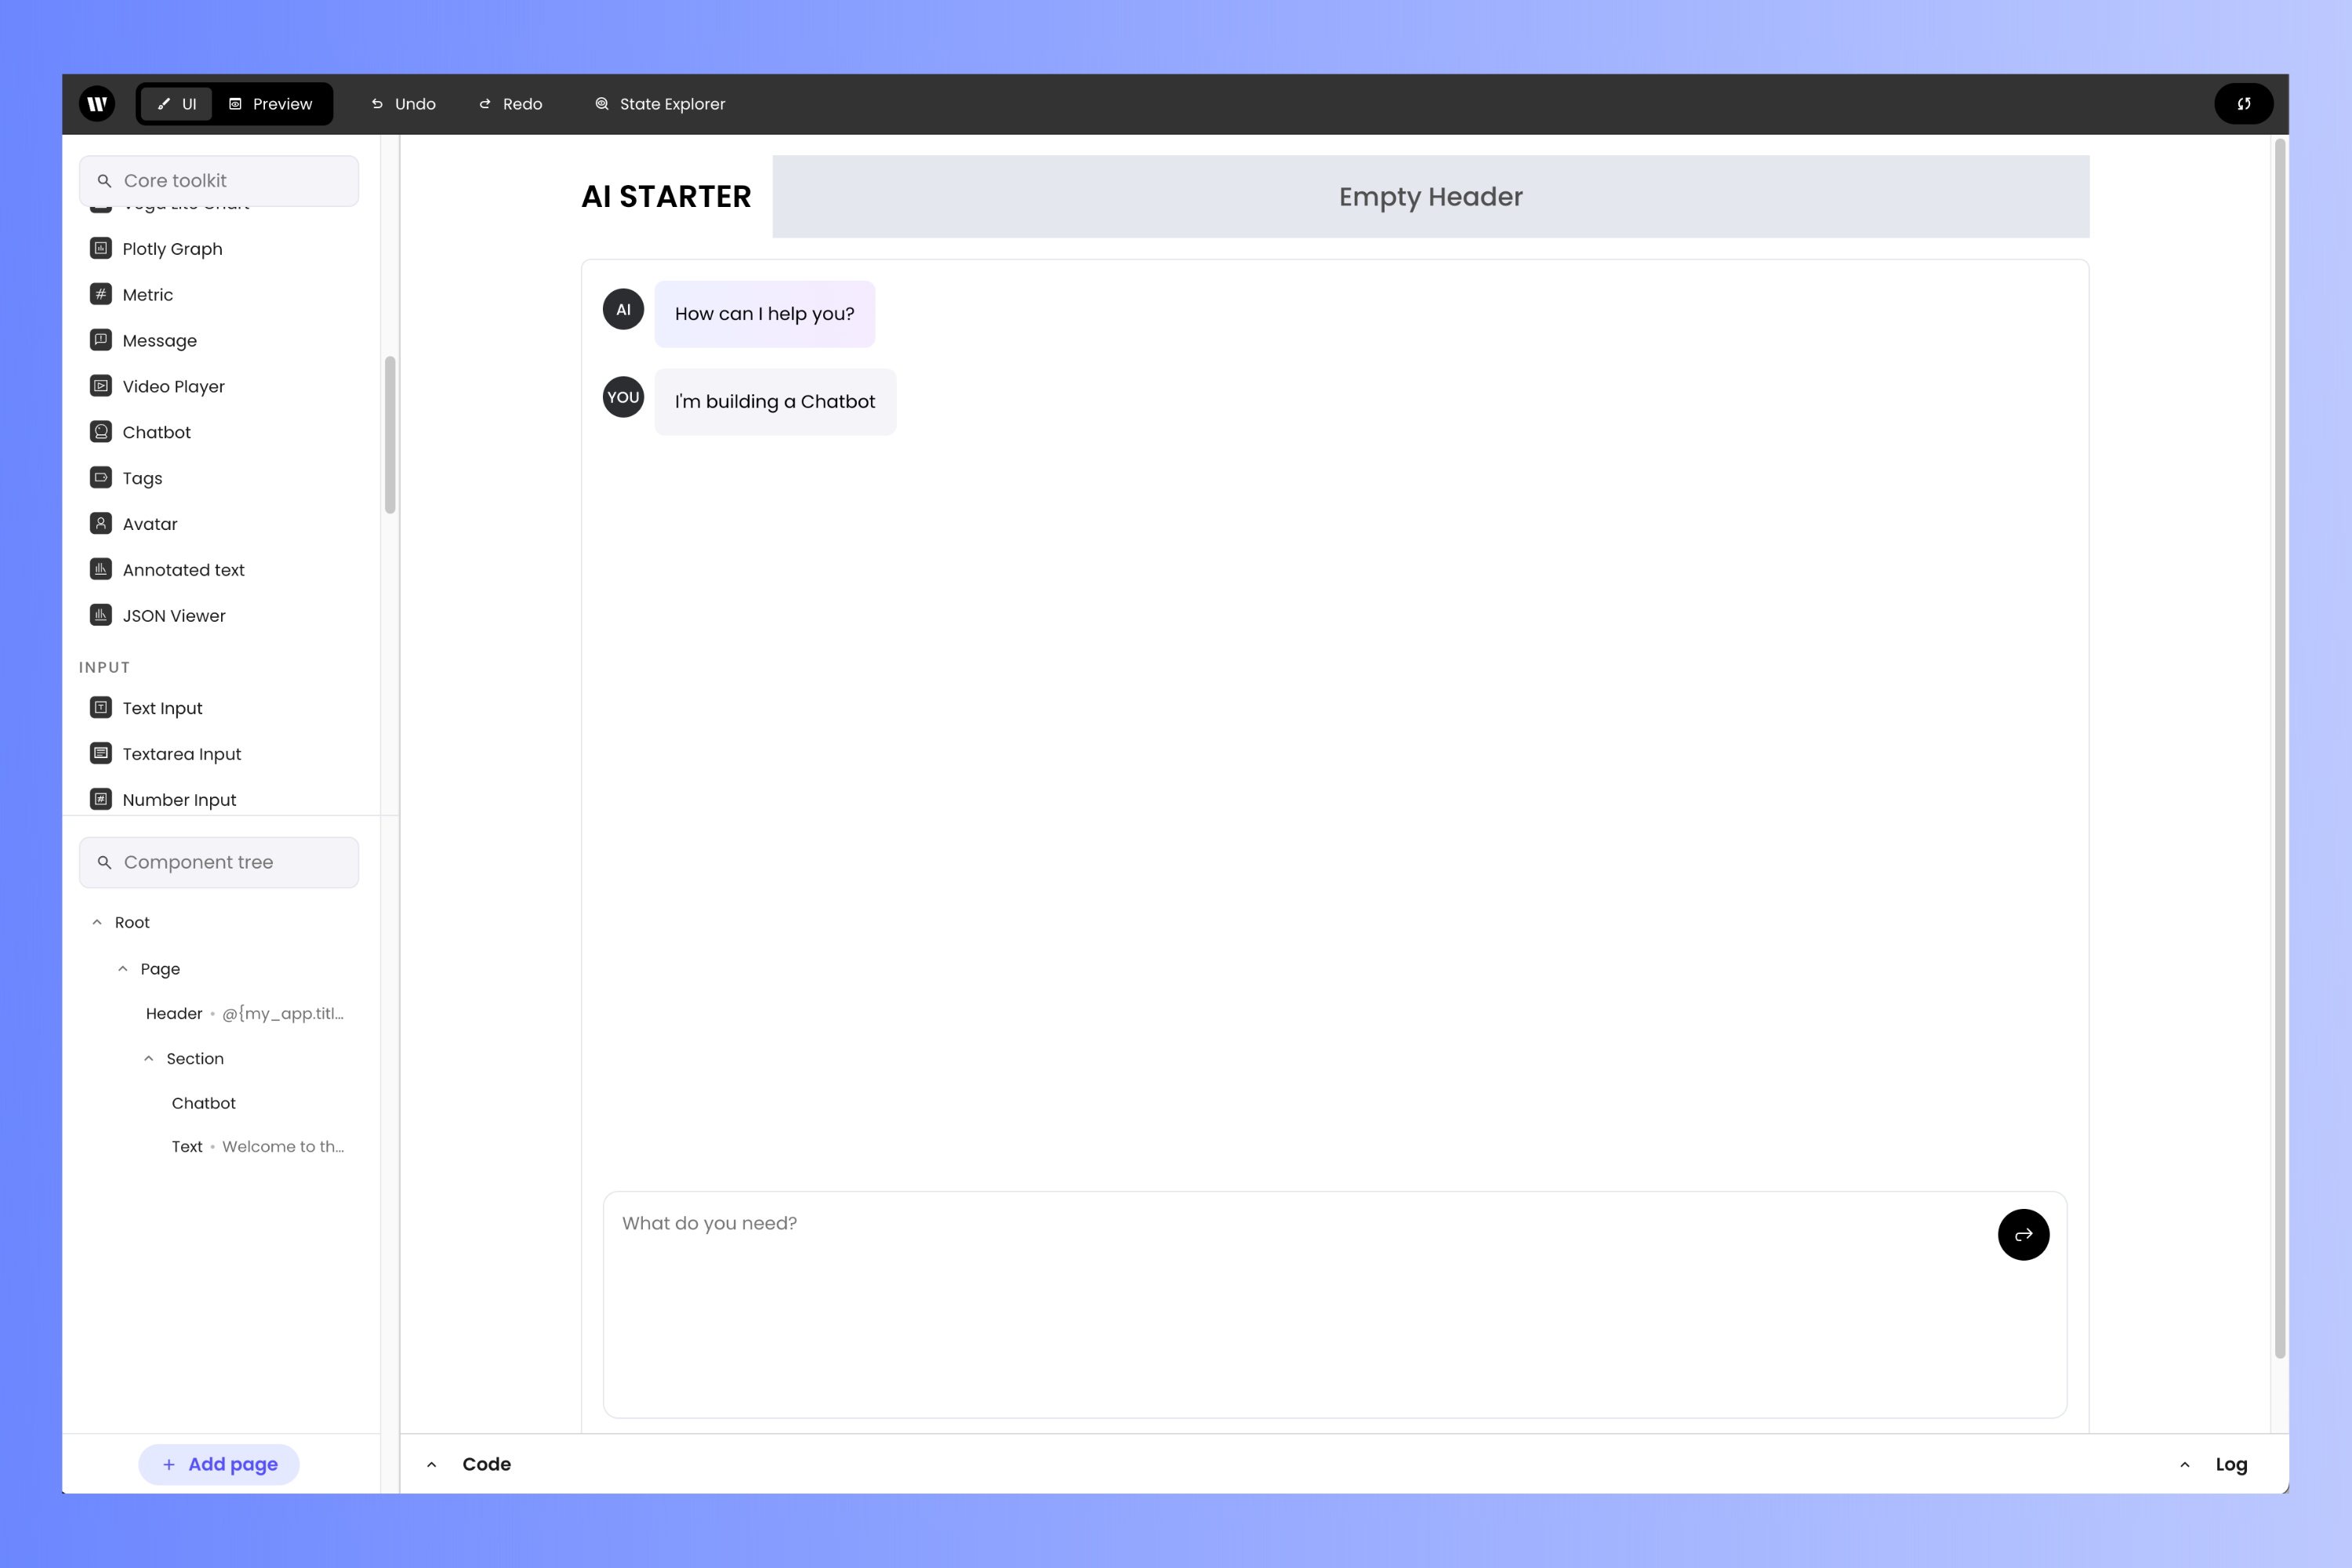
Add the back-end code
With the UI laid out, it’s time to work on the logic behind it. The logic behind the user interface is defined in a file namedmain.py, which is in your project’s directory. This file was automatically generated; you’ll update the code in it to define the behavior of your app.
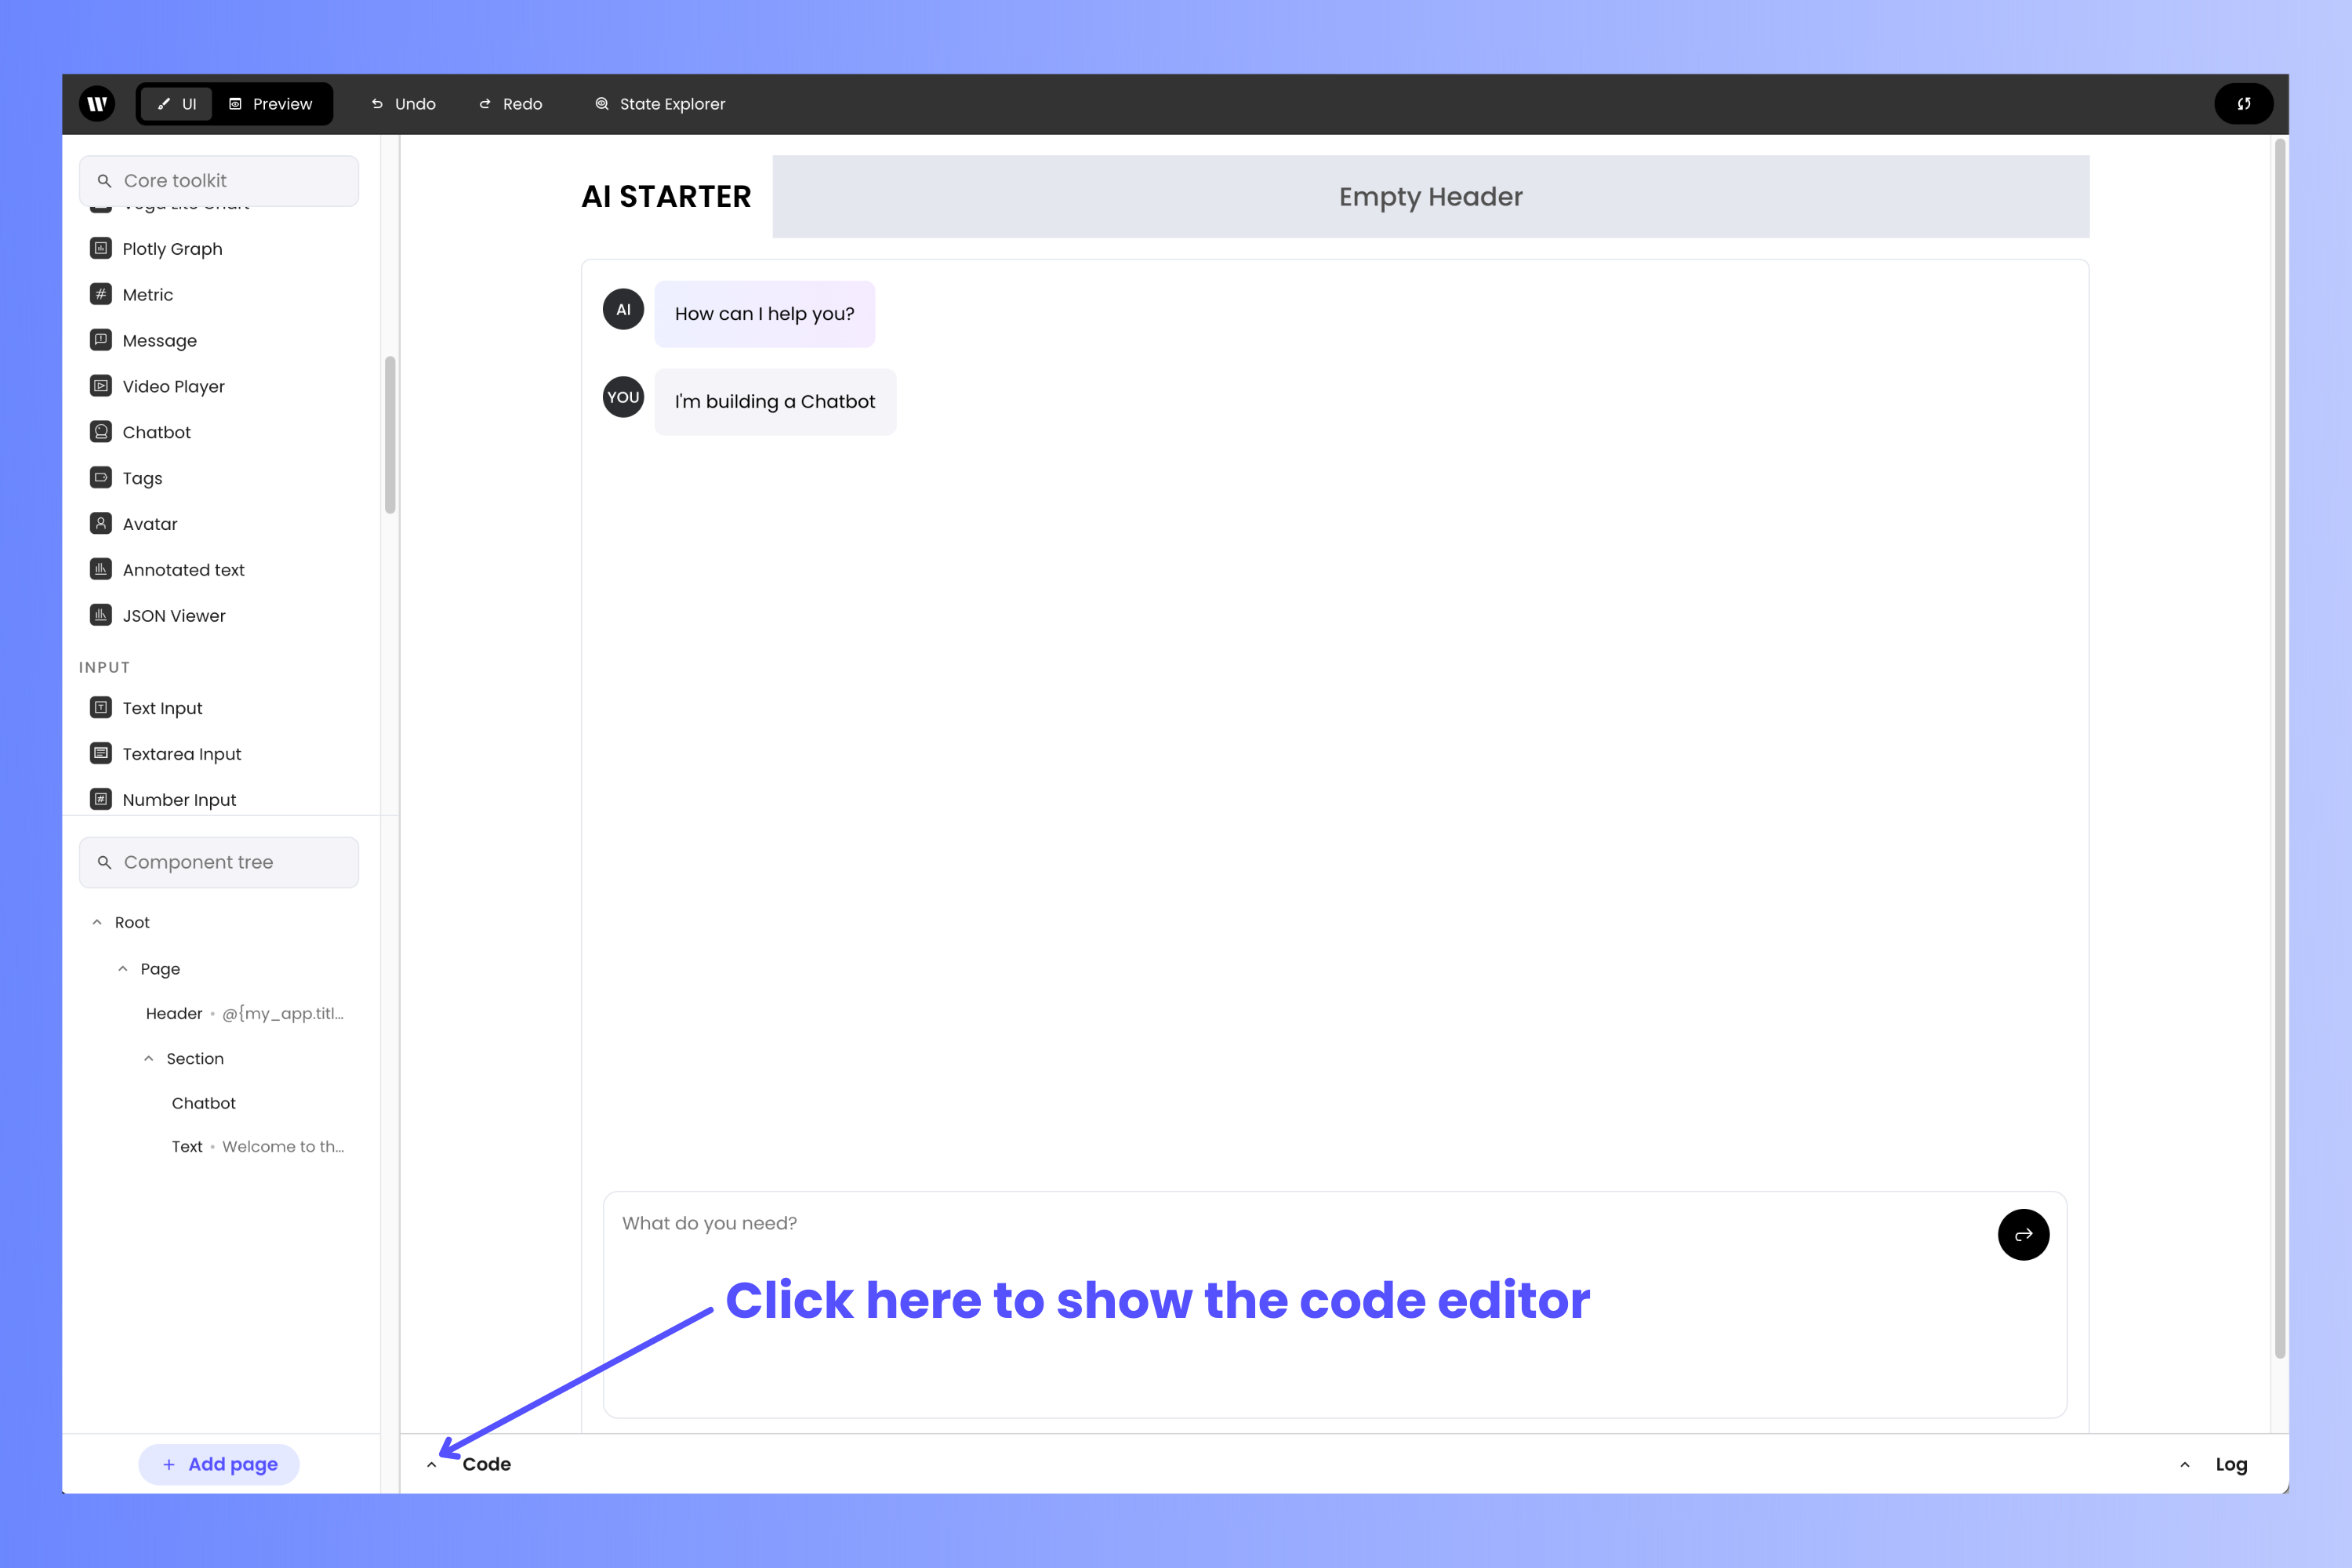
The simplest way to edit main.py is within the project editor. Click on the “toggle code” button (beside the word Code) near the lower left corner of the project editor page.
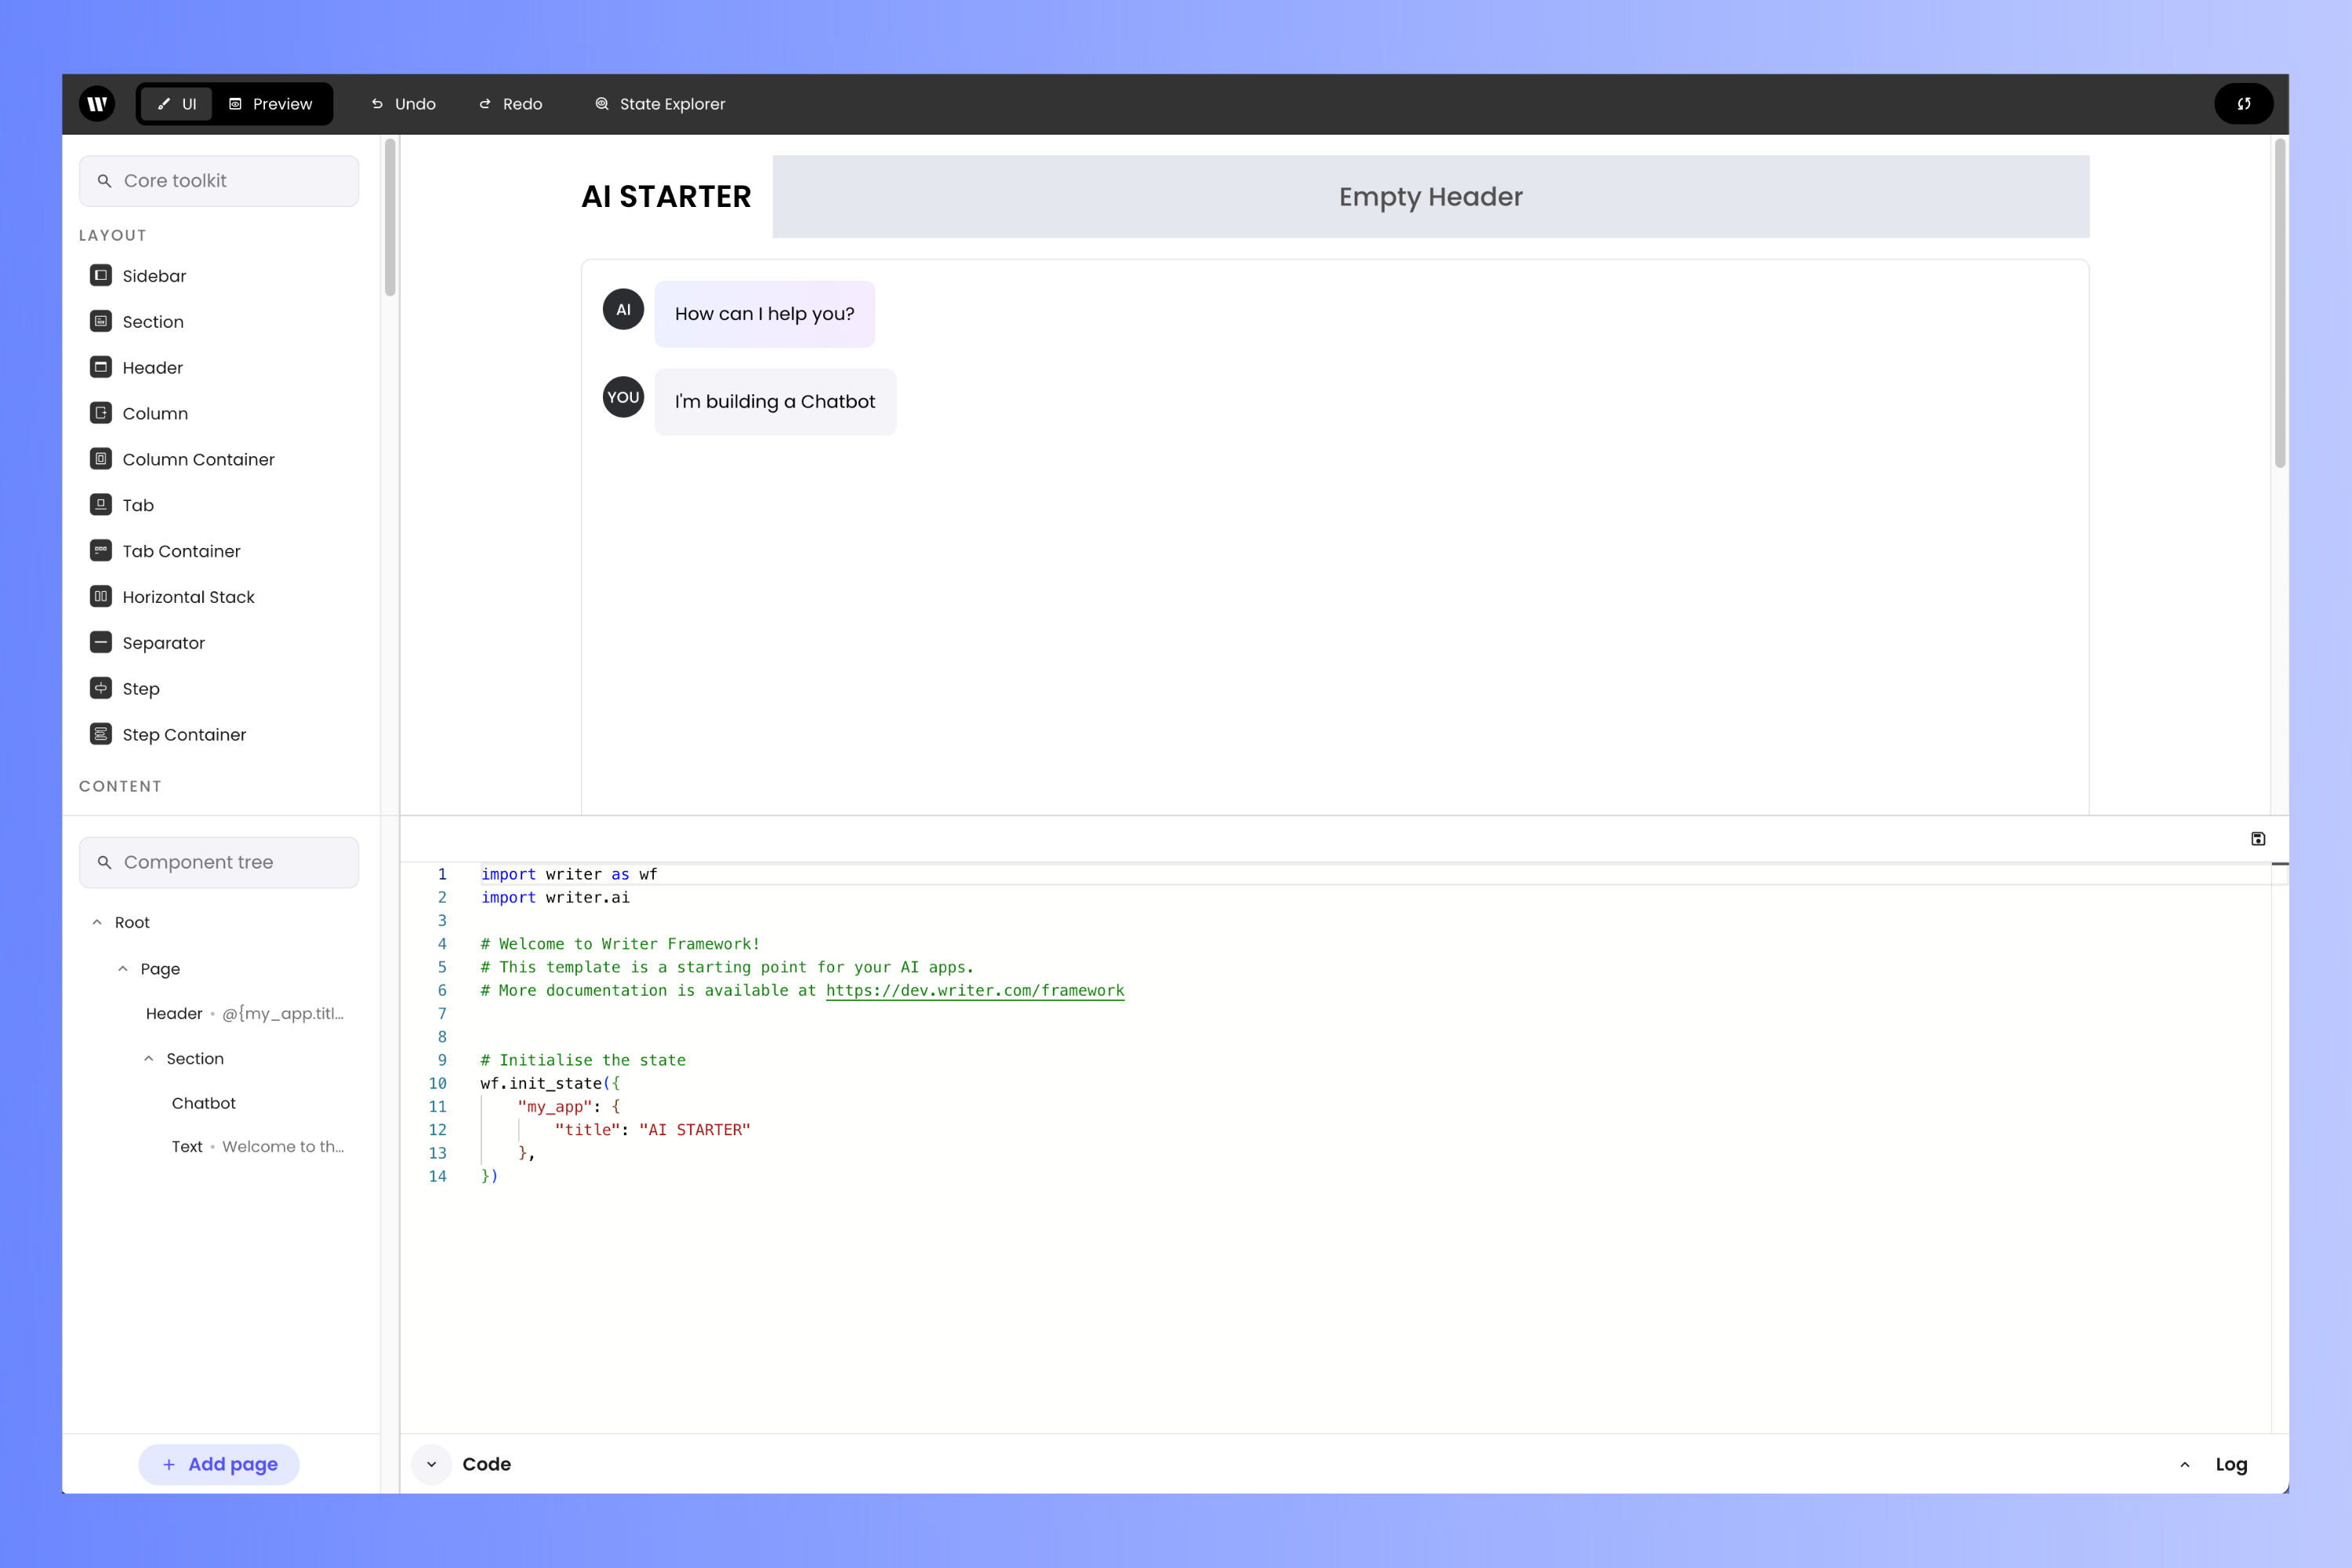
main.py.
If you’d rather use a code editor instead of coding in the browser, use it to open the
main.py file in your project’s directory.Import libraries and load the Writer Framework API key
You should see the following at the start of the file:Replace that code with the following:This code imports the libraries that the application will need and then reads your Writer Framework API key in the
WRITER_API_KEY environment variable.Create a handler to respond to the user's input
The application needs a function to handle incoming chat messages. Find these comments in the code……and replace them with the following function:The Note that
generate_completion() function will be called when the user enters a prompt, which is contained in the payload object. The payload object is added to the conversation object contained in the application’s state, which adds the user’s prompt to the record of the conversation between the user and the LLM.After adding the user’s prompt to the conversational record, generate_completion() calls the conversation object’s stream_complete() method, which generates an LLM completion based on the conversation so far. As its name implies, stream_complete() returns the completion as a stream of text chunks, which are captured and added to the conversation object.The
conversation object in the code above is an instance of Writer’s Conversation class. You can find out more about this class on our Writer AI module page.generate_completion() completion uses a lot of print() functions for debugging purposes, and you can use them to get a better idea of what’s happening in the function. You’ll see their output in both your terminal application and in the project editor’s ‘log’ pane (which will be covered shortly) as you use the chat assistant. This output will include:- The prompt the user entered
- The chunks of data that make up the LLM’s response as they are generated
- The record of the conversation between the user and the LLM.
print() functions don’t affect the operation of the chat assistant in any way, and you can remove them if you wish.Initialize the application
The final step is to set the application’s initial state. Find this code, which should be just after the …and replace it with this:The Writer Framework’s
generate_completion() function…init_state() method sets the initial value of state, a dictionary containing values that define the state of the application. The key-value pairs in state are how you store values used by your app and how you pass data between the back-end code and the UI.The code above sets the initial value of state so that it has two key-value pairs:conversation: An object that keeps a record of the conversation that the user is having with the LLM. You’ll bind its value to the Chatbot component soon.my_app: A dictionary containing values that define the application’s appearance. This dictionary has a single key-value pair,title, which defines the text that appears as the application’s title in the Header.
For more details about the
state variable, see our Application state page.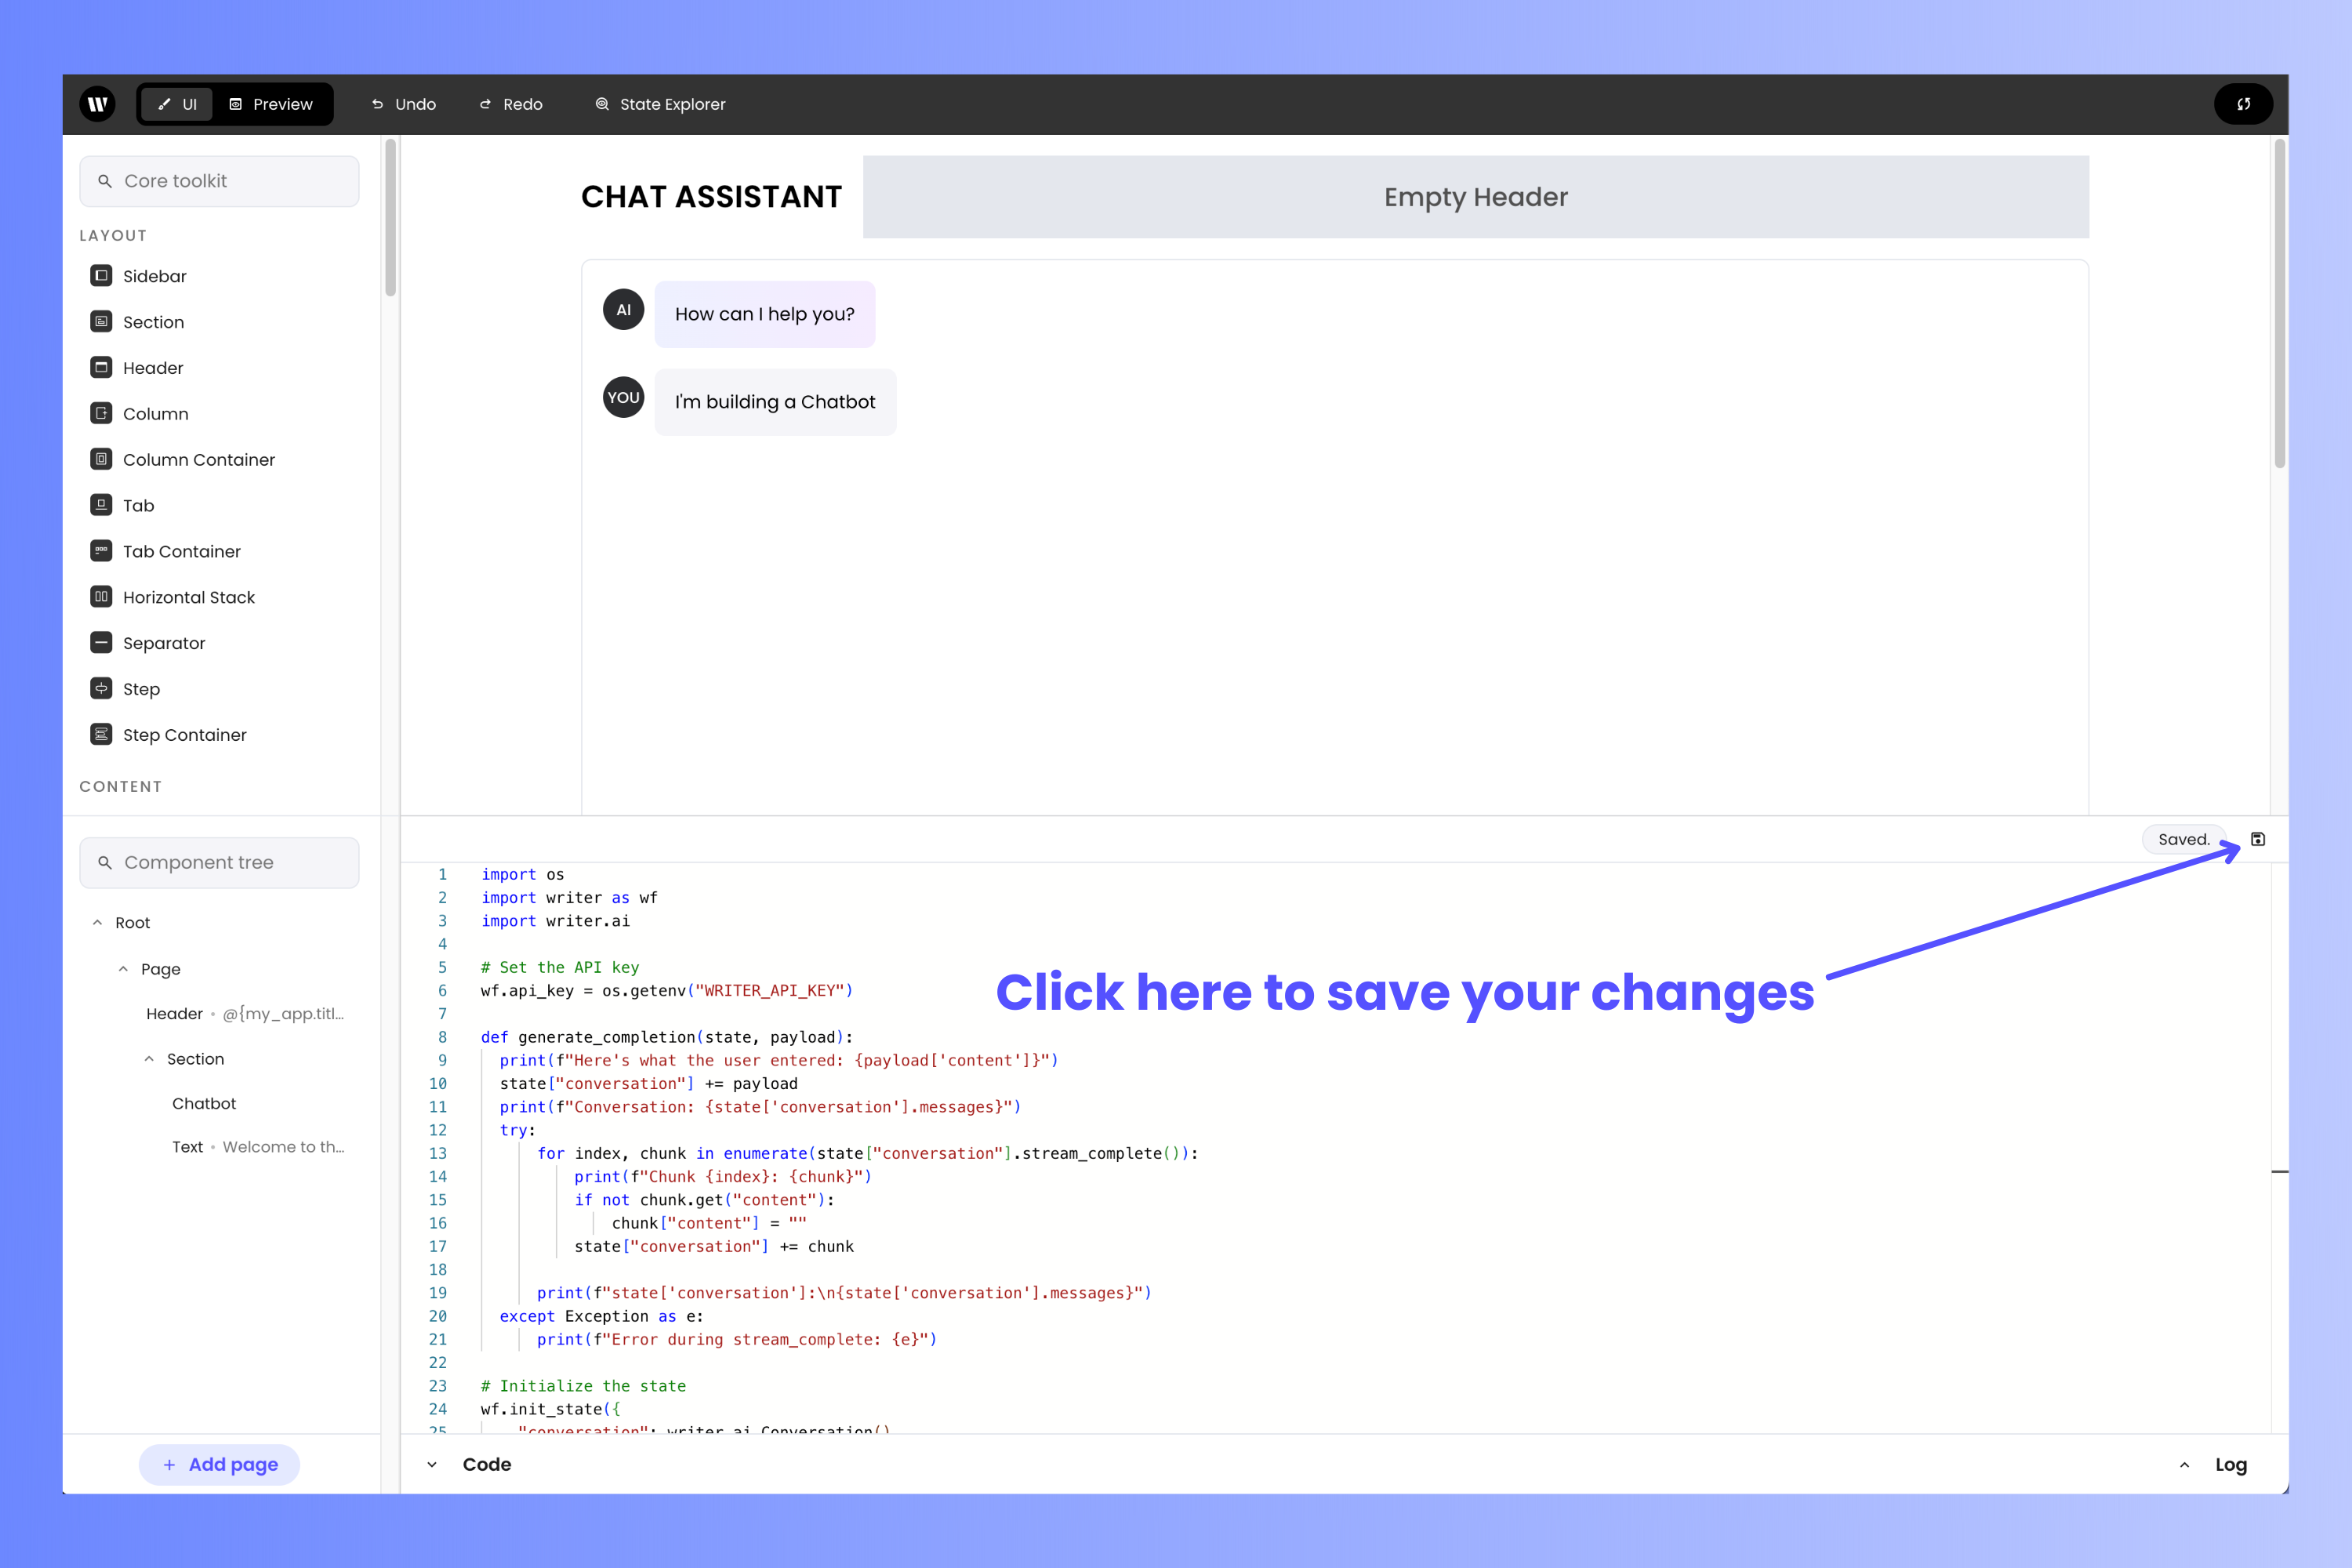
Bind the UI to the back-end code
You’ve built the UI and written the code behind it. Let’s connect the two! Go back to the browser window with the project editor and do the following:Observe that the heading at the top of the app is now 'CHATBOT ASSISTANT'
Earlier, you saw that the Header component’s Text property was set to
@{my_app.title}, a value in the app’s state variable. You changed this value when you update the call to the Writer Framework’s init_state() method.Bind the Chatbot component to the 'state' variable's 'conversation' key
Recall that the 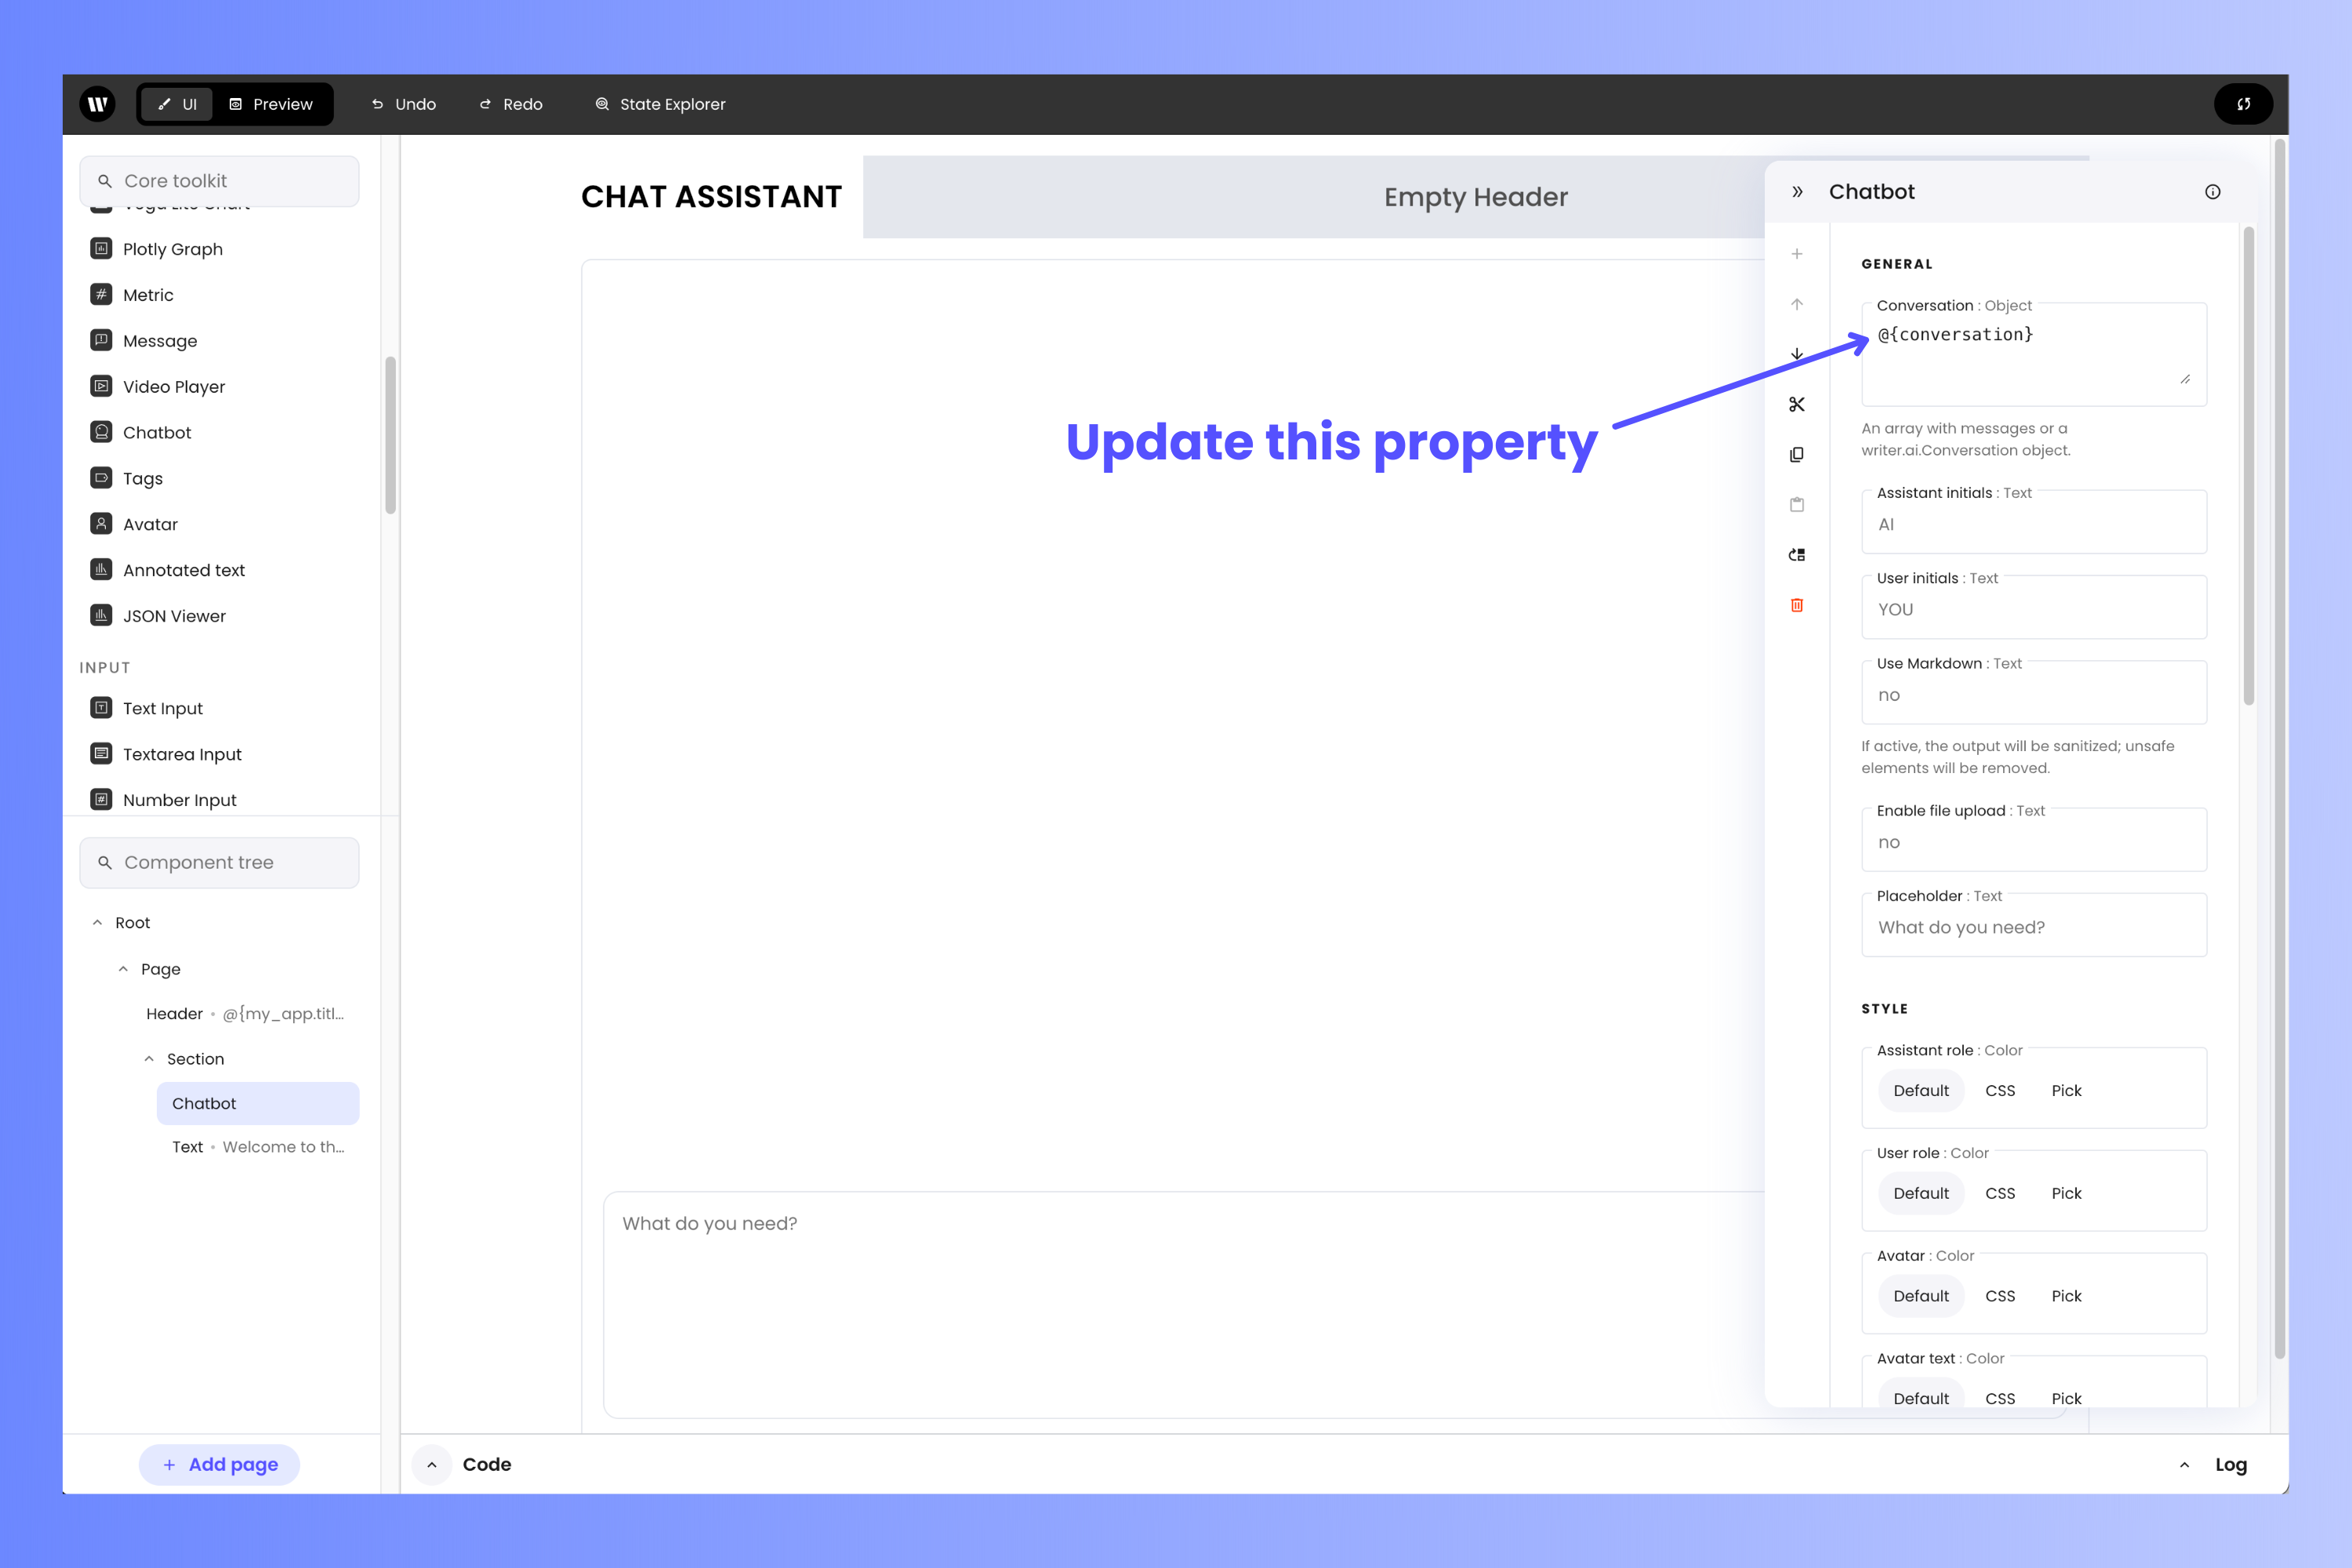
conversation object contained within the state variable contains the record of the conversation that the user is having with the LLM. Binding the Chatbot component to this object allows it to display the conversation to the user.Select the Chatbot component. In the properties panel, find the Conversation property and set its value to @{conversation}.@{conversation} specifies that the Chatbot component should get its information from the value corresponding to the conversation key in the application’s state variable.Specify the Chatbot component's event handler
You need to specify that the Chatbot component should call the 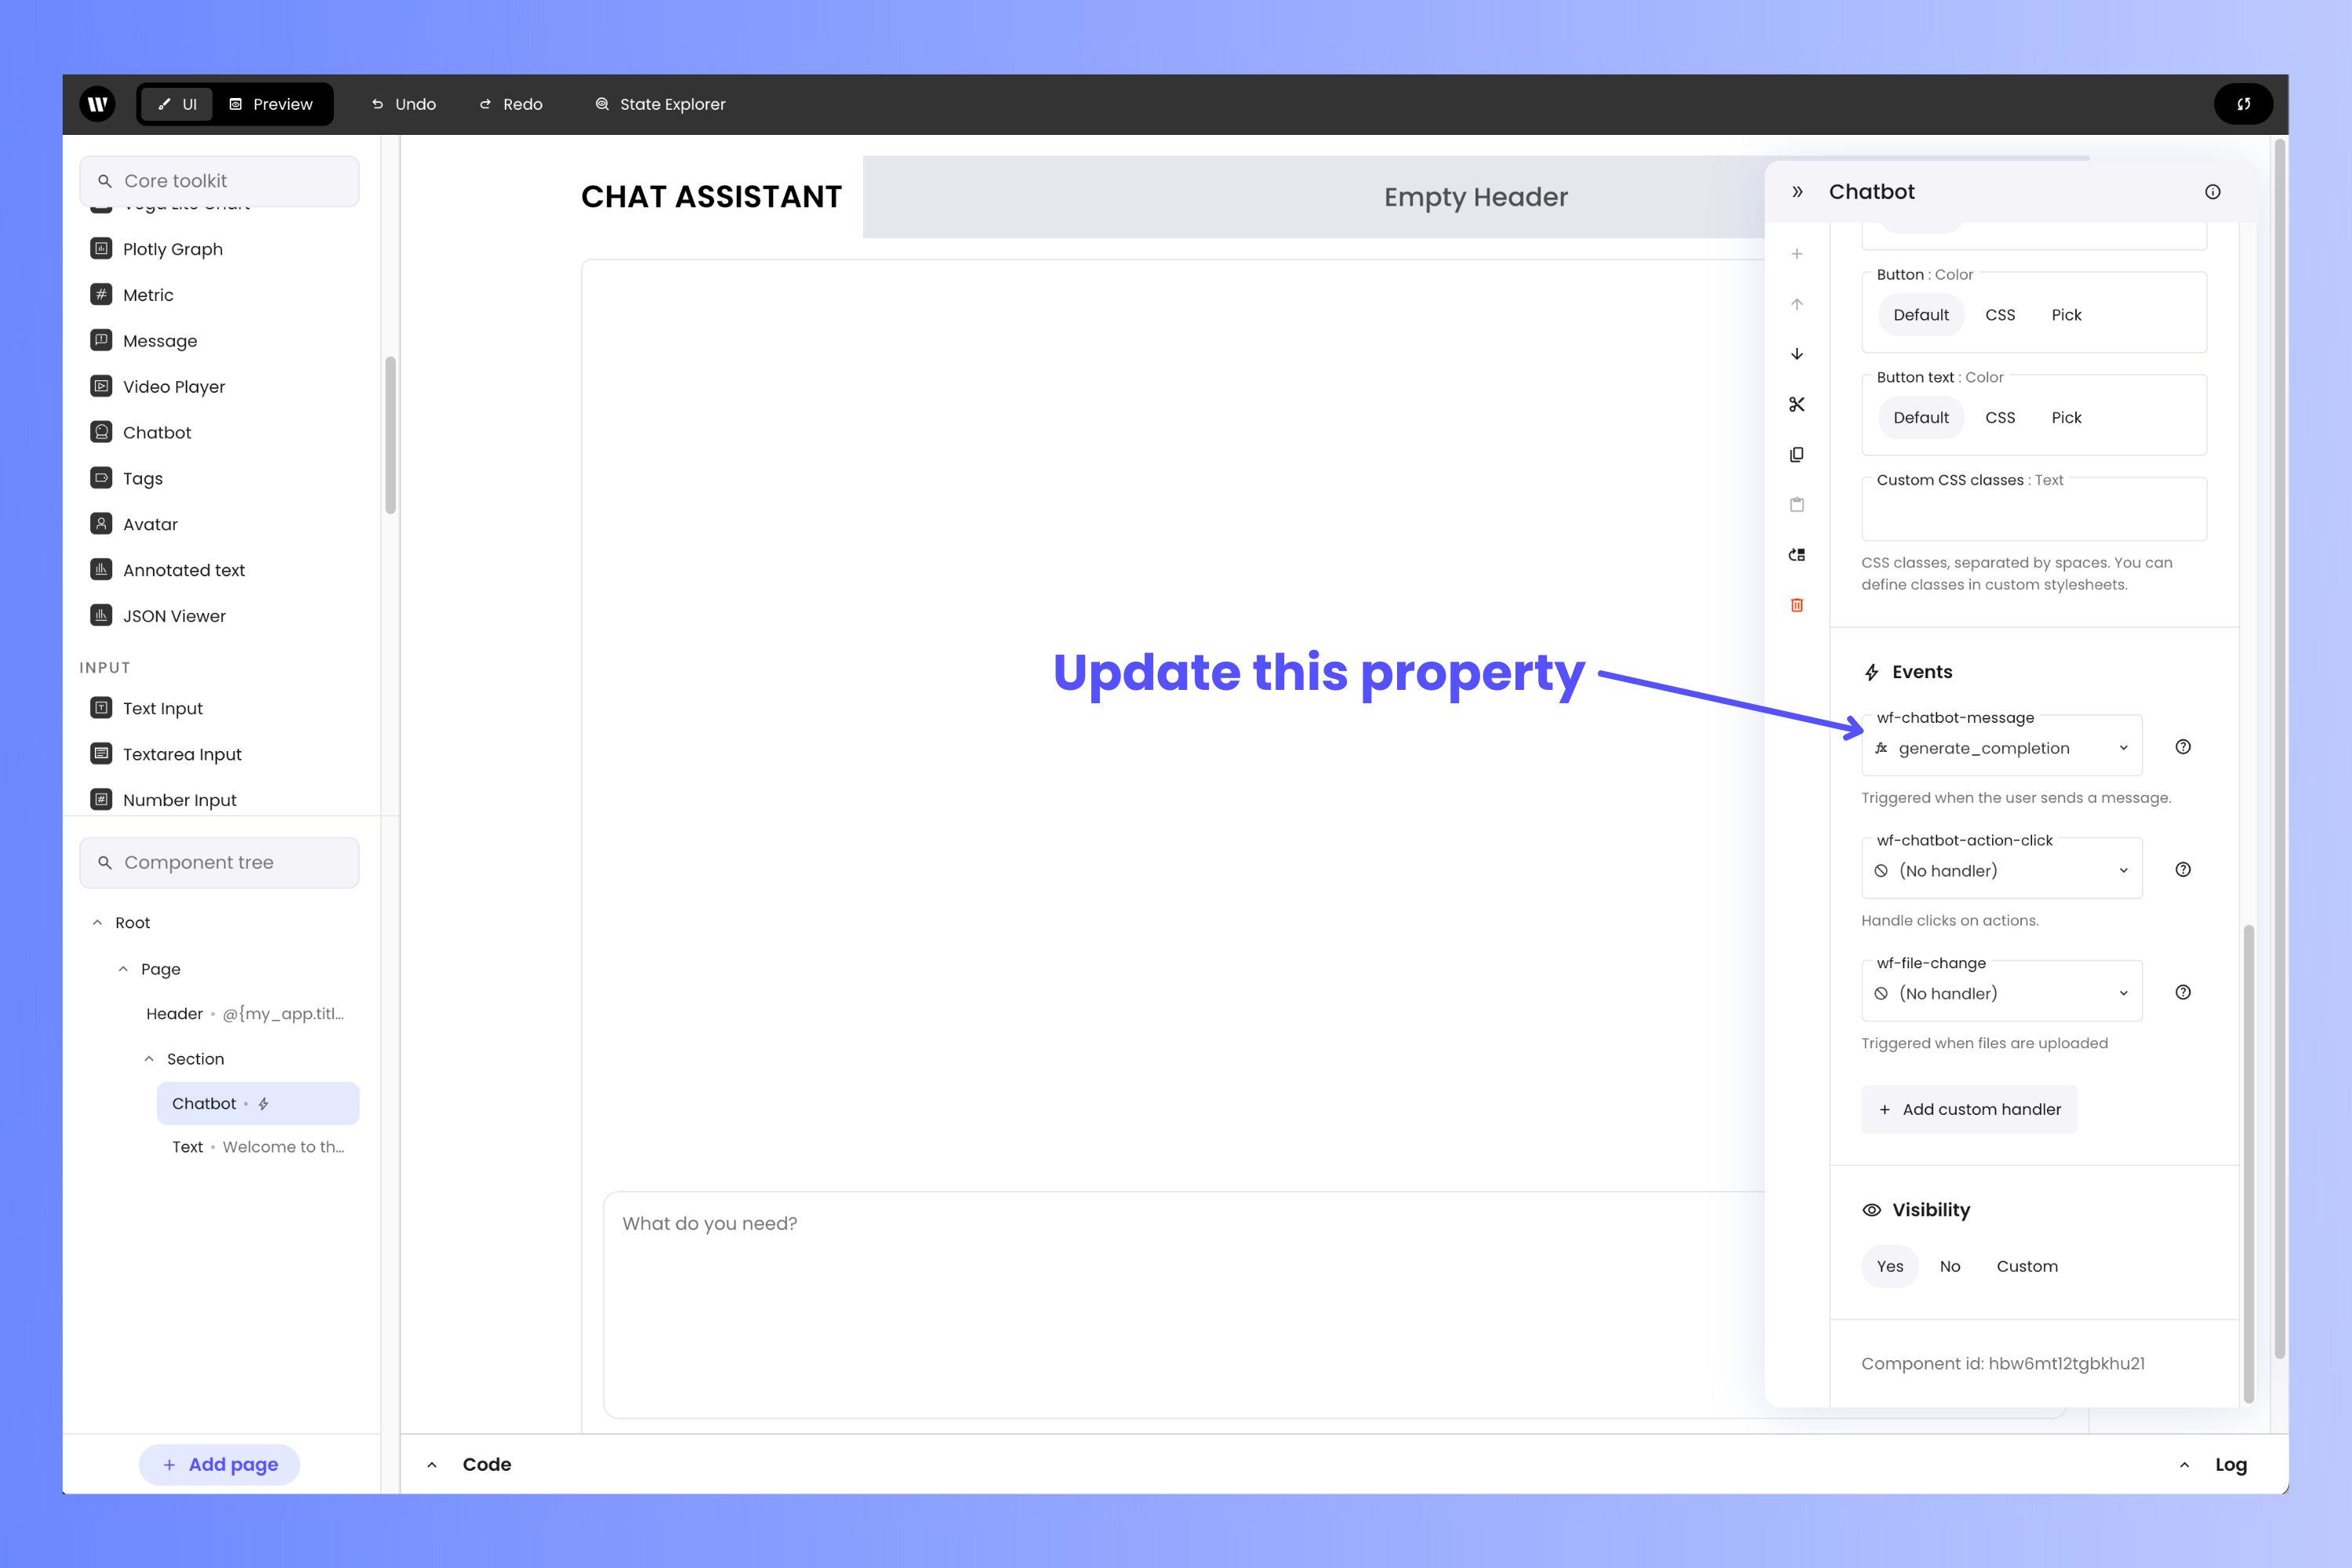
generate_completion() function when the user enters a prompt.Do this by scrolling down the properties panel to the Events section until you see a property called wf_chatbot_message. Select generate_completion from its menu.Test the application
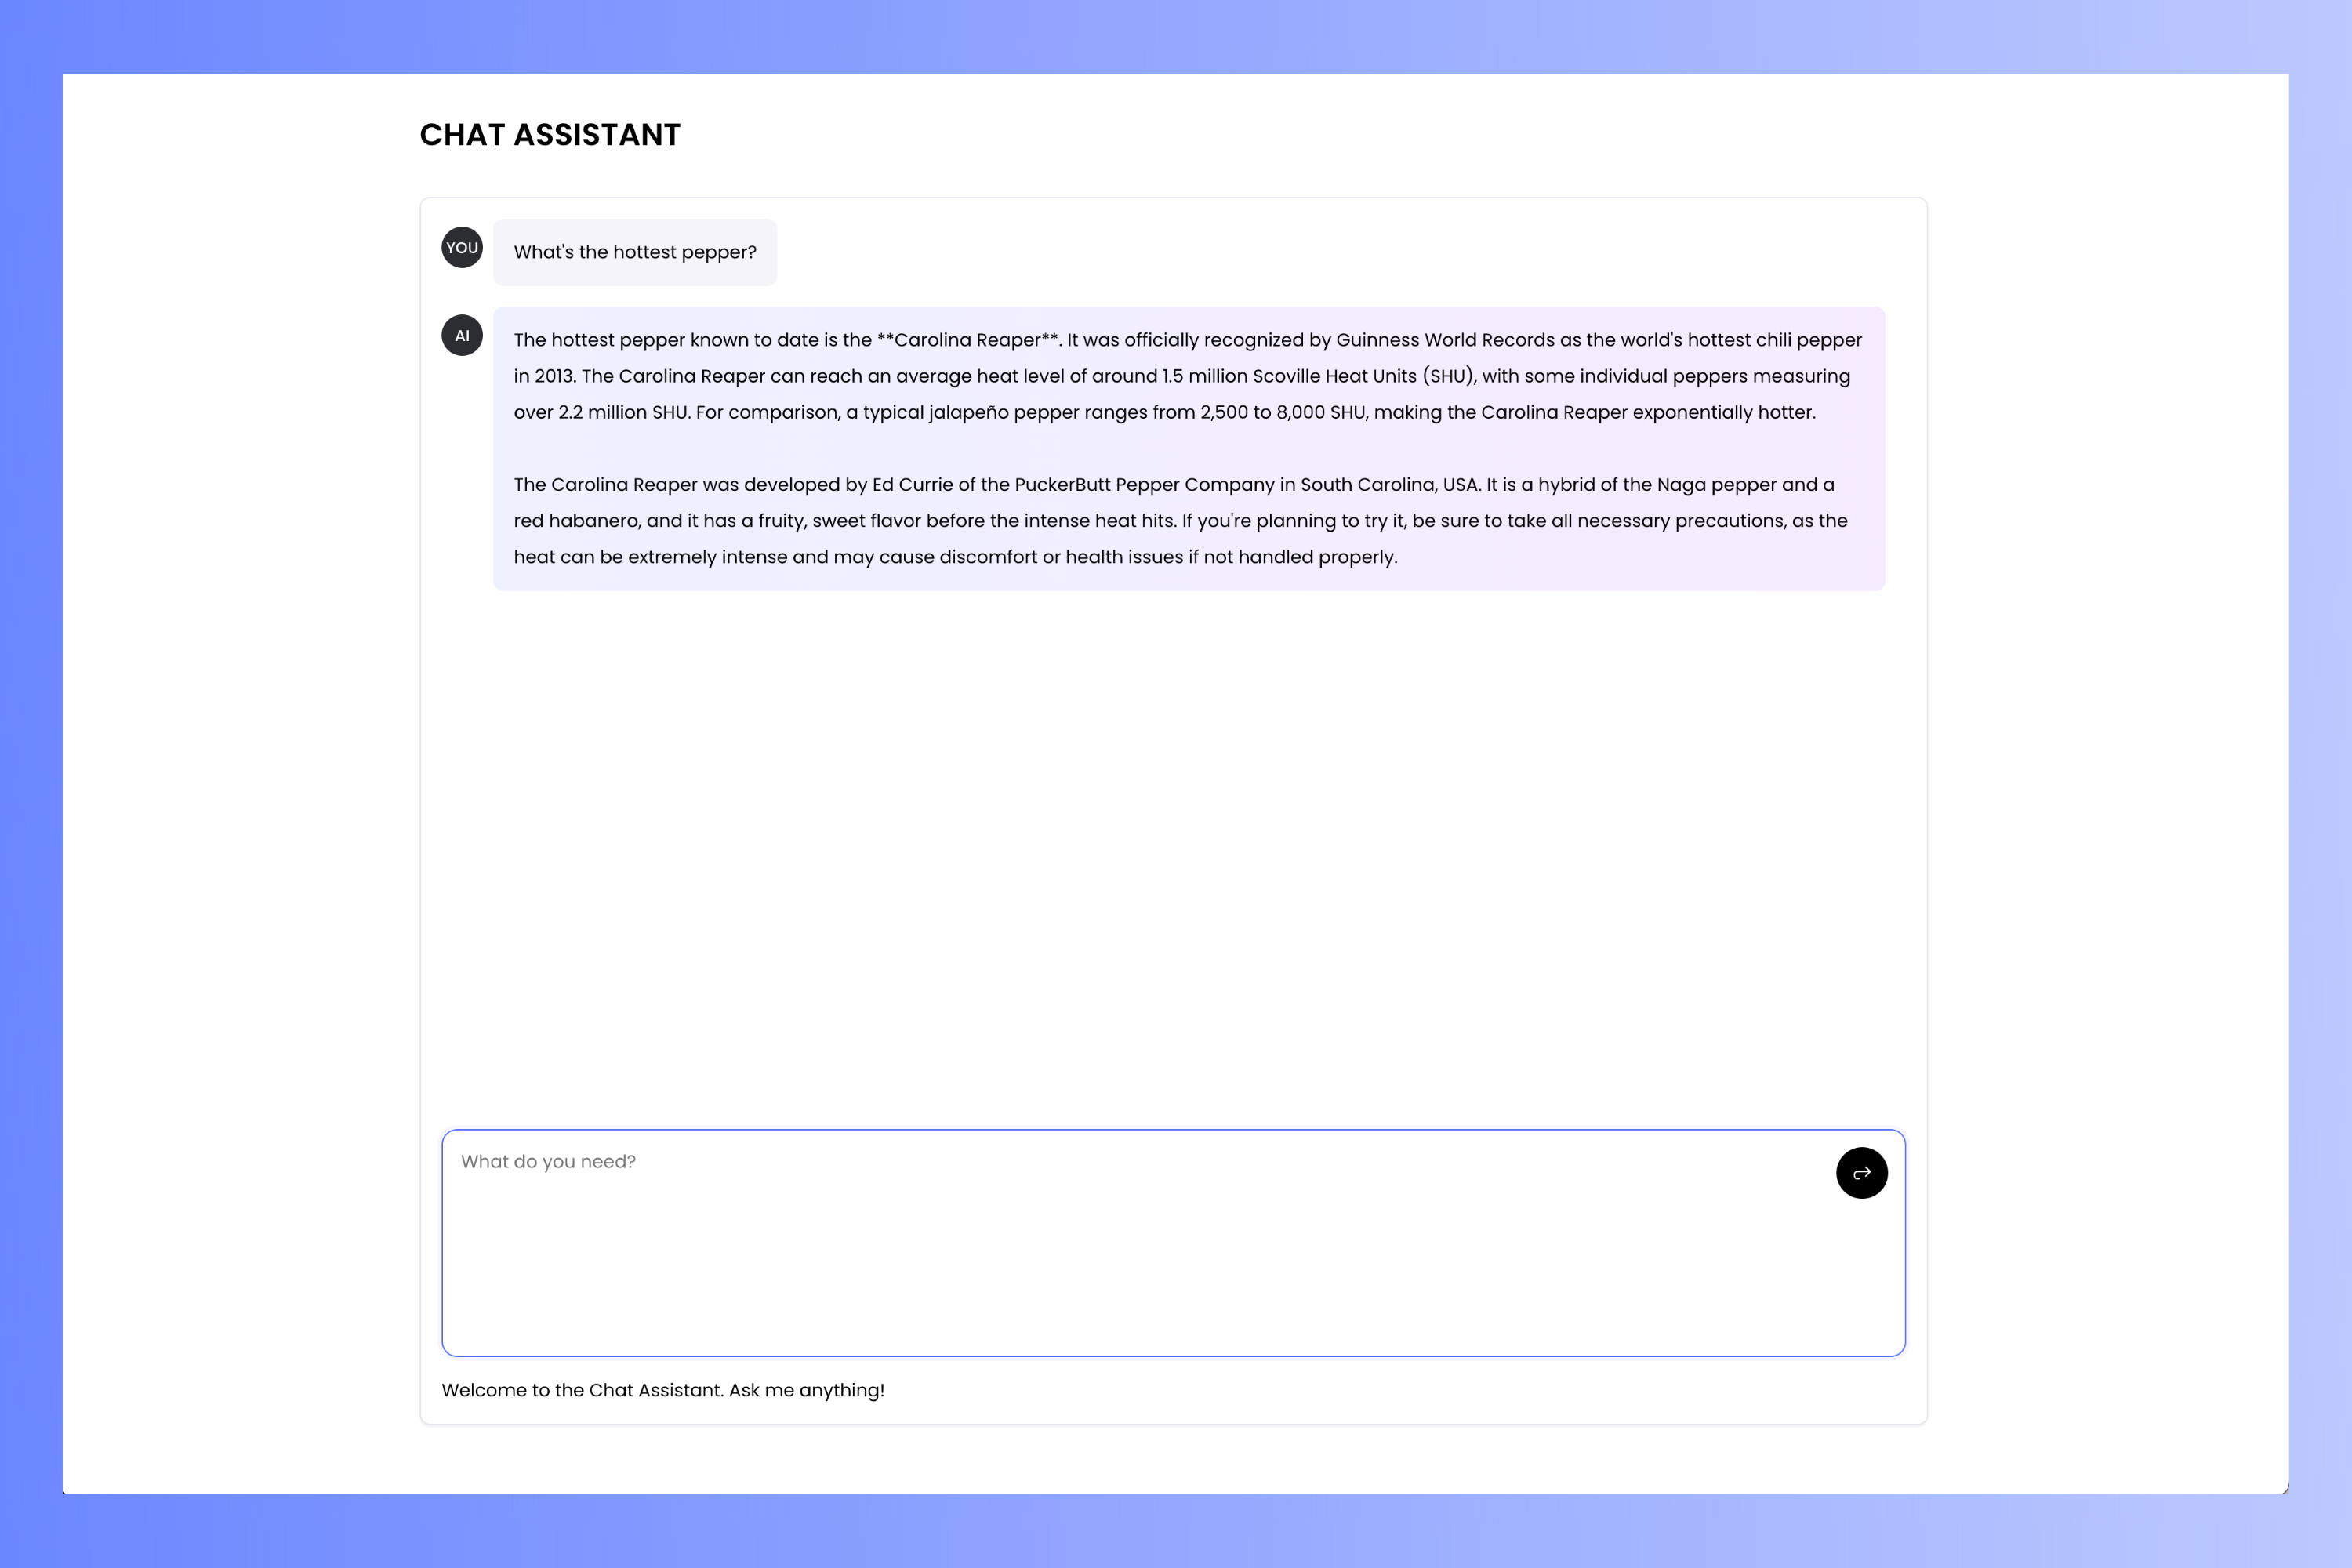
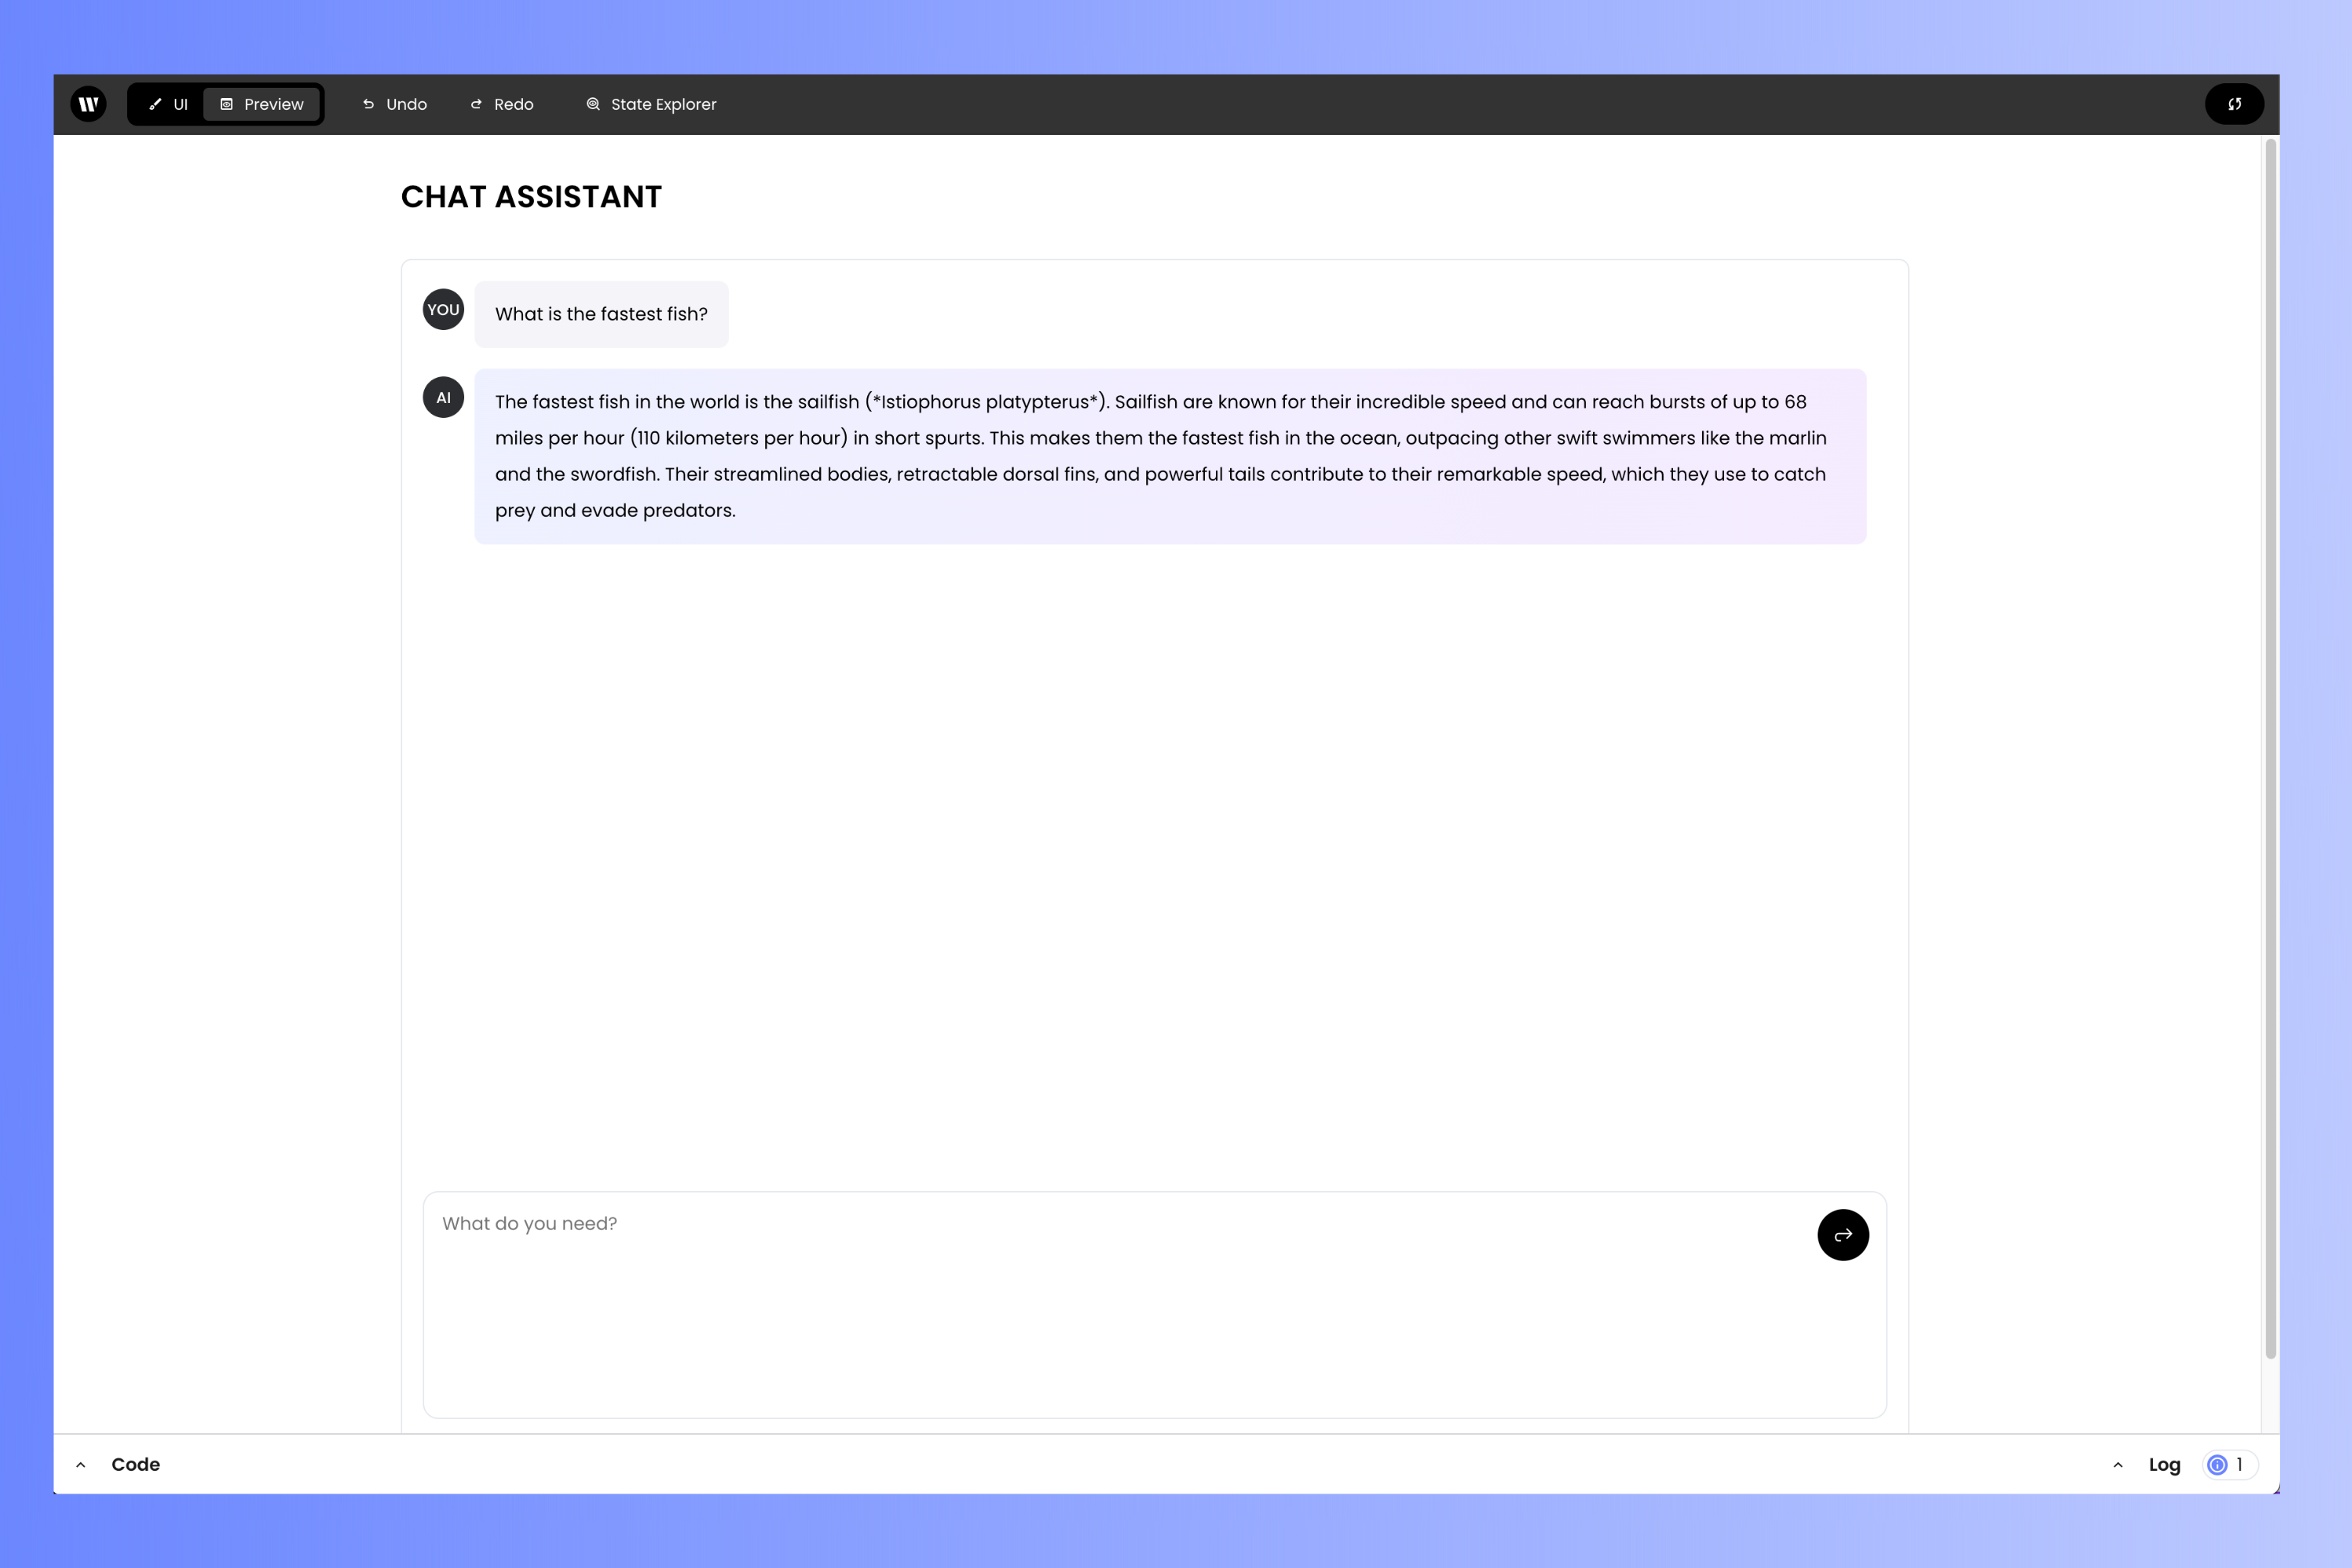
You’ve completed all the steps to make a working chat assistant, and you can try using it right now, even while editing the user interface! Try entering some prompts into the text entry at the bottom of the Chatbot component. The LLM should respond accordingly:
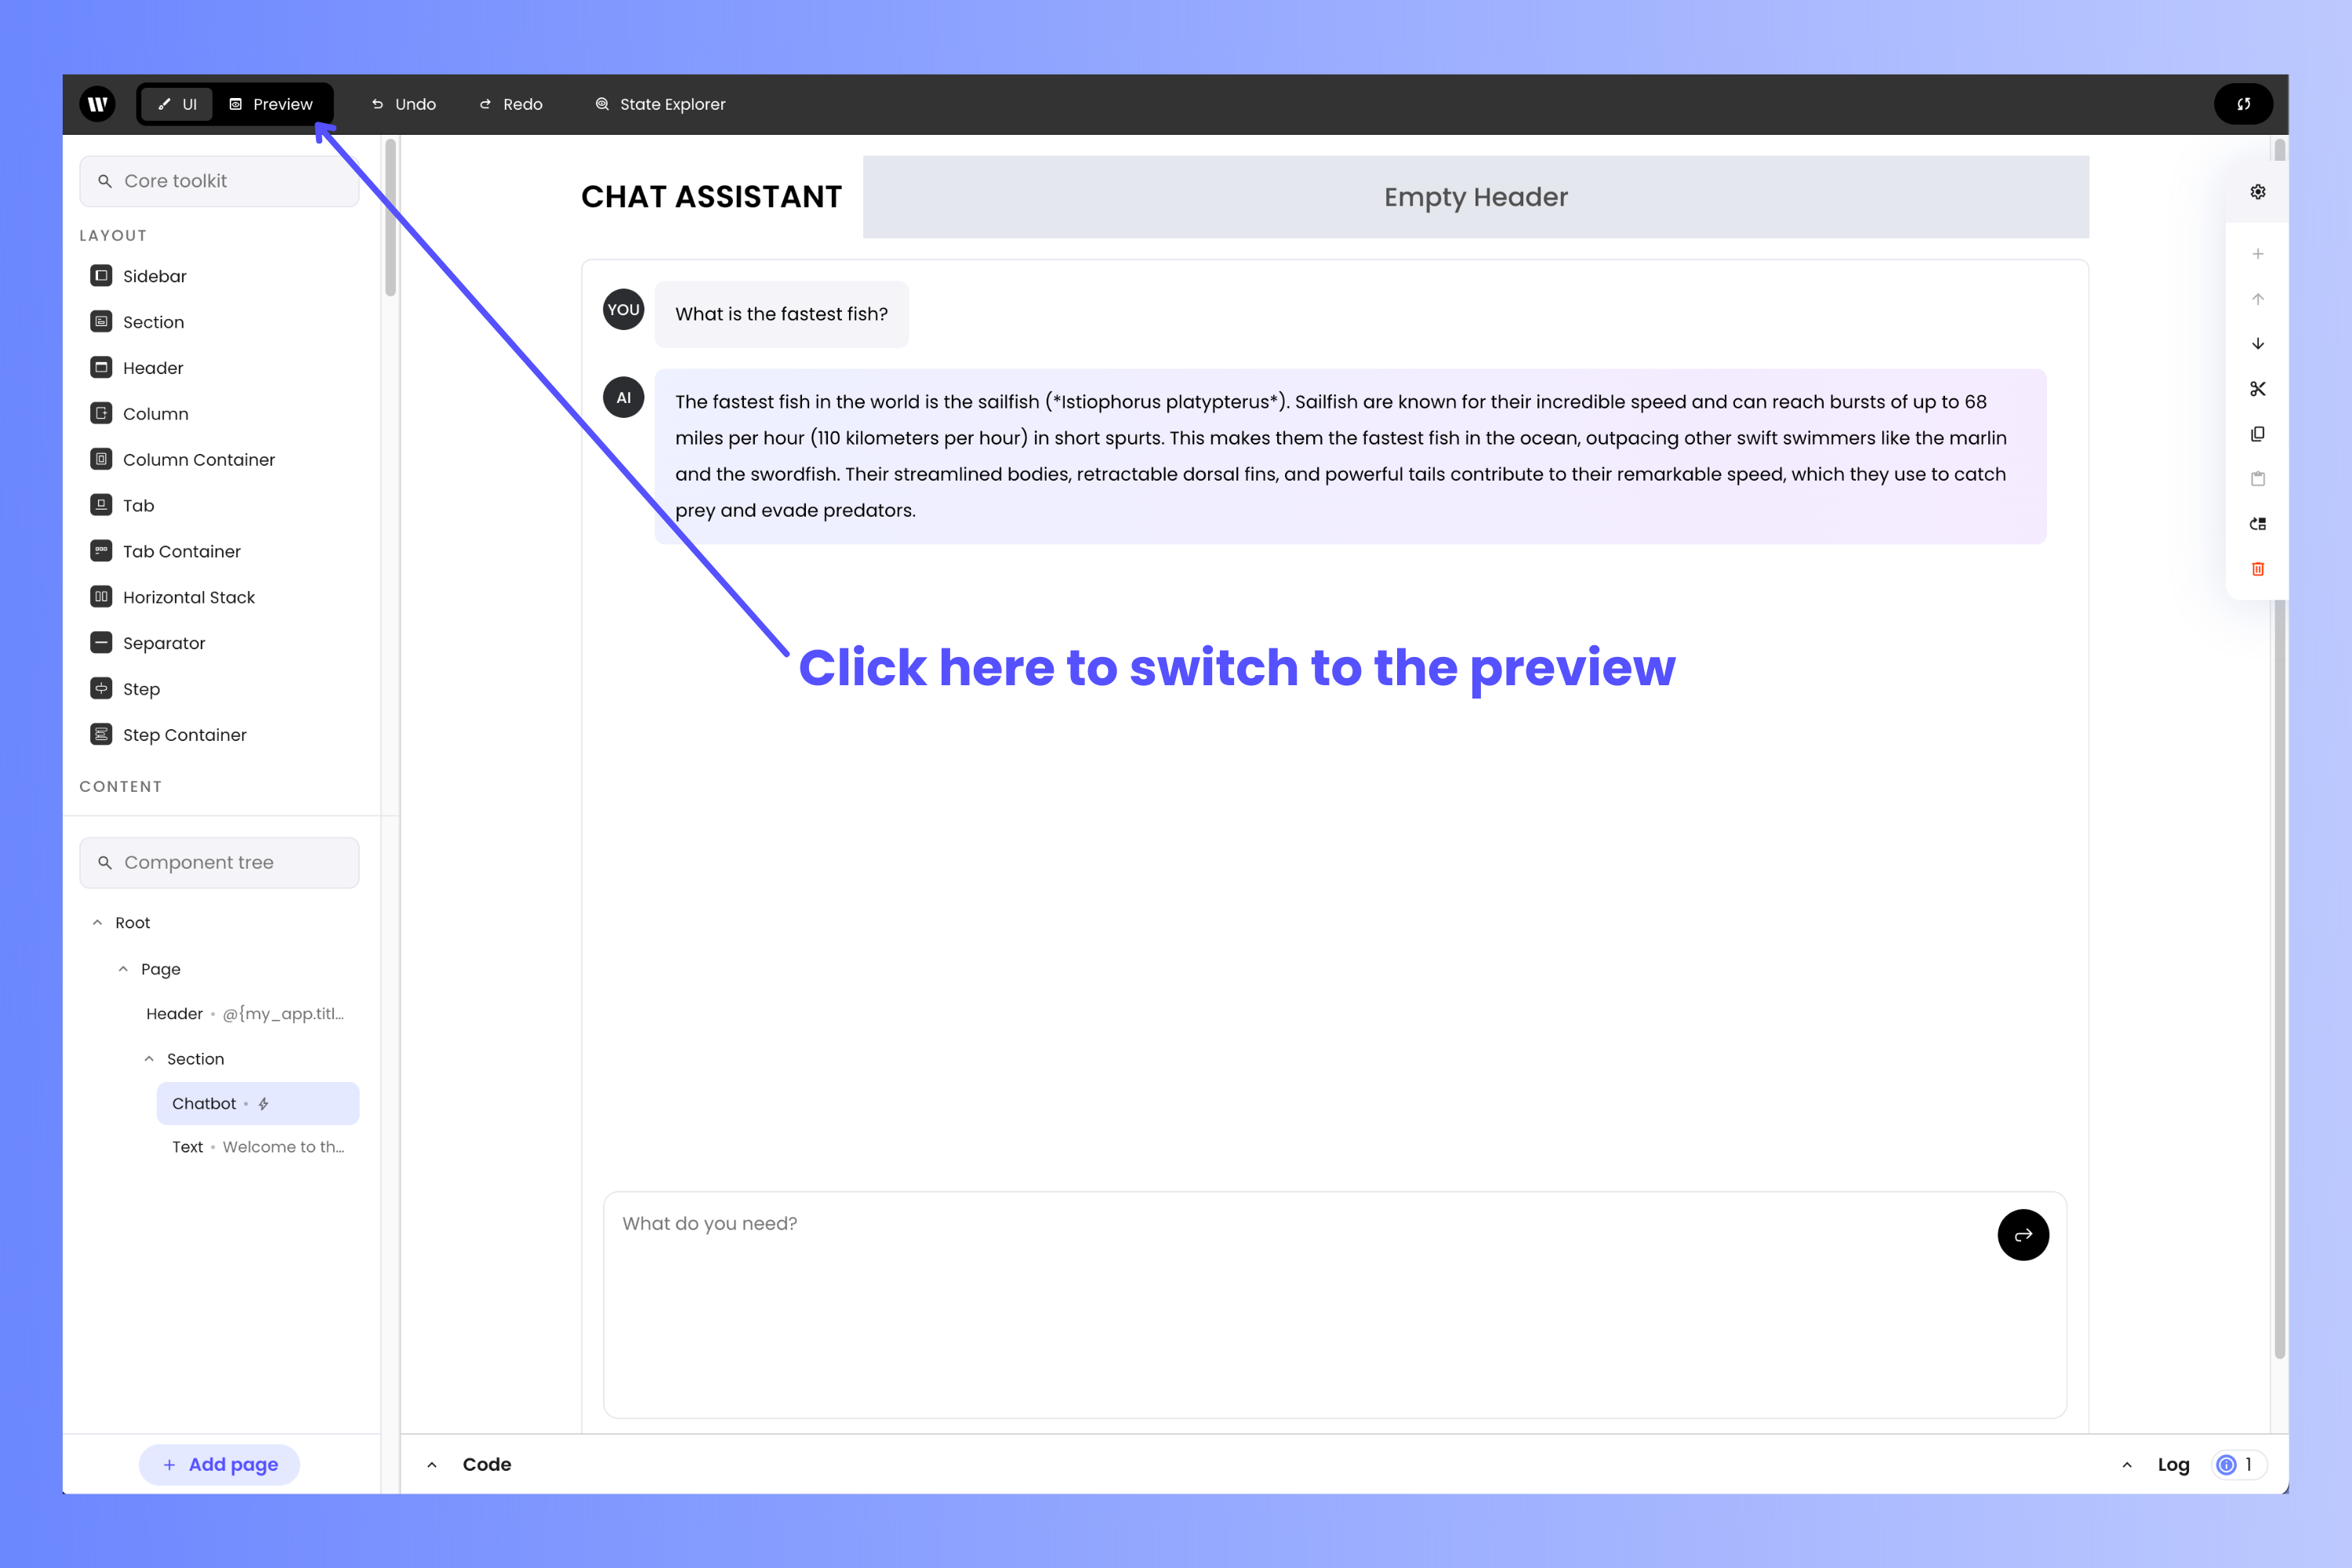
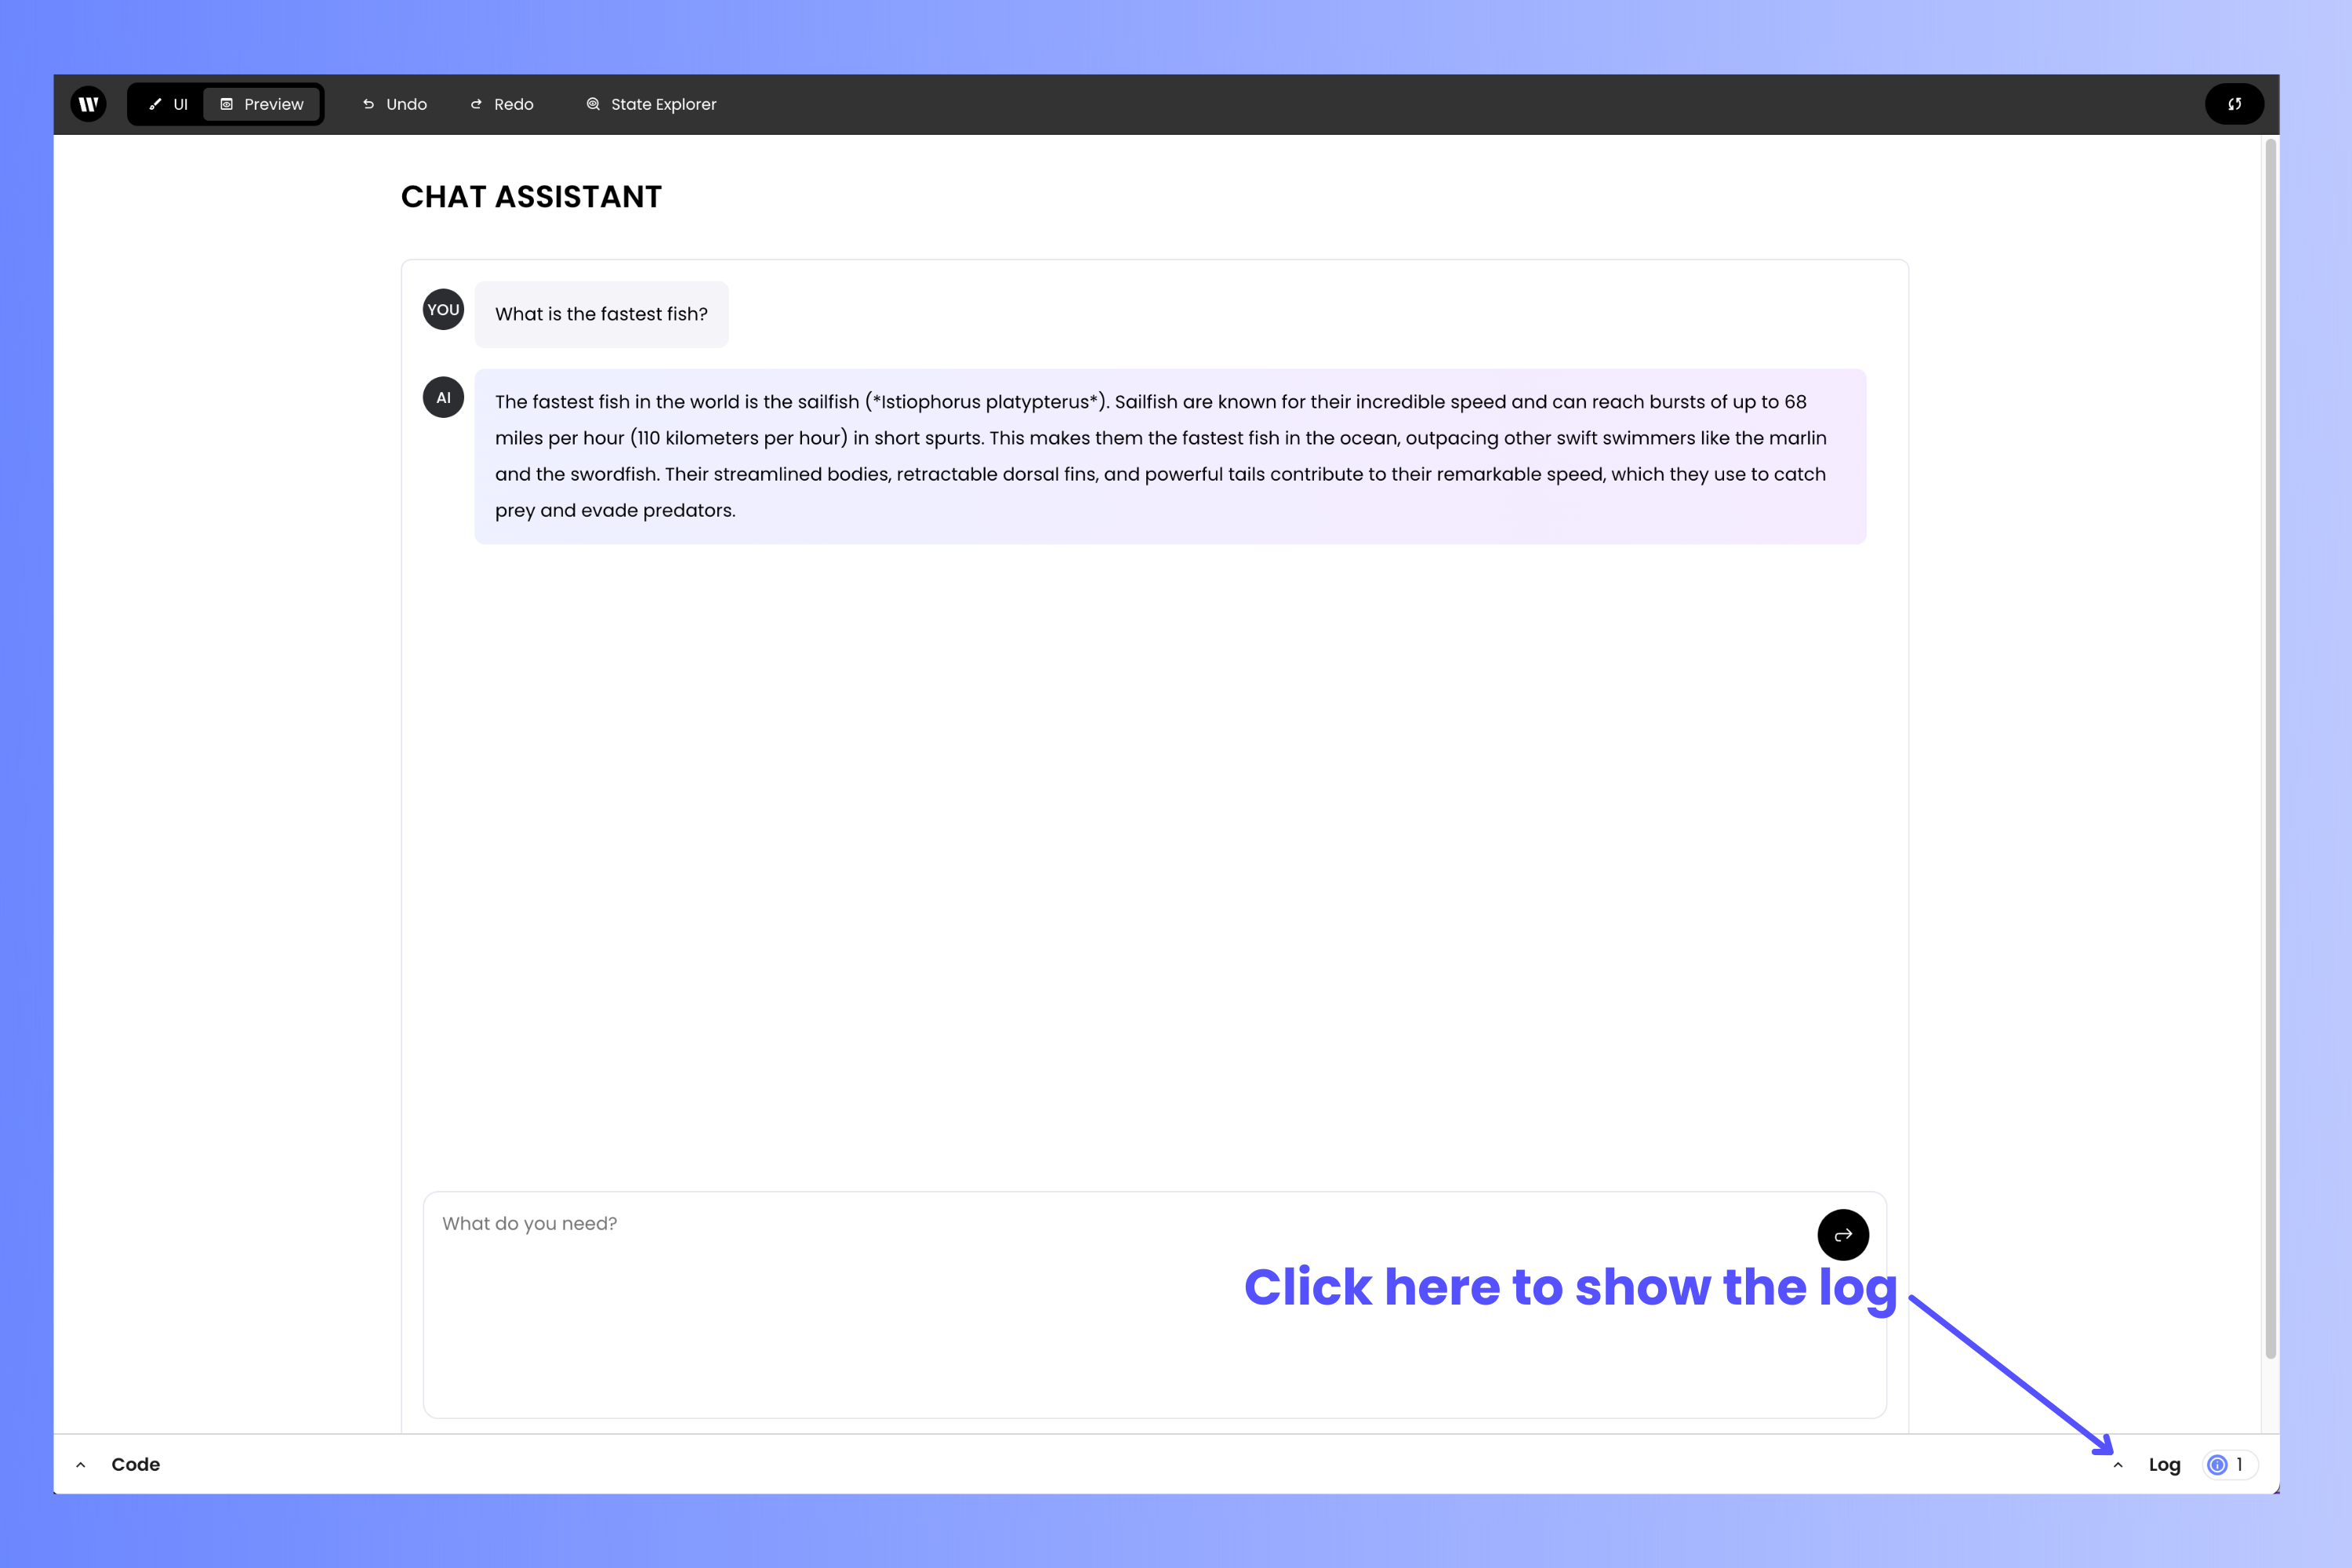
print() functions and error messages by clicking on the Log button located near the upper right corner of the page:

Run the application locally
Once you’ve tested the application, it’s time to run it locally. Switch back to your terminal application. Stop the project editor with ctrl-c, then run the application by entering the following command:writer run as opposed to writer edit. This launches the application as your users will see it, without any of the editing tools. Even though you can preview your applications in the project editor, it’s still a good idea to test it by running it on your computer, outside the project editor, before deploying it.
You’ll be able to access the application with your browser at the URL that appears on the command line. It should look like this:
The Writer editor, which you launched with
writer edit chat-assistant, and your application, which you launched with writer run chat-assistant, run on the same URL, but on different ports (specified by the number after the : character at the end of the URL).