

Set up the Salesforce connector
Configure the Salesforce connector in AI Studio under Connectors & Tools. The Salesforce connector supports two authentication options:- WRITER-managed OAuth (recommended): Writer provides the OAuth application. No setup required—just authorize access to your Salesforce account.
- Organization-managed OAuth: Create your own Salesforce External Client Application for custom branding and control.
Most users should choose WRITER-managed OAuth for faster setup. Only use organization-managed OAuth if you need custom branding or have specific security requirements.
Configure Salesforce
Before connecting, verify the following in your Salesforce environment:- Confirm that the Salesforce user account has API access enabled
- Verify the user has appropriate permissions for the objects and operations you plan to use
- Ensure any required Salesforce features (reports, Chatter, Bulk API) are enabled for your org
Install the Writer app from Salesforce AgentExchange (WRITER-managed only)
If you choose WRITER-managed OAuth, install the Writer Salesforce Connector package in your Salesforce org from AgentExchange. A Salesforce admin must complete this step.- Go to the Writer for Sales Personalization listing on Salesforce AgentExchange
-
Select Get It Now
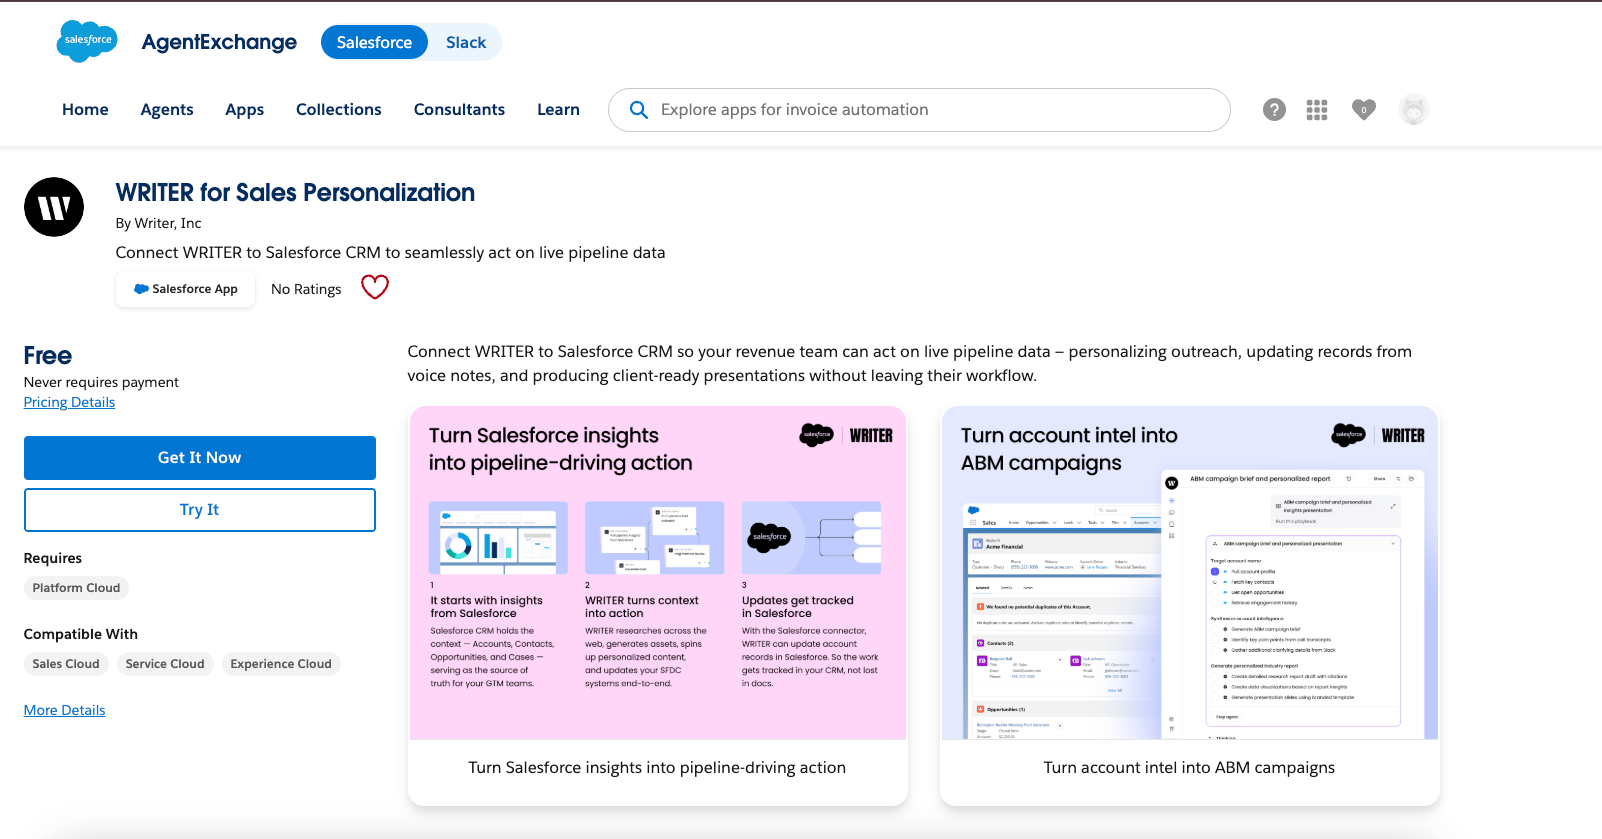
-
Select the Salesforce account to install the package into, then select Install in Production
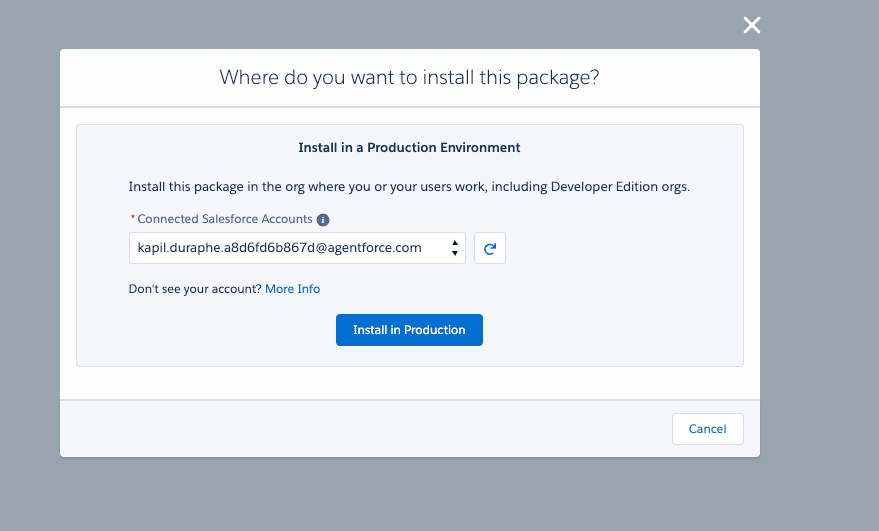
-
Review the installation details, select the checkbox to agree to the terms and conditions, then select Confirm and Install
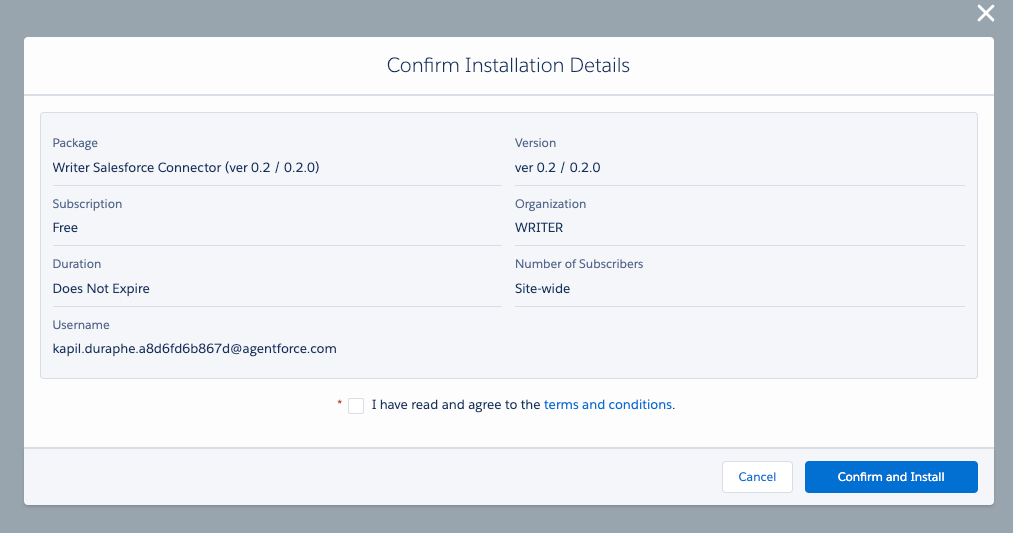
- Log in to Salesforce when prompted to continue the installation
- Select Install for All Users, then select Install
- Wait for the installation to complete, then select Done
-
In Salesforce, go to Setup > Installed Packages and confirm that Writer Salesforce Connector appears in the list with a status of Active
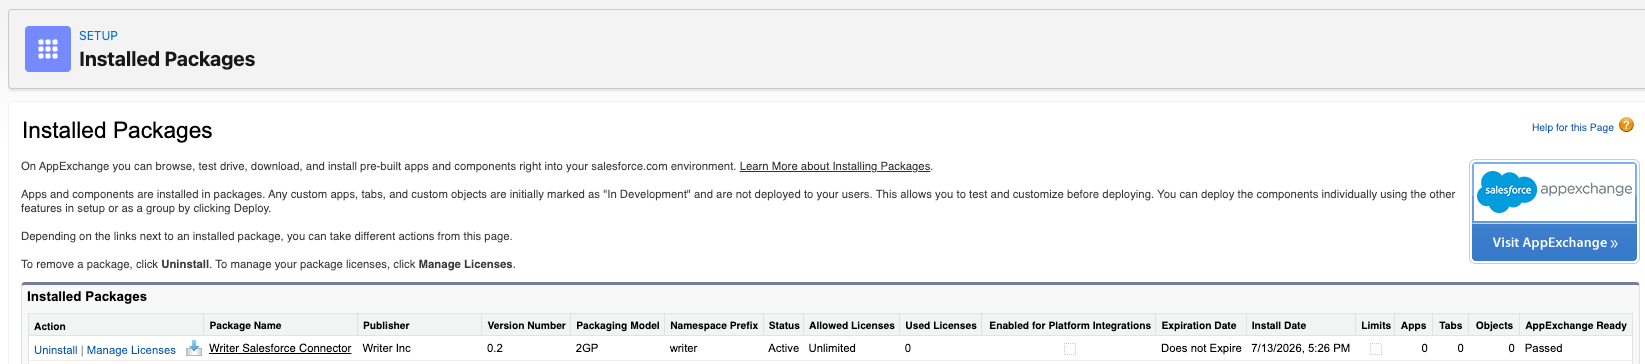
Create a Salesforce External Client Application (organization-managed only)
If you choose to create a self-managed OAuth application to connect, create an External Client Application (ECA) in Salesforce:- In Salesforce Setup, search for External in Quick Find, select External Client App Manager, then select New External Client App
- Complete the required fields in the Basic Information section
- Expand API (Enable OAuth Settings) and select Enable OAuth
-
Add the Writer redirect URI to the Callback URL:
If your organization is deployed in the EU, use
https://app.eu2.writer.com/mcp/oauth/callbackinstead. - Select the required OAuth scopes
- Configure flow enablement settings
- Configure security settings
- Select Create
- Go to the app’s Settings > OAuth Settings and copy the Consumer Key and Consumer Secret
Required OAuth scopes
api- Manage user data via APIsrefresh_token,offline_access- Perform requests at any timeopenid- Access unique user identifierssfap_api- Access the Salesforce API Platform
Flow enablement settings
Under Flow Enablement, select the following options:- Enable Client Credentials Flow
- Enable Authorization Code and Credentials Flow
- Enable Token Exchange Flow
- Require secret for Token Exchange Flow
Security settings
In the Security section, select the following options:- Require secret for Web Server Flow
- Require secret for Refresh Token Flow
- Require Proof Key for Code Exchange (PKCE) extension for Supported Authorization Flows
- Enable Refresh Token Rotation
- Limit Idle Refresh Token Time-to-Live (TTL) to 30 Days
- Enforce Refresh Token IP Allowlist
Configure the connector in AI Studio
- Navigate to Connectors & Tools in AI Studio
- Select the Salesforce connector
- Select who has access by default (all users or specific teams)
-
Select the connection type:
- Level: User level (each user authenticates their own account) or org level (shared connection to a single account)
- Managed by: WRITER-managed or self-managed (your own OAuth app)
- Select which tools to enable for your agents
-
On the Connect step, enter your Tenant URL in the format
{instance URL}/services/data/v62.0, for example: - If using self-managed OAuth, also enter your OAuth client ID and client secret
- Complete the OAuth authorization flow
Install on a Salesforce sandbox
AgentExchange doesn’t support installing packages directly into sandbox orgs. To try the Salesforce connector in a sandbox before deploying to production, install the package directly using a URL in the following format:FAQ
The following questions cover common Salesforce connector setup issues.How do I build my Tenant URL?
How do I build my Tenant URL?
The Tenant URL is your Salesforce My Domain plus the API path
/services/data/v62.0. Don’t use a Lightning app URL (*.lightning.force.com).- In Salesforce, go to Setup > My Domain and copy the domain, for example
yourcompany.my.salesforce.com - Add
https://at the start:https://yourcompany.my.salesforce.com - Add
/services/data/v62.0at the end:https://yourcompany.my.salesforce.com/services/data/v62.0
Next steps
- Set up connectors: Learn how to configure and enable connectors in AI Studio
- Tool calling guide: Understand how AI agents use tools in conversations
- WRITER Agent guide: Learn how to use WRITER Agent with connected tools
- MCP gateway overview: Learn about Writer’s MCP gateway architecture