Create a new agent with text generation capabilities
From the AI Studio home page, click Build an agent in the top right corner. Then, select Text generation as the type of agent you want to create.
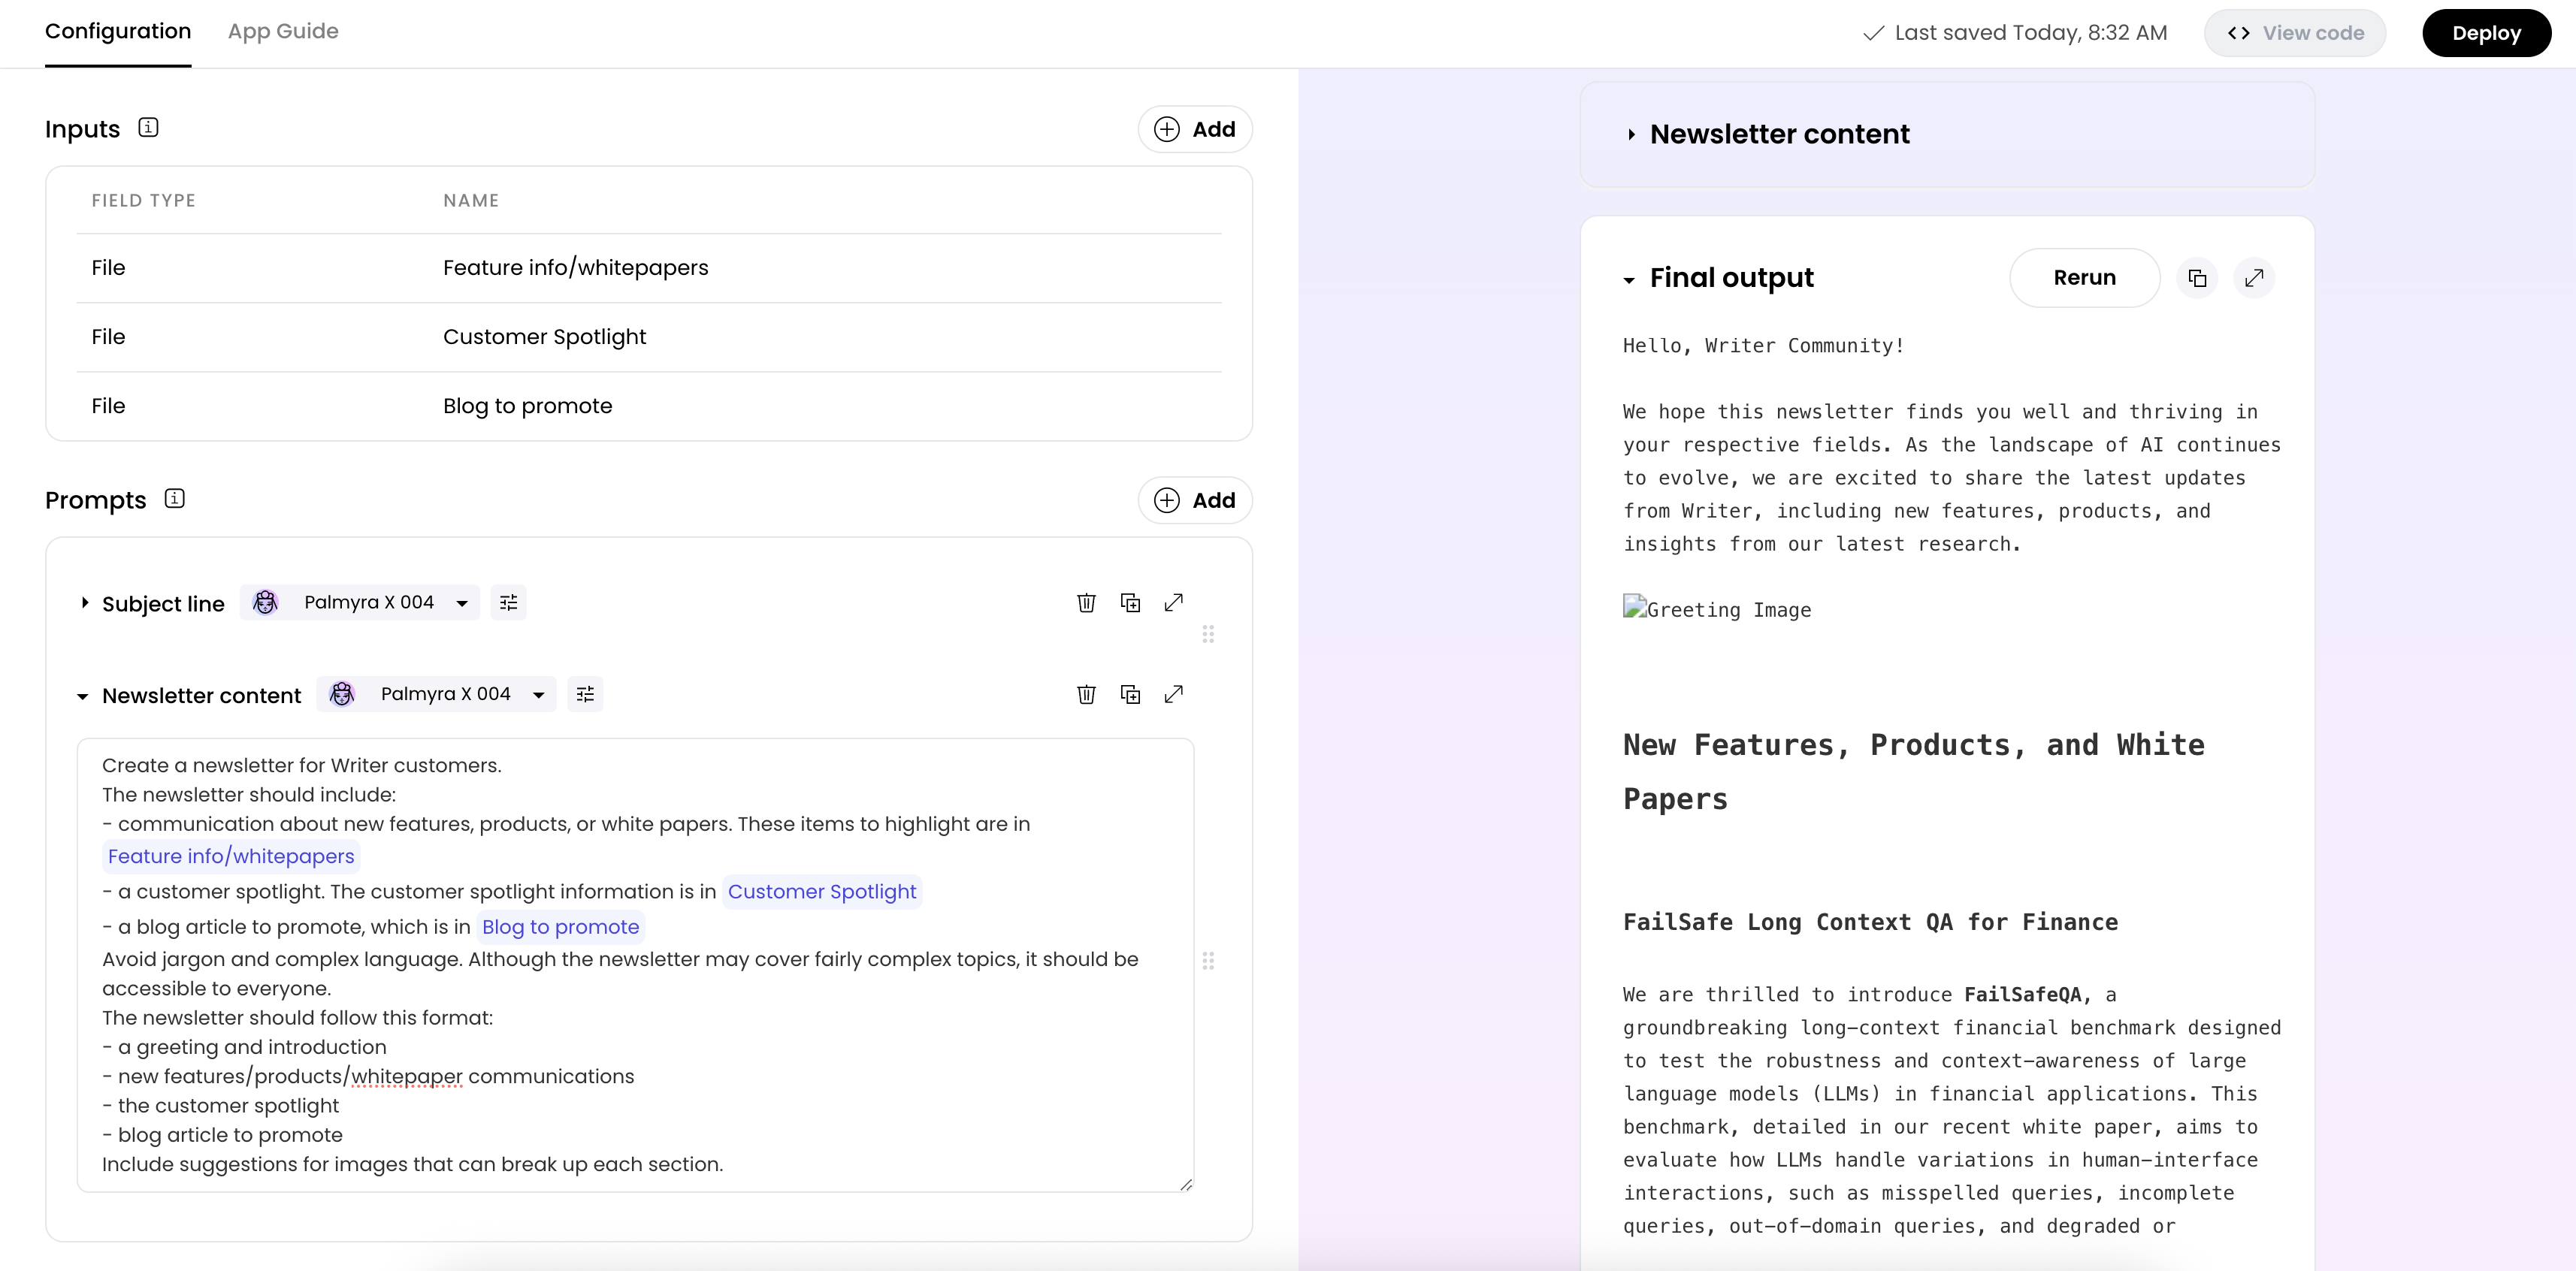
Define your inputs
This example is a newsletter that always includes three key components:
- Communication about new features, products, or white papers
- A customer spotlight
- Information about the latest blog post
- Feature info/whitepapers
- Customer Spotlight
- Blog to promote
Write your prompts
There are several ways to break up the prompts for generating a newsletter. In this example, create two prompts: one to generate the subject line and one to generate the body of the newsletter.The prompt for the subject line is:
Create a subject line for a weekly newsletter about the new features, customer spotlights, and featured blog posts.The prompt for the body of the newsletter is:
Create a newsletter for Writer customers. The newsletter should include:Avoid jargon and complex language. Although the newsletter may cover fairly complex topics, it should be accessible to everyone. The newsletter should follow this format:
- communication about new features, products, or white papers. These items to highlight are in
@Feature info/whitepapers- a customer spotlight. The customer spotlight information is in
@Customer Spotlight- a blog article to promote, which is in
@Blog to promoteInclude suggestions for images that can break up each section.
- a greeting and introduction
- new features/products/whitepaper communications
- the customer spotlight
- blog article to promote
Format your output
Decide how you want your output to look in the Output formatting section. You can use Markdown to format your output.In this example, the output is a newsletter with a subject line and body:
@subject_line @body
Test and refine your output
The first version of your newsletter may not be what you’re looking for. That’s okay! The more you tweak your prompts and provide examples, the better your output will be.It can also be helpful to provide examples in your prompts of newsletters and subject lines you think are the best. That way, Writer can learn from what you consider to be the best newsletters.
Deploy your agent
Once you’re happy with how everything looks, deploy your agent so that everyone can use it. Developers can also invoke this agent with the API and use it with tool calling to integrate into other agentic workflows.