> ## Documentation Index
> Fetch the complete documentation index at: https://dev.writer.com/llms.txt
> Use this file to discover all available pages before exploring further.
# Quickstart
## Overview
In this guide, you'll learn how to get started with the Writer Framework by building a simple "Hello, World" application. This beginner-friendly guide will help you install the necessary tools, set up an app, and deploy it to the Writer Cloud.
## Step 1: Install Writer Framework and run the demo app
Writer Framework works on Linux, Mac, and Windows. It supports Python versions 3.9.2 through 3.12. We recommend using a virtual environment.
Python 3.13 is not yet supported.
Use the following command to install the Writer Framework using `pip`. Open your command line interface and type:
```bash theme={null}
pip install writer
```
This will download and install the Writer Framework and all its required dependencies.
Once the installation is complete, you can verify that everything is set up correctly by running the built-in demo application. Navigate to your desired directory and type:
```bash theme={null}
writer hello
```
This command creates a subfolder named **hello** and launches the Writer Framework, opening a visual editor accessible through a local URL displayed in your command line. This demo app illustrates the different components available in Writer Framework, helping you get familiar with the setup.
## Step 2: Create a new framework app
Now that we've tested the setup, let's create our first "Hello, World" app using the `ai-starter` template. This template showcases how quickly you can build AI-powered applications with the Writer Framework.
Use the following command to generate the app structure:
```sh theme={null}
writer create hello-world --template=ai-starter
```
This will create a new app folder, **hello-world**, with the following structure:
1. `main.py` - The entry point for the app. You can import anything you need from here.
2. `.wf/` - This folder contains the UI component declarations. Maintained by the Writer Framework's visual editor.
3. `static/` - This folder contains front-end static files which you might want to distribute with your app, such as images and stylesheets.
## Step 3: Start the visual editor
To start building and customizing your app visually, use the Writer Framework’s editor. This browser-based interface allows you to drag components, arrange layouts, and modify settings in real-time.
```sh theme={null}
writer edit hello-world
```
After running this command, you'll see a local URL displayed in your command line. Open this URL in a web browser to access the editor.
 In your terminal, enter the following command to open the editor:
```sh theme={null}
writer edit hello-world
```
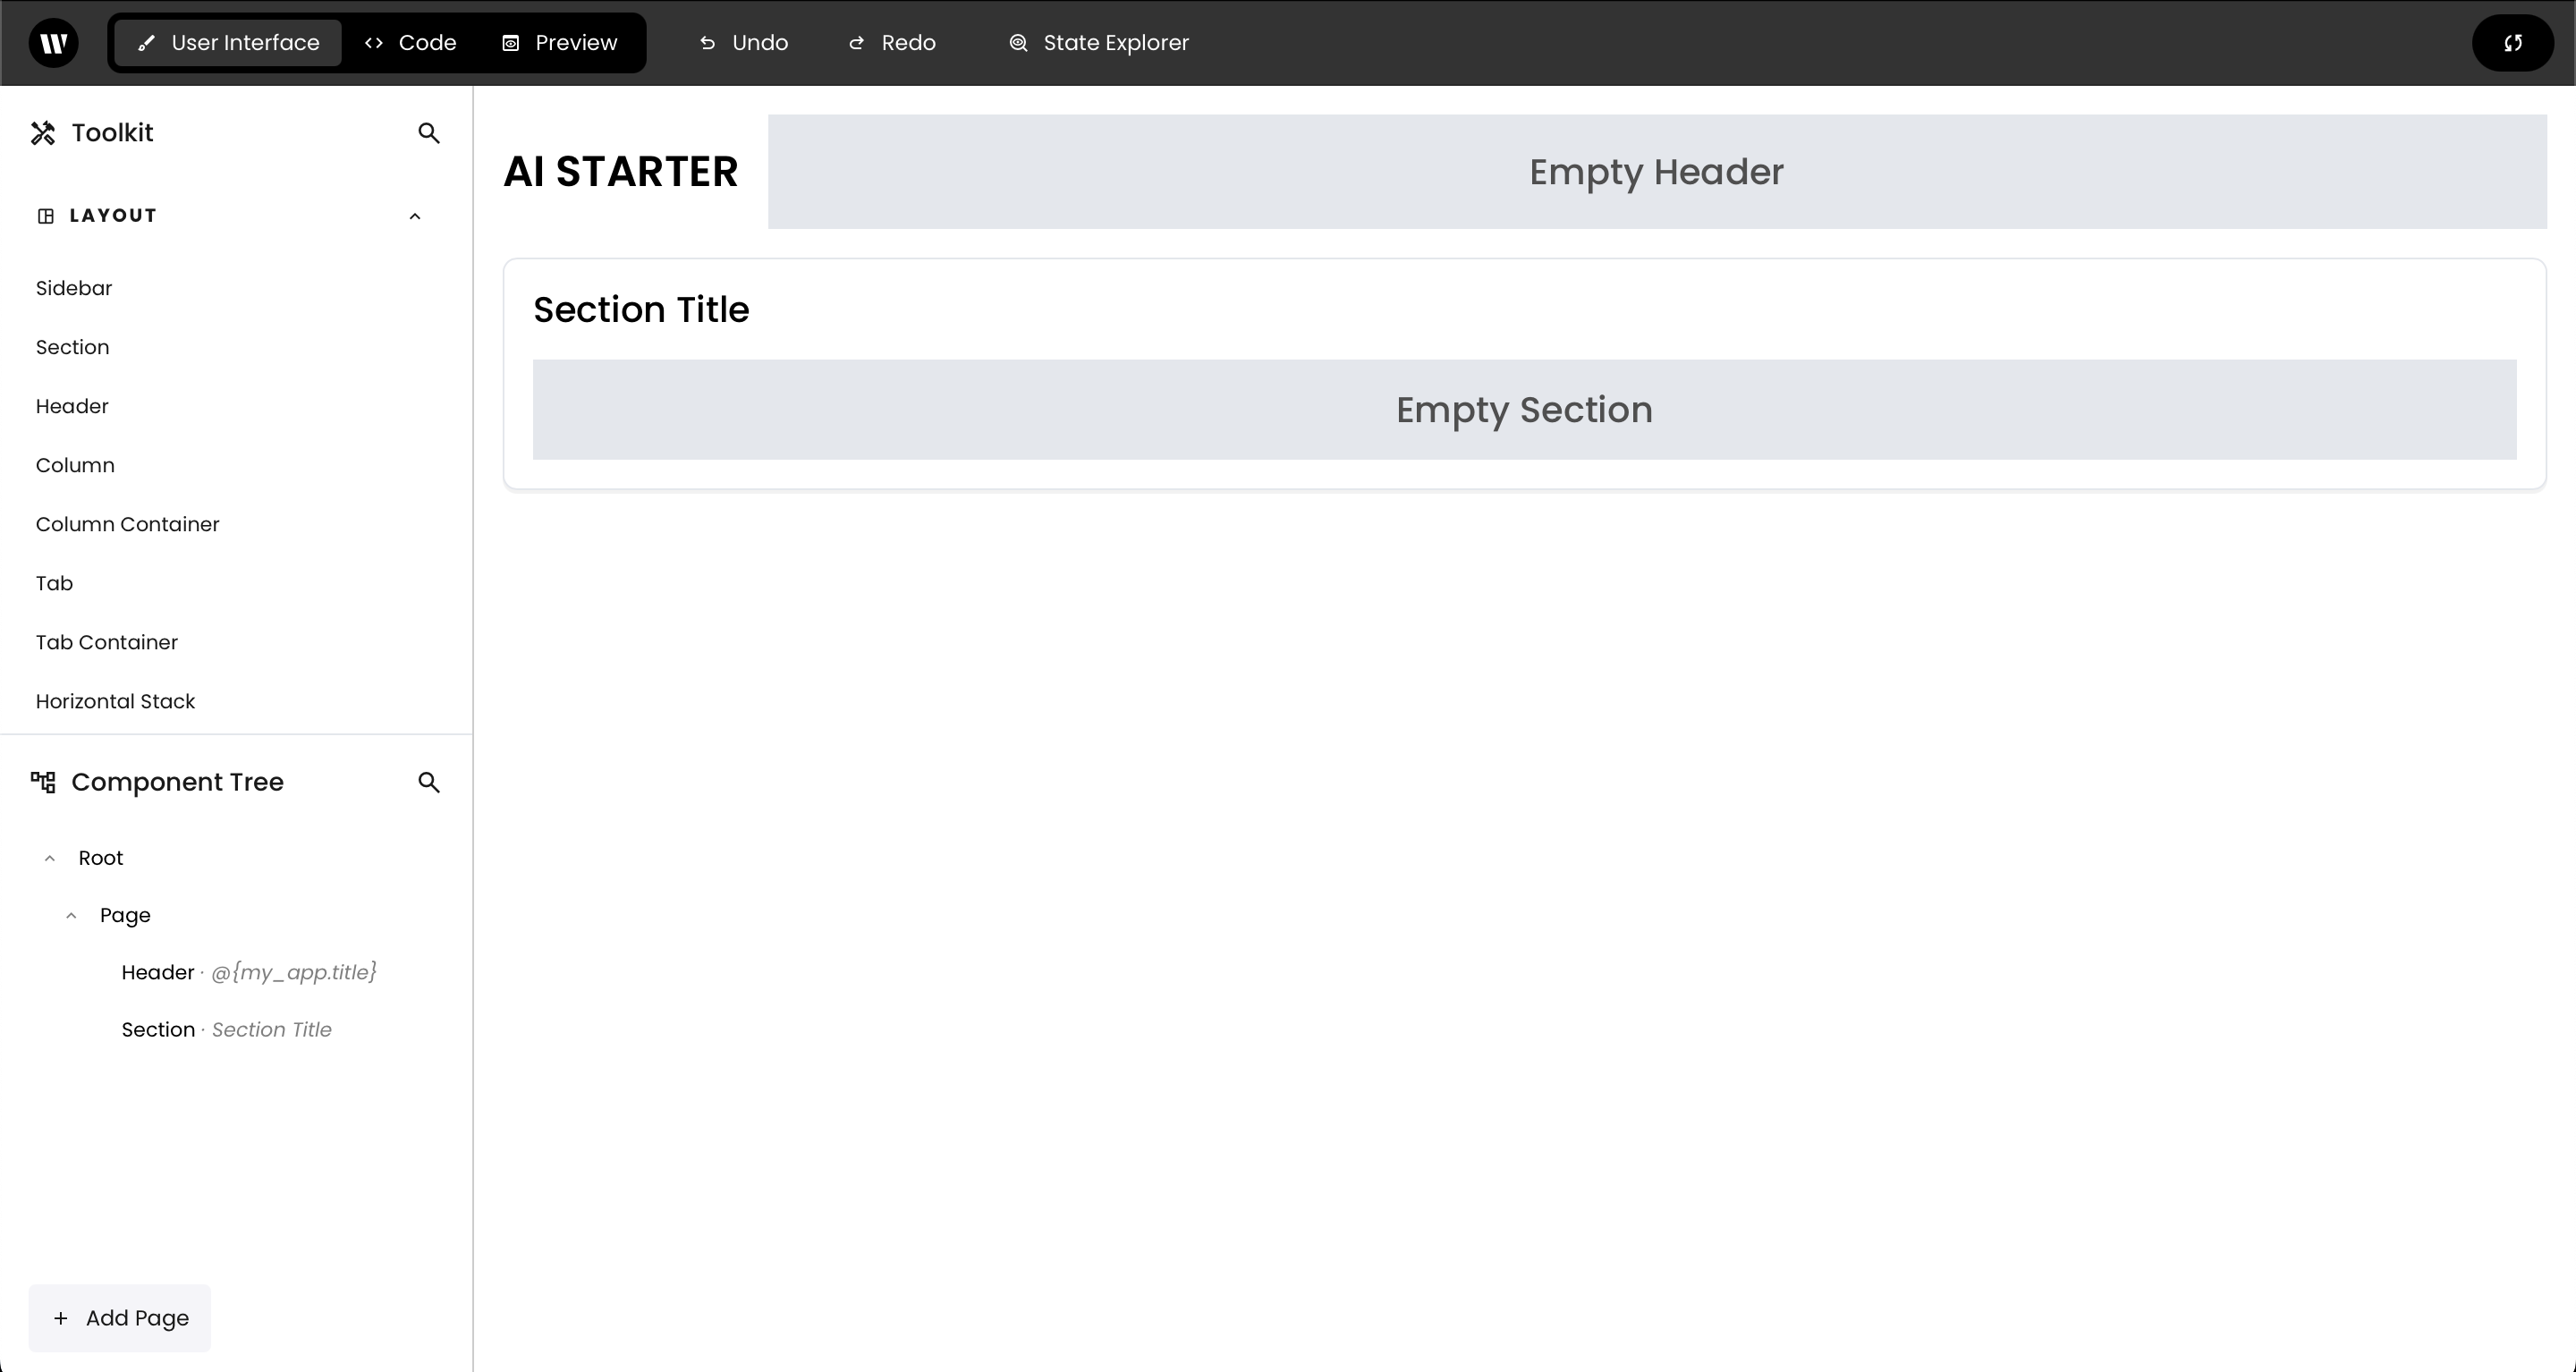
This command opens the Writer Framework editor in your browser, where you’ll see a live preview of your app. The editor interface includes a **component library** on the left, a **canvas** in the center for building layouts, and a **settings panel** on the right for customizing selected components.
The editor starts by default on port 4005. If you launch multiple editors in parallel and do not specify a port, Writer Framework will automatically assign the next port until reaching the limit of 4099.
It's not recommended to expose the Framework to the Internet. If you need to access the editor remotely, we recommend setting up an SSH tunnel. By default, requests from non-local origins are rejected as a security measure to protect against drive-by attacks.
If you need to disable this protection, use the flag `--enable-remote-edit`.
On the left sidebar, browse through the **Component Library** and try dragging a few components onto the **Canvas**. For example, you can add a **Text** component to display "Hello, World!" or try other components to see how they work together.
Experiment with arranging these components on the canvas to create a simple layout.
In your terminal, enter the following command to open the editor:
```sh theme={null}
writer edit hello-world
```
This command opens the Writer Framework editor in your browser, where you’ll see a live preview of your app. The editor interface includes a **component library** on the left, a **canvas** in the center for building layouts, and a **settings panel** on the right for customizing selected components.
The editor starts by default on port 4005. If you launch multiple editors in parallel and do not specify a port, Writer Framework will automatically assign the next port until reaching the limit of 4099.
It's not recommended to expose the Framework to the Internet. If you need to access the editor remotely, we recommend setting up an SSH tunnel. By default, requests from non-local origins are rejected as a security measure to protect against drive-by attacks.
If you need to disable this protection, use the flag `--enable-remote-edit`.
On the left sidebar, browse through the **Component Library** and try dragging a few components onto the **Canvas**. For example, you can add a **Text** component to display "Hello, World!" or try other components to see how they work together.
Experiment with arranging these components on the canvas to create a simple layout.
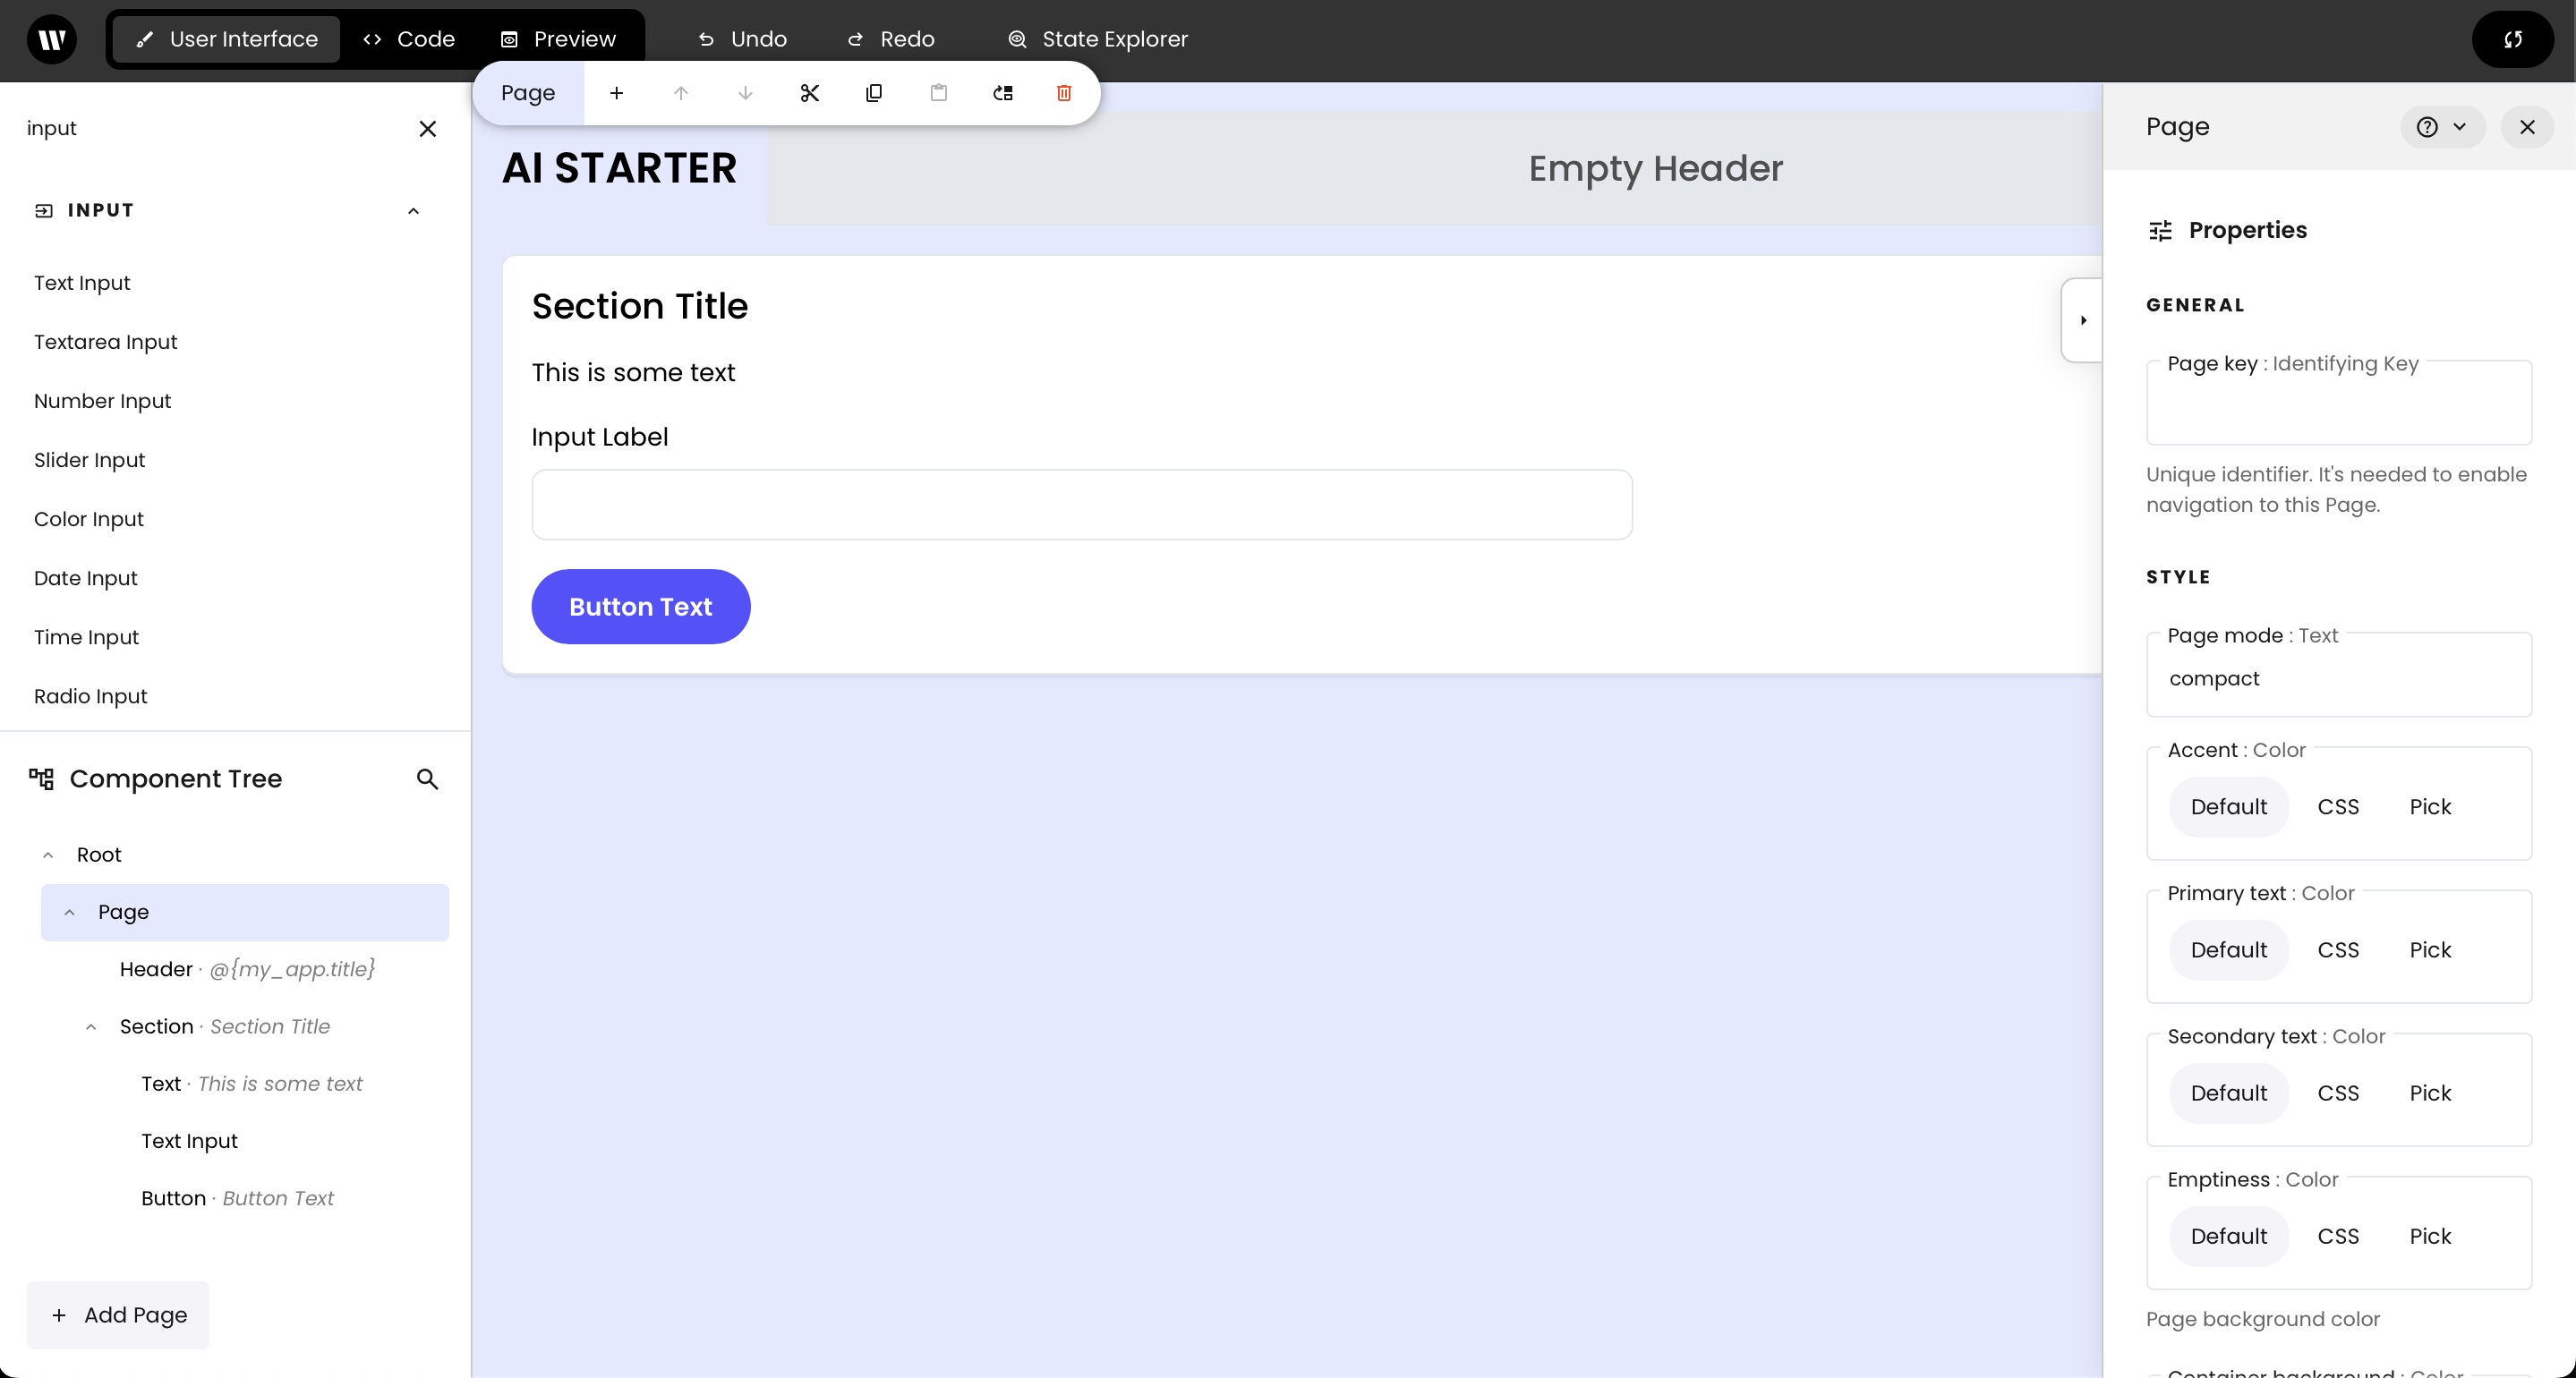 With a component selected, look at the **Settings Panel** on the right side. Here, you can edit properties like text content, colors, and alignment to see how it changes the appearance and behavior of the component on the canvas.
This panel allows you to customize components without writing any code, giving you a quick and visual way to build a frontend.
To personalize your app further, open `main.py` in the root of your project folder. Locate the following line:
```python theme={null}
wf.init_state({
"my_app": {
"title": "AI STARTER"
},
})
```
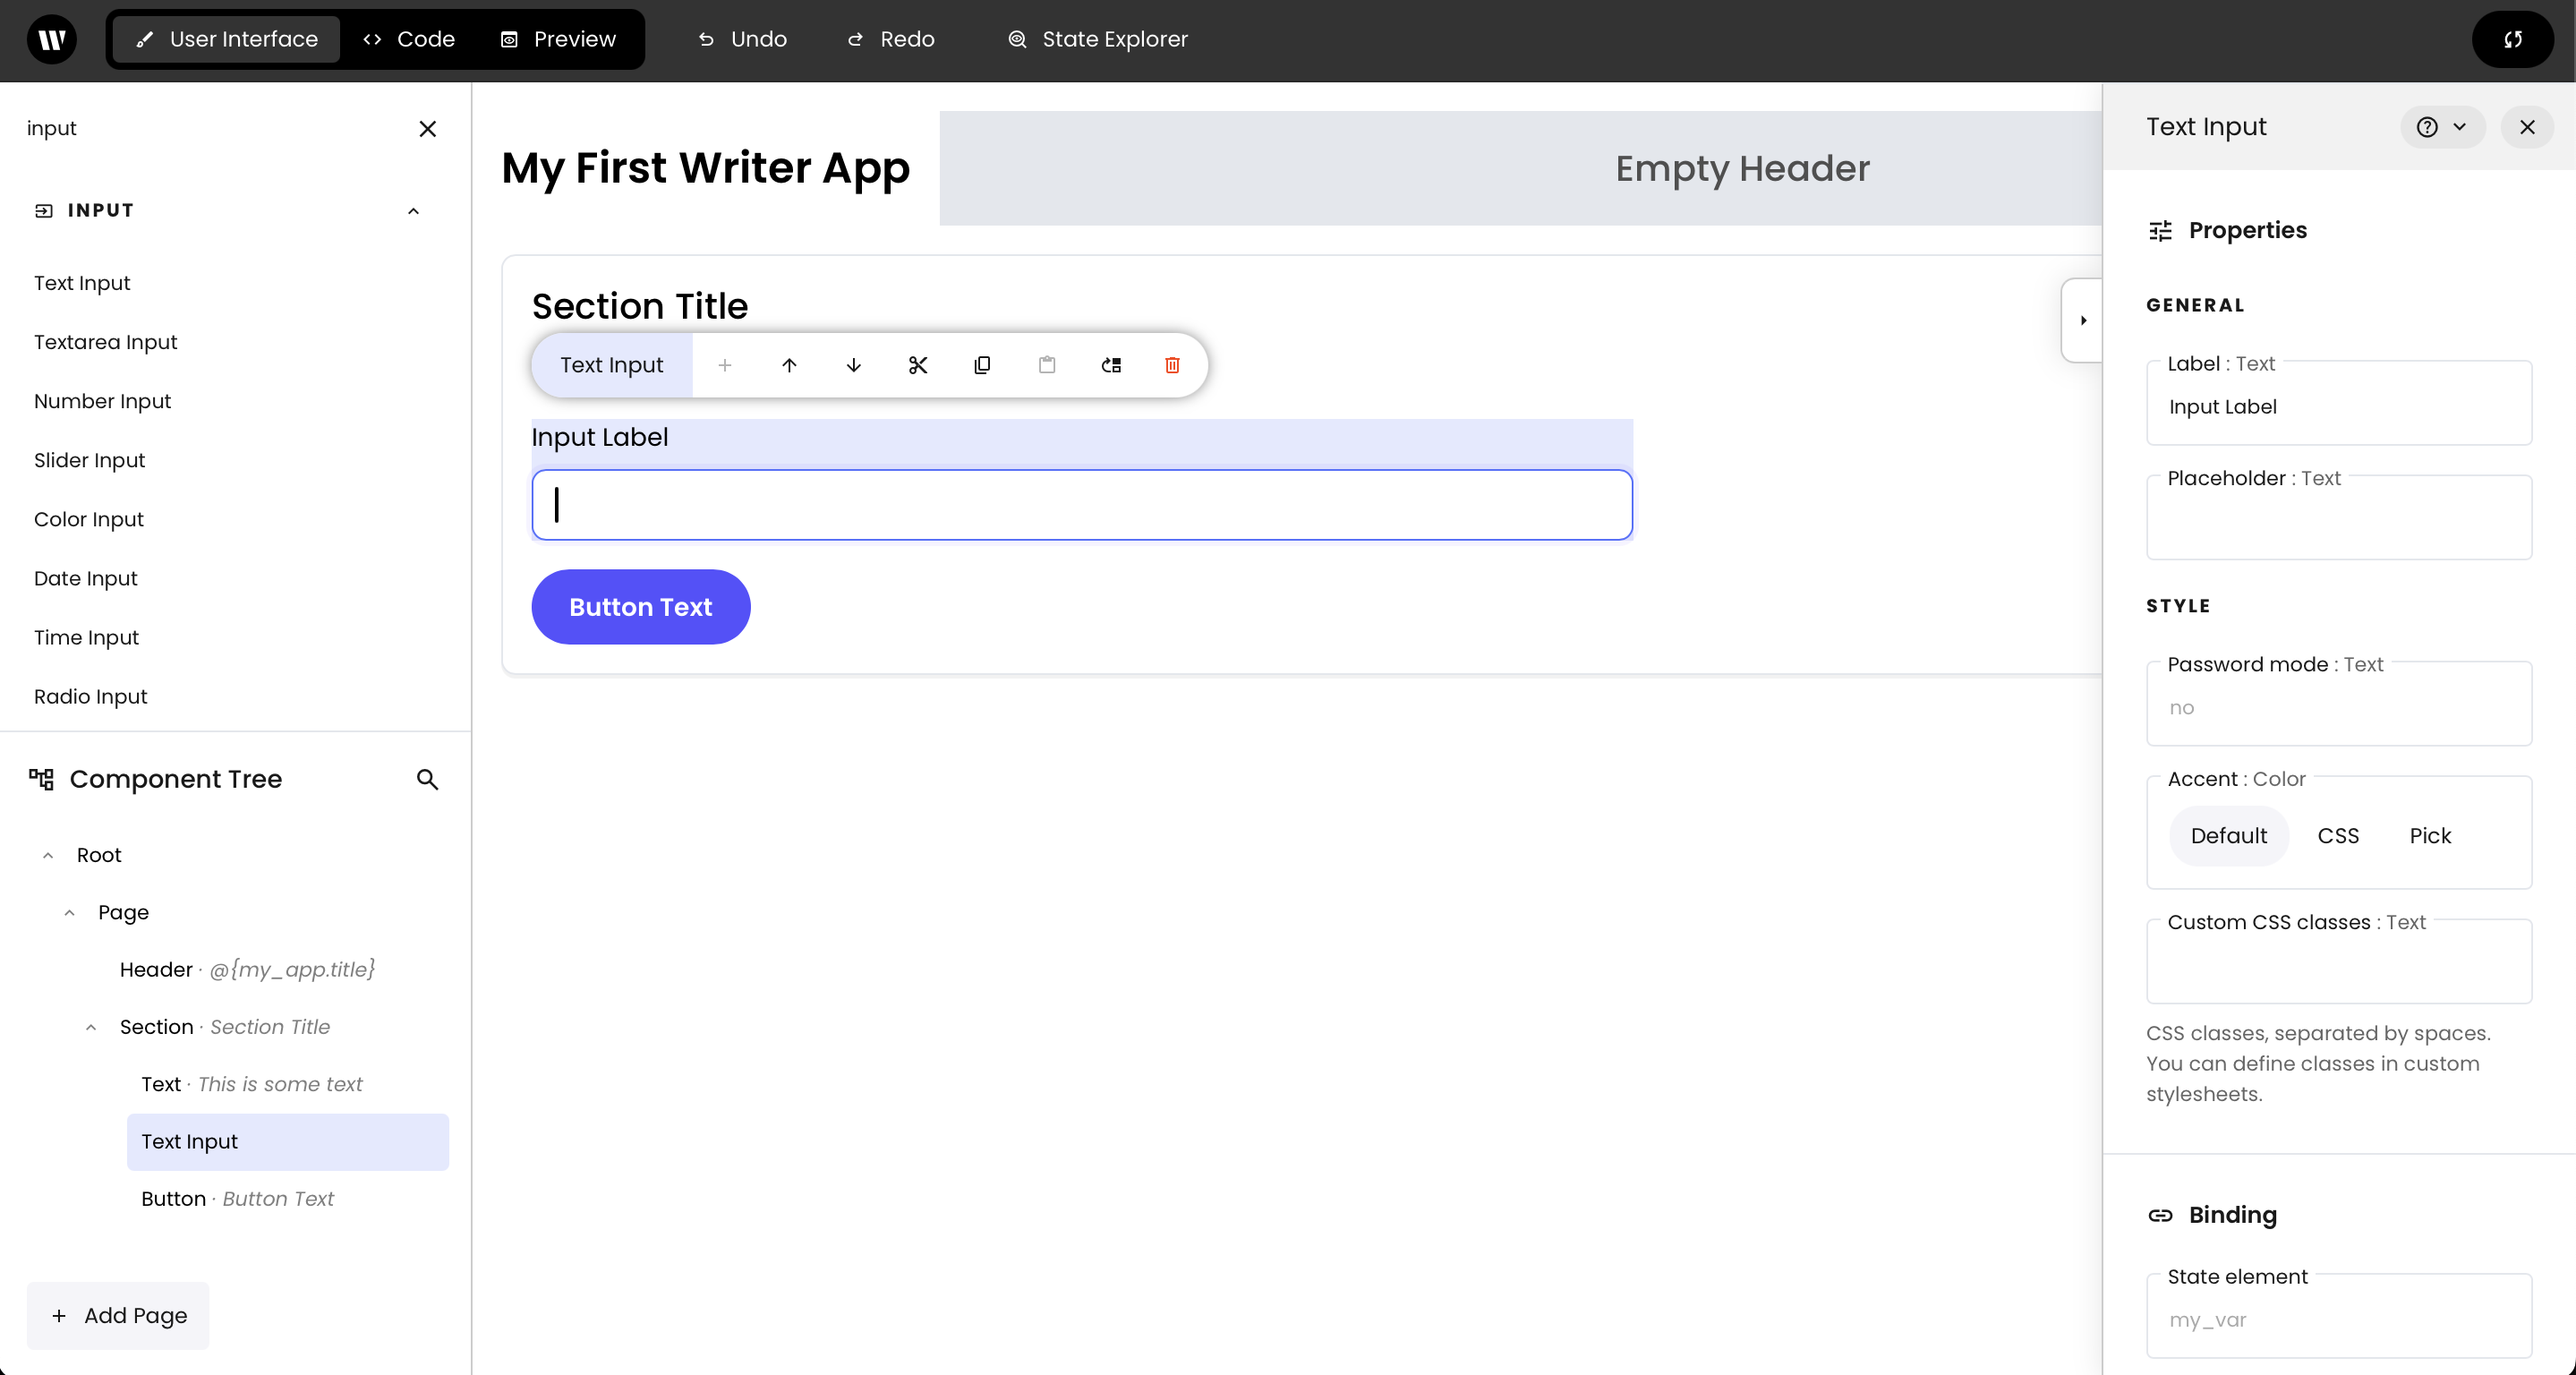
Change `"AI STARTER"` to something unique, like `"My First Writer App"`. Save the file, and you’ll see the updated name reflected immediately in the editor.
With a component selected, look at the **Settings Panel** on the right side. Here, you can edit properties like text content, colors, and alignment to see how it changes the appearance and behavior of the component on the canvas.
This panel allows you to customize components without writing any code, giving you a quick and visual way to build a frontend.
To personalize your app further, open `main.py` in the root of your project folder. Locate the following line:
```python theme={null}
wf.init_state({
"my_app": {
"title": "AI STARTER"
},
})
```
Change `"AI STARTER"` to something unique, like `"My First Writer App"`. Save the file, and you’ll see the updated name reflected immediately in the editor.
 For now, this simple exploration gives you an idea of how the framework enables rapid frontend building without code. In later tutorials, like creating a [Chat assistant](/framework/chat-assistant) or a [Social post generator](/framework/social-post-generator), you’ll explore more advanced components and layouts using this visual editor.
## Step 4: Run the app locally
When your app is ready, execute the `run` command, which will allow others to run, but not edit, your Framework app.
```sh theme={null}
writer run hello-world
```
Your app starts by default on port 3005. If you launch multiple apps in parallel and do not specify a port, Writer Framework will automatically assign the next port until reaching the limit of 3099.
You can specify a port and host. Specifying `--host 0.0.0.0` enables you to share your application in your local network.
```sh theme={null}
writer run hello-world --port 5000 --host 0.0.0.0
```
## Conclusion
Congratulations! You’ve set up and configured your first app with the Writer Framework. Now, try building a [Chat assistant](/framework/chat-assistant) or a [Social post generator](/framework/social-post-generator) to put these skills into action.
For now, this simple exploration gives you an idea of how the framework enables rapid frontend building without code. In later tutorials, like creating a [Chat assistant](/framework/chat-assistant) or a [Social post generator](/framework/social-post-generator), you’ll explore more advanced components and layouts using this visual editor.
## Step 4: Run the app locally
When your app is ready, execute the `run` command, which will allow others to run, but not edit, your Framework app.
```sh theme={null}
writer run hello-world
```
Your app starts by default on port 3005. If you launch multiple apps in parallel and do not specify a port, Writer Framework will automatically assign the next port until reaching the limit of 3099.
You can specify a port and host. Specifying `--host 0.0.0.0` enables you to share your application in your local network.
```sh theme={null}
writer run hello-world --port 5000 --host 0.0.0.0
```
## Conclusion
Congratulations! You’ve set up and configured your first app with the Writer Framework. Now, try building a [Chat assistant](/framework/chat-assistant) or a [Social post generator](/framework/social-post-generator) to put these skills into action.