> ## Documentation Index
> Fetch the complete documentation index at: https://dev.writer.com/llms.txt
> Use this file to discover all available pages before exploring further.
# Product description generator
In this tutorial, you'll use the Writer Framework to build a Saturn Snacks product description generator for a variety of food outlets. After adding the initial functionality of the app, you'll also extend the app to include a chart of SEO keyword analysis and the ability for users to add their own food outlet.
 ## Setting up your project
### Creating a Writer app and getting your API key
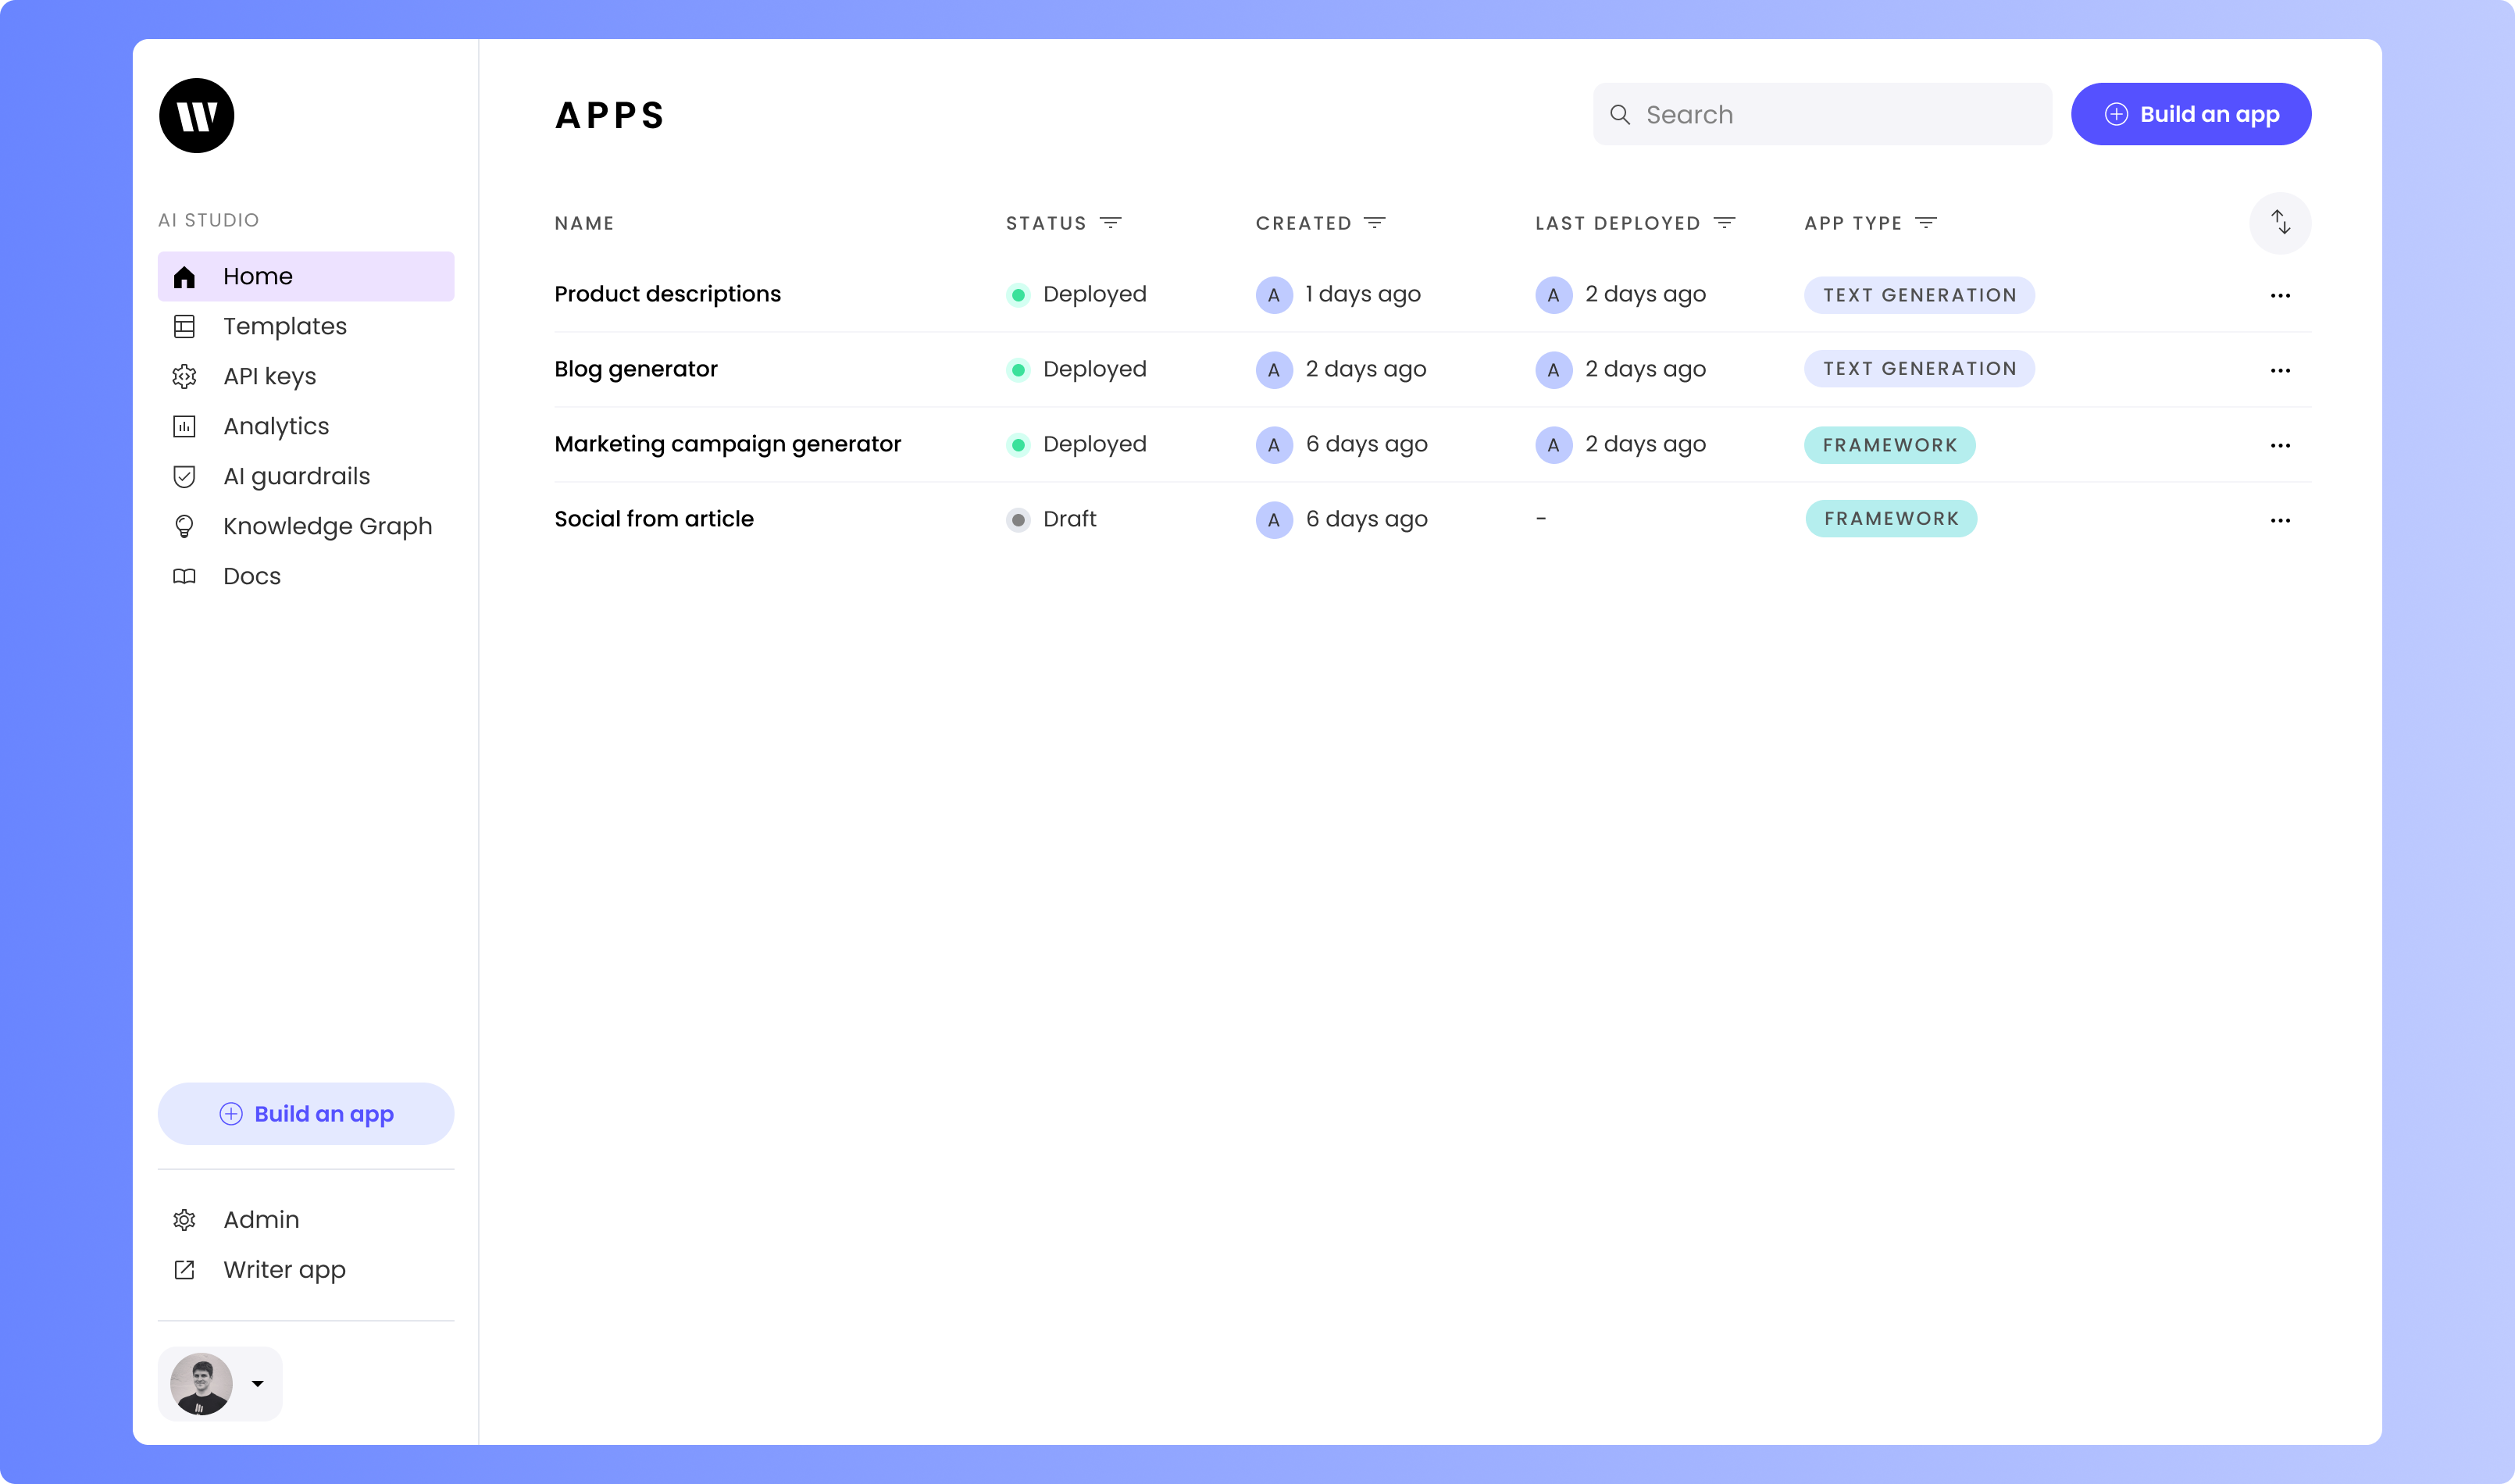
From the Home screen, click on **Build an app**.
## Setting up your project
### Creating a Writer app and getting your API key
From the Home screen, click on **Build an app**.
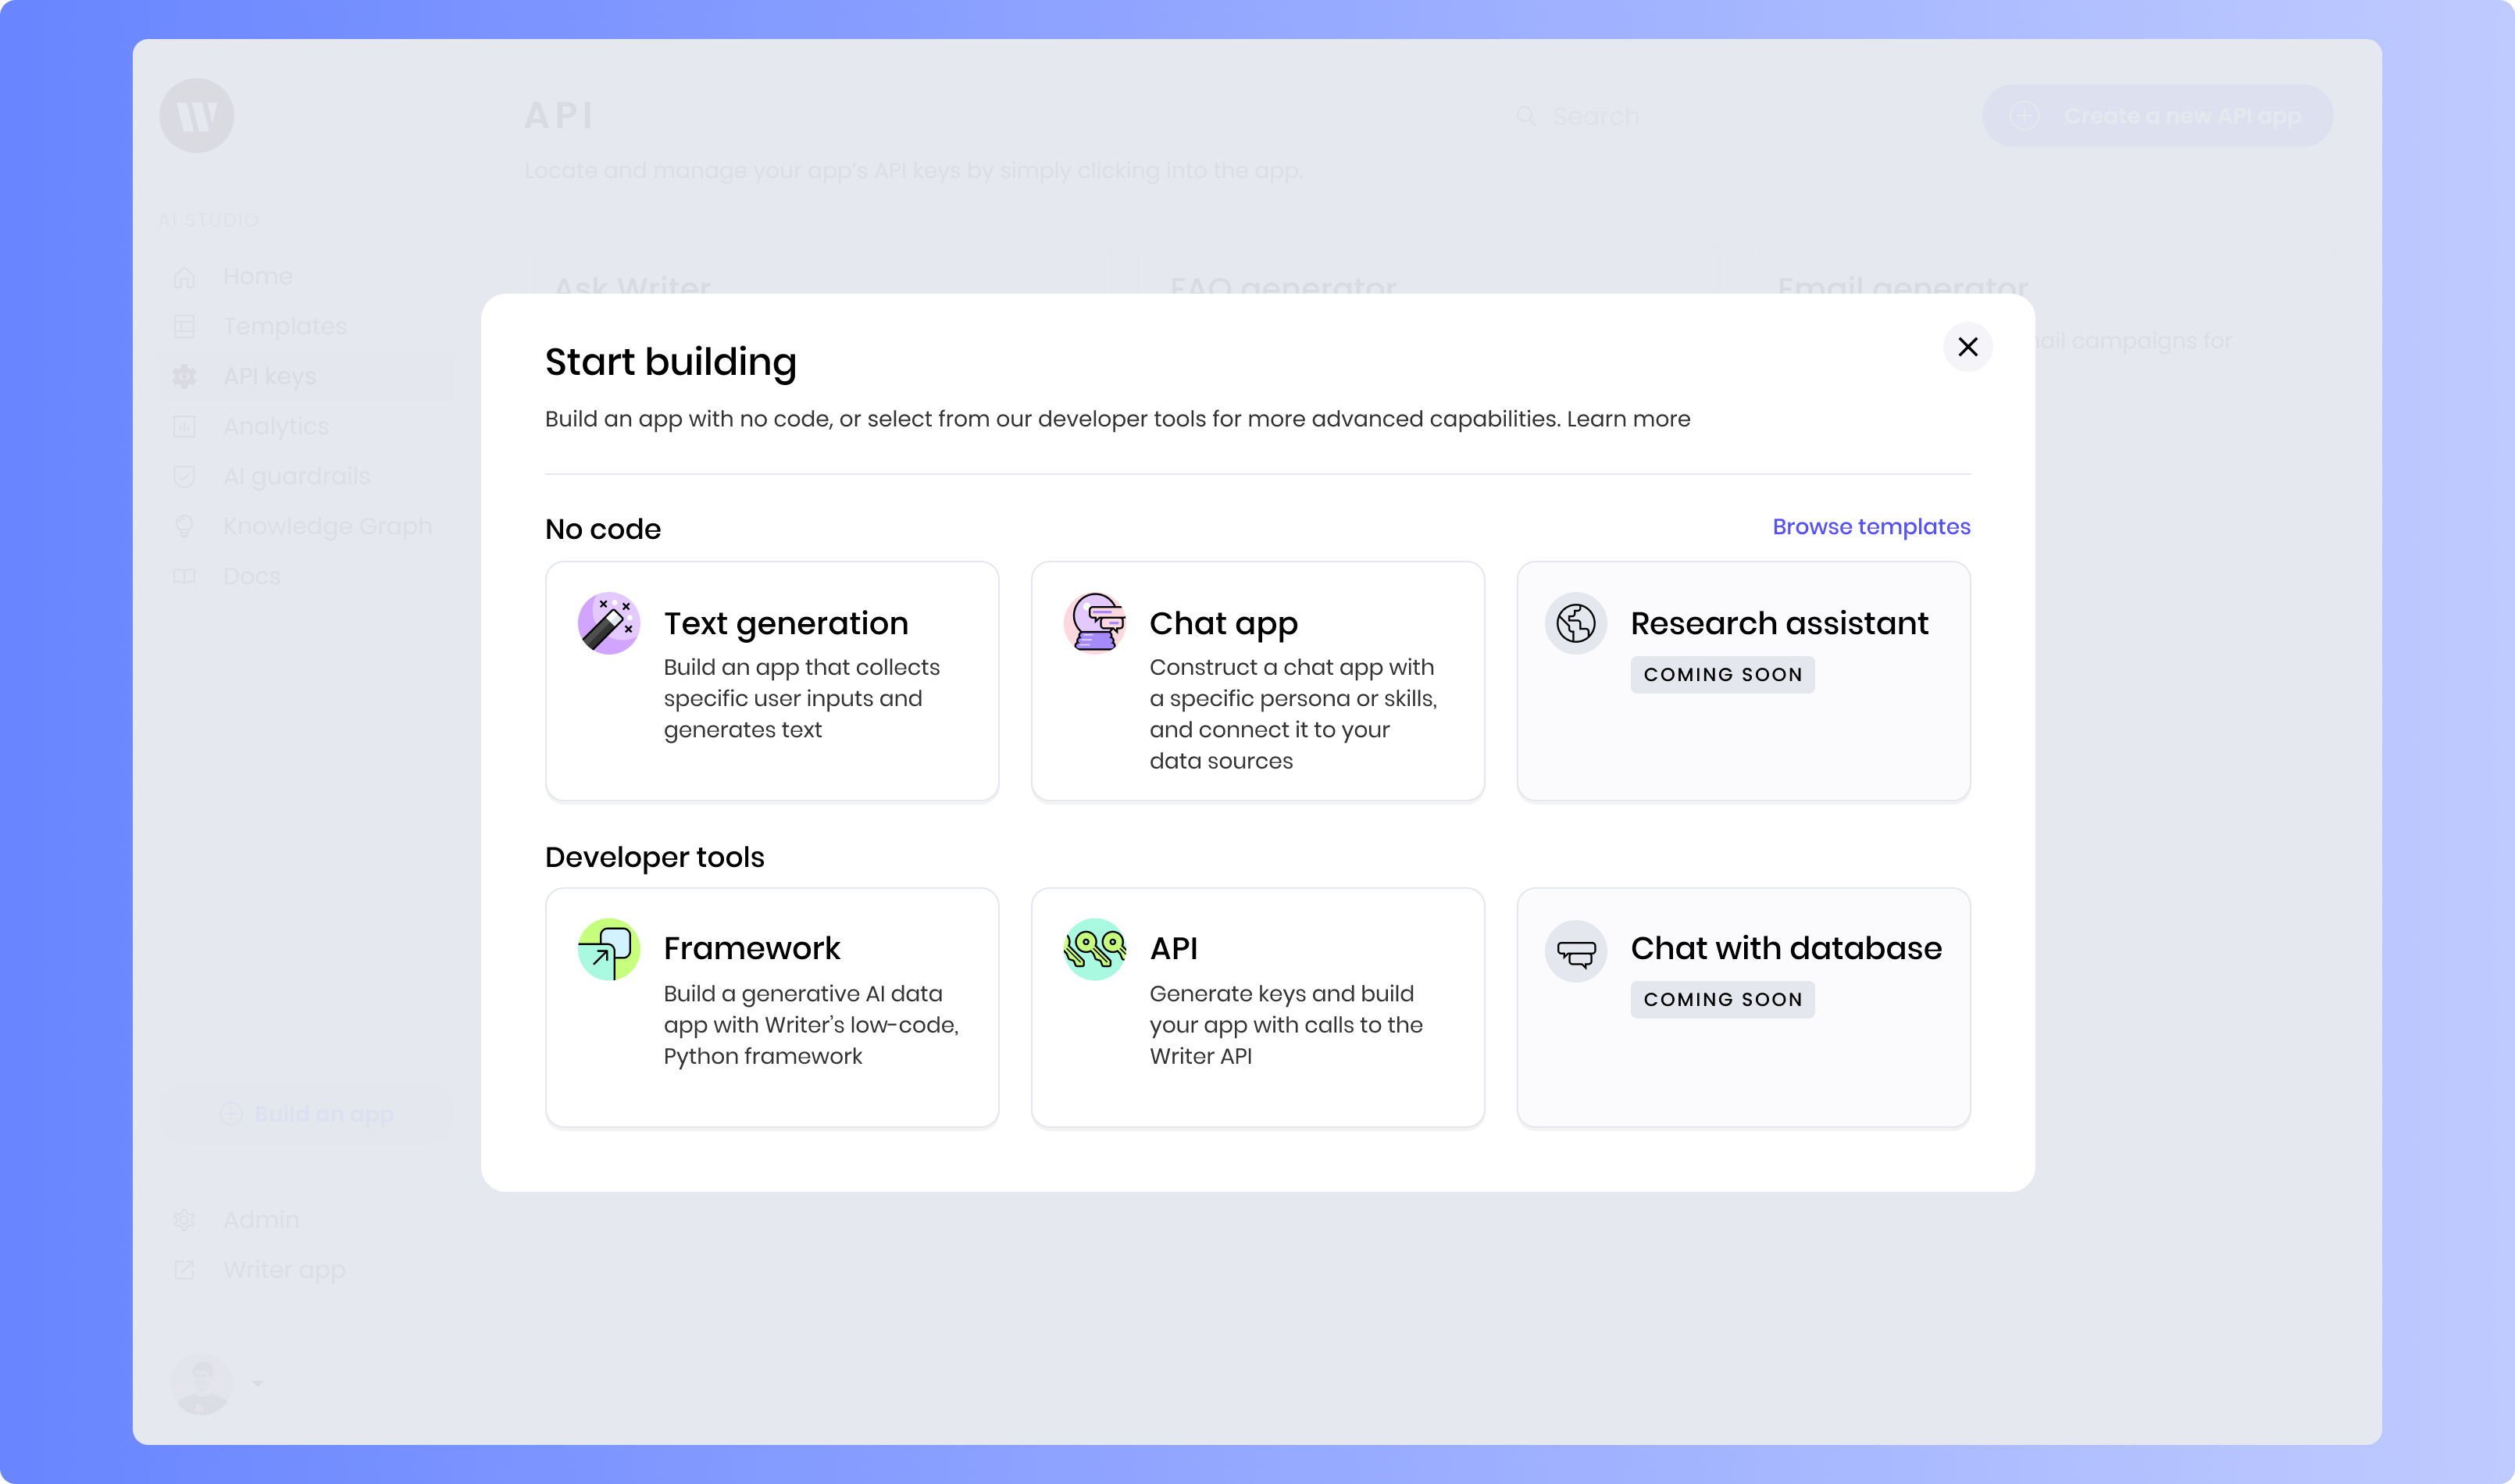
 Select Framework as the app type you’d like to create, enabling you to generate keys and build your app with the Writer Framework.
 On the next screen, you can edit your Writer application name in the upper left. Underneath “Authenticate with an API key,” click on “Reveal” to see and copy your API key.
### Creating the application
Next, open your terminal and navigate to the directory where you want to create your application directory.
To pass your API key to the Writer Framework, you'll need to set an environment variable called `WRITER_API_KEY`. Here’s how you can set this variable in your terminal session:
```sh On macOS/Linux theme={null}
export WRITER_API_KEY=[key]
```
```sh On Windows theme={null}
set WRITER_API_KEY=[key]
```
Run the following command to create your application. Replace `product-description-app` with your desired project name and `pdg-tutorial` with the template you wish to use:
```
writer create product-description-app --template=pdg-tutorial
```
This command sets up a new project called `product-description-app` in the specified directory using a template designed for this tutorial.
To edit your project, run the below commands. This will bring up the console, where Framework-wide messages and errors will appear, including logs from the API. By default, the Writer Framework Builder is accessible at `localhost:4005`. If that port is in use, you can specify a different port. Open this address in your browser to view your default application setup.
```bash Standard port theme={null}
writer edit product-description-app
```
```bash Custom port theme={null}
writer edit product-description-app --port=3007
```
## Introduction to the application setup
When you first start up the application, you're going to see two main layout items provided by the template:
1. A Header component with the name of the application
2. A Column container that'll house most of the UI of the app
The left column includes a form that has three text inputs and a button. These three text inputs are bound to corresponding state elements. The right column contains a Message component for loading and status messages, as well as an empty Tab container which you'll use to display the product descriptions of the various outlets.
### Code overview
Looking at the code in `main.py`, you'll see that the template already imported the Writer Framework, the AI module, and the product description prompts that you'll use throughout this tutorial.
```python theme={null}
import writer as wf
import writer.ai
from prompts import base_prompts, user_prompt, seo_keywords
```
The prompts are stored in a separate file called `prompts.py`. You are welcome to open this project in the IDE of your choice and modify the prompts however you wish. However, you don't need to make any changes to this file to follow this tutorial.
You'll also see the state initialization:
```python theme={null}
wf.init_state({
"form": {
"title": "",
"description": "",
"keywords": ""
},
"message": "Fill in the inputs and click \"Generate\" to get started.",
})
```
The form elements and the message have been initialized as strings. You'll add to this state dictionary throughout the tutorial.
## Implementing the Product description generator
Your first goal is to generate product descriptions for the various food outlets, with each outlet appearing as a tab to the right of the form.
On the next screen, you can edit your Writer application name in the upper left. Underneath “Authenticate with an API key,” click on “Reveal” to see and copy your API key.
### Creating the application
Next, open your terminal and navigate to the directory where you want to create your application directory.
To pass your API key to the Writer Framework, you'll need to set an environment variable called `WRITER_API_KEY`. Here’s how you can set this variable in your terminal session:
```sh On macOS/Linux theme={null}
export WRITER_API_KEY=[key]
```
```sh On Windows theme={null}
set WRITER_API_KEY=[key]
```
Run the following command to create your application. Replace `product-description-app` with your desired project name and `pdg-tutorial` with the template you wish to use:
```
writer create product-description-app --template=pdg-tutorial
```
This command sets up a new project called `product-description-app` in the specified directory using a template designed for this tutorial.
To edit your project, run the below commands. This will bring up the console, where Framework-wide messages and errors will appear, including logs from the API. By default, the Writer Framework Builder is accessible at `localhost:4005`. If that port is in use, you can specify a different port. Open this address in your browser to view your default application setup.
```bash Standard port theme={null}
writer edit product-description-app
```
```bash Custom port theme={null}
writer edit product-description-app --port=3007
```
## Introduction to the application setup
When you first start up the application, you're going to see two main layout items provided by the template:
1. A Header component with the name of the application
2. A Column container that'll house most of the UI of the app
The left column includes a form that has three text inputs and a button. These three text inputs are bound to corresponding state elements. The right column contains a Message component for loading and status messages, as well as an empty Tab container which you'll use to display the product descriptions of the various outlets.
### Code overview
Looking at the code in `main.py`, you'll see that the template already imported the Writer Framework, the AI module, and the product description prompts that you'll use throughout this tutorial.
```python theme={null}
import writer as wf
import writer.ai
from prompts import base_prompts, user_prompt, seo_keywords
```
The prompts are stored in a separate file called `prompts.py`. You are welcome to open this project in the IDE of your choice and modify the prompts however you wish. However, you don't need to make any changes to this file to follow this tutorial.
You'll also see the state initialization:
```python theme={null}
wf.init_state({
"form": {
"title": "",
"description": "",
"keywords": ""
},
"message": "Fill in the inputs and click \"Generate\" to get started.",
})
```
The form elements and the message have been initialized as strings. You'll add to this state dictionary throughout the tutorial.
## Implementing the Product description generator
Your first goal is to generate product descriptions for the various food outlets, with each outlet appearing as a tab to the right of the form.
 ### Setting up the code
First, integrate new functionality into your code for generating product descriptions.
Paste the following method on line 5 after all of the imports to create a helper function for generating product descriptions:
```python theme={null}
def _generate_product_description(base_prompt, product_info):
prompt = base_prompt.format(**product_info)
description = writer.ai.complete(prompt)
return description
```
This function, `_generate_product_description`, accepts a base prompt and the product information from a form on the page. The underscore at the beginning of its name indicates that it's a private method not exposed to the UI.
Update the `wf.init_state()` to include a `product_description` dictionary with visibility control and outlets for descriptions:
```python theme={null}
wf.init_state({
"form": {
"title": "",
"description": "",
"keywords": ""
},
"message": "Fill in the inputs and click \"Generate\" to get started.",
"product_descriptions": {
"visible": False,
"outlets": {}
}
})
```
This setup includes a variable `visible` to control whether product description tabs are shown or hidden, and an empty dictionary `outlets` for storing descriptions.
Paste the following method beneath `_generate_product_description` to handle button clicks and generate descriptions:
```python theme={null}
def handle_click(state):
state["product_descriptions"]["visible"] = False
# Loop through all the base prompts to generate versions tailored to each outlet
for outlet, base_prompt in base_prompts.items():
state["message"] = f"% Generating product description for {outlet}..."
product_description = _generate_product_description(base_prompt, state["form"].to_dict())
state["product_descriptions"]["outlets"][outlet] = product_description
state["product_descriptions"]["visible"] = True
state["message"] = ""
```
This handler will loop through each imported base prompt, format it with the form information, and pass it to the helper method. The handler also manages UI interactions, such as displaying and hiding product descriptions and managing loading messages.
### Setting up the user interface
You can now set up the UI to iterate over the product descriptions dictionary and create tabs. Begin by opening the User Interface.
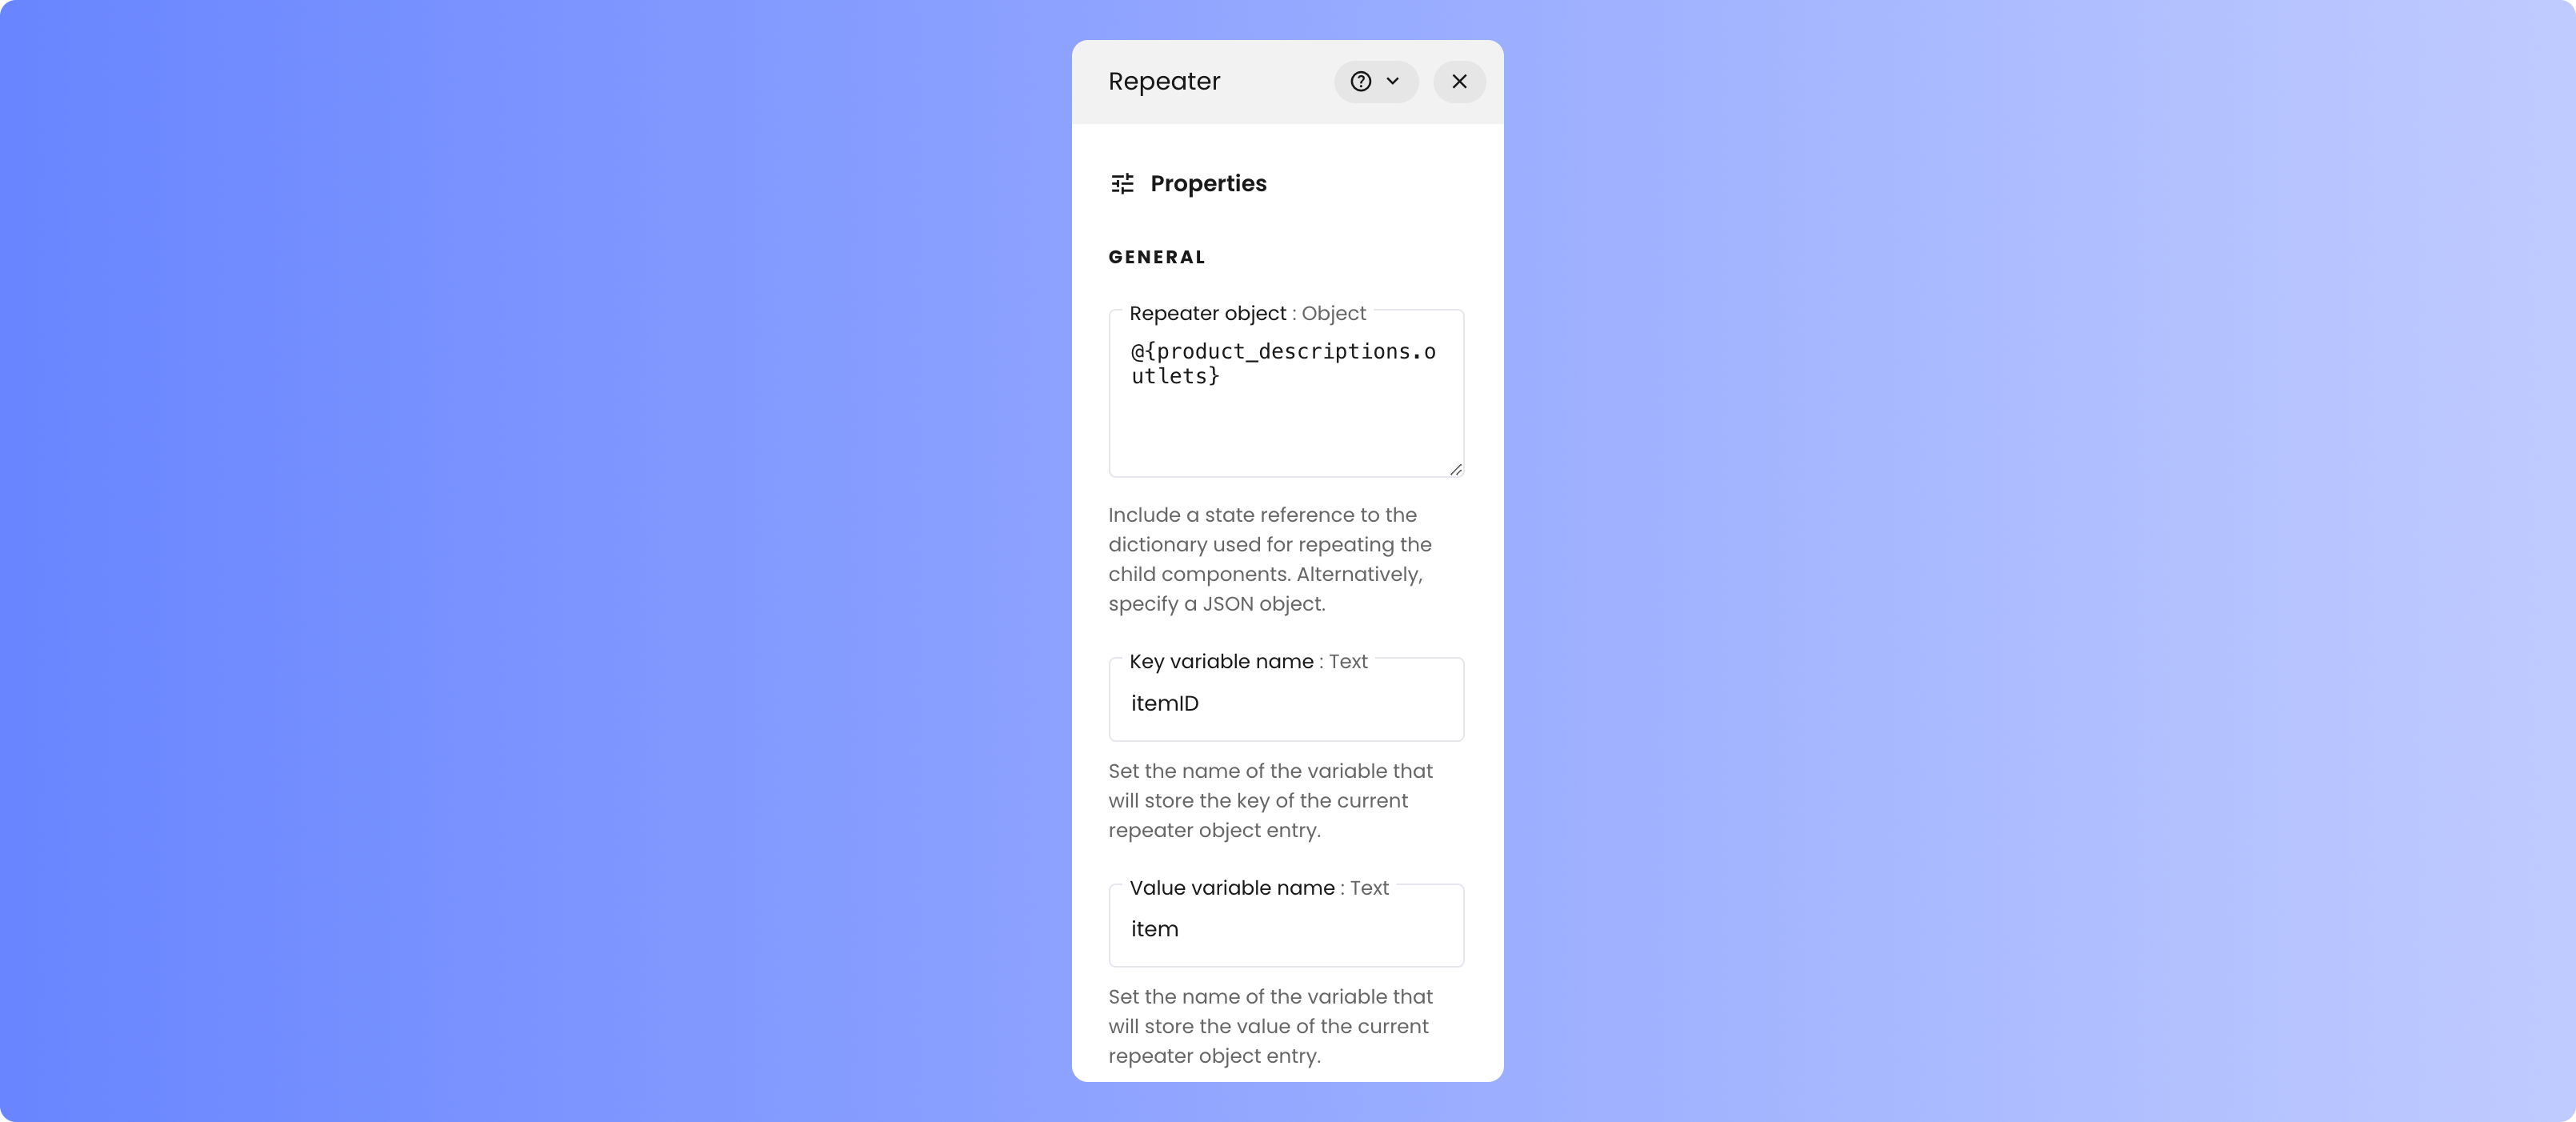
In the toolkit, drag a Repeater component from the Other section into the empty Tab Container. Click on the Repeater component to open its component settings. Under Properties, add `@{product_descriptions.outlets}` as the Repeater object to be used for repeating the child components. Replace the default “Key variable name” with `itemId`. You can leave “Value variable name” as `item`.
### Setting up the code
First, integrate new functionality into your code for generating product descriptions.
Paste the following method on line 5 after all of the imports to create a helper function for generating product descriptions:
```python theme={null}
def _generate_product_description(base_prompt, product_info):
prompt = base_prompt.format(**product_info)
description = writer.ai.complete(prompt)
return description
```
This function, `_generate_product_description`, accepts a base prompt and the product information from a form on the page. The underscore at the beginning of its name indicates that it's a private method not exposed to the UI.
Update the `wf.init_state()` to include a `product_description` dictionary with visibility control and outlets for descriptions:
```python theme={null}
wf.init_state({
"form": {
"title": "",
"description": "",
"keywords": ""
},
"message": "Fill in the inputs and click \"Generate\" to get started.",
"product_descriptions": {
"visible": False,
"outlets": {}
}
})
```
This setup includes a variable `visible` to control whether product description tabs are shown or hidden, and an empty dictionary `outlets` for storing descriptions.
Paste the following method beneath `_generate_product_description` to handle button clicks and generate descriptions:
```python theme={null}
def handle_click(state):
state["product_descriptions"]["visible"] = False
# Loop through all the base prompts to generate versions tailored to each outlet
for outlet, base_prompt in base_prompts.items():
state["message"] = f"% Generating product description for {outlet}..."
product_description = _generate_product_description(base_prompt, state["form"].to_dict())
state["product_descriptions"]["outlets"][outlet] = product_description
state["product_descriptions"]["visible"] = True
state["message"] = ""
```
This handler will loop through each imported base prompt, format it with the form information, and pass it to the helper method. The handler also manages UI interactions, such as displaying and hiding product descriptions and managing loading messages.
### Setting up the user interface
You can now set up the UI to iterate over the product descriptions dictionary and create tabs. Begin by opening the User Interface.
In the toolkit, drag a Repeater component from the Other section into the empty Tab Container. Click on the Repeater component to open its component settings. Under Properties, add `@{product_descriptions.outlets}` as the Repeater object to be used for repeating the child components. Replace the default “Key variable name” with `itemId`. You can leave “Value variable name” as `item`.
 From the Layout section of the toolkit, drag a Tab component into the Repeater. Click on the Tab to bring up the component settings and add `@{itemId}` to the Name property to display the outlet name on the tab.
 Drag a Text component from the Content section of the Toolkit into the Tab. Click on the Text component to open the Component settings and set the Text property to `@{item}`. You may also choose to set “Use Markdown” to “yes.”
 Click on the Tab container to bring up its Component settings. Scroll to the bottom and, under Visibility, click “Custom” and add `product_descriptions.visible` to the Visibility value input.
 Click on the Generate button inside the form to bring up its Component settings. In the Events section, select `handle_click` for the `wf-click` event.
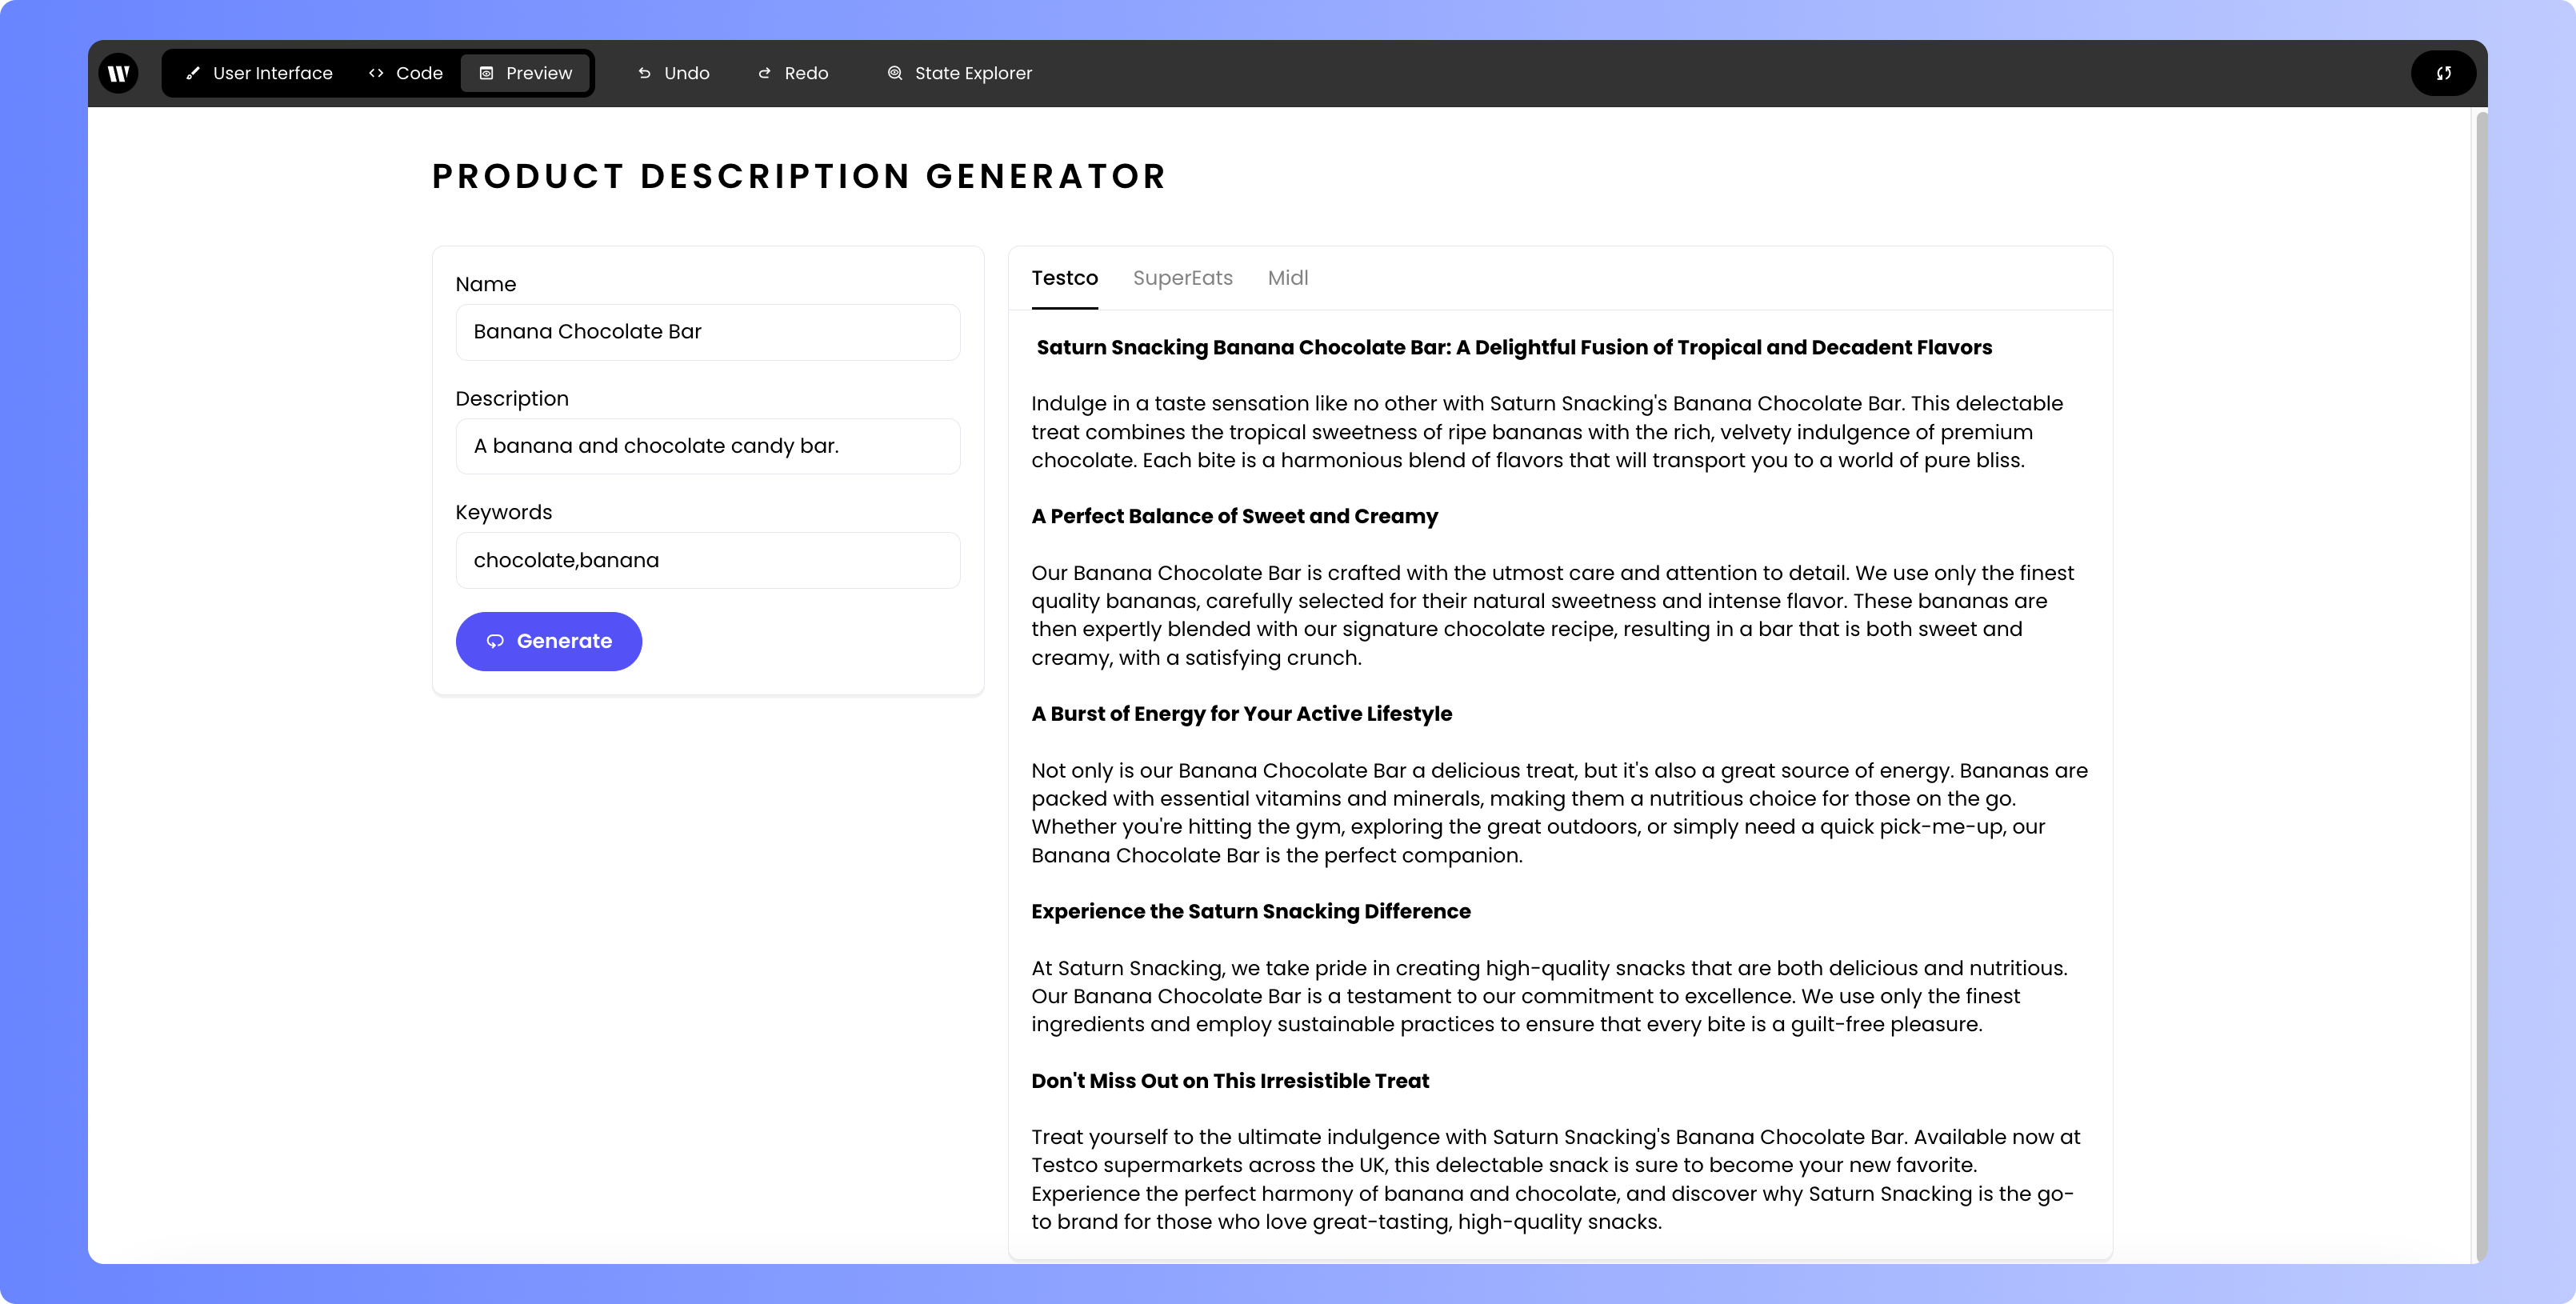
 Click **Preview** in the top toolbar, enter some test data, and click the **Generate** button. You should see a loading message, as well as three example food outlets displayed in the tabs. The loading message should disappear when everything is loaded, and the tab should remain visible once the data has loaded.
Great work!
## Expanding the application: SEO keyword analysis
You can expand on this application by adding a chart that displays the top ten SEO keywords present in the product descriptions.
### Updating the code
To do this, back in the code, first add the following helper function underneath your ` _generate_product_description` helper method:
```python theme={null}
def _generate_seo_keywords(outlets):
combined_descriptions = "\n".join(f"{key}: {value}" for key, value in outlets.items())
# Generate the prompt with the provided descriptions
prompt = seo_keywords.format(descriptions=combined_descriptions)
# Strip out whitespace and backticks from the response
return writer.ai.complete(prompt).strip(" `\n")
```
This method concatenates all of the product descriptions and incorporates them into a prompt in `prompts.py`. It then sends the formatted prompt to the Palmyra LLM using the `complete` method. The prompt not only analyzes the descriptions for SEO keywords, but also outputs a [Plotly.js](/components/plotlygraph) schema object that you can use directly with a Plotly graph component.
With the helper method in place, you can now update the click handler for the button. On line 27, add the following code before the product description visibility is set:
```python theme={null}
# Create the SEO analysis
state["message"] = "Analyzing SEO keywords..."
outlets = state["product_descriptions"]["outlets"]
state["seo_analysis"] = _generate_seo_keywords(outlets)
```
This code sets the loading message and passes all of the product descriptions to the SEO keyword helper method.
### Adding SEO analysis to the UI
To update the UI to display this chart, first drag a new tab from the Layout section of the toolkit into the Tab container. This tab should not be inside of the Repeater, but can be either before or after it. Click on the tab to open the component settings, and change the name to “SEO Analysis.” If you'd like, you can also set the Visibility to “Custom” and set `seo_analysis` as the visibility value.
Click **Preview** in the top toolbar, enter some test data, and click the **Generate** button. You should see a loading message, as well as three example food outlets displayed in the tabs. The loading message should disappear when everything is loaded, and the tab should remain visible once the data has loaded.
Great work!
## Expanding the application: SEO keyword analysis
You can expand on this application by adding a chart that displays the top ten SEO keywords present in the product descriptions.
### Updating the code
To do this, back in the code, first add the following helper function underneath your ` _generate_product_description` helper method:
```python theme={null}
def _generate_seo_keywords(outlets):
combined_descriptions = "\n".join(f"{key}: {value}" for key, value in outlets.items())
# Generate the prompt with the provided descriptions
prompt = seo_keywords.format(descriptions=combined_descriptions)
# Strip out whitespace and backticks from the response
return writer.ai.complete(prompt).strip(" `\n")
```
This method concatenates all of the product descriptions and incorporates them into a prompt in `prompts.py`. It then sends the formatted prompt to the Palmyra LLM using the `complete` method. The prompt not only analyzes the descriptions for SEO keywords, but also outputs a [Plotly.js](/components/plotlygraph) schema object that you can use directly with a Plotly graph component.
With the helper method in place, you can now update the click handler for the button. On line 27, add the following code before the product description visibility is set:
```python theme={null}
# Create the SEO analysis
state["message"] = "Analyzing SEO keywords..."
outlets = state["product_descriptions"]["outlets"]
state["seo_analysis"] = _generate_seo_keywords(outlets)
```
This code sets the loading message and passes all of the product descriptions to the SEO keyword helper method.
### Adding SEO analysis to the UI
To update the UI to display this chart, first drag a new tab from the Layout section of the toolkit into the Tab container. This tab should not be inside of the Repeater, but can be either before or after it. Click on the tab to open the component settings, and change the name to “SEO Analysis.” If you'd like, you can also set the Visibility to “Custom” and set `seo_analysis` as the visibility value.
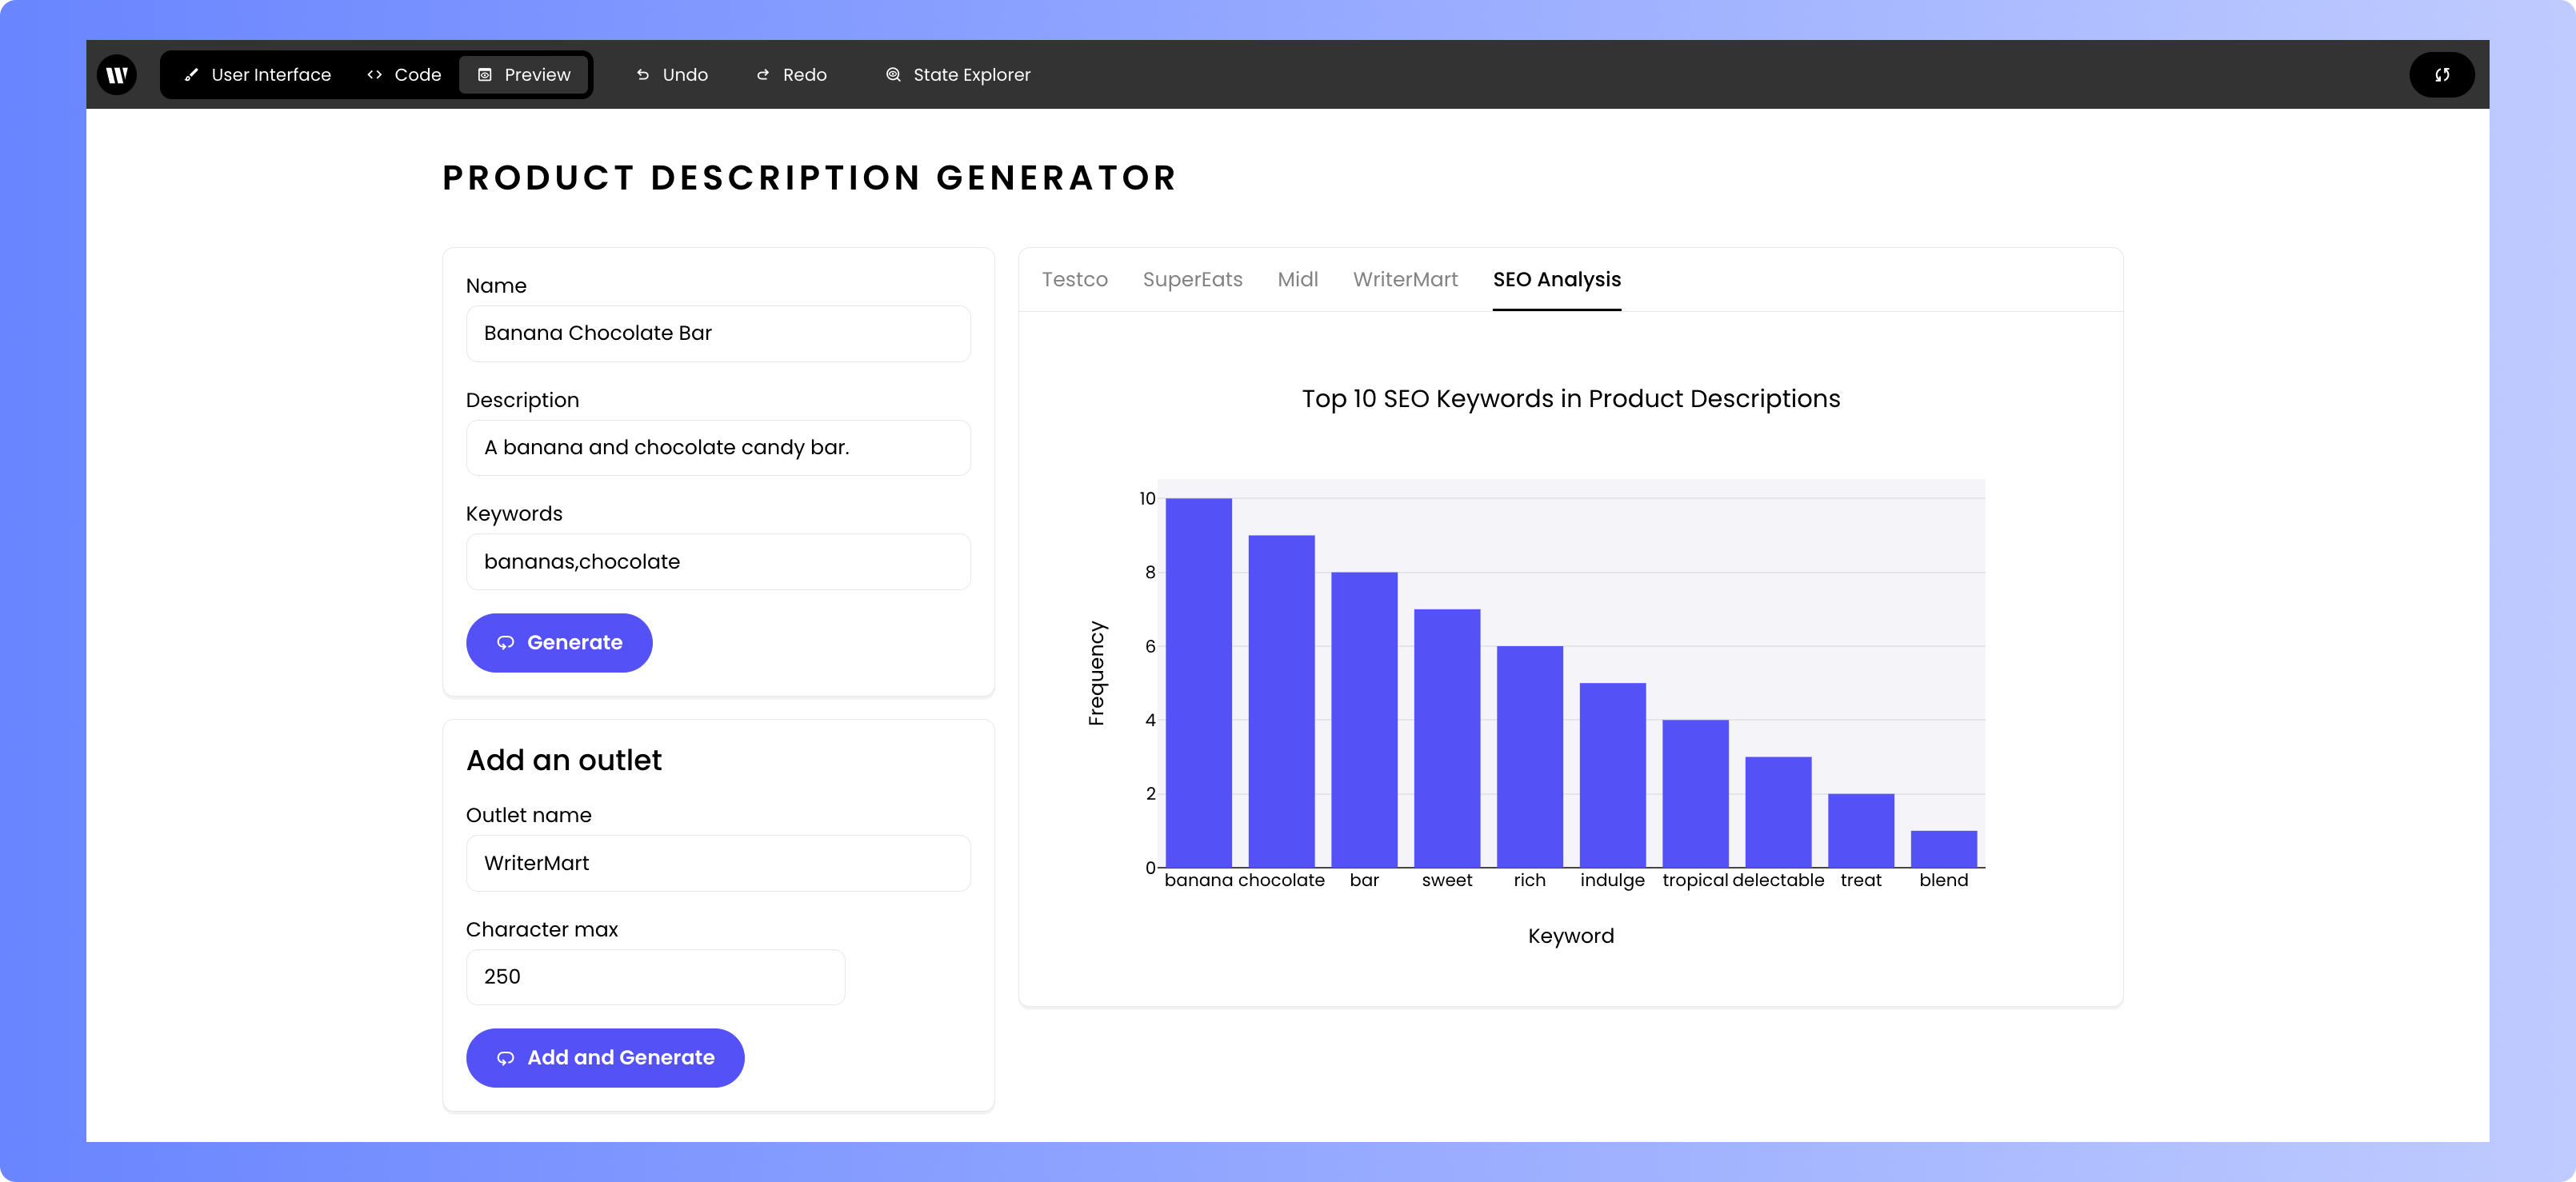
 To display the chart, drag a Plotly graph component from the Content section of the toolkit into your new tab. Click on the component to bring up the component settings. The Plotly graph component accepts a graph specification. Add `@{seo_analysis}` to pass the LLM-generated graph specification to the component.
Click preview, add some data to the form, and click generate. You should see a new SEO analysis tab appear with a nicely formatted and labeled chart.
To display the chart, drag a Plotly graph component from the Content section of the toolkit into your new tab. Click on the component to bring up the component settings. The Plotly graph component accepts a graph specification. Add `@{seo_analysis}` to pass the LLM-generated graph specification to the component.
Click preview, add some data to the form, and click generate. You should see a new SEO analysis tab appear with a nicely formatted and labeled chart.
 ## Extending the application: user-added outlet
Finally, you can extend this application even further by allowing users to add their own custom food outlet and derive a new description from a custom prompt.
### Adding the new form
Start by building the UI for this new form. From the Layout section of the Toolkit, drag a new Section component into the column where the current form is and drop it above or below it. Click on the Section and change the Name to “Add an outlet.”
To create the inputs for the form, drag a Text Input and a Number Input from the Input section of the Toolkit into the newly created section. Click on the Text Input component to change the Label to “Outlet name.” Click on the Number Input and change the label to “Character max.”
Finally, add a Button from the Other section of the toolkit to the bottom of the new section. Click on the button and change the text to “Add and Generate.” You can also add `laps` or another [Material Symbols](https://fonts.google.com/icons) ID to the Icon input if you wish.
## Extending the application: user-added outlet
Finally, you can extend this application even further by allowing users to add their own custom food outlet and derive a new description from a custom prompt.
### Adding the new form
Start by building the UI for this new form. From the Layout section of the Toolkit, drag a new Section component into the column where the current form is and drop it above or below it. Click on the Section and change the Name to “Add an outlet.”
To create the inputs for the form, drag a Text Input and a Number Input from the Input section of the Toolkit into the newly created section. Click on the Text Input component to change the Label to “Outlet name.” Click on the Number Input and change the label to “Character max.”
Finally, add a Button from the Other section of the toolkit to the bottom of the new section. Click on the button and change the text to “Add and Generate.” You can also add `laps` or another [Material Symbols](https://fonts.google.com/icons) ID to the Icon input if you wish.
 ### Updating the code
In the code, you next need to add corresponding state elements for the new form components to `wf.init_state()`. Add the following to the state dictionary:
```python theme={null}
"outlet_form": {
"name": "",
"character_max": "",
},
```
Don't forget to check your commas when adding to the state dictionary. Your completed state should look like this:
```python theme={null}
wf.init_state({
"form": {
"title": "",
"description": "",
"keywords": ""
},
"outlet_form": {
"name": "",
"character_max": "",
},
"message": "Fill in the inputs and click \"Generate\" to get started.",
"product_descriptions": {
"visible": False,
"outlets": {}
}
})
```
The `outlet_form` state elements will bind to the form elements.
Next, add the click handler for the new button. Copy and paste this `handle_add_outlet` method into the code under the `handle_click` method:
```python theme={null}
def handle_add_outlet(state):
# Create a new base prompt for the new outlet
new_outlet_name = state["outlet_form"]["name"]
product_info = {**state["outlet_form"].to_dict(), **state["form"].to_dict()}
base_prompt = user_prompt.format(**product_info)
# Add the new base prompt to the base_prompts dictionary
base_prompts[new_outlet_name] = base_prompt
# Generate the product description for the new outlet
state["message"] = f"% Generating product description for {new_outlet_name}..."
product_description = _generate_product_description(base_prompt, state["form"].to_dict())
state["product_descriptions"]["outlets"][new_outlet_name] = product_description
# Update the SEO analysis
state["message"] = "Updating SEO analysis..."
outlets = state["product_descriptions"]["outlets"]
state["seo_analysis"] = _generate_seo_keywords(outlets)
state["message"] = ""
```
This method formats the input from both forms into the imported `user_prompt` and adds the formatted prompt to the `base_prompts` dictionary. It then generates the product description for the new food outlet, updates the SEO analysis, and clears the status message.
### Binding the elements and handler to the UI
Finalize your setup by binding the state elements and configuring the click handler to the UI components.
* **Outlet Name**: Click on the “Outlet name” Text Input component. In the Binding section of the component settings, set the state element to `outlet_form.name`.
* **Character Max**: Move to the “Character max” Text Input. Update its state element binding to `outlet_form.character_max`.
Click on the **Add and Generate** Button. In the Events section of the component settings, select `handle_add_outlet` for the `wf-click` event.
To conditionally display the form based on whether descriptions have been generated, click on the Section containing the form. In the Visibility section, choose “Custom” and set `product_descriptions.visible` as the “Visibility value.”
### Testing the finished product
To see the result of your hard work, click **Preview** in the top toolbar, enter some information into the original product description form, and click **Generate**. The “Add an outlet” form should appear once the product descriptions have been generated. Add a new example outlet name and a character max and click “Add and Generate.” You should see a new tab appear with your new outlet, as well as an updated SEO analysis chart.
### Updating the code
In the code, you next need to add corresponding state elements for the new form components to `wf.init_state()`. Add the following to the state dictionary:
```python theme={null}
"outlet_form": {
"name": "",
"character_max": "",
},
```
Don't forget to check your commas when adding to the state dictionary. Your completed state should look like this:
```python theme={null}
wf.init_state({
"form": {
"title": "",
"description": "",
"keywords": ""
},
"outlet_form": {
"name": "",
"character_max": "",
},
"message": "Fill in the inputs and click \"Generate\" to get started.",
"product_descriptions": {
"visible": False,
"outlets": {}
}
})
```
The `outlet_form` state elements will bind to the form elements.
Next, add the click handler for the new button. Copy and paste this `handle_add_outlet` method into the code under the `handle_click` method:
```python theme={null}
def handle_add_outlet(state):
# Create a new base prompt for the new outlet
new_outlet_name = state["outlet_form"]["name"]
product_info = {**state["outlet_form"].to_dict(), **state["form"].to_dict()}
base_prompt = user_prompt.format(**product_info)
# Add the new base prompt to the base_prompts dictionary
base_prompts[new_outlet_name] = base_prompt
# Generate the product description for the new outlet
state["message"] = f"% Generating product description for {new_outlet_name}..."
product_description = _generate_product_description(base_prompt, state["form"].to_dict())
state["product_descriptions"]["outlets"][new_outlet_name] = product_description
# Update the SEO analysis
state["message"] = "Updating SEO analysis..."
outlets = state["product_descriptions"]["outlets"]
state["seo_analysis"] = _generate_seo_keywords(outlets)
state["message"] = ""
```
This method formats the input from both forms into the imported `user_prompt` and adds the formatted prompt to the `base_prompts` dictionary. It then generates the product description for the new food outlet, updates the SEO analysis, and clears the status message.
### Binding the elements and handler to the UI
Finalize your setup by binding the state elements and configuring the click handler to the UI components.
* **Outlet Name**: Click on the “Outlet name” Text Input component. In the Binding section of the component settings, set the state element to `outlet_form.name`.
* **Character Max**: Move to the “Character max” Text Input. Update its state element binding to `outlet_form.character_max`.
Click on the **Add and Generate** Button. In the Events section of the component settings, select `handle_add_outlet` for the `wf-click` event.
To conditionally display the form based on whether descriptions have been generated, click on the Section containing the form. In the Visibility section, choose “Custom” and set `product_descriptions.visible` as the “Visibility value.”
### Testing the finished product
To see the result of your hard work, click **Preview** in the top toolbar, enter some information into the original product description form, and click **Generate**. The “Add an outlet” form should appear once the product descriptions have been generated. Add a new example outlet name and a character max and click “Add and Generate.” You should see a new tab appear with your new outlet, as well as an updated SEO analysis chart.
 You can add whatever additional form inputs you wish to the outlet form, but be sure to update `user_prompt` in the `prompts.py` file using your favorite editor.
## Conclusion
You’ve now built a full application with the Writer Framework and the Writer AI module. Congratulations! This application not only demonstrates the platform's capabilities but also provides a foundation on which you can build more complex applications. To learn more, explore the rest of the Writer Framework documentation and the API documentation.
You can add whatever additional form inputs you wish to the outlet form, but be sure to update `user_prompt` in the `prompts.py` file using your favorite editor.
## Conclusion
You’ve now built a full application with the Writer Framework and the Writer AI module. Congratulations! This application not only demonstrates the platform's capabilities but also provides a foundation on which you can build more complex applications. To learn more, explore the rest of the Writer Framework documentation and the API documentation.