> ## Documentation Index
> Fetch the complete documentation index at: https://dev.writer.com/llms.txt
> Use this file to discover all available pages before exploring further.
# Manage agent state
The agent's state is a core component of the agent's behavior. It contains values that the UI, blueprint, and custom Python code can access and update. The state acts as a shared memory for each part of the agent.
## Agent state explained
Think of an agent's "state" like a memory or a notebook that stores important information. Just like how you might jot down notes to remember things, an agent uses its state to keep track of various values or data that it needs to perform its tasks.
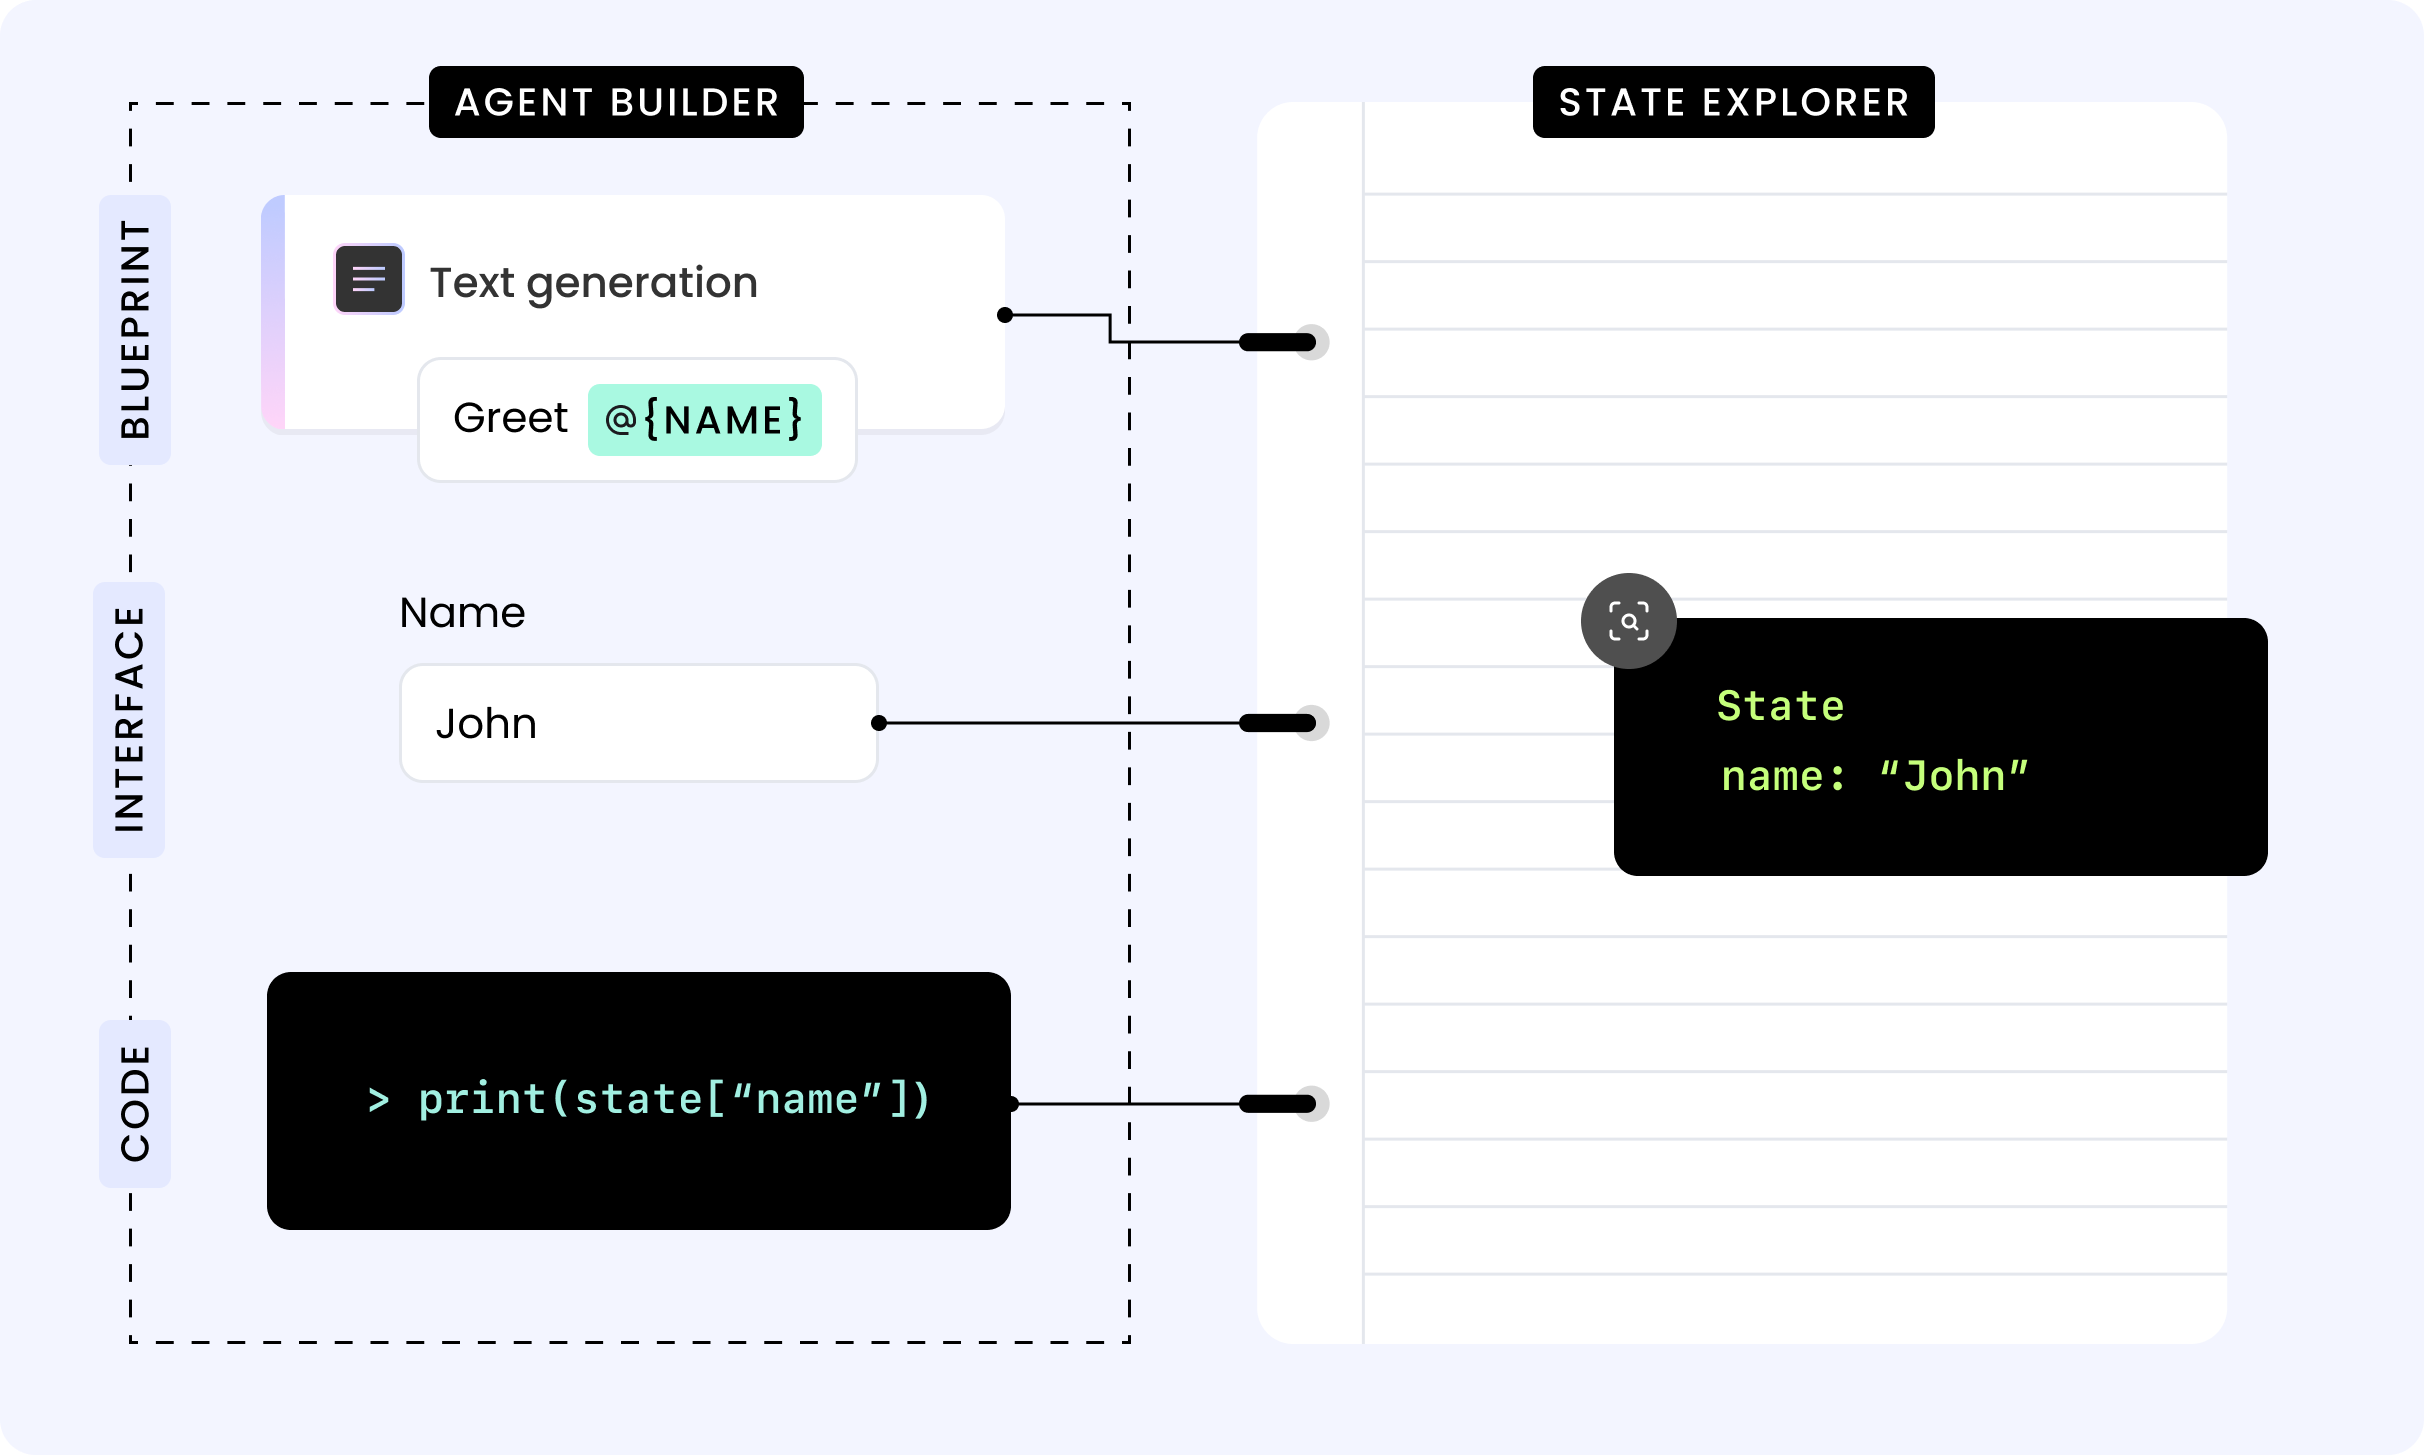
Imagine you're building a chatbot using Writer's Agent Builder. The chatbot needs to remember the user's name, so it can greet them by name later. In this case, the agent stores the user's name in its state as a variable. The chatbot can access this information and use it to personalize its responses.
The state is like a shared notebook that different parts of the agent can read from and write to. This allows the agent to keep track of its progress, remember important details, and make decisions based on the information stored in its state.
 Agent state is session-based, temporary, and visible in the UI.
* For persistent, non-sensitive data: use the [**Key-Value Storage** block](/blueprints/key-valuestorage) to store data in the cloud.
* For sensitive data: use [**Vault**](/agent-builder/secrets) to store sensitive information like API keys, passwords, and credentials.
## Inspect the state
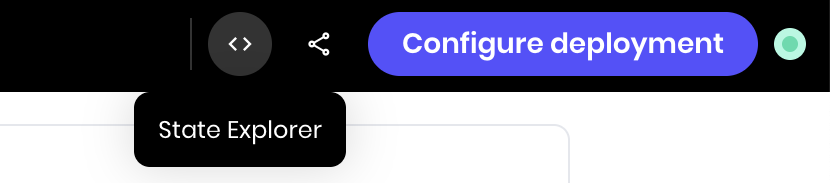
You can view the agent's state from any view by clicking the **State explorer** icon in the top right of the page. This is helpful for debugging and understanding how the agent is working.
Agent state is session-based, temporary, and visible in the UI.
* For persistent, non-sensitive data: use the [**Key-Value Storage** block](/blueprints/key-valuestorage) to store data in the cloud.
* For sensitive data: use [**Vault**](/agent-builder/secrets) to store sensitive information like API keys, passwords, and credentials.
## Inspect the state
You can view the agent's state from any view by clicking the **State explorer** icon in the top right of the page. This is helpful for debugging and understanding how the agent is working.
 ## Set state variables
You can set and update state variables in two ways:
* In a UI input element
* Using the **Set state** block in the blueprint
* Using custom Python code
### Set state in a UI input element
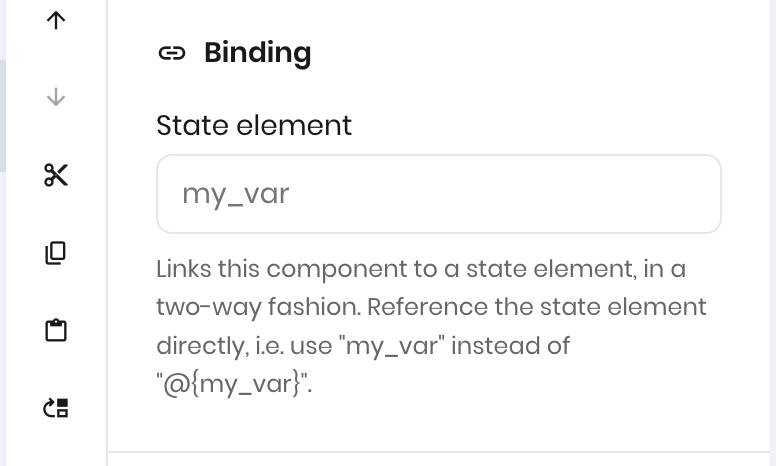
You can set state variables in any input block in the UI under the **Binding** section of the UI element's properties.
When a user enters a value in the input element, the value is automatically set as a state variable with the name you provide in the **Binding** section. Other parts of the agent can access this value.
## Set state variables
You can set and update state variables in two ways:
* In a UI input element
* Using the **Set state** block in the blueprint
* Using custom Python code
### Set state in a UI input element
You can set state variables in any input block in the UI under the **Binding** section of the UI element's properties.
When a user enters a value in the input element, the value is automatically set as a state variable with the name you provide in the **Binding** section. Other parts of the agent can access this value.
 ### Set state block
The [**Set state** block](/blueprints/setstate) allows you to set a state variable within a blueprint. Provide the name of the state variable and the value you want to set. When the block runs, the state variable is created or updated with the provided value.
### Set state block
The [**Set state** block](/blueprints/setstate) allows you to set a state variable within a blueprint. Provide the name of the state variable and the value you want to set. When the block runs, the state variable is created or updated with the provided value.
 You can set state variables as `text` or `JSON`. Under the **Value type** dropdown, select the type of value you want to set. In the **Value** field, enter the value you want to set.
If you set the value as `text`, the value of the state variable is stored as a string. If you set the value as `JSON`, the value of the state variable is stored as a JSON object.
See how to [access nested state variables that are set as JSON](#nested-state-variables) below.
### Set state with custom Python
You can also set state variables with custom Python code.
To initialize the state, use the `wf.init_state` function:
```python theme={null}
import writer as wf
wf.init_state({
"counter": 0
})
```
To update the state, define a function that takes the state as an argument and updates the state. The state is similar to a Python dictionary, so you can update it by accessing the key and assigning a new value.
```python theme={null}
def increment(state):
state["counter"] += 1
```
#### Private state variables
You can create private state variables with custom Python code. Private state variables are not visible to the agent's UI and are only accessible via code.
To create a private state variable, prefix the variable with an underscore (`_`).
```python theme={null}
wf.init_state({
"_user_name": "John Doe"
})
```
## Access state variables
You can access state variables in the agent's blueprint, UI, and custom Python code.
### Access state variables in a UI element
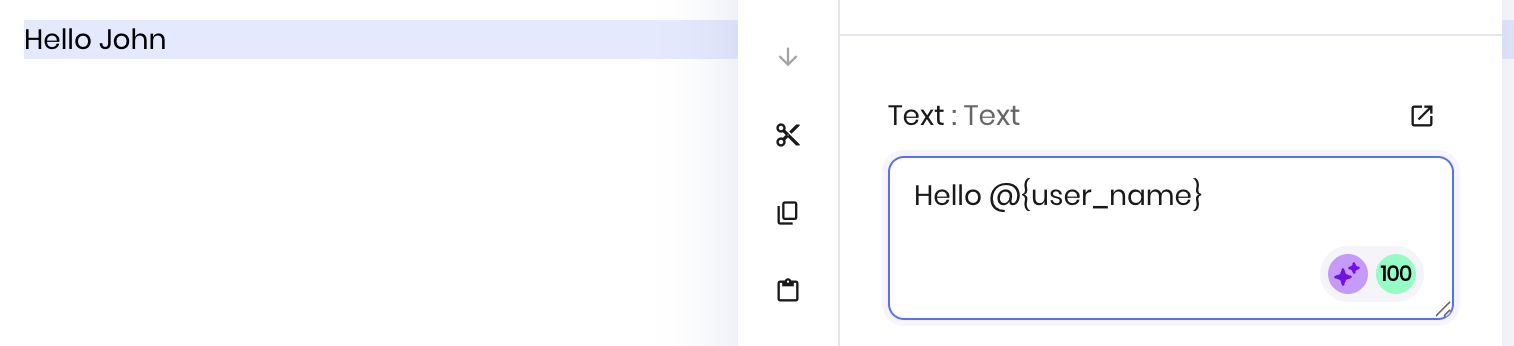
You can access state variables in a UI element by using the `@` syntax.
You can set state variables as `text` or `JSON`. Under the **Value type** dropdown, select the type of value you want to set. In the **Value** field, enter the value you want to set.
If you set the value as `text`, the value of the state variable is stored as a string. If you set the value as `JSON`, the value of the state variable is stored as a JSON object.
See how to [access nested state variables that are set as JSON](#nested-state-variables) below.
### Set state with custom Python
You can also set state variables with custom Python code.
To initialize the state, use the `wf.init_state` function:
```python theme={null}
import writer as wf
wf.init_state({
"counter": 0
})
```
To update the state, define a function that takes the state as an argument and updates the state. The state is similar to a Python dictionary, so you can update it by accessing the key and assigning a new value.
```python theme={null}
def increment(state):
state["counter"] += 1
```
#### Private state variables
You can create private state variables with custom Python code. Private state variables are not visible to the agent's UI and are only accessible via code.
To create a private state variable, prefix the variable with an underscore (`_`).
```python theme={null}
wf.init_state({
"_user_name": "John Doe"
})
```
## Access state variables
You can access state variables in the agent's blueprint, UI, and custom Python code.
### Access state variables in a UI element
You can access state variables in a UI element by using the `@` syntax.
 ### Access state variables in a blueprint
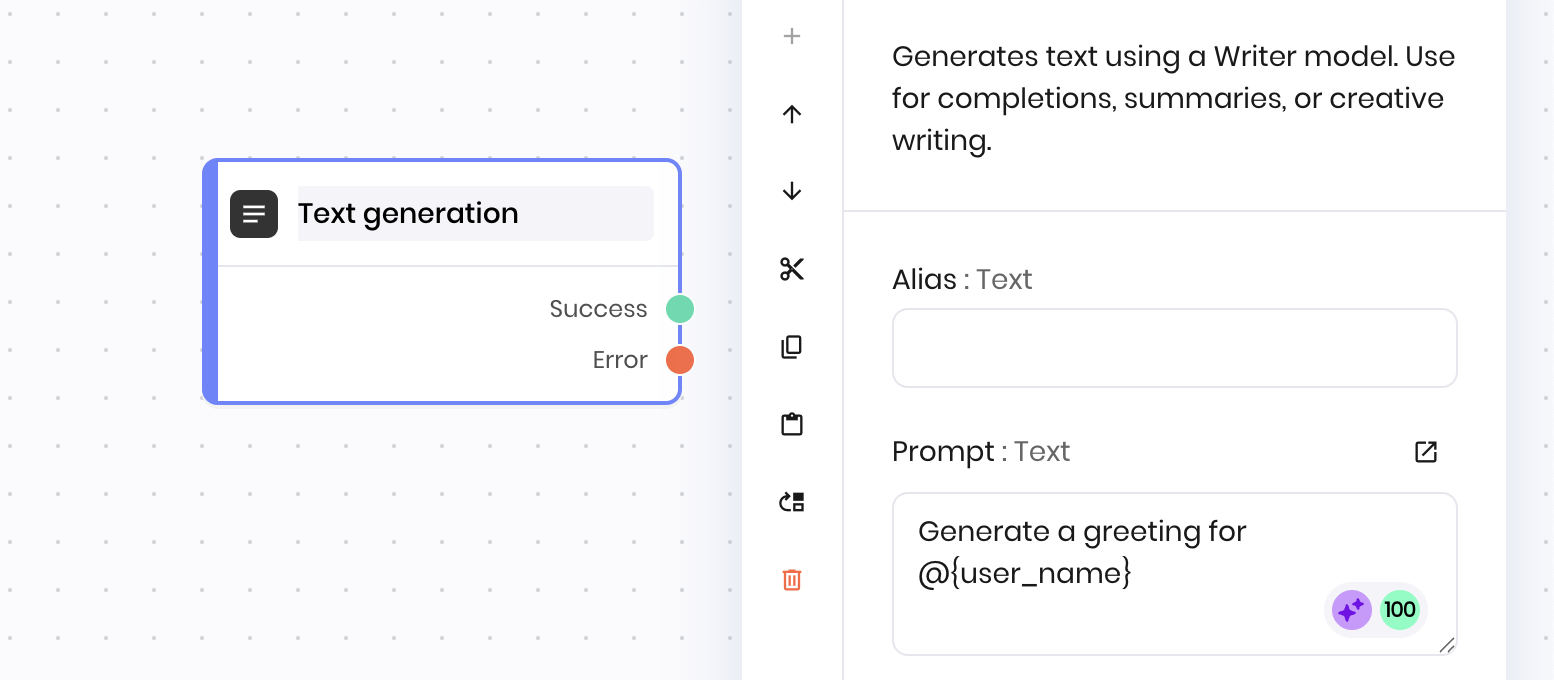
Access state variables in a blueprint by using the `@` syntax.
### Access state variables in a blueprint
Access state variables in a blueprint by using the `@` syntax.
 ### Access state variables in custom Python
You can access state variables in custom Python code by referencing the `state` variable. The `state` variable functions like a Python dictionary, so you can access and update state variables by referencing the key.
Pass the `state` variable to the function when you call it.
```python theme={null}
def increment(state):
state["counter"] += 1
```
## Nested state variables
Agent Builder allows you to create and access nested state variables. This is useful when you need to store complex data that requires multiple levels of organization.
### Set nested state variables
You can set nested state variables in the **Set state** block using `JSON` as the value type and a JSON object as the value.
You can also set nested state variables in custom Python code.
### Access nested state variables
In the UI or a blueprint, use `.` to access the different levels of nested state variables. For example, consider a state variable with the following structure:
```json theme={null}
"tasks": [
{
"title": "Write a blog post"
}
]
```
### Access state variables in custom Python
You can access state variables in custom Python code by referencing the `state` variable. The `state` variable functions like a Python dictionary, so you can access and update state variables by referencing the key.
Pass the `state` variable to the function when you call it.
```python theme={null}
def increment(state):
state["counter"] += 1
```
## Nested state variables
Agent Builder allows you to create and access nested state variables. This is useful when you need to store complex data that requires multiple levels of organization.
### Set nested state variables
You can set nested state variables in the **Set state** block using `JSON` as the value type and a JSON object as the value.
You can also set nested state variables in custom Python code.
### Access nested state variables
In the UI or a blueprint, use `.` to access the different levels of nested state variables. For example, consider a state variable with the following structure:
```json theme={null}
"tasks": [
{
"title": "Write a blog post"
}
]
```
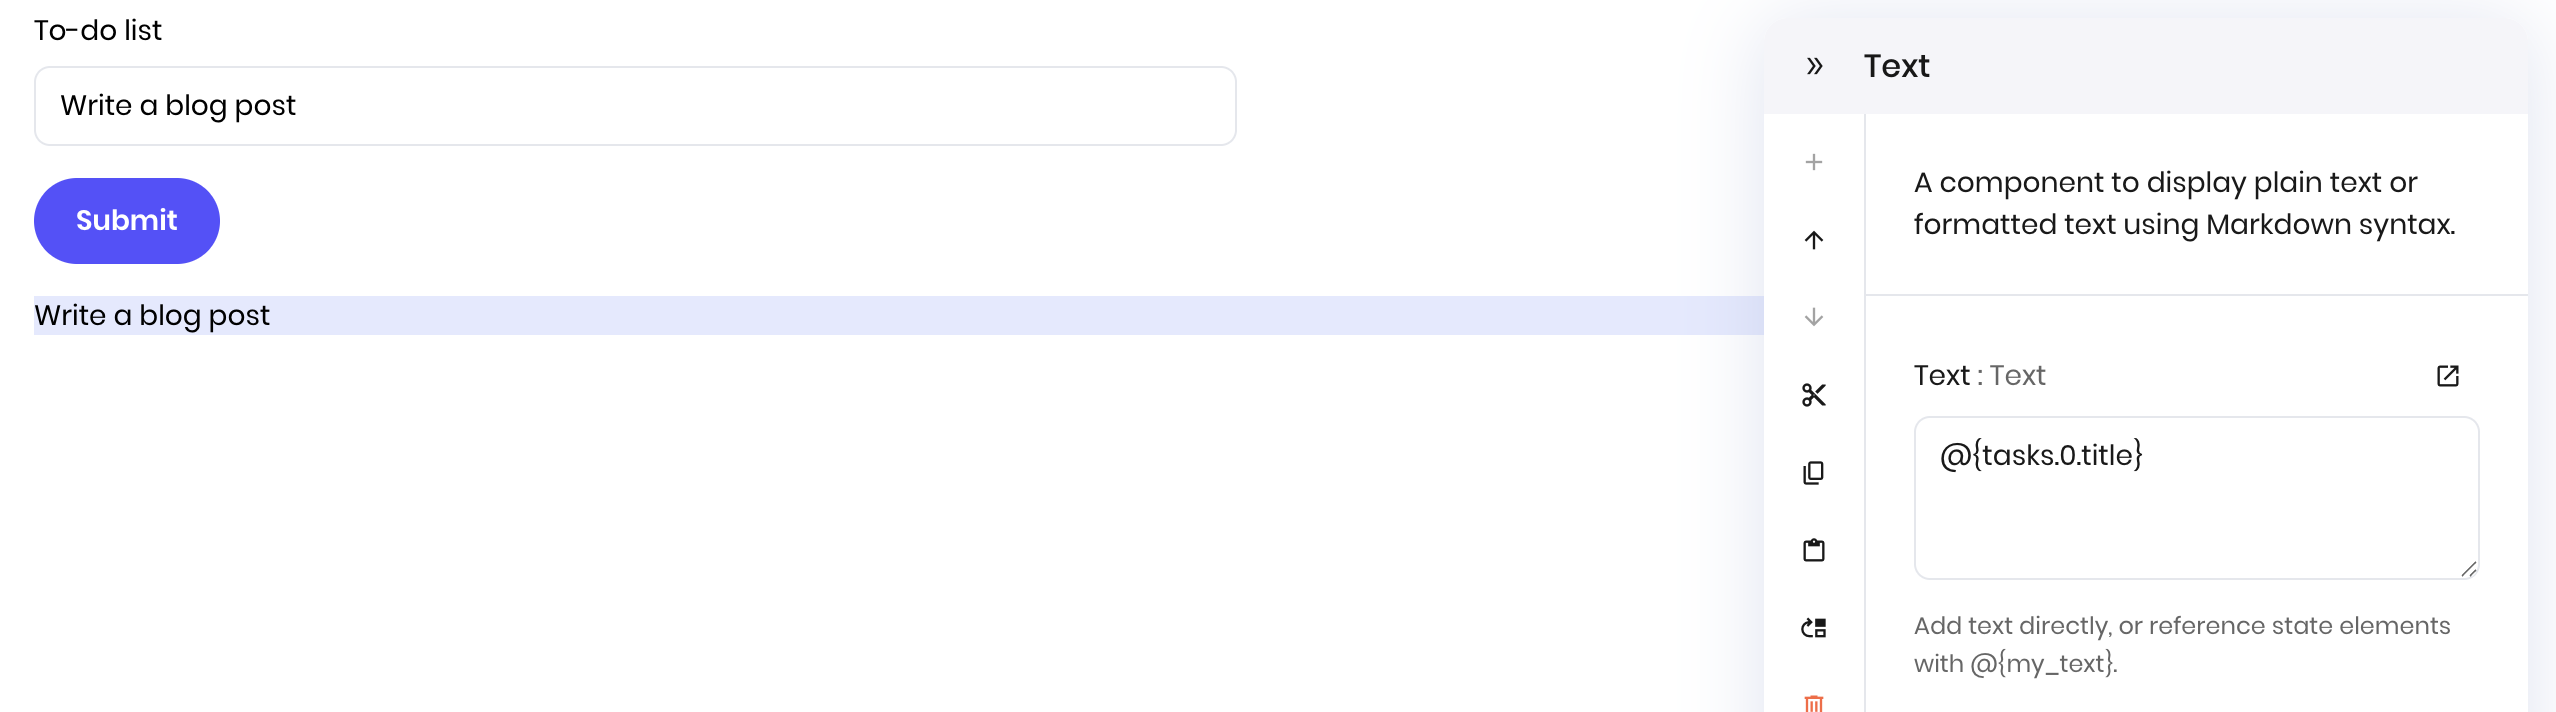
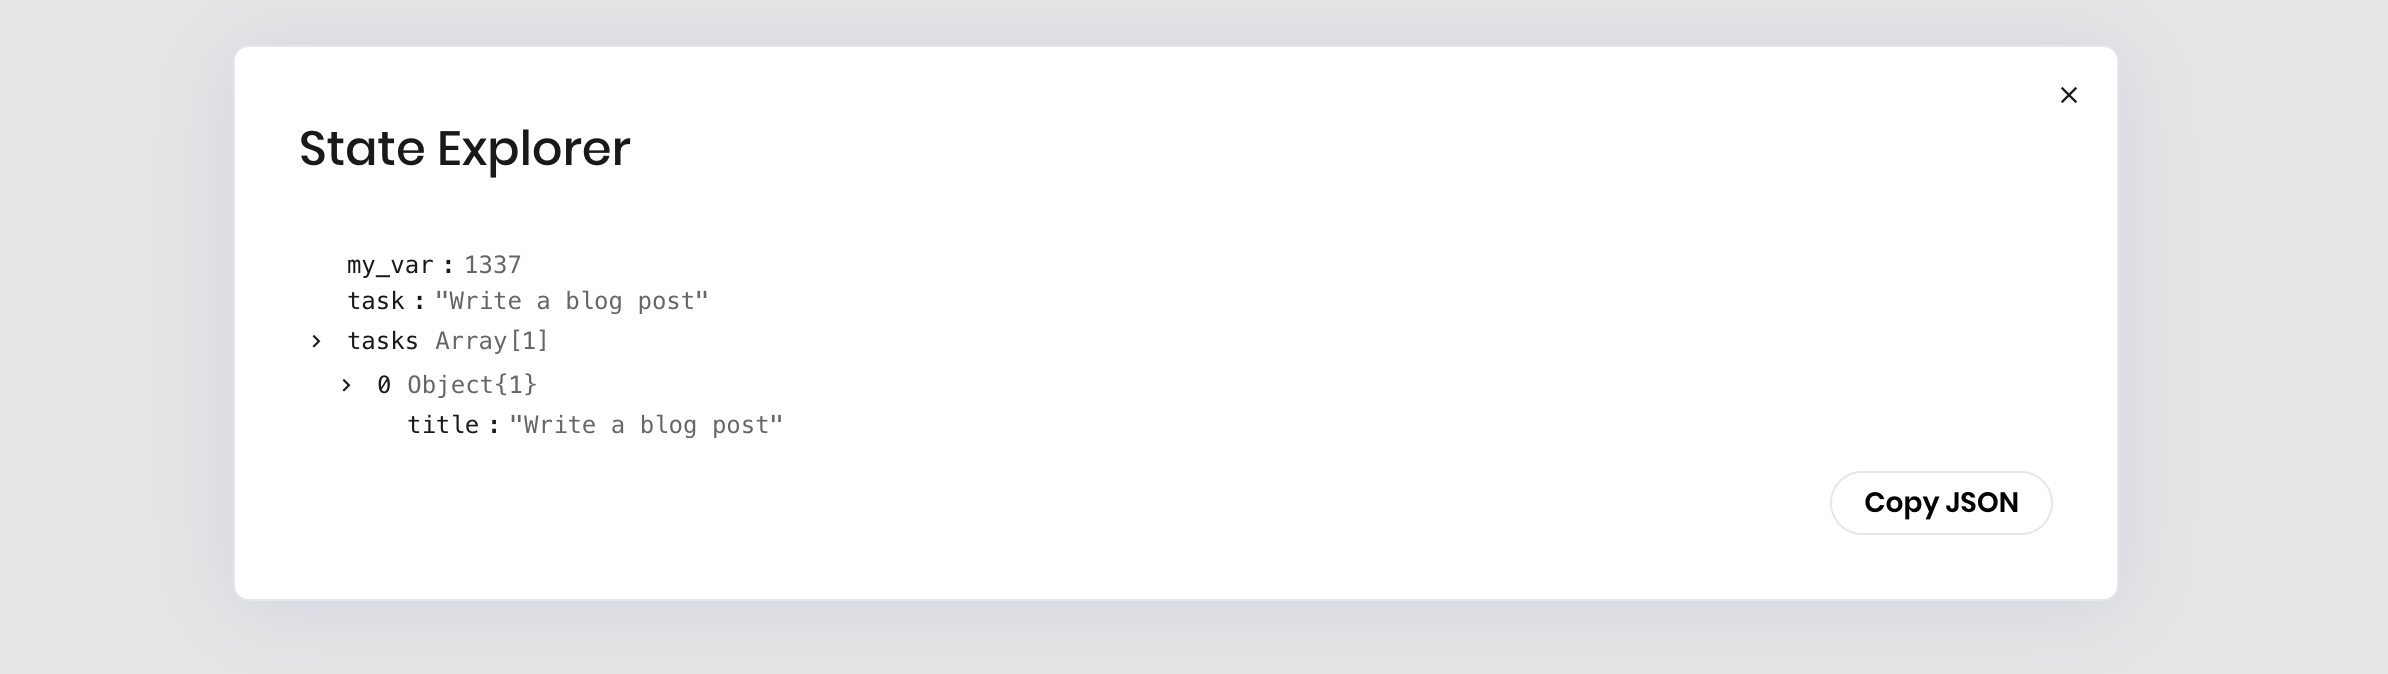 To access the `title` of the first task in a blueprint or UI block, use the following syntax:
```
@{tasks.0.title}
```
To access the `title` of the first task in a blueprint or UI block, use the following syntax:
```
@{tasks.0.title}
```